Table of Contents >> Show >> Hide
- Why This Upcycled Bench Idea Works So Well
- What “Salvaged Chair Legs Turned Into a Bench” Really Means
- How To Build the Bench Without Building Regret
- Best Places To Use a Bench Made From Salvaged Chair Legs
- Mistakes That Can Ruin the Project
- How To Make the Finished Bench Look Intentional
- Conclusion
- Experience Notes: What This Project Feels Like in Real Life
- SEO Tags
There are two kinds of people in this world: the ones who see a busted dining chair and sigh, and the ones who see four beautifully turned legs and think, “Well, that looks suspiciously like the beginning of a great bench.” This article is for the second group.
Salvaged chair legs turned into a bench is more than a clever upcycling idea. It is a practical, character-filled furniture project that blends sustainability, craftsmanship, and design common sense. Instead of tossing damaged chairs into the furniture afterlife, you can rescue their best parts and turn them into something sturdy, useful, and much more interesting than another flat-pack seat with an identity crisis.
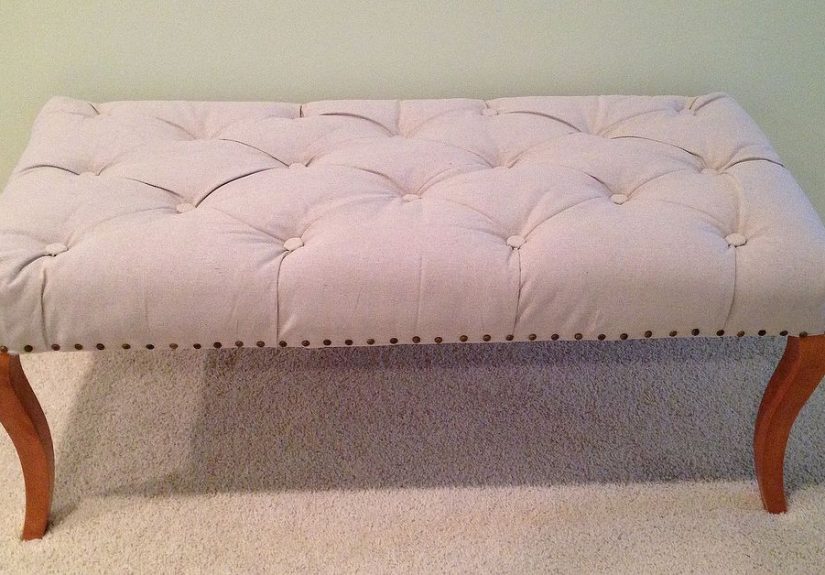
Done right, a bench built from salvaged chair legs can look custom, feel solid, and tell a better story than most store-bought furniture. It can live in an entryway, at the foot of a bed, in a mudroom, on a covered porch, or next to a dining table that suddenly needs extra seating because your family reproduces at holidays like rabbits with casserole dishes.
The secret is not simply screwing random old parts together and hoping for rustic magic. A good bench needs proportion, stability, comfortable dimensions, and a finish that matches where it will live. That means choosing chair legs that are structurally sound, pairing them with a seat that feels intentional, and building the joinery so the piece survives more than one dramatic sit-down.
Why This Upcycled Bench Idea Works So Well
The appeal starts with the materials. Old chair legs often have details that are expensive to reproduce today: turned profiles, gentle tapers, carved feet, and hardwood that has already spent years proving it can handle real life. Even when the chair itself is wobblier than a shopping cart with one bad wheel, the legs may still be excellent candidates for reuse.
That is why this project sits at the sweet spot between reclaimed furniture and practical DIY. You get the beauty of vintage woodwork without having to preserve the entire chair. And from a sustainability angle, repurposing furniture parts makes real sense. Reuse stretches the life of materials, reduces waste, and cuts the demand for new raw inputs. In plain English: fewer good pieces end up in the trash, and your hallway gets a bench with personality.
There is also a strong budget argument. A bench with handcrafted details, hardwood legs, and custom proportions can be expensive to buy. Salvaged materials lower the cost while raising the character. That is the kind of math DIYers enjoy.
What “Salvaged Chair Legs Turned Into a Bench” Really Means
This phrase can describe a few different build strategies. The simplest version uses two matching pairs of chair legs as the bench base, then connects them with aprons, stretchers, and a seat. A slightly more decorative version reuses larger sections from the front or side of old chairs, preserving spindles, rails, or curved details. The boldest version combines whole chair backs with a new seat to create a bench with a built-in architectural look.
For most homeowners, the smartest path is the middle one: save the legs and any strong lower rails, then build a fresh bench frame around them. That gives you freedom to adjust the size while keeping the vintage charm.
Choose Chair Legs Like a Skeptic, Not a Romantic
Yes, the flea-market pair with the gorgeous turned legs is calling your name. No, you should not ignore the cracks just because the wood looks “full of character.” Character is great in novels. In furniture, it needs limits.
Look for legs that are:
Made from solid wood rather than split veneer or particleboard cores. Free of deep rot, insect damage, or long structural cracks. Similar in height and profile if you plan to use them as matching sets. Dry and reasonably straight. Still attached firmly to any rails you intend to keep.
Old glue joints can usually be repaired, but severely compromised wood is not worth the heroic effort. A bench is supposed to invite sitting, not risk an interpretive dance with gravity.
Comfort Matters More Than Instagram
One reason homemade benches sometimes look great but feel awkward is bad proportion. A comfortable bench typically lands in a useful range for seat height and depth rather than chasing whatever looks dramatic in a photo. If you are building an entry bench or dining-style bench, aim for a seat height that feels natural for adults getting on and off without a squat workout. A seat depth that is too shallow feels perch-like; too deep and it becomes a waiting room for your lower back.
Good design also means matching the thickness and visual weight of the seat to the legs. Delicate chair legs paired with a giant slab can look top-heavy. Thick farmhouse planks on skinny spindle legs may feel like the furniture equivalent of a bodybuilder in ballet slippers. The piece should look balanced before anyone even sits on it.
How To Build the Bench Without Building Regret
The best benches built from salvaged chair legs succeed because the builder respects both old materials and new structure. In other words, the vintage parts provide charm, but the new frame provides reliability.
Step 1: Clean, Strip, and Inspect Everything
Before assembly, remove dirt, loose finish, old nails, and failed glue residue. If the legs are painted and you want stained wood, the finish may need to come off completely. If you plan to repaint the piece, you still need a clean, stable surface. Sanding should be deliberate, not aggressive. You are trying to prepare the wood, not erase its history with the enthusiasm of a tax auditor.
This is also the moment to confirm that all four legs are actually the same height. “Pretty close” is not a furniture measurement. A wobbly bench will announce itself every time someone sits down, which is charming only if your design goal is “haunted breakfast nook.”
Step 2: Build a New Frame Around the Salvaged Legs
A strong bench usually needs aprons between the legs and at least one stretcher to resist racking. That is especially important when you are mixing old components with new lumber. Even beautiful chair legs need a dependable structure tying them together.
Hardwoods such as oak, maple, or ash work well for a bench frame, but a painted bench can also succeed with quality paint-grade lumber. The joinery can range from pocket screws to dowels to mortise-and-tenon construction depending on your skill level. The point is not to win a joinery beauty contest. The point is to create a frame that stays square and tight over time.
If you are using legs from old dining chairs, save any lower side rails that are still sound. They can often be integrated into the new base, preserving more of the original look. Just make sure the reused rails are truly solid and not relying on ancient glue and optimism.
Step 3: Pick the Right Seat
The seat is where the bench becomes its own thing. A thick reclaimed board gives it farmhouse warmth. Edge-glued hardwood creates a cleaner, more refined look. A plywood core with upholstery works well for bedrooms and entryways where comfort and softness matter. Slatted tops are better for outdoor use because they allow water to move through instead of turning your bench into a decorative sponge.
If the chair legs are ornate, a simple seat lets them shine. If the legs are plain, the seat can carry more design interest through thicker edges, shaped corners, upholstery, or a live-edge look. The best results feel composed, not crowded.
Step 4: Match the Finish to the Location
An indoor bench has different needs than a porch or patio bench. For indoor pieces, stain and clear finish, paint, or oil-and-wax systems can all work depending on the look you want. Outdoor or semi-outdoor benches demand more attention to wood species, finish durability, adhesive choice, and hardware. Exterior-rated glue, appropriate fasteners, and a realistic maintenance plan matter just as much as color.
If you want a painted bench for a mudroom or porch, primer and paint can help less weather-resistant woods perform better. If you prefer the wood look outdoors, use products intended for exterior furniture and understand that all outdoor finishes eventually require maintenance. Sunshine is beautiful, but it is also a rude little goblin.
Best Places To Use a Bench Made From Salvaged Chair Legs
Entryway Bench
This is the most natural home for the project. An entry bench does a lot in a small space: it offers a place to sit while putting on shoes, acts as a landing zone for bags, and adds instant style near the front door. A bench with vintage legs feels especially welcoming because it has that collected, lived-in quality people try very hard to fake with expensive catalog styling.
Mudroom or Laundry Area
A bench with a painted base and durable seat is perfect here. Add baskets underneath and suddenly the project looks like you own your life, even if there are still mystery socks in three separate rooms.
Dining Bench
If the height is right, a salvaged-leg bench works beautifully on one side of a dining table. It softens the room and makes seating more flexible. This is also where matching the style of the legs to the table matters most. Traditional turned legs pair well with farmhouse or cottage interiors, while simplified tapered legs can lean more transitional.
Bedroom Bench
At the foot of the bed, the bench becomes less about heavy daily use and more about texture, convenience, and style. Upholstery works especially well here. Salvaged chair legs can provide a nice vintage note without making the room feel overly formal.
Covered Porch or Garden Room
If you build for exterior conditions, this is where the project gets extra charm. Old furniture parts already carry a little weathered soul, so they look right at home in spaces that blur indoor and outdoor living.
Mistakes That Can Ruin the Project
Using mismatched legs without a plan. Eclectic is one thing. Random is another. If the legs do not match, they should at least relate in scale, era, or finish.
Skipping structural reinforcement. Decorative salvage alone does not equal a strong bench. New aprons and stretchers are often the difference between “heirloom charm” and “public embarrassment.”
Ignoring old damage. Hairline cracks, loose joints, and worm damage need repair before assembly, not after your uncle Dave test-sits the bench like he is evaluating a truck suspension.
Over-sanding vintage details. The old turnings and worn edges are part of the appeal. Preserve them where possible.
Choosing the wrong finish for the location. Indoor topcoat on an outdoor bench is like wearing paper shoes in a rainstorm. Technically possible. Deeply unwise.
How To Make the Finished Bench Look Intentional
The difference between a charming repurposed bench and a “what exactly happened here?” bench usually comes down to editing. Limit the number of competing details. Repeat a color somewhere else in the room. Use a cushion that fits the proportions instead of one that hangs over the seat like melting cake frosting. If the wood has lots of patina, keep accessories simpler. If the bench is painted a bold color, let it be the star.
Good upcycling is not about proving that every scrap can be saved. It is about selecting the best parts and giving them a second life that feels useful and beautiful. That is what makes salvaged chair legs turned into a bench such a satisfying project. It honors craftsmanship, reduces waste, and produces furniture with actual presence.
Conclusion
Turning salvaged chair legs into a bench is one of those rare DIY ideas that checks every box. It is practical, sustainable, budget-aware, and design-friendly. It allows you to preserve the most attractive parts of old furniture while creating something better suited to modern life. The result can be rustic, polished, farmhouse, cottage, or quietly traditional depending on the seat, finish, and setting.
Most important, it proves that great furniture does not always begin with a perfect pile of new lumber. Sometimes it begins with a broken chair, a sharp eye, and the glorious refusal to throw away good wood just because the original piece gave up the ghost. That is not just resourceful. That is style with a backbone.
Experience Notes: What This Project Feels Like in Real Life
One of the most memorable things about building a bench from salvaged chair legs is that the project changes character at every stage. In the beginning, it feels like a rescue mission. You are sorting through mismatched old furniture, wiping away dust, and trying to decide whether you have discovered treasure or simply adopted someone else’s structural problems. Then, somewhere between cleaning the legs and dry-fitting the frame, the idea starts to look real. That moment is surprisingly satisfying. What used to be four leftovers suddenly starts acting like furniture again.
There is also a strange pleasure in working with pieces that already have shape and history. New lumber is predictable. Salvaged parts are more like strong-willed relatives. They are beautiful, useful, and occasionally determined to remind you that they had a life before this project. A leg may be slightly out of square. An old finish may cling to one groove like it pays rent. A hidden repair might show up the minute you think you are ahead. That can be frustrating, but it also makes the build feel more personal. You are not just assembling parts; you are negotiating with them.
People often imagine upcycling projects as casual weekend fun, but this one teaches patience fast. The bench gets better when you slow down. You measure again. You test for wobble again. You sand one more pass because the seat edge feels almost right, which is another way of saying not right at all. The experience becomes less about rushing to the reveal and more about letting the piece tell you what it needs. That sounds poetic, which is dangerous in a workshop, but it is true.
Then comes the best part: the first time the bench is placed in the room where it will live. Suddenly all the dusty decisions make sense. The old chair legs no longer look like leftovers. They look intentional. Guests notice the shape before they understand the origin, and when they do realize the base came from salvaged chairs, the bench becomes a conversation piece without trying too hard. It has a story built into it.
There is a practical emotional payoff too. A bench like this tends to get used immediately. Someone sits on it to take off shoes. A bag lands on it. A folded blanket appears. The family starts treating it like it has always belonged there. That is the sweet spot in furniture design: when a piece has enough presence to be admired and enough usefulness to be slightly bossed around by everyday life.
In that way, the experience of making a bench from salvaged chair legs is not just about woodworking. It is about seeing value where other people see waste. It is about training your eye to notice quality, proportion, and possibility. And yes, it is also about earning the deeply satisfying right to point at a bench and say, with modesty only partially intact, “That used to be broken chairs.”
Note: Source links are intentionally omitted for clean publishing, and unnecessary citation artifacts have been removed.