Table of Contents >> Show >> Hide
- Before You Start: Is This a Full Replacement or a “Surgical Strike”?
- Tools and Materials Checklist
- Step 1: Prep the Room (AKA “Move Everything You Love”)
- Step 2: Remove Baseboards or Quarter-Round (Without Turning Them Into Toothpicks)
- Step 3: Remove the Old Laminate Flooring
- Step 4: Inspect and Prep the Subfloor (The Step Everyone Wants to Skip… and Shouldn’t)
- Step 5: Acclimate the New Flooring
- Step 6: Plan Your Layout (So You Don’t End With a Skinny “Sad Strip”)
- Step 7: Install Underlayment and Vapor Barrier (If Needed)
- Step 8: Install the First Row
- Step 9: Install the Remaining Rows (Click, Tap, Repeat)
- Step 10: Doorways, Vents, and Pipes (The “Fun” Obstacles)
- Step 11: Finish the Perimeter and Reinstall Trim
- Common Mistakes (So You Don’t Become a Flooring Cautionary Tale)
- Time, Cost, and When to Call a Pro
- FAQ: Replacing Laminate Flooring
- Real-World Replacement Experiences (500+ Words of “What I Wish Someone Told Me”)
Replacing laminate flooring is one of those DIY projects that feels suspiciously “too doable” at first. Then you remember: floors are big, furniture is heavy, and you only own one pair of knees.
The good news? Laminate is typically a floating floor (it clicks together and “floats” over the subfloor), which makes removal and installation much more approachable than glued-down options. The even better news? When you’re done, your room will look like it got a glow-upand you’ll walk across it at least 17 times a day just to admire it.
Before You Start: Is This a Full Replacement or a “Surgical Strike”?
“Replace laminate flooring” can mean two different missions:
- Full replacement: You’re removing the whole floor (common after water damage, major swelling, widespread gaps, or when the style screams “2011 rental chic”).
- Partial replacement (board repair): Sometimes you can replace a few damaged planksif you can find matching product, the locking system cooperates, and the damage isn’t caused by a bigger moisture problem.
If the floor is buckling, spongy, or the subfloor feels questionable, a full replacement is often the smarter long-term move. And if moisture is still present (active leak, damp slab, wet crawlspace), pause the project and fix that firstnew laminate is not a sponge’s natural enemy.
Tools and Materials Checklist
You don’t need a workshop the size of an aircraft hangar, but a few specific tools make laminate floor replacement faster and cleaner.
Tools
- Tape measure, pencil, chalk line
- Utility knife (underlayment and packaging)
- Pry bar / trim puller (for baseboards and transitions)
- Hammer or rubber mallet
- Laminate installation kit: spacers, tapping block, pull bar
- Jigsaw or circular saw / miter saw (for cuts)
- Oscillating multi-tool or jamb saw (for undercutting door trim)
- Shop vacuum and broom (dust is forever)
- Safety gear: eye protection, gloves, kneepads, hearing protection
Materials
- New laminate planks (buy extra for waste and future repairsoften 10% extra, more for complex rooms)
- Underlayment (if not attached to the planks)
- Vapor barrier / moisture barrier (often required over concrete; follow your product instructions)
- Transition strips (T-molding, reducers, thresholds as needed)
- Baseboards or quarter-round/shoe molding (reuse or replace)
- Leveling compound or floor patch (if needed)
- Appropriate fasteners for trim (finish nails) and adhesive if required for transitions
Step 1: Prep the Room (AKA “Move Everything You Love”)
- Clear the room completely. If it’s heavy furniture, recruit a friend with strong opinions and stronger forearms.
- Remove doors if they’ll be in the way. Pop the hinge pins and set the door aside.
- Pull up transitions at doorways (reducers, thresholds). Take photos so you can reinstall the right style in the right spot.
- Check appliances (kitchen/laundry). Many laminate products don’t want heavy appliances sitting directly on a floating floor without proper planningfollow manufacturer guidance.
- Shut off power to floor outlets if you’ll be removing them, and remove vent covers/registers.
Important safety note about older flooring
If you’re removing older flooring layers (especially old vinyl tile/sheet flooring underneath, old adhesives, or unknown materials), consider the possibility of asbestos in older building products. If you suspect it, don’t sand, grind, or aggressively tear it outget it assessed by a qualified professional. When in doubt, treat “mystery layers” with respect.
Step 2: Remove Baseboards or Quarter-Round (Without Turning Them Into Toothpicks)
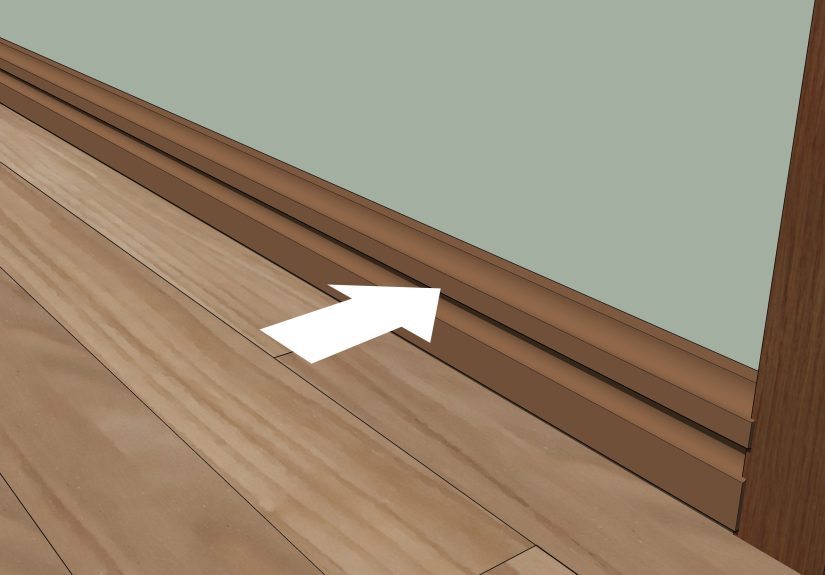
Most laminate floors need an expansion gap around the perimeter (often around 1/4 inch to 3/8 inchyour product will specify). That gap is usually hidden by baseboards or shoe molding.
- Score the caulk line where trim meets the wall using a utility knife. This helps prevent paint peel.
- Pry gently using a trim puller or pry bar. Work slowly and move along the length to avoid snapping the trim.
- Label pieces on the back (e.g., “North wall left”) so reinstalling is painless.
If you’re reusing baseboards, be patient. If you’re replacing them, you can be slightly less patientbut still don’t crater the drywall.
Step 3: Remove the Old Laminate Flooring
Most laminate is a click-lock floating system. That means removal is usually a reverse-installation process: find an edge, unlock boards, and work backward.
How to remove a floating laminate floor
- Start at a wall where you can see the edge of the flooring. Remove any spacers if you spot them.
- Lift and unlock planks row by row. Many click systems release by lifting the long edge at an angle.
- Stack planks neatly if you’re keeping them (for a workshop, storage room, or a friend you like enough to give free flooring).
- Remove underlayment and any taped seams. Vacuum thoroughlythis is the moment dust tries to claim squatter’s rights.
If the old floor was glued or damaged
If a prior installer used glue (some systems allow it, some don’t) or the boards are water-swollen and refuse to unlock, removal may require more prying and breaking. Go slow near the subfloor so you don’t gouge it into a modern art piece.
Step 4: Inspect and Prep the Subfloor (The Step Everyone Wants to Skip… and Shouldn’t)
A laminate floor only looks as good as what’s under it. If the subfloor is uneven, you’ll feel it. If it’s wet, your new floor will eventually throw a tantrum.
Subfloor basics
- Clean: Remove debris, staples, old tape, and high spots.
- Flat: Many manufacturers call for a relatively tight flatness tolerance (commonly around 3/16 inch over 10 feet, but verify your product).
- Solid: Fix squeaks (screws into joists), replace soft/rotted areas, secure loose panels.
Leveling: what to do when reality isn’t flat
- High spots: Sand or grind carefully (and safely), especially on concrete. Vacuum dust.
- Low spots: Use a floor patch or leveling compound compatible with your subfloor type.
Moisture matters (especially on concrete)
If you’re installing over a concrete slab, follow your laminate manufacturer’s moisture requirements. Many installs require a vapor barrier (often polyethylene film) plus properly taped seams. This step is not optional if you’d like the floor to stay flat and calm.
Step 5: Acclimate the New Flooring
Laminate planks need time to adjust to the room’s temperature and humidity. Set the unopened boxes flat in the room for the manufacturer-recommended acclimation period (commonly 48–72 hours). This helps minimize future expansion/contraction drama.
Step 6: Plan Your Layout (So You Don’t End With a Skinny “Sad Strip”)
Layout planning is where you trade 10 minutes of math for years of not side-eyeing a 1-inch sliver along the wall.
Quick layout checklist
- Direction: Many people run planks parallel to the longest wall or toward a main light source for a more seamless look.
- Stagger: Stagger end joints (often 8–12 inches or per instructions) to strengthen the floor and avoid a repeating pattern.
- First and last row width: Measure the room to ensure the final row won’t be too narrow. If it will, trim the first row to balance both sides.
- Expansion gap: Plan for the required perimeter gap (often around 1/4 to 3/8 inch, depending on the product).
Step 7: Install Underlayment and Vapor Barrier (If Needed)
Some laminate has attached underlayment; some requires a separate underlayment layer. Over concrete, many products also require a dedicated moisture barrier. Follow the product instructions like they’re your flooring’s owner’s manualbecause they are.
- Roll out underlayment in the direction of the planks.
- Butt seams, don’t overlap (unless your product says otherwise).
- Tape seams with the recommended tape to keep the layer flat and continuous.
- For vapor barrier film, overlap and tape seams per instructions, then keep it smooth as you work.
Step 8: Install the First Row
The first row decides whether the rest of the floor goes smoothly or becomes a three-day interpretive dance titled: “Why Won’t This Click?”
- Place spacers along the starting wall to maintain the expansion gap.
- Set the first plank straight and square. Most systems install with the tongue/groove oriented in a specific directionfollow the manufacturer’s diagram.
- Connect end joints carefully. If tapping is allowed, use a tapping blockdon’t whack the plank directly.
- Cut the last plank in the row to length, leaving the expansion gap at the wall.
Step 9: Install the Remaining Rows (Click, Tap, Repeat)
This is the rhythm section of laminate floor installation. You’ll click long edges together, lock end joints, and maintain consistent staggering.
Best practices that prevent future headaches
- Stagger joints thoughtfully: Avoid “H-joints” and stair-step patterns unless your product specifically allows them.
- Keep rows tight: Gaps often happen from debris in the joint, damaged locking edges, or not fully locking boards.
- Use the pull bar for the last plank in a row: It’s the difference between a tight fit and “why is there daylight in my floor?”
- Check alignment often: If the floor starts drifting, fix it early. Small errors become big ones by row 12.
Step 10: Doorways, Vents, and Pipes (The “Fun” Obstacles)
Undercut door trim for a clean look
Instead of cutting laminate into tiny shapes to fit around door casing, undercut the trim so the flooring slides underneath. Use an oscillating tool or jamb saw. A scrap plank plus underlayment makes a great height guide.
Floor registers/vents
Remove covers and plan cuts so the opening looks intentional, not like a beaver got involved. Leave appropriate clearance so the floor can still expand.
Pipes
For pipes, measure carefully, drill holes with a hole saw, and maintain the manufacturer-required expansion space around the pipe. Many systems use trim rings/escutcheons to cover the gap neatly.
Large rooms and transitions
Some laminate systems require additional expansion planning or transition breaks for very long runs or wide spaces. Doorways are often a natural place for a T-molding. Follow your product’s limits and recommendations.
Step 11: Finish the Perimeter and Reinstall Trim
- Remove spacers once the floor is fully installed.
- Install transitions at doorways and height changes. Many transitions are attached to the subfloor, not the laminate, so the floor can float.
- Reinstall baseboards and/or shoe molding. The key rule: fasten trim to the wall/baseboardnever through the laminate.
- Reinstall vent covers and doors. Check door clearance and trim if needed.
In moisture-prone areas, some manufacturers specify perimeter sealing details (like flexible silicone at edges or around fixtures). Always follow your specific laminate installation instructionsespecially for water-resistant products.
Common Mistakes (So You Don’t Become a Flooring Cautionary Tale)
- Skipping acclimation: Leads to expansion issues later.
- No expansion gap: Floors can buckle when they expand. Give the planks room to breathe.
- Installing over an uneven subfloor: Creates bounce, noise, and gaps.
- Nailing quarter-round into the flooring: Traps the floating floor and invites buckling.
- Ignoring moisture: Concrete and crawlspaces can introduce moisture even when things look dry.
- Messy joints: Dust and debris in click-lock edges can prevent full connection.
Time, Cost, and When to Call a Pro
A straightforward bedroom can sometimes be done in a day (not counting acclimation). A whole level of a home? Plan a weekend (or two), especially if you’re doing subfloor repairs.
Costs vary widely by laminate quality, thickness, water resistance, and how many transitions/trim pieces you need. DIY saves labor, but don’t underestimate tool costs and the value of proper prep materials.
Consider calling a professional if:
- The subfloor is severely uneven or damaged
- You suspect moisture problems you can’t diagnose
- You’re dealing with complex layouts (multiple angles, built-ins, large continuous runs)
- You suspect older materials may require specialized handling
FAQ: Replacing Laminate Flooring
Can I install new laminate over old laminate?
Sometimesbut it’s often not ideal. You’ll raise floor height (door clearance issues), and any unevenness or damage underneath can telegraph through. Most importantly, you still need a flat, stable base and to follow the new product’s requirements. When in doubt, remove the old floor.
Do I need underlayment if my laminate has attached padding?
Usually you do not stack underlayment on top of attached padding unless the manufacturer specifically allows it. Over concrete, you may still need a vapor barrier film. Always follow the installation guide for your specific product.
How much expansion gap should I leave?
Many laminate systems call for about 1/4 inch to 3/8 inch around the perimeter and fixed objects, but this varies. Use the spacing specified in your product instructionsthis is one of those “small detail, big consequence” items.
What if my floor squeaks after installation?
Squeaks are usually a subfloor issue (loose panels, nails rubbing, uneven spots). Fix squeaks before installation by securing the subfloor and flattening irregularities. Once the laminate is down, squeaks are harder to chase.
Real-World Replacement Experiences (500+ Words of “What I Wish Someone Told Me”)
Let’s talk about the part of replacing laminate flooring that most tutorials politely skip: the “human experience.” Not the glamorous reveal. The middle partwhere you’re sitting on the subfloor, surrounded by trim pieces, wondering why you ever said the words “It can’t be that hard.”
The first lesson is that removing the old laminate is either delightfully easy or weirdly stubborn, and it depends on how it was installed and how it aged. Some click-lock floors lift up row by row like they were designed by angels. Others behave like they’ve been emotionally bonded to the subfloor. Water damage makes this worse: swollen edges don’t unlock politely, so you end up dismantling planks in smaller chunks. If you’re trying to salvage boards, stack them flat and treat the locking edges like potato chipsone careless toss and you’ll be looking at a pile of “almost usable.”
The second lesson: labeling trim is not optional if you enjoy sanity. Baseboards look identical until you try to reinstall them and realize one piece was cut around a door casing a decade ago and now doesn’t fit anywhere except the exact wall it came from. A pencil mark on the back (“E wall, by closet”) is a tiny action that prevents a future meltdown. And while we’re on trim: when you pry it off, you will discover how many nails can exist in a single linear foot. It’s like previous installers were paid per nail. Respect the nail count.
The third lesson is the one that turns a “pretty good” floor into a “wow” floor: subfloor prep is the whole game. If you skip flattening a low spot, you’ll feel it foreverespecially in socks. Even a small hump can make click joints separate over time or create a hollow sound that drives you nuts at 11:43 p.m. when the house is quiet. The best “pro move” is to spend more time than you think you need on cleaning, checking flatness, and fixing squeaks. It’s not exciting, but neither is redoing row eight because you ignored a bump the size of a pancake.
The fourth lesson: your first row is your future. If you start even slightly crooked, the mistake multiplies across the room like it’s earning interest. Take the extra time to make that first run straight, keep spacers consistent, and confirm your click joints are fully engaged. When you hit doorways, undercutting trim is the difference between “custom install” and “science fair project.” Sliding the laminate under casing makes everything look cleaner and also hides tiny measurement sinswhich we all commit.
Finally: expect a few “learning moments” that are totally normal. You’ll cut a plank backward at least once. You’ll forget the expansion gap at least once and catch it just in time. You’ll get very familiar with the pull bar on the last row. And when it’s all done, you’ll probably stand at the doorway holding your coffee, staring at the floor like you personally invented wood grain. That’s the real reward: not just a new laminate floor, but the confidence that you can replace laminate flooring without summoning a contractor (or chaos).




