Table of Contents >> Show >> Hide
- What Makes a Mudroom Bench a “Perfect Landing Zone”?
- Plan First: Size, Layout, and the Shoe Math Nobody Warns You About
- Pick Your Bench Style (a.k.a. “How Much Stuff Are We Hiding?”)
- Materials and Tools
- Step-by-Step: Build a Mudroom Bench (Weekend-Friendly Box Bench Plan)
- Step 1: Measure your space and protect the walkway
- Step 2: Choose your final size (and write it down)
- Step 3: Cut your plywood panels cleanly
- Step 4: Assemble the bench box (the carcass)
- Step 5: Add dividers for cubbies (and strength)
- Step 6: Build a base or toe kick (optional, but it looks high-end)
- Step 7: Add top supports (do not skip this)
- Step 8: Face frame and trim for a finished look
- Step 9: Install the seat/top
- Step 10: Sand, fill, prime, and finish for mudroom reality
- Make It a True Landing Zone: Hooks, Shelves, and Smart Add-Ons
- Pro Details That Make Your Bench Look Custom
- Common Mistakes (and How to Avoid Them)
- A Practical Example Layout (Customize to Fit)
- Conclusion
- Real-World Mudroom Bench Lessons (Experience That Saves You Time)
- SEO Tags
A mudroom bench is basically a bouncer for your house. It stops dirt, wet shoes, rogue backpacks, and “where are my gloves??”
chaos at the door and politely says, “Not tonight, buddy.” If your entryway currently looks like a sports store exploded,
building a sturdy mudroom bench creates an instant landing zonea place to sit, stash, and reset the mess
before it migrates to your couch.
This guide walks you through a weekend-friendly build that looks custom, holds up to real life, and doesn’t require a
12th-century apprenticeship in joinery. You’ll get smart sizing, material choices that survive muddy seasons, step-by-step
assembly, and pro-level finishing tipsplus of real-world “wish we’d known that” experience at the end.
What Makes a Mudroom Bench a “Perfect Landing Zone”?
The best mudroom benches do three jobs at once: seat, store, and organize.
The “perfect” part isn’t fancy trim (though we’ll make it look nice). It’s how well the bench supports your routine:
- Seating that’s comfortable: You can put on boots without performing a one-leg balancing act.
- Storage that matches your habits: Cubbies for shoes, baskets for accessories, or drawers if you want the clutter invisible.
- A drop zone up top: A small shelf, hooks, or a tray area for keys/mail so they stop teleporting.
- Materials that handle moisture: Because “mudroom” is not a metaphor.
Plan First: Size, Layout, and the Shoe Math Nobody Warns You About
Comfortable bench dimensions (use these as a starting point)
Most entry and mudroom benches feel right when the seat is around 18–20 inches high. For depth, aim around
15–20 inches so it’s supportive but not blocking the walkway. If you’ll add a cushion, remember it can add
1–3 inches of “height,” so you may want to build slightly lower.
Width and cubbies: design around your household
Decide who the bench is for and what it’s catching at the door. A solo apartment bench can be 36 inches wide and feel generous.
A busy family bench might be 60–84 inches wide (or longer) with multiple shoe bays. The secret is not perfectionit’s
capacity. If you build three cubbies but have four people, congratulations: you’ve built an argument.
Built-in vs. freestanding: choose your commitment level
- Freestanding: Easier, faster, movable. Great if you rent or rearrange often.
- Wall-to-wall built-in: Looks custom, wastes less space, can be stronger. Requires careful scribing to walls and solid anchoring.
- Hybrid: A freestanding bench base with hooks/shelves attached to studs aboveoften the sweet spot.
Pick Your Bench Style (a.k.a. “How Much Stuff Are We Hiding?”)
Option A: Simple box bench with open shoe cubbies (best all-around)
A plywood “carcass” with vertical dividers creates cubbies that keep shoes corralled and improves strength by shortening spans.
It’s straightforward, budget-friendly, and easy to customize with baskets or boot trays.
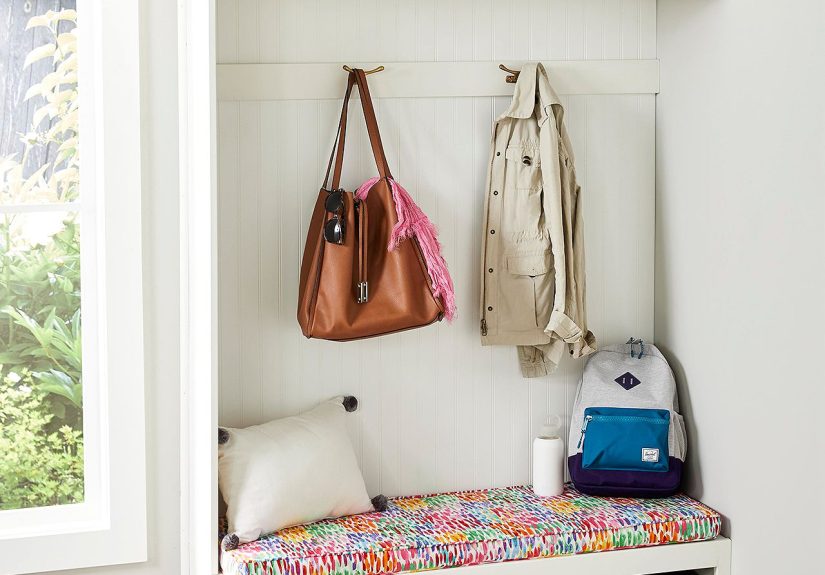
Option B: Hall-tree bench (bench + hooks + shelf)
Add a back panel, wall hooks, and an upper shelf and you’ve got a full landing-zone command center. If backpacks are part of your
daily storyline, hooks are not optionalthey’re survival gear.
Option C: Built-in bench between walls (most “custom” look)
Perfect for alcoves or small entry nooks. You’ll attach cleats/ledgers to studs, build a bench base, then fit a top that’s
scribed to the walls. It looks like it came with the house (in a good way).
Option D: Drawer bench (cleanest look, most work)
Drawers hide the chaos. They also take more time and precision (slides, face alignment, hardware). If your mudroom is the first
thing guests see and you prefer “minimalist calm” over “honest shoe pile,” drawers are worth it.
Materials and Tools
Best materials for a mudroom bench that lasts
- 3/4-inch cabinet-grade plywood for the bench box (strong, stable, paints well).
- 1/2-inch plywood for back panels or interior bottoms (optional, depending on design).
- 1×2 or 1×3 poplar for a face frame (straight, paint-friendly).
- Hardwood edging (or iron-on edge banding) to hide plywood edges on the seat/top.
- 2x4s for a base platform/ledger if you want extra stiffness or a recessed toe kick.
- Wood glue + screws (pocket screws or trim-head screws) for assembly.
- Primer + durable paint (or stain + polyurethane) for a wipeable finish.
Note on MDF: It can work for certain painted projects if fully sealed, but mudrooms see wet boots and humidity. Plywood
is usually the safer “build it once” choice.
Tools (keep it practical)
- Measuring tape, pencil, level
- Circular saw with a straightedge guide (or a track saw if you’re fancy)
- Drill/driver + bits, countersink bit
- Pocket-hole jig (optional, but makes assembly easier)
- Clamps (more clamps = less regret)
- Sander + sandpaper (80/120/180 grit)
- Brad nailer (optional, great for trim/face frame)
Step-by-Step: Build a Mudroom Bench (Weekend-Friendly Box Bench Plan)
This build describes a classic box bench with cubbies that you can leave freestanding or anchor to the wall.
Adjust dimensions to your space, but keep the same logic: sturdy box, strong top support, clean face frame, durable finish.
Step 1: Measure your space and protect the walkway
Measure the wall area where the bench will live. Then measure the clear walking path. A bench that sticks out too far turns
your entry into a pinball lane. If your door swings inward, account for the swing arc and leave breathing room so the bench
doesn’t take a doorknob to the face (or worse, to your paint job).
Step 2: Choose your final size (and write it down)
Pick a target seat height (often 18–20 inches), a depth (often 15–20 inches), and a width that fits your household. Decide how
many cubbies you want and whether they’ll be open shoe bays or basket-sized compartments. This prevents the classic DIY symptom:
“I built it perfectly, except it doesn’t fit boots.”
Step 3: Cut your plywood panels cleanly
Cut the top, bottom, sides, and dividers from 3/4-inch plywood. Use a straightedge guide so your cuts are square and repeatable.
Label every piece (top/bottom/side/divider) because plywood panels all look the same after you blink twice.
Step 4: Assemble the bench box (the carcass)
You have a few solid assembly options:
- Pocket holes: Fast, beginner-friendly, and strong enough for a bench when combined with glue.
- Rabbets/dados: More “cabinet-like” and self-aligning if you’re comfortable with a router or table saw.
- Screw-and-glue with countersunk screws: Totally valid if you plan to cover edges with a face frame.
Dry-fit first, then glue and fasten. Check for square by measuring diagonals (they should match). If they don’t, coax it into
square with clamps before the glue sets. Glue has feelings, and it remembers.
Step 5: Add dividers for cubbies (and strength)
Dividers do double duty: they separate shoes and act like internal “supports” that prevent the top from flexing. Space them
evenly or customize widths (wider bays for adult boots, narrower for kids). Attach dividers with glue and fasteners, and keep
their front edges aligned so your face frame sits flat later.
Step 6: Build a base or toe kick (optional, but it looks high-end)
A recessed toe kick makes the bench feel built-in and gives your feet somewhere to go when you sit. You can create this by:
- Building a simple 2×4 platform slightly smaller than the bench footprint, then placing the bench box on top, or
- Adding a recessed toe-kick panel under the front edge of the box.
Either way, aim for a clean shadow line at the bottom. It’s a small detail that screams “custom” without actually screaming.
Step 7: Add top supports (do not skip this)
Benches carry dynamic loadspeople plopping down, tying boots, dropping backpacks like they’re mad at gravity. Add internal
cleats or stretchers just under the top edge, especially along the front and back. If your bench is wide, a center divider plus
supports makes the seat feel rock solid.
Step 8: Face frame and trim for a finished look
A face frame (1×2 poplar is great) hides plywood edges and makes openings look crisp. Cut stiles and rails, dry-fit, then glue
and nail/screw in place. Keep the frame flush with the inside edges of openings so baskets slide cleanly.
Optional upgrades:
- Beadboard back: Adds character, especially if you’re doing hooks above.
- Side panels: Dress up the ends with a Shaker-style frame or simple applied trim.
- Baseboard integration: If built-in, notch or remove baseboard and replace for a seamless look.
Step 9: Install the seat/top
You’ve got choices, depending on your style and budget:
- Plywood top with hardwood edging: Paint it, cushion it, live happily ever after.
- Solid wood top: Beautiful, but allow for seasonal wood movement (use figure-8 fasteners or elongated holes).
- Butcher block top: Warm and durablegreat for a “furniture” look in an entryway.
Leave a slight overhang (even 1/2 inch) so the front face doesn’t take the brunt of every shoe scuff. Predrill holes to avoid
splitting, and keep fasteners where they won’t interfere with baskets or shoes.
Step 10: Sand, fill, prime, and finish for mudroom reality
Sand everything smooth (especially corners that will meet ankles). Fill screw holes and seams with wood filler, sand again,
then prime. Mudrooms are high-traffic, so choose finishes that wipe clean:
- Paint: A quality primer + durable enamel (often satin or semi-gloss) is easy to clean.
- Stain: Seal with polyurethane (wipe-on poly is beginner-friendly and forgiving).
Pro tip: Paint the inside of cubbies too. Leaving them raw is how you end up with the “mystery scuff gallery” effect.
Make It a True Landing Zone: Hooks, Shelves, and Smart Add-Ons
The bench is the base. The landing zone magic happens with what you pair above and around it.
Hooks that actually hold stuff
Install hooks into studs whenever possible. If studs don’t align with your preferred hook spacing, add a sturdy backer board
(like a painted 1×6 or plywood strip) anchored to studs, then mount hooks to the board. This is how you avoid “hook failure”
during backpack season.
A shelf for bins, hats, and the things that multiply
A simple shelf above the hooks is perfect for labeled bins (gloves, scarves, dog gear, reusable bags). Labels aren’t just cute;
they’re how you keep your bench from becoming a museum exhibit titled “Random Objects Found Near the Door.”
Boot tray, drip zone, and ventilation
If wet boots are common, plan for a tray or a washable mat in front of or under the bench. Open cubbies and a bit of air space
help damp items dry faster and keep odors from settling in like unwanted roommates.
Bonus: A charging nook
If you’re building a larger mudroom setup, consider a small charging shelf (or a cubby sized for a power strip). Keeping devices
near the door can make mornings smootherassuming everyone remembers where they put them, which is a big assumption.
Pro Details That Make Your Bench Look Custom
Edge treatment matters
Plywood edges are the giveaway. Hardwood edging, clean trim, or quality edge banding instantly levels up the look. Slightly
round over sharp corners on the seat with sandpaper for comfort (and fewer “ow” moments).
Keep openings consistent
Even if your cubbies aren’t identical widths, keep the face-frame reveals consistent and square. Visual consistency reads as
“professional,” even when the inside is full of shoes that are definitely not consistent.
Use a “mudroom-proof” paint approach
Prime properly, sand between coats if needed, and let the finish cure before heavy use. Dry-to-touch is not the same as durable,
and boots do not care about your timeline.
Common Mistakes (and How to Avoid Them)
- Building too deep: It blocks traffic. Stay mindful of door swing and walkway clearance.
- Skipping supports: A wide top needs dividers/cleats to prevent flex and squeaks.
- Ignoring moisture: Use plywood and sealed finishes; avoid raw edges that can swell.
- Mounting hooks into drywall only: Anchor to studs or a stud-mounted backer board.
- Forgetting the “stuff”: Measure boots, baskets, and backpacks before you commit to cubby sizes.
A Practical Example Layout (Customize to Fit)
If you want a straightforward starting point, try this concept:
- Width: 60 inches (fits 3–4 “stations” depending on how you organize)
- Seat height: ~18–19 inches before cushion
- Depth: ~16–18 inches
- Cubbies: 3 openings with dividers (strong + shoe-friendly)
- Top: 3/4-inch plywood with hardwood edging, or butcher block
- Above: A stud-mounted backer board + 5–7 hooks + one shelf
This layout keeps things simple: shoes below, coats/bags above, and a seat that doesn’t wobble when someone sits down like they
mean it.
Conclusion
A well-built mudroom bench is one of those rare DIY wins that improves your home every single day. You’re not just
building a seatyou’re building a routine: shoes go here, bags go there, and the rest of the house stays calmer because the
chaos got stopped at the door. Build it sturdy, finish it like it’s going to see some action (because it is), and add the
hooks/shelf combo that turns your bench into a true landing zone.
Real-World Mudroom Bench Lessons (Experience That Saves You Time)
Talk to enough DIYers and you’ll hear the same theme: the bench build is the easy part. The behavior of the household
is the hard part. A mudroom bench succeeds when it matches what people actually do at the doornot what you wish they did.
One common experience is building gorgeous cubbies… then realizing everyone kicks shoes off two feet before the bench.
The fix isn’t a bigger lecture. It’s a bigger “target.” A slightly wider bench, a boot tray that visually signals “drop shoes
here,” or a rug runner that funnels traffic toward the bench can turn good intentions into muscle memory.
Another lesson: storage needs change with seasons, sports, and growth spurts. In fall, you need space for rain boots and
jackets. In winter, it’s bulkier coats, gloves, hats, and the kind of scarves that appear from nowhere. In spring, everything is
muddy again but in a different, more optimistic way. People who love their benches long-term often build in flex:
cubbies sized to accept baskets, a shelf that fits labeled bins, and hooks spaced so you can swap a little kid’s coat for a
teenager’s backpack without remodeling the entire wall. The bench becomes a framework, not a fixed sculpture.
Finishing is another “experience-based” surprise. Many first-time builders paint the bench and immediately start using it,
only to discover that fresh paint plus gritty shoe soles equals instant distressing. (If you wanted distressed, great. If you
didn’t, welcome to the club.) The more satisfying approach is to let paint cure, add a small overhang on the seat, and consider
a wipeable cushion or washable pad. Families who use their benches daily also appreciate darker paint colors, satin or
semi-gloss sheens, and interiors that are painted toobecause raw cubbies collect grime and look tired fast.
Hooks are where reality truly checks in. If hooks are installed into drywall only, the first heavy backpack (or a determined
kid doing a one-handed yank) can loosen them. People who’ve lived with mudroom setups swear by stud-mounted backer boards or
blocking behind the wall. It’s one of those invisible upgrades that pays off every morning. And speaking of mornings: the best
“landing zones” usually include a tiny, intentional spot for the small essentialskeys, dog leash, sunglasses, school notes.
Without that micro-drop-zone, those items wander. With it, they behave.
Finally, a lot of real-world bench satisfaction comes from adding one “comfort detail” that makes the space feel welcoming:
a small lamp, a warm wood top, a cushion that matches the home’s style, or even just a nicely framed label system that makes
everyone feel like the mudroom is organized on purpose. The bench doesn’t have to be complicated to be life-changing. It just
has to be the place where the daily mess politely stopsso the rest of your home doesn’t have to deal with it.




