Table of Contents >> Show >> Hide
- Before You Start: Prep Your Hair Like a Pro
- Method 1: The Braid-and-Press Crimp
- Method 2: The S-Wave Flat Iron Crimp
- Method 3: The Twist-and-Press Texture Method
- Method 4: The Root-Crimp Volume Trick
- How to Make Crimped Hair Last Longer
- Common Mistakes to Avoid
- Best Products for Crimping Hair With a Straightener
- Which Crimping Method Should You Choose?
- Extra Experience Tips: What Actually Helps in Real Life
- Conclusion
Crimped hair is back, and this time it is not arriving with neon leg warmers, frosted lipstick, and a can of hairspray large enough to qualify as furniture. Today’s crimped hair is softer, cooler, and much easier to customize. Better yet, you do not need to buy a separate crimping iron to get the look. Your everyday straightener can create everything from tiny zig-zag texture to loose mermaid waves, beachy bends, and root-lifting volume.
Learning how to crimp your hair with a straightener is basically the beauty equivalent of discovering your toaster also makes waffles. With a few smart techniques, the right prep, and a little patience, a flat iron can become your secret weapon for texture, body, and “yes, I woke up stylish” energy.
This guide walks you through four easy ways to crimp hair with a flat iron, including the braid method, the S-wave method, the twist method, and the root-volume method. We will also cover heat protection, sectioning, styling products, common mistakes, and real-world tips that make the difference between cute crimped waves and hair that looks like it got into a disagreement with a lawn chair.
Before You Start: Prep Your Hair Like a Pro
Crimping hair with a straightener works best when your hair is clean, fully dry, detangled, and protected. Heat styling on damp hair is one of the fastest ways to cause damage, so make sure your strands are completely dry before the flat iron touches them. If your hair is still holding moisture, give it more time or use a blow dryer on a gentle setting before styling.
Use Heat Protectant Every Time
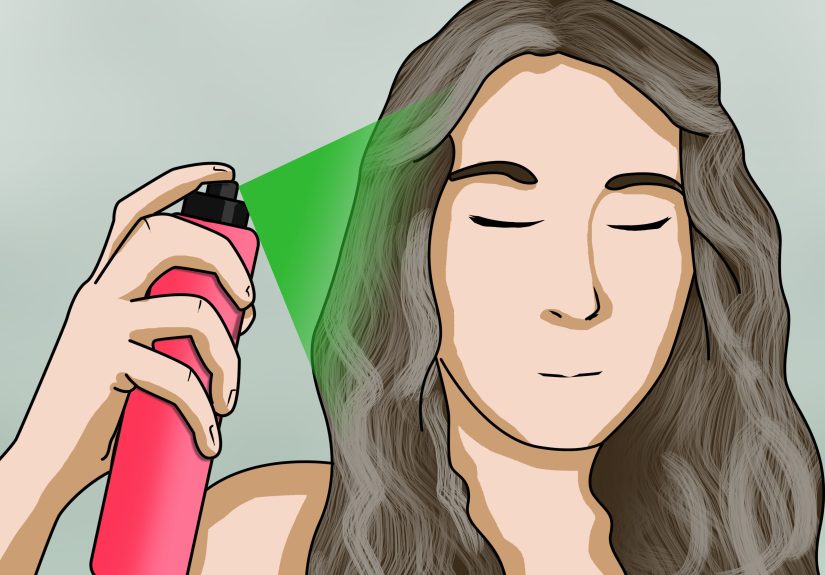
A heat protectant spray or cream is not optional. It helps create a barrier between your hair and the hot plates of the straightener. Apply it evenly from mid-lengths to ends, then let it dry before you begin. Spraying heat protectant and immediately clamping down with a flat iron is like putting a raincoat on and jumping into a swimming pool. The intention is good, but the execution needs work.
Choose the Right Flat Iron Temperature
Use the lowest heat setting that still gives you a visible crimp. Fine, fragile, bleached, or color-treated hair usually needs lower heat. Thick, coarse, or resistant hair may need a slightly higher setting, but more heat is not automatically better. If you have to pass over the same section again and again, your sections may be too thick, or your technique may need adjusting.
Section Your Hair First
Divide your hair into manageable layers. Clip the top half up and begin with the bottom sections. Smaller sections create tighter crimps, while larger sections create softer waves. Think of section size as your “texture dial.” Tiny sections say, “I brought drama.” Bigger sections say, “I drink iced coffee and casually look amazing.”
Method 1: The Braid-and-Press Crimp
The braid-and-press method is one of the easiest ways to crimp hair with a straightener, especially if you are a beginner. It creates a classic crimped texture without requiring complicated wrist movements or advanced salon-level coordination.
How to Do It
Start by brushing your dry hair and applying heat protectant. Divide your hair into several sections. For tighter crimps, create small braids. For looser, more relaxed texture, make fewer and larger braids. Braid each section from near the root to the ends, securing with a small elastic.
Once the braids are ready, clamp your straightener over each braid for a few seconds at a time, moving slowly from top to bottom. Do not drag the iron aggressively. Instead, press, release, move down, and press again. Let the braids cool completely before unraveling them. This cooling step is important because hair sets into shape as it cools.
After removing the elastics, gently separate the crimps with your fingers. Avoid brushing unless you want major volume. A wide-tooth comb can soften the pattern, but a regular brush may turn your cute crimps into a fluffy triangle. A fashionable triangle, perhaps, but still a triangle.
Best For
This method works well for long hair, medium-length hair, layered hair, and anyone who wants an easy, low-skill technique. It is also great for creating overnight-looking waves quickly. If your goal is soft, wearable crimped hair rather than super-defined zig-zags, this is the method to try first.
Method 2: The S-Wave Flat Iron Crimp
The S-wave method creates a more polished, modern crimp. Instead of braiding the hair first, you shape each section into an “S” pattern and press the straightener over the bends. The result is softer than old-school crimping but more defined than beach waves.
How to Do It
Take a small section of dry, protected hair. Hold the section with one hand and use your fingers to bend it into an S shape. Clamp the flat iron gently over the first bend for a few seconds. Then move down the section, reversing the bend each time. Continue creating alternating curves until you reach the ends.
The key is rhythm: bend, press, release, bend the opposite way, press again. It may feel awkward at first, but after a few sections, your hands will figure it out. The first section might look like modern art. That is normal. Modern art has value.
For a softer finish, leave the last inch of hair straighter. This keeps the style fresh and prevents the ends from looking too stiff. Once the hair cools, break up the waves with your fingers and add a light mist of flexible hairspray or texture spray.
Best For
The S-wave method is ideal for shoulder-length hair, bobs, lobs, and face-framing pieces. It gives the hair movement without making it overly puffy. If you want crimped texture that looks editorial, trendy, and wearable, this technique is your new best friend.
Method 3: The Twist-and-Press Texture Method
The twist-and-press method is perfect when you want a relaxed, beachy crimp rather than a sharp zig-zag. It is fast, casual, and forgiving. Translation: if you are styling your hair while half-awake and emotionally dependent on coffee, this one has your back.
How to Do It
Separate your hair into medium sections. Take one section and twist it away from your face. The tighter the twist, the more defined the texture. Clamp the straightener over the twist, starting near the top and moving downward in short presses. Hold each press for only a few seconds.
Let the twisted section cool before releasing it. Once cool, loosen it with your fingers. Repeat around your head, alternating the direction of some twists for a more natural effect. If every section twists the same way, your hair can clump together instead of looking full and textured.
Finish with a lightweight texture spray or a small amount of styling cream on the ends. Avoid heavy oils before heat styling, and use shine products sparingly after styling so the crimps do not collapse.
Best For
This technique is great for medium to long hair, casual waves, second-day hair, and anyone who wants a quick style that does not look too “done.” It is also useful for adding movement to straight hair that usually falls flat after ten minutes of pretending to cooperate.
Method 4: The Root-Crimp Volume Trick
Crimping is not only about visible texture. You can also use a straightener to create hidden volume at the roots. This technique is especially helpful for fine hair, flat hair, oily roots, or styles that need lift without teasing.
How to Do It
Part your hair where you normally wear it, then lift a thin section underneath the top layer. Do not crimp the very top section unless you want the texture to show. Working with hidden under-sections, place the flat iron close to the root and create a small bend by gently rocking the iron back and forth. Hold for a second or two, then release.
Repeat around the crown, focusing only on areas where you want lift. Let the hair cool, then lay the smooth top layer over the crimped roots. The hidden texture acts like scaffolding for your hairstyle. Tiny architectural support, but make it beauty.
Use a light hairspray to hold the lift in place. Dry shampoo can also help add grip if your roots are silky or freshly washed. The goal is invisible volume, not obvious dents, so keep the sections small and the pressure light.
Best For
This method is excellent for fine hair, limp roots, ponytails, half-up styles, and glam looks that need height. It works especially well when you want fullness without teasing, backcombing, or using so much product that your hair feels like a craft project.
How to Make Crimped Hair Last Longer
The secret to long-lasting crimped hair is preparation, cooling time, and the right finishing products. Start with dry hair that has some grip. Freshly washed hair can be slippery, so a little mousse, texture spray, or dry shampoo can help hold the shape.
Always let each section cool before touching it. This is the moment when the style sets. If you pull, brush, or fluff the hair while it is still warm, you may loosen the crimp before it has a chance to lock in.
Once your hair is fully styled, use a flexible-hold hairspray. Avoid heavy sprays that make hair crunchy. Modern crimped hair should move, bounce, and look touchable. Nobody wants hair that sounds like a snack bag when the wind blows.
Common Mistakes to Avoid
Using Too Much Heat
More heat does not always mean better crimps. Excessive heat can dry out the hair, weaken strands, and make ends look rough. Start low and increase only if necessary.
Skipping Heat Protectant
Crimping requires direct contact with hot plates, so heat protection matters. Apply it evenly, let it dry, and then style.
Crimping Wet or Damp Hair
Never use a straightener on wet hair unless the tool is specifically designed for that purpose, and even then, caution is wise. For regular flat irons, dry hair is the rule.
Making Sections Too Thick
Thick sections may not heat evenly, which can lead to weak texture and repeated passes. Smaller sections take more time but usually create better, longer-lasting results.
Brushing Too Aggressively After Styling
Use your fingers to separate crimps. Brushing can create frizz and expand the style dramatically. Unless you are aiming for “glam rock cloud,” be gentle.
Best Products for Crimping Hair With a Straightener
You do not need a mountain of products, but a few smart choices can help. A heat protectant is the most important. A lightweight mousse can add hold before styling, especially for fine hair. Texture spray can give the finished look more body. Flexible hairspray keeps the crimps in place without making them stiff.
If your hair is dry or frizz-prone, use a tiny amount of smoothing serum after styling, focusing on the ends. Avoid applying heavy oils before using your straightener because they can make hair feel greasy and may interfere with the final texture.
Which Crimping Method Should You Choose?
Choose the braid-and-press method if you want beginner-friendly crimped waves. Choose the S-wave method if you want trendy, polished bends. Choose the twist-and-press method if you want relaxed, beachy texture. Choose the root-crimp trick if you want volume without obvious crimping.
You can also combine methods. For example, use the root-crimp technique at the crown, the S-wave method around the face, and the braid method through the back. Hair styling is not a math test. You are allowed to mix formulas and still win.
Extra Experience Tips: What Actually Helps in Real Life
After trying different ways to crimp hair with a straightener, one thing becomes clear: the best technique depends on how much time you have, how much patience you were born with, and whether your hair enjoys following instructions. Some hair types take a crimp quickly. Others need a pep talk, a texture spray, and possibly a signed agreement.
For beginners, the braid-and-press method is usually the most reliable. It does not require perfect hand movements, and it gives consistent texture from top to bottom. The biggest lesson is to let the braids cool before taking them out. When you unravel them too soon, the waves relax almost immediately. Waiting an extra few minutes can make the difference between “cute crimped hair” and “slightly confused bend.”
The S-wave method looks beautiful, but it takes practice. The first time you try it, start on a lower layer of hair where mistakes can hide. Once your hands learn the motion, use it on the front pieces. Face-framing crimps should usually be softer than the back sections because strong bends around the face can look intense very quickly. A gentle S-wave near the cheekbones can look stylish and modern; a sharp dent near the temple can look like your straightener had a personal vendetta.
The twist-and-press method is the best choice when you are short on time. It gives a casual finish and does not punish imperfection. In fact, slightly uneven twists often look better because they create natural movement. This method is also great for second-day hair because a little natural oil and texture can help the style hold.
For fine hair, hidden root crimping can be a game changer. The trick is to crimp only the underneath sections. If you crimp the visible top layer, the texture may show more than you want. Keep the pressure light, use small sections, and let the top layer fall naturally over the lifted roots. This creates fullness without the tangled feeling that can come from teasing.
Another practical tip: do not aim for perfection. Modern crimped hair looks better when it has movement and variation. Leave the ends slightly straighter for a cooler finish. Alternate directions when twisting. Use different braid sizes if you want a fuller, more natural texture. Perfectly identical crimps can look costume-like, while slightly imperfect texture looks effortless.
Finally, remember that heat styling should not be an everyday requirement. Give your hair rest days, use conditioning products, and keep your flat iron clean. Product buildup on hot plates can snag hair and affect your results. A clean tool, protected hair, and patient sectioning will do more for your style than simply turning the temperature higher.
Conclusion
Crimping your hair with a straightener is simple once you understand the four main techniques. The braid-and-press method gives easy classic texture. The S-wave method creates polished modern bends. The twist-and-press method delivers relaxed beachy movement. The root-crimp trick adds hidden lift where flat hair needs it most.
The best results come from dry hair, heat protectant, smart sectioning, moderate temperature, and patience while the hair cools. Whether you want bold crimped texture or soft everyday waves, your flat iron can do far more than straighten. It may not make breakfast, answer emails, or fold laundry, but for hair texture? It is surprisingly talented.




