Table of Contents >> Show >> Hide
- Signs Your 3D Printer Nozzle Needs Cleaning
- Tools You May Need
- How to Clean the Nozzle on a 3D Printer: 11 Steps
- Step 1: Pause or Stop the Print Safely
- Step 2: Heat the Nozzle to the Correct Temperature
- Step 3: Remove Loose Filament and Exterior Debris
- Step 4: Scrub the Outside with a Brass Brush
- Step 5: Try Manual Extrusion
- Step 6: Use a Nozzle Cleaning Needle for a Tip Blockage
- Step 7: Perform a Cold Pull for Internal Residue
- Step 8: Flush the Nozzle with Cleaning Filament
- Step 9: Remove the Nozzle for Deep Cleaning
- Step 10: Soak or Heat-Clean the Removed Nozzle When Appropriate
- Step 11: Reinstall, Test Extrusion, and Print a Calibration Model
- Common Causes of 3D Printer Nozzle Clogs
- How Often Should You Clean a 3D Printer Nozzle?
- When to Replace the Nozzle Instead of Cleaning It
- Extra Experience: Real-World Lessons from Cleaning 3D Printer Nozzles
- Conclusion
A clogged 3D printer nozzle is the tiny villain behind many big printing disasters. One minute your printer is laying down smooth, satisfying layers; the next minute it is clicking, under-extruding, dragging burnt plastic blobs across your model, or producing spaghetti that looks like it escaped from a cafeteria tray. The good news? In most cases, you do not need to panic, replace half the hotend, or whisper dramatic farewell speeches to your printer.
Learning how to clean the nozzle on a 3D printer is one of the most useful maintenance skills for any FDM printer owner. Whether you print with PLA, PETG, ABS, TPU, nylon, or specialty filaments, residue can build up inside the nozzle over time. Dust, burnt filament, moisture-damaged material, wrong temperature settings, and tiny particles from low-quality filament can all interrupt filament flow. A clean nozzle helps restore consistent extrusion, sharper details, better first layers, and fewer failed prints.
This guide walks you through 11 practical steps to clean a 3D printer nozzle safely and effectively. You will learn how to diagnose a clog, clean the outside of the nozzle, clear partial blockages with a needle, perform a cold pull, remove the nozzle for deeper cleaning, and prevent clogs from coming back like an annoying sequel nobody asked for.
Signs Your 3D Printer Nozzle Needs Cleaning
Before grabbing tools, make sure the nozzle is actually the problem. A clogged nozzle often causes thin extrusion lines, missing layers, rough surfaces, clicking from the extruder, curled filament at the nozzle tip, or filament that refuses to come out even when the hotend is heated. You may also notice that the first layer looks patchy, the printer prints in the air because material is barely flowing, or the nozzle leaves burnt specks on your model.
However, similar symptoms can come from incorrect bed leveling, a worn extruder gear, wet filament, incorrect slicer settings, heat creep, or a damaged PTFE tube. That is why the best approach is to start with simple, non-invasive cleaning methods before disassembling anything.
Tools You May Need
You do not need a futuristic laboratory to clean a 3D printer nozzle. Most clogs can be handled with basic tools: heat-resistant gloves, a brass wire brush, nozzle cleaning needles, tweezers, cleaning filament or nylon filament, paper towels, isopropyl alcohol for exterior residue, a wrench or socket for nozzle removal, and a spare nozzle in the correct size.
A brass brush is useful because brass is softer than hardened steel tools and less likely to damage a brass nozzle. Cleaning needles are helpful for small tip blockages, but they should be used gently. For deep internal residue, cleaning filament or a cold pull is often more effective than poking randomly at the nozzle like you are trying to solve a tiny metal mystery.
How to Clean the Nozzle on a 3D Printer: 11 Steps
Step 1: Pause or Stop the Print Safely
If your nozzle clogs during a print, pause the job if your printer allows it. If the print has already failed badly, stop it and move the print head away from the model. Avoid pulling filament or scraping plastic while the machine is moving. A clogged nozzle is frustrating, but a bent toolhead, damaged bed surface, or burned finger is much worse.
Let the printer remain powered while you are using temperature controls, but keep your hands clear of the hotend, fans, belts, and moving parts. If you need to remove the nozzle or disassemble the hotend later, follow your printer manufacturer’s instructions carefully.
Step 2: Heat the Nozzle to the Correct Temperature
Set the nozzle to the printing temperature of the last filament you used. For PLA, this is often around 190–220°C. PETG commonly prints around 220–250°C, while ABS may require about 230–260°C. These ranges vary by brand, printer, and hotend design, so check the filament label and your printer’s recommended settings.
Heating the nozzle softens the stuck plastic inside. Trying to clear cold filament from a cold nozzle is like trying to squeeze frozen peanut butter through a straw. Technically possible in a cartoon, not recommended in real life.
Step 3: Remove Loose Filament and Exterior Debris
Once the nozzle is hot, unload the filament using your printer’s unload function or gently retract it according to your machine’s normal procedure. If plastic has collected around the outside of the nozzle, use tweezers to remove loose strings or blobs. Work slowly and avoid touching the heater block, thermistor wires, heater cartridge wires, or silicone sock.
External buildup can sometimes look like a clog even when the inside of the nozzle is mostly fine. Melted plastic stuck to the nozzle tip may drag across prints, cause brown marks, or interfere with the first layer. Cleaning the outside first is the easiest win.
Step 4: Scrub the Outside with a Brass Brush
With the nozzle still warm, gently brush the exterior using a brass wire brush. Do not use a steel brush on a brass nozzle, because it can scratch or damage the nozzle surface. Brush lightly around the tip and sides to remove cooked-on residue. If you use isopropyl alcohol on a cloth for wiping, keep it away from open heat sources and use it only with proper care.
This step is best for burnt filament stuck outside the nozzle, not for a deep internal clog. Think of it as cleaning the front door before checking whether something is blocking the hallway.
Step 5: Try Manual Extrusion
Load filament again and manually extrude a small amount through the hotend. Many printers have a menu option for extrusion. You can also gently push filament by hand if your printer design allows it and the extruder tension is released, but do not force it. The filament should flow downward in a smooth, consistent strand.
If the filament curls sharply, comes out very thin, sputters, or does not come out at all, the nozzle may still be partially blocked. If extrusion improves after a few centimeters of filament, the clog may have been softened and pushed out.
Step 6: Use a Nozzle Cleaning Needle for a Tip Blockage
If filament is barely coming out, insert a nozzle cleaning needle into the hot nozzle opening from below. Use a needle that matches your nozzle size. For example, a standard 0.4 mm nozzle requires a very thin cleaning needle designed for 3D printer nozzles. Move it gently up and down to break up debris near the tip.
Do not jam the needle sideways, twist aggressively, or force a tool larger than the nozzle opening. A nozzle is small, precise, and surprisingly easy to damage. After using the needle, manually extrude filament again to see whether the flow is straight and steady.
Step 7: Perform a Cold Pull for Internal Residue
A cold pull, also called an atomic pull, is one of the best methods for removing burnt plastic and particles from inside the nozzle without taking the hotend apart. Load cleaning filament, nylon, or PLA depending on your printer and filament compatibility. Heat the nozzle high enough to melt the material and push filament through until it flows cleanly.
Then cool the hotend to the recommended pulling temperature for the material. For PLA, many users pull around 80–100°C, while nylon or cleaning filament may require different temperatures. When the filament is firm but not completely stuck, pull it upward in one smooth motion. The end of the removed filament may show the shape of the inside of the nozzle, along with dark specks, burnt residue, or old material.
Repeat the cold pull until the pulled filament comes out clean. This process can feel oddly satisfying, like removing lint from a dryer trap, except nerdier and involving more Celsius.
Step 8: Flush the Nozzle with Cleaning Filament
Cleaning filament is designed to grab leftover material and push it out of the hotend. It is especially useful when switching between materials with different printing temperatures, such as moving from ABS or PETG back to PLA. Heat the nozzle to the cleaning filament’s recommended range, feed it through, and continue extruding until the strand looks clean.
This step is great preventive maintenance. You do not have to wait until your printer behaves like a moody espresso machine. Running a small amount of cleaning filament after abrasive, glitter, wood-filled, carbon-fiber-filled, or high-temperature materials can help reduce future clogs.
Step 9: Remove the Nozzle for Deep Cleaning
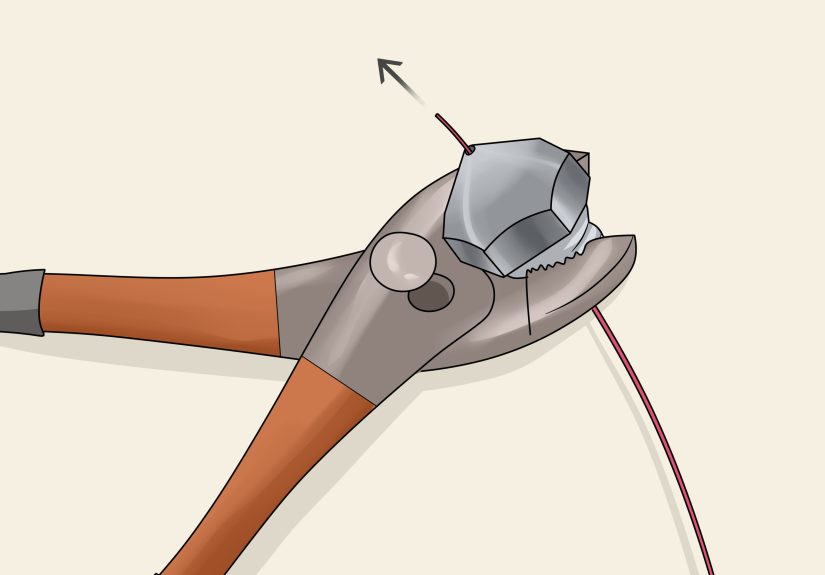
If the nozzle remains clogged after brushing, needling, extrusion, and cold pulls, it may need to be removed. Heat the hotend to the appropriate temperature before loosening the nozzle, because plastic inside the threads can lock it in place when cold. Hold the heater block steady with one wrench and loosen the nozzle with the correct socket or wrench.
Be extremely careful: the hotend is hot enough to burn skin instantly. Wear heat-resistant gloves, keep tools stable, and avoid pulling on wires. Once removed, you can inspect the nozzle for blocked material, damaged threads, or a worn opening. A badly worn nozzle may not be worth saving, especially if it is a standard brass nozzle that costs very little to replace.
Step 10: Soak or Heat-Clean the Removed Nozzle When Appropriate
For certain materials, soaking may help loosen residue. ABS and ASA residue may soften with acetone, while PLA and PETG usually do not dissolve effectively in common household solvents. Always research the filament type before using chemicals, and never mix random solvents. Use good ventilation, gloves, and a safe container.
Some users heat removed nozzles carefully to soften plastic and then clear the bore with a fine wire, but this should be done cautiously. Overheating can discolor, weaken, or damage parts, and unsafe heating methods are not worth the risk. In many cases, replacing the nozzle is faster, cleaner, and cheaper than performing heroic surgery on a $2 part.
Step 11: Reinstall, Test Extrusion, and Print a Calibration Model
Reinstall the nozzle while the hotend is heated, following your printer’s correct tightening procedure. The nozzle must seal properly against the heat break, not merely against the heater block. If it is installed incorrectly, melted filament can leak around the threads and create a plastic blob of doom around the hotend.
After reinstalling, load filament and extrude several centimeters. The filament should come out smoothly and vertically. Then print a small test model, such as a single-wall cube, first-layer square, or temperature tower if you are also troubleshooting filament settings. Watch the first layer closely. A clean nozzle should produce consistent lines without gaps, clicking, or random burnt crumbs.
Common Causes of 3D Printer Nozzle Clogs
Nozzle clogs rarely appear from nowhere. One common cause is printing too cold, which prevents filament from melting fully and increases pressure inside the hotend. Printing too hot can also cause trouble by burning filament and leaving carbonized residue inside the nozzle.
Dusty filament is another major culprit. Filament can collect dust while sitting on an open spool holder, and that dust travels directly into the nozzle. Wet filament can bubble, sputter, and leave inconsistent deposits. Low-quality filament may contain impurities or diameter inconsistencies. Abrasive materials, such as glow-in-the-dark, carbon fiber, metal-filled, and wood-filled filaments, can wear or clog standard brass nozzles faster than plain PLA.
Heat creep can also cause jams. This happens when heat travels too far up the hotend and softens filament before it reaches the melt zone. The softened filament expands, sticks, and blocks the path. Poor cooling, a failing hotend fan, excessive retraction, or an all-metal hotend running unsuitable settings can make heat creep worse.
How Often Should You Clean a 3D Printer Nozzle?
There is no single schedule that fits every printer. A hobbyist printing PLA once a week may only need occasional cleaning. Someone printing daily with PETG, nylon, or composite filament may need more frequent maintenance. As a practical rule, wipe external residue whenever it appears, run cleaning filament when switching between very different materials, and perform a cold pull when extrusion becomes inconsistent.
If you print abrasive filament, inspect the nozzle regularly. A worn nozzle opening can become larger or uneven, causing over-extrusion, fuzzy details, and poor dimensional accuracy. At that point, cleaning will not fix the issue. The nozzle is not clogged; it is retired.
When to Replace the Nozzle Instead of Cleaning It
Replace the nozzle if the opening is visibly damaged, the filament exits at an angle even after cleaning, the nozzle has heavy internal residue that will not clear, or the printer still under-extrudes after you have ruled out filament, extruder tension, temperature, and hotend issues. You should also replace brass nozzles that have been used heavily with abrasive filaments.
For standard 0.4 mm brass nozzles, replacement is often inexpensive and saves time. For hardened steel, ruby-tipped, tungsten carbide, or specialty nozzles, cleaning may be worth more effort because they cost more. Either way, keep a few spare nozzles on hand. Nothing ruins a weekend project faster than discovering your only nozzle is clogged at 11:48 p.m.
Extra Experience: Real-World Lessons from Cleaning 3D Printer Nozzles
After dealing with many nozzle clogs, one lesson becomes clear: the nozzle is usually the messenger, not the entire problem. Many beginners clean the nozzle, get one good print, and then the clog returns. That usually means something upstream is causing the blockage. The filament may be wet, the printing temperature may be too low, the extruder gear may be grinding material, or the hotend fan may not be cooling properly.
One common experience is the “PLA after PETG” clog. PETG often prints hotter than PLA. If small PETG residue remains in the nozzle and you switch to PLA at a lower temperature, that leftover PETG may not melt enough to flow smoothly. The printer then starts under-extruding, and it looks like the PLA is bad. In reality, the nozzle is holding a tiny plug of previous material. Running cleaning filament or doing a cold pull between material changes can prevent this headache.
Another lesson is that the first layer can trick you. If the nozzle is too close to the bed, filament cannot exit properly. The extruder clicks, the lines look thin, and the printer behaves like it has a clog. But once you raise the Z-offset slightly, extrusion returns to normal. Before tearing apart the hotend, always check whether the nozzle has enough room to extrude during the first layer.
Cleaning needles are useful, but they are not magic swords. They work best for small blockages near the nozzle tip. If burnt material is stuck higher inside the melt zone, a needle may only poke a temporary path through the clog. The printer may work for a few minutes and then fail again. That is when a cold pull becomes more effective because it removes residue from the inside instead of just punching through it.
The cold pull also teaches patience. The first pull may come out dirty, stretched, or incomplete. The second might look better. By the third or fourth, the shape of the nozzle tip becomes cleaner, and the filament flow usually improves. Rushing the process by pulling too hot can leave material behind. Pulling too cold can snap the filament. The sweet spot depends on the material, so write down what works for your printer.
It is also smart to treat filament storage as nozzle maintenance. Dry, clean filament prevents many clogs before they start. Keep spools in sealed bags, dry boxes, or containers with desiccant. Add a simple filament dust filter if your printing area is dusty. This tiny habit can reduce debris entering the nozzle and make extrusion more consistent.
Finally, do not be emotionally attached to a cheap worn nozzle. Many 3D printing problems become easier when you accept that nozzles are consumable parts. If you have cleaned the same nozzle repeatedly and prints still look rough, replace it and move on with your life. Your printer will forgive you. Your models will look better. Your sanity may even return.
Conclusion
Cleaning the nozzle on a 3D printer is not complicated, but it does require the right sequence. Start with safe, simple methods: heat the nozzle, clean the exterior, check extrusion, and use a cleaning needle for minor tip clogs. For deeper residue, perform a cold pull or flush the hotend with cleaning filament. If the clog refuses to leave, remove the nozzle carefully and decide whether deep cleaning or replacement makes more sense.
A clean nozzle improves extrusion, surface quality, first-layer reliability, and overall print consistency. More importantly, it helps you spend less time troubleshooting and more time printing the things you actually wanted to make. Your 3D printer may still occasionally act dramatic, but at least the nozzle will no longer be the prime suspect.
Note: This article is written from synthesized, real-world 3D printer maintenance practices used by printer manufacturers, support documentation, and experienced FDM printing communities. No source links or unnecessary citation placeholders are inserted, so the content is ready for web publishing.




