Table of Contents >> Show >> Hide
- Why This DIY Project Works So Well
- Choosing the Right Door for the Job
- Designing the Hall Tree
- Materials and Tools You Will Likely Need
- How to Build an Upcycled Door Hall Tree With Chalkboard
- Chalkboard Tips That Make a Big Difference
- Best Places to Use This Project
- Mistakes to Avoid
- Why This Project Has Serious SEO-Worthy Appeal for DIY Fans
- Experience and Lessons From Building One Yourself
- Conclusion
If you have an old door leaning sadly against a garage wall, congratulations: you are already halfway to a charming, hardworking, conversation-starting hall tree with a chalkboard. This project is one part organization, one part furniture makeover, and one part “look at me being wildly resourceful with architectural leftovers.” In other words, it is the kind of DIY that turns clutter into character.
An upcycled door hall tree with a chalkboard works because it solves multiple entryway problems at once. You get vertical storage for coats, bags, and scarves. You get a bench for pulling on boots without performing an accidental yoga pose. You get a spot for keys, mail, and the random glove that apparently lives alone. And with a chalkboard built into the design, you also get a place for grocery reminders, school notes, family schedules, or passive-aggressive messages like “WHO LEFT ONE SHOE HERE?”
Why This DIY Project Works So Well
The best home projects do not just look cute in photos. They make daily life easier. That is exactly why the hall tree has survived every design trend from farmhouse to modern rustic to “I saw this on Pinterest at 1:12 a.m. and now I must own it.” A well-designed hall tree creates a drop zone near the door, which means fewer jackets on dining chairs, fewer backpacks on the floor, and fewer frantic morning searches for keys.
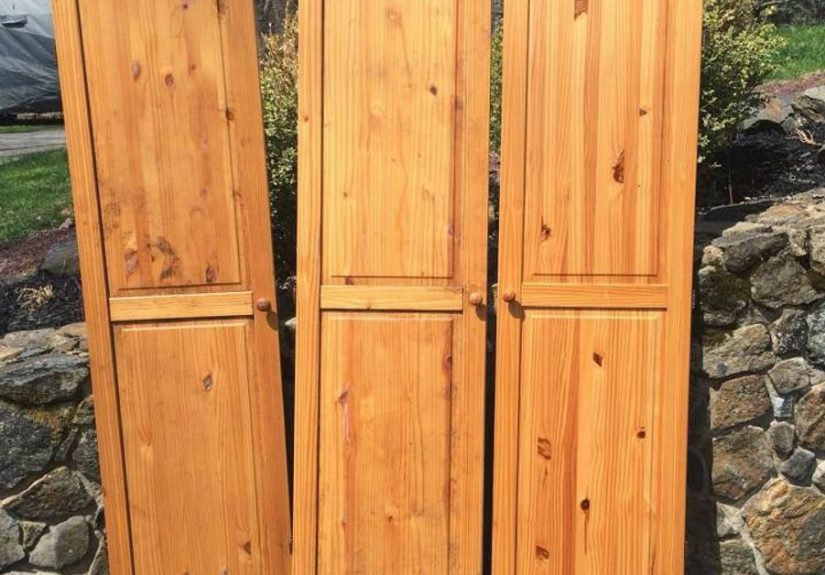
Using an old door as the back panel gives the piece height, structure, and personality. It instantly feels custom, even if your budget says “clearance aisle plus a prayer.” A vintage panel door can add classic charm, while a French door offers the chance to swap glass sections for chalkboard panels, cork, or decorative inserts. If the door has old hardware marks, worn edges, or faded paint, even better. Those details give the finished piece a lived-in look that brand-new furniture often tries very hard to fake.
Choosing the Right Door for the Job
Solid Wood vs. Hollow Core
A solid wood door is usually the dream choice because it is sturdy and can handle hooks, trim, shelves, and a bench connection without acting offended. Hollow-core doors can still work, but they often need reinforcement, especially if you plan to attach heavy coat hooks or mount the hall tree securely to the wall. If your door feels light enough to lose in a dramatic sneeze, reinforce it before building around it.
Style Matters
Paneled doors are especially useful because the recessed sections practically beg to become chalkboard panels or decorative features. French doors can be transformed into memo stations with multiple writing areas, while flat doors create a cleaner, simpler look that fits more modern spaces. A weathered schoolhouse door or salvaged interior door gives the final project extra story, which is interior-design code for “people will ask where you got it, and you get to sound impressive.”
Check for Safety Before You Sand
If the door is old, treat it with respect and caution. Doors from older homes may have layers of paint that should not be disturbed casually. Before sanding heavily, stripping finishes, or cutting into an older painted door, make sure you understand whether the surface could require lead-safe handling. Safety gear is not glamorous, but neither is turning a DIY afternoon into a home-improvement regret.
Designing the Hall Tree
The beauty of this project is that you can scale it to your space. A narrow entryway might only need the door, a small bench, and three hooks. A larger mudroom can handle a bench with storage cubbies, a top shelf, bins underneath, and enough hooks to hold a winter’s worth of outerwear. The trick is to think in zones:
- Upper zone: hooks for coats, hats, bags, and dog leashes
- Middle zone: chalkboard for notes, menus, appointments, or doodles
- Lower zone: bench for seating and shoe storage
- Optional extras: shelf, mail clip, key hook, basket cubbies, or a narrow ledge for chalk
If your entryway is tight, keep the bench shallow and the upper section visually open. If you have more breathing room, add cubbies or a chunky farmhouse bench. Either way, the finished piece should feel practical first and decorative second. Pretty storage that cannot hold a backpack is just furniture cosplay.
Materials and Tools You Will Likely Need
- One salvaged door
- Bench materials such as plywood, reclaimed boards, or a ready-made bench base
- Coat hooks
- Chalkboard paint or chalkboard panel material
- Primer, depending on the surface
- Wood filler and caulk
- Sandpaper or sanding sponge
- Paint, stain, or topcoat
- Drill, screws, level, measuring tape, and stud finder
- Painter’s tape, drop cloths, and a small roller or brush
You can also mix old and new materials to keep the cost sensible. A salvaged door paired with fresh trim and new hooks often gives the best balance: authentic character without structural drama.
How to Build an Upcycled Door Hall Tree With Chalkboard
1. Clean and Prep the Door
Start by removing loose hardware, wiping away grime, and evaluating the surface. Fill unwanted holes, dents, or gouges with wood filler. Lightly sand the door so the finish will accept paint or primer evenly. If the door is glossy, this step matters. Paint loves a properly prepped surface. Paint hates chaos.
2. Plan the Chalkboard Area
You have two main options here. The first is to paint an existing panel or central section with chalkboard paint. The second is to install a separate chalkboard insert, which can look more tailored and may be better if the original surface is rough. If using chalkboard paint, tape off the area carefully and apply smooth, even coats. Let it cure fully before using it. Do not rush this part because impatience and writable finishes are not friends.
3. Build or Attach the Bench
The bench can be as simple as a framed seat with open space below or as elaborate as a storage bench with cubbies and a lift-top lid. For everyday use, aim for a comfortable sitting height and enough depth for shoes to slide underneath. A bench is not just a nice extra. It is what takes the piece from decorative door experiment to genuine hall tree.
4. Add Hooks and Storage Details
Place hooks high enough to keep coats off the bench but low enough that daily users can reach them. If the hall tree is for a family, staggered or double hooks can be a smart move. Add a narrow shelf above the hooks for baskets or seasonal items. A small ledge below the chalkboard can hold chalk, an eraser, or the mysterious paperclip that somehow runs every household.
5. Paint or Stain the Piece
This is where personality enters the room. White gives a bright farmhouse look. Black feels dramatic and modern. Deep green looks rich without trying too hard. Natural wood tones warm up an entryway instantly. Distressing can work beautifully on a vintage-style piece, but do it with restraint. The goal is “collected charm,” not “this furniture survived a bar fight.”
6. Secure It Properly
A tall hall tree should be stable, level, and securely anchored if needed. Once coats, bags, and daily life start hanging from those hooks, you want the piece to behave like built-in furniture, not a nervous freestanding sculpture. Especially in homes with kids, a secure install is the smarter choice.
Chalkboard Tips That Make a Big Difference
The chalkboard is not just a cute feature. It is what makes this project feel custom and useful. Use it for dinner plans, pickup reminders, sports schedules, chores, welcome messages, or the occasional masterpiece by a small person with sticky fingers.
For best results, keep the writing surface smooth. Apply thin coats instead of one heavy coat. Give it proper cure time. Once cured, season the surface if the product directions call for it by rubbing chalk across the board and wiping it down. That old-school trick helps prevent “ghost” writing from lingering forever like the memory of a bad haircut.
If you want a cleaner look, use chalk markers sparingly and only if the finish is compatible. Traditional chalk is more forgiving and easier to erase, especially on heavily used family boards.
Best Places to Use This Project
- Front entryway
- Back door mudroom
- Laundry room drop zone
- Kids’ homework station near the kitchen
- Garage entry for shoes, backpacks, and sports gear
- Vacation home or cabin where rustic charm fits naturally
This is one of those projects that can flex across styles and spaces. In a small entryway, it becomes a compact command center. In a larger mudroom, it can feel like a focal point. In a farmhouse-inspired home, it looks completely at ease. In a modern house, a simplified version with a darker paint color and cleaner hardware can still work beautifully.
Mistakes to Avoid
- Ignoring scale: a giant hall tree in a tiny entryway will feel bulky fast
- Using the wrong paint: chalk paint and chalkboard paint are not the same thing
- Skipping prep: dirt, gloss, and rough patches can sabotage the final finish
- Forgetting real-life storage: hooks alone are rarely enough
- Rushing cure time: writable surfaces need patience
- Overdecorating: leave room for coats, shoes, and actual human behavior
Why This Project Has Serious SEO-Worthy Appeal for DIY Fans
People love projects like “upcycled door into hall tree with chalkboard” because they hit several popular home-improvement themes at once: reclaimed materials, budget decorating, mudroom organization, farmhouse furniture, entryway storage, and chalkboard DIY ideas. That mix makes it attractive not only in real life but also in search. It answers the modern homeowner’s favorite question: “Can this old thing become a useful new thing without costing me a fortune?”
The answer, happily, is yes. And unlike some DIYs that end with a decorative object nobody needed, this one earns its floor space every day.
Experience and Lessons From Building One Yourself
One of the most interesting things about making an upcycled door hall tree with a chalkboard is how quickly the project stops being “just a furniture build” and starts becoming part of your family routine. At first, you are focused on the usual DIY details: finding a good door, measuring the bench, deciding where the hooks should go, and trying to convince yourself that paint in your hair is a design choice. But once the piece is finished and moved into the entryway, it changes how the space works almost immediately.
The first thing most people notice is that the door gives the project presence. A basic bench with hooks can be useful, sure, but an old door creates height and visual structure. It makes the entry feel intentional, like you planned this charming little corner all along instead of slowly losing a battle with coats and backpacks. The chalkboard adds even more personality. It turns the hall tree into something interactive, not just functional. One day it is holding the grocery list, the next day it is displaying a birthday message, and by the weekend it is covered in doodles and a reminder that someone has soccer at 9:00 a.m.
Another real-world lesson is that durability matters more than perfection. Tiny dents, old hinge marks, patched holes, and slightly uneven trim often become part of the charm. In fact, a piece with a little visible history usually looks more believable than one polished to showroom perfection. This is especially true in homes that lean rustic, cottage, farmhouse, or vintage. You begin to realize that the worn edges are not flaws; they are receipts. The door had a life before this, and now it has a much better job.
There is also something deeply satisfying about seeing clutter behave for once. Shoes end up under the bench. Bags go on hooks. Keys stop disappearing into whatever alternate universe usually eats them. Even people who do not care much about design can appreciate a project that helps mornings run more smoothly. That practical payoff is what makes the build memorable.
And yes, there are a few classic lessons learned the hard way. Hooks need more spacing than you think. Bench depth matters more than it seems on paper. Chalkboard cure time should not be “interpreted creatively.” And if you are choosing between cute hardware and sturdy hardware, pick sturdy every time. Cute is lovely. Cute that rips off the door after two winter coats is less lovely.
In the end, the experience of building an upcycled door into a hall tree with a chalkboard feels rewarding because it combines storytelling with usefulness. It gives new purpose to old materials, adds storage where you actually need it, and creates a piece that feels personal rather than mass-produced. That is the sweet spot in DIY: not just making something, but making something that earns its keep and makes your home feel a little smarter, warmer, and more like you.
Conclusion
An upcycled door into a hall tree with chalkboard is the kind of project that checks every box: storage, style, creativity, sustainability, and everyday usefulness. It can be rustic or refined, compact or roomy, playful or polished. Most importantly, it takes something old and overlooked and turns it into a feature that works hard every single day.
If your entryway needs help and you have a salvaged door waiting for a second life, this project is more than worth considering. With the right prep, thoughtful layout, and a little patience, you can build a custom piece that organizes your home, adds character, and gives your family one very stylish place to drop everything.





