Table of Contents >> Show >> Hide
- What Is Straw Bale Gardening, Exactly?
- Why Straw Bale Gardening Works from the Arctic to the Caribbean
- Choosing and Placing Your Straw Bales
- How to Condition Straw Bales: The 10–14 Day “Spa Treatment”
- Planting Your Straw Bale Garden
- Watering and Feeding in Different Climates
- Benefits and Drawbacks of Straw Bale Gardening
- Common Mistakes to Avoid
- Real-World Straw Bale Gardening Experiences: From Snowbanks to Sea Breezes
- Ready to Try Straw Bale Gardening?
If you’ve ever stared at your rock-hard lawn, sandy soil, or icy driveway and thought, “There’s no way I can garden here,” straw bale gardening is about to prove you wrong. This clever method turns a simple bale of straw into a warm, cozy, portable raised bed that works surprisingly well almost anywherefrom chilly gardens flirting with the Arctic Circle to steamy backyards in the Caribbean.
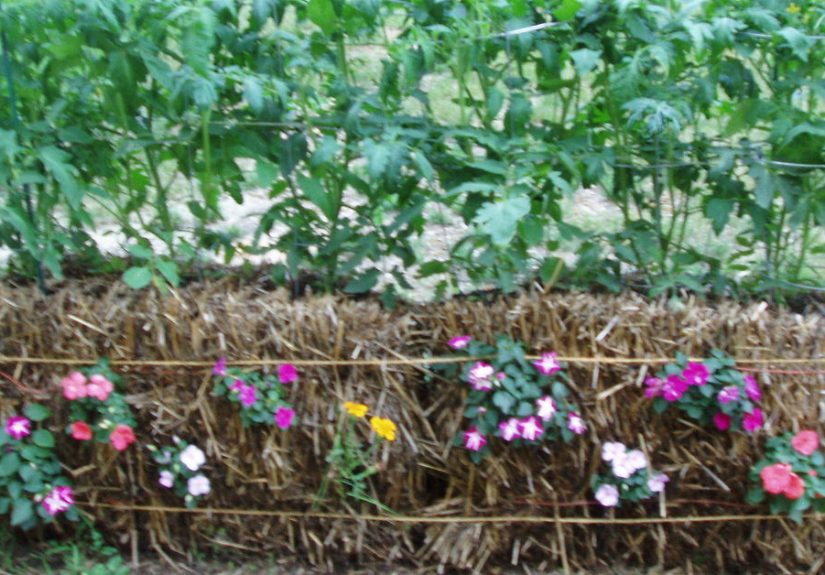
Think of a straw bale garden as container gardening with a twist. The container is the straw bale. Once it’s “conditioned,” the inside transforms into a mini compost pile that feeds your plants, holds moisture, and even generates a bit of heat. The result? Happy roots, fewer weeds, and a lot less digging for you.
In this guide, we’ll walk through how straw bale gardening works, why it’s so adaptable to nearly every climate, how to set it up, and what to watch out for. We’ll finish with some real-world-style experiencesfrom snow boots to flip-flopsso you can picture what this looks like in your own space.
What Is Straw Bale Gardening, Exactly?
Straw bale gardening is the practice of growing vegetables, herbs, or flowers directly in a straw bale that has been prepped to start decomposing from the inside. The straw acts as a growing medium, much like potting soil, after it’s been treated with water and a nitrogen source.
Straw is made from the stems of grains like wheat, oats, or barley. After harvest, the hollow stalks are baled and typically used as animal bedding or mulch. For gardening, those hollow stems are perfect: they hold air, wick moisture, and gradually break down into nutrient-rich compost.
Once conditioned, the bale behaves a bit like a raised bed full of compost. You simply tuck seedlings into planting pockets or add a shallow layer of potting mix on top and sow seeds. Over the season, the bale slowly decomposes, feeding plants and eventually turning into beautiful organic matter you can re-use in other beds.
Why Straw Bale Gardening Works from the Arctic to the Caribbean
Built-in Heat for Cold or Short-Season Climates
Gardeners in cold or subarctic regions often struggle with frozen soil, short seasons, and nights that stay chilly long after the calendar says “spring.” A conditioned straw bale acts like a tiny compost heater. As microbes break down the straw, the interior can warm significantlysometimes well over typical soil temperatureshelping roots stay cozy and letting you plant a bit earlier in spring and keep things going later in fall.
That gentle warmth means tomatoes, peppers, and other heat-loving crops get a head start even when the ground around them is still waking up. In truly cold regions, gardeners often pair straw bale beds with low plastic tunnels or row covers to create a mini “Arctic greenhouse” effect.
Moisture Management for Hot, Sunny, or Windy Climates
In hot or tropical zones, water can disappear faster than you can say “mulch.” Straw bales work like a sponge and a filter at the same time. The hollow stems absorb water, release it slowly to plant roots, and let excess drain away instead of pooling around stems.
This balance is especially handy in places with blazing sun, strong trade winds, or sandy soils where water usually disappears instantly. With a straw bale garden, you can maintain more even moisture with drip lines or soaker hoses, making gardening far more forgiving when temperatures soar.
They Ignore Bad Soil, Rocks, and Concrete
One of the biggest advantages of straw bale gardening is that it doesn’t care what your “soil” is. You can put a bale on top of heavy clay, thin topsoil, gravel, or even a concrete patio and still grow a lush cropperfect for urban gardeners, renters, and anyone whose yard is more “parking lot” than “prairie.”
Because the growing medium is inside the bale, you avoid many soilborne diseases and significantly reduce weeding. You’re effectively starting fresh, above the mess, at a height that’s easier on your back and knees.
Choosing and Placing Your Straw Bales
Straw vs. Hay (Yes, It Matters)
- Choose straw, not hay. Straw is mostly hollow stems with very few seeds. Hay is harvested as animal feed and is loaded with seeds that will happily sprout and try to turn your bale into a hayfield.
- Look for “no-spray” or untreated bales. Ideally, your straw should be free of persistent herbicides that could harm garden plants.
- Check the binding. Synthetic twine or plastic baling straps outlast natural fiber twine and help the bale hold its shape all season.
Where to Put Your Bales
Location can make or break your straw bale garden:
- Sunlight: Aim for at least six hours of direct sun per daymore if you’re growing fruiting crops like tomatoes or peppers.
- Water access: Set bales close to a hose, spigot, or rain barrel; straw bale gardens need consistent watering, especially early in the season.
- Stable footing: Place bales on level ground, pavers, gravel, or even directly on lawn. Once wet, they’re heavy and tough to move.
- Cold climates: Position bales where they’ll catch maximum sun and consider placing them near a south-facing wall to radiate heat at night.
- Hot/tropical climates: If the sun is brutal, allow for some light afternoon shade or plan to use shade cloth during heat waves.
How to Condition Straw Bales: The 10–14 Day “Spa Treatment”
Conditioning is the secret sauce of straw bale gardening. You’re jump-starting decomposition inside the bale so that microbes can turn that dry straw into a nutrient-rich, plant-friendly medium.
Basic Conditioning Schedule (Approximate)
There are many variations, but a common schedule over 10–14 days looks like this:
- Days 1–3: Water thoroughly each day until water runs out the bottom. The goal is to saturate the bale and wake up the microbes.
- Days 4–6: Continue watering and add a high-nitrogen fertilizer (synthetic or organic) each day. Sprinkle it on top, then water it in so it soaks through the bale.
- Days 7–9: Apply fertilizer every other day, with water on the days in between.
- Days 10–12: Switch to a balanced, all-purpose fertilizer once or twice, with regular watering. At this point, the bale should be starting to cool down and break apart internally if you poke into it.
During this process, the inside of the bale heats upsometimes dramatically. That’s a good sign that the microbes are busy. However, if it’s still very hot to the touch when you reach in, wait a few more days before planting so you don’t “cook” young roots.
How to Tell When the Bale Is Ready
Your bale is ready for planting when:
- The interior feels warm but not scalding (like a cozy compost pile, not a hot oven).
- The straw near the center feels softer and slightly crumbly instead of stiff and shiny.
- There’s no harsh ammonia smell; it should smell earthy or slightly sweet.
Cooler weather may lengthen the conditioning period to two weeks or more, while hot climates may finish faster. Don’t obsess over the exact daygo by feel and smell.
Planting Your Straw Bale Garden
Best Crops for Straw Bales
Most plants that thrive in raised beds or containers do well in straw bales. Popular choices include:
- Tomatoes, peppers, and eggplants
- Cucumbers, squash, and zucchini (with support or space to sprawl)
- Leafy greens like lettuce, kale, and spinach
- Herbs such as basil, parsley, cilantro, and dill
- Flowers like marigolds, nasturtiums, or zinnias for color and pollinators
Root crops like carrots or beets can work if you plant them on top in a layer of quality potting mix, but they’re a little fussier because the interior straw can be chunky.
How to Plant in a Straw Bale
You’ve got two main techniques:
- Planting seedlings in pockets: Use a hand trowel to carve a hole or pocket into the bale, roughly the size of the transplant’s root ball. Add a scoop of potting mix or compost into the hole, tuck in the seedling, and firm the soil around it.
- Sowing seeds on top: Spread 2–3 inches of good potting mix on top of the bale and treat it like a narrow raised bed. Sow seeds at the recommended spacing, keep them moist, and thin as they grow.
Keep a bit of extra potting mix handy for topping up as the bale settles over the season.
Watering and Feeding in Different Climates
General Watering Tips
Straw bales drain quickly but also hold a lot of water internally. The key is consistency:
- Use a soaker hose or drip line laid across the top of each bale for even moisture.
- Water until the bale feels heavy and damp all the way through; then let the surface start to dry slightly before watering again.
- In peak summer, daily watering may be needed, especially for thirsty crops like tomatoes and cucumbers.
Because the bale is mostly carbon (straw), regular fertilizing is critical. Use a balanced, slow-release fertilizer at planting and supplement with liquid feeds every few weeks, especially for heavy feeders.
Cold or Subarctic Conditions
In northern or high-altitude regions with short growing seasons, straw bale gardening offers several perks:
- Earlier planting: The decomposing bale warms faster than the ground, allowing you to plant a bit sooner if you protect plants from hard frost.
- Season extension: Simple plastic covers, row covers, or mini hoop houses over the bales help capture daytime heat and protect from nighttime chills.
- Drainage during snowmelt: The raised height keeps roots above soggy, partially frozen soil.
Just remember that cold air still sinks. On very frosty nights, cover plants generously or bring containers indoors if they’re small enough.
Hot, Humid, or Tropical Conditions
In Caribbean-style climatesor any place that feels like a sauna half the yearyour biggest challenges are heat stress, intense UV, and high humidity.
- Shade smartly: Provide light afternoon shade for cool-season crops or delicate greens with shade cloth, tall companion plants, or strategically placed structures.
- Watch for rot and fungi: High humidity accelerates decomposition. Expect your bales to break down faster, sometimes in a single season, and keep good airflow around them.
- Water deeply, not constantly: Overwatering can leach nutrients and keep roots too wet. Check moisture a few inches below the surface before automatically turning on the hose.
Even in very hot regions, straw bale gardens can thrive with a bit of shade management and consistent but not excessive watering.
Benefits and Drawbacks of Straw Bale Gardening
Big Benefits
- Less weeding: Because you’re planting in fresh straw rather than native soil, you drastically cut down on weed seeds.
- Accessibility: Bales are at a comfortable working height, which is easier on backs, knees, and gardeners with limited mobility.
- Flexible layout: Arrange bales in rows, U-shapes, or island beds. Move or remove them from season to season without permanent construction.
- Good for bad soil: If your soil is rocky, compacted, or contaminated, straw bale gardening lets you grow food without disturbing it.
- Built-in compost: At the end of the season, the bale collapses into dark, crumbly organic matterperfect for mulching or enriching other beds.
Possible Downsides
- Fertilizer needs: Straw itself is low in nutrients, so you must supply fertilizer and keep up with feeding.
- Limited lifespan: Each bale usually lasts one main growing season (sometimes two in cooler, drier climates) before it breaks down fully.
- Source quality matters: Poor-quality or hay-heavy bales can introduce weeds or herbicide residues, so sourcing from a trusted farm is important.
- Moisture balance: Overwatering can leach nutrients and promote rot; under-watering dries the bale and stresses plants. It takes a little practice to find the sweet spot.
Common Mistakes to Avoid
- Skipping conditioning: Planting into a dry, unconditioned bale is like planting into a bundle of drinking strawsthere’s nothing there for roots to grab or feed on.
- Planting too early while the bale is still hot: Overheated bales can kill seedlings. Always check the internal temperature with your hand or a thermometer.
- Using hay instead of straw: Hay = seeds = instant weedy chaos.
- Forgetting about drainage underneath: Placing bales in a low spot where water pools can lead to soggy, anaerobic conditions.
- Overcrowding: Just because the bale looks small doesn’t mean you can cram ten tomato plants into it. Follow typical plant spacing guidelines.
Real-World Straw Bale Gardening Experiences: From Snowbanks to Sea Breezes
So what does straw bale gardening actually feel like when you’re the one dragging the hose, checking the bales, and waiting for those first tomatoes? Let’s walk through a few scenario-style “experiences” inspired by gardeners in very different climates.
The Northern “Snow-to-Salad” Garden
Imagine a small backyard in a northern town where spring is basically “late winter with optimism.” The ground stays cold and soggy well into May, and traditional garden beds take forever to warm up. Our gardenercall her Lauralines up six straw bales along a sunny, south-facing fence.
In late April, while snow piles are still melting in the shady corners, she starts conditioning. Within a week, a faint steam rises from the bales on cool mornings. When she reaches inside, the straw feels warm, like a cozy compost pile. By the time her neighbors are just thinking about turning soil, Laura is planting tomatoes, peas, and hardy greens into her bales.
On frosty nights, she tosses row cover fabric or old bed sheets over some simple hoops stuck into the bales. The combination of internal warmth and light frost protection keeps plants happy while nearby lawns still look half asleep. By early summer, her bale-grown tomatoes are outpacing anything she’s ever grown in that yard. When the season ends, the collapsed bales become mulch for a future perennial bed, already adapted to her chilly climate.
The Small Urban Patio “Bale-cony”
Now picture an apartment dweller, Marcus, with only a concrete patio for outdoor space. Traditional raised beds aren’t allowed, and large containers are expensive. Two straw bales, however, fit perfectly along the railing.
He conditions the bales over two weeks, using a watering can and a small bag of organic fertilizer. Neighbors are curious (and maybe a little skeptical) as the bales start to steam on cool mornings. Soon, he’s planting basil, compact tomatoes, and trailing nasturtiums along the edges.
Because the patio is exposed, wind can dry things out, so Marcus snakes a soaker hose over the bales and connects it to a simple timer. The straw acts like a moisture bank, preventing the “drought-flood” cycle common in containers. By midsummer, his patio looks like a mini jungle, and he’s snipping herbs for dinner on the way back inside. When the bales finally collapse, he bags up the rich compost-like material and gifts it to a friend with a community garden plot.
The Tropical “Too-Hot-to-Hoe” Backyard
In a coastal, Caribbean-style climate, our gardener Ana faces a different problem: it’s always hot. The soil can be sandy, and the intense sun wilts tender greens by lunchtime. She sets up a cluster of straw bales near a water source and positions them so a nearby tree casts dappled shade in the late afternoon.
Conditioning goes quickly in her heat; the bales warm and start breaking down in just over a week. She installs drip irrigation and plants peppers, okra, sweet potatoes, and heat-tolerant herbs. For fragile crops like lettuce, she reserves one bale under a lightweight shade cloth.
The bales decompose faster in the humidity, so she treats each one as a one-season raised bedbut a highly productive one. By the time they slump into compost, she’s harvested more than enough to justify the experiment. The spent straw becomes mulch around her fruit trees, where it continues to hold moisture and feed the soil.
What All These Experiences Have in Common
Despite wildly different temperatures and humidity levels, these straw bale gardens share a few themes:
- They started small. Most successful straw bale gardeners begin with a handful of balesenough to learn the system without being overwhelmed.
- They watched the bales. Instead of blindly following a calendar, they checked temperature, moisture, and plant responses and adjusted as needed.
- They embraced the “temporary” nature. Each bale is a one- or two-season experiment that turns into future soil. Nothing is permanent, which makes it easier to tweak layouts and try new crops.
The big takeaway: straw bale gardening isn’t magic, but it is incredibly forgiving once you understand conditioning and moisture. Whether you’re battling permafrost, concrete, or scorching sun, a simple bale can help bridge the gap between “I can’t garden here” and “Wow, look what I grew.”
Ready to Try Straw Bale Gardening?
If you’re short on good soil, time, or patience for weedingbut long on enthusiasm for homegrown foodstraw bale gardening is worth a try. Start with two to six bales, place them where they’ll get sun and easy water access, condition them carefully, and plant a mix of forgiving crops like herbs, greens, and a few tomatoes or peppers.
From Arctic-adjacent backyards to Caribbean-style courtyards, gardeners are discovering that sometimes the best raised bed isn’t built with lumber and screwsit’s tied up with twine and full of straw. Your future self, arms full of homegrown veggies, will be very glad you gave this quirky method a chance.




