Table of Contents >> Show >> Hide
- What “Default Storage” Means on Android
- Before You Start: Check These Things First
- How to Set an SD Card as Internal Storage on Android
- How to Make Photos and Videos Save to the SD Card
- How to Move Files to the SD Card
- How to Move Apps to an SD Card
- How to Change Download Locations in Individual Apps
- Why Your Phone May Not Offer “Format as Internal”
- Troubleshooting SD Card Storage Problems
- Best Practices for Using an SD Card on Android
- Real-World Experience: What Actually Works Best
- Final Thoughts
- SEO Tags
Running out of storage on an Android phone is one of modern life’s tiny dramas. One minute you are trying to take a photo of your dog doing something heroic with a sock, and the next minute your phone says, “Storage almost full.” Rude, but not always wrong.
The good news is that if your Android phone supports a microSD card, you may be able to use that card to store photos, videos, downloads, documents, and even some apps. The slightly less glamorous news is that “default storage” on Android does not mean the same thing on every phone. A Motorola, Nokia, TCL, or budget Android model may offer an option to format the SD card as internal storage. Many Samsung Galaxy phones, meanwhile, usually treat the SD card as removable storage for media and selected files rather than a full replacement for internal memory.
So, can you use an SD card as default storage on Android? Yes, but with conditions. This guide explains what is possible, what is not, how to set it up safely, and how to avoid turning your shiny new microSD card into a tiny plastic headache.
What “Default Storage” Means on Android
Before tapping through settings like a caffeinated woodpecker, it helps to understand the two main SD card modes Android may offer: portable storage and internal storage.
Portable Storage
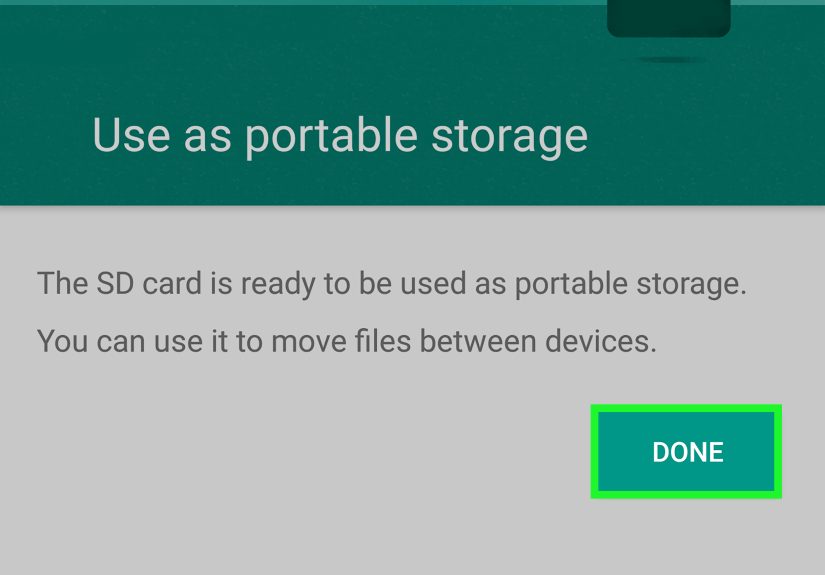
Portable storage means the SD card works like a removable drive. You can save photos, videos, music, downloads, and documents on it. You can remove it and use it in another phone, computer, camera, or card reader. This is the safest and most flexible option.
The trade-off is that Android will usually not install apps directly to a portable SD card. Some apps may let you choose the SD card for downloads or media, but the phone’s system apps and most app data still stay in internal storage.
Internal Storage or Adoptable Storage
Internal storage, sometimes called adoptable storage, lets Android format the SD card so it becomes part of the phone’s built-in storage system. After setup, the phone may store apps, app data, photos, videos, and other files on the card automatically.
However, there are important catches. Formatting the card as internal storage erases it. The card becomes encrypted and tied to that specific phone. You cannot simply pull it out and use it in another device. If the card fails or is removed unexpectedly, apps and data stored on it may stop working.
Before You Start: Check These Things First
Using an SD card as default storage sounds simple, but a little preparation can save you from a lot of sighing later.
1. Make Sure Your Phone Supports a MicroSD Card
Not every Android phone has a memory card slot. Many flagship phones have abandoned microSD support, while many budget and midrange Android phones still include it. Check your phone’s SIM tray or user manual. Some phones use a shared tray where you can insert either a second SIM card or a microSD card, but not both at the same time.
2. Back Up Your Files
If the SD card already contains photos, videos, or documents, back them up before formatting. Formatting as internal storage will erase everything on the card. Even formatting as portable storage can wipe data depending on the setup process. Copy important files to a computer, cloud storage, or another drive first.
3. Choose the Right SD Card
For Android storage, do not grab the cheapest mystery card from a corner of the internet where product names look like they were written during a keyboard accident. Choose a trusted brand and look for a microSD card with A1 or A2 app performance rating. These ratings are designed for app usage and random read/write performance, which matters when apps are opening files constantly.
For photos and videos, Class 10, UHS-I, U1, U3, V10, or V30 cards are common choices. If you plan to record lots of HD or 4K video, faster write speed matters. If you plan to use the card for apps, A1 or A2 matters more than a big number printed next to “read speed.”
How to Set an SD Card as Internal Storage on Android
If your Android phone supports adoptable storage, this is the closest you can get to making the SD card your default storage. Menu names vary by brand and Android version, but the general process is similar.
Step 1: Insert the MicroSD Card
Turn off your phone if your manufacturer recommends it. Insert the microSD card into the tray or slot, then restart the phone if needed. Once Android detects the card, you may see a notification that says a new SD card has been found.
Step 2: Open Storage Settings
Go to:
Settings > Storage
On some devices, the path may be:
Settings > Battery and device care > Storage
or:
Settings > Storage > SD card
Step 3: Choose Format as Internal
Tap the SD card name. Open the menu, usually shown as three dots in the top-right corner. Look for an option such as:
- Format as internal
- Use as internal storage
- Format as phone storage
- Set up as internal storage
If you only see “Format” or “Format as portable,” your phone may not support adoptable storage.
Step 4: Confirm and Format
Android will warn you that formatting erases the card. Read the warning carefully. If you have backed up your files, continue. The phone will format and encrypt the card so it works with that device.
Step 5: Move Data to the SD Card
After formatting, Android may ask whether you want to move content now or later. Choose “Move now” if you want the phone to transfer supported apps, photos, videos, and other data immediately. Choose “Move later” if you want to keep the setup quick and move things manually afterward.
Once completed, the SD card becomes part of your phone’s storage system. From then on, Android may use it automatically when internal storage fills up, depending on your device and software version.
How to Make Photos and Videos Save to the SD Card
For many users, camera files are the real storage villains. A few 4K videos can eat space faster than a teenager eats pizza. Setting your Camera app to save to the SD card is one of the easiest wins.
On Many Android Camera Apps
- Open the Camera app.
- Tap the Settings gear.
- Look for Storage location, Save to, or Storage path.
- Select SD card.
After this, new photos and videos should save to the SD card. Existing photos may stay in internal storage unless you move them manually.
On Samsung Galaxy Phones
Open the Camera app, tap the settings gear, then choose Storage location and select SD card. If the option does not appear, make sure the card is inserted, recognized, and formatted correctly. Some camera modes may still save certain files internally, especially burst shots or special camera features.
How to Move Files to the SD Card
If your phone does not support full internal SD storage, you can still free up plenty of space by moving files manually.
Using Files by Google
- Open the Files by Google app.
- Tap Browse.
- Select a category such as Images, Videos, Audio, Documents, or Downloads.
- Choose the files you want to move.
- Tap the three-dot menu.
- Select Move to or Copy to.
- Choose SD card.
- Select or create a folder, then confirm.
Moving removes the file from internal storage and places it on the card. Copying keeps the original in internal storage, so it does not free up space unless you delete the original afterward.
Turn On “Save to SD Card” in Files by Google
Some Android devices allow Files by Google to save certain files directly to the SD card. Open Files by Google, go to settings, and turn on Save to SD card. You may need to grant permission before the app can write to the card.
How to Move Apps to an SD Card
This is where expectations need a friendly seatbelt. Not all Android phones allow apps to move to an SD card. Not all apps allow it either. Developers can block SD card movement if the app needs fast internal storage, widgets, background services, security features, or system-level access.
Move Apps on Supported Phones
- Open Settings.
- Tap Apps.
- Select the app you want to move.
- Tap Storage.
- If available, tap Change.
- Select SD card.
- Tap Move.
If you do not see the Change button, that app cannot be moved on your device. This is normal. It does not mean your phone is broken, cursed, or secretly judging your app collection.
Apps That Usually Should Stay Internal
Keep important, frequently used apps in internal storage when possible. Banking apps, messaging apps, launchers, widgets, password managers, and apps with constant background activity usually perform better and more reliably from internal storage. Games, offline map packs, media apps, and large but nonessential apps are better candidates for SD storage if your phone supports it.
How to Change Download Locations in Individual Apps
Many apps manage storage inside their own settings. Even if Android does not let you make the SD card a universal default, you can often tell individual apps to save downloads or media to the card.
Streaming and Media Apps
Apps for music, podcasts, audiobooks, video streaming, and offline learning may include a download location setting. Open the app’s settings and look for options such as:
- Download location
- Storage location
- Save downloads to
- Offline storage
- Use SD card
Switching these apps to SD storage can free up a surprising amount of space, especially if you download playlists, lectures, movies, or entire seasons of shows for travel.
Browsers and File Download Apps
Some browsers allow you to choose a download folder. If your browser supports it, set the download path to a folder on the SD card, such as SD card > Downloads. If not, download normally and move files later using Files by Google or your phone’s file manager.
Why Your Phone May Not Offer “Format as Internal”
One of the most common questions is: “Why can’t I set my SD card as internal storage?” The answer usually comes down to manufacturer choice.
Android supports adoptable storage, but phone makers can disable or hide it. Some brands prefer SD cards to remain portable because removable storage is slower and less reliable than built-in storage. If users remove a card that contains apps, those apps can break. If the card is slow, the whole phone can feel slow. Manufacturers would rather avoid support headaches, and honestly, support headaches are not anyone’s favorite flavor of headache.
Samsung Galaxy devices commonly allow moving certain apps and saving camera files to SD card, but they may not offer full adoptable storage. Some Motorola and other Android models do offer internal SD formatting, although availability varies by model.
Troubleshooting SD Card Storage Problems
The SD Card Is Not Detected
Remove the card and reinsert it carefully. Restart the phone. Try the card in another device or card reader. If it is still not detected, the card may be damaged, counterfeit, or formatted in a way your phone does not support.
The Phone Says the Card Is Slow
Android may warn you if the card is too slow for internal storage. Take this warning seriously. A slow card can make apps lag, photos save slowly, and the phone feel older than it is. Use a reputable A1 or A2 microSD card for app storage.
Apps Still Use Internal Storage
Even when moved to SD card, some apps keep essential data internally. This is normal. The SD card may store part of the app, while login data, widgets, services, or protected files remain on the phone.
The SD Card Works in Settings but Not in Files
If the card is formatted as internal storage, it may not appear like a normal removable card in file manager apps. Internal SD storage is managed by Android and encrypted for that phone. To use the card as a regular removable card again, you must move important data back to the phone or another location, then format the card as portable storage.
Best Practices for Using an SD Card on Android
- Use a quality card: Choose A1 or A2 for apps and a reliable speed class for media.
- Back up regularly: SD cards can fail, get corrupted, or disappear into the mysterious drawer where old chargers live.
- Do not remove internal SD cards casually: If formatted as internal storage, the card is part of the phone’s system.
- Keep critical apps internal: Security, banking, messaging, and launcher apps are usually better on built-in storage.
- Move media first: Photos, videos, music, and downloads are safer and easier to store on SD cards than apps.
- Leave free space: Do not fill the card to 100%. Storage performs better when it has breathing room.
Real-World Experience: What Actually Works Best
In everyday Android use, the best SD card strategy is usually not “move everything and hope for the best.” It is more like organizing a small apartment: keep daily essentials close, move bulky items to storage, and do not put your house keys in a box labeled “miscellaneous.”
The most successful setup is to use internal storage for the apps you rely on every day and use the SD card for big, space-hungry files. Photos, videos, downloaded movies, music libraries, podcasts, PDFs, offline maps, and large document folders are perfect SD card candidates. These files do not usually need the lightning-fast response that apps need, and moving them can instantly make a cramped phone feel usable again.
For example, a 64GB Android phone can feel full after a year of photos, videos, messaging attachments, and app updates. Instead of deleting memories one by one like a digital heartbreak ceremony, install a 128GB or 256GB microSD card and move the Camera, Downloads, and Videos folders. Then set the Camera app to save new photos and videos to the SD card. This one change can prevent the “storage full” warning from returning every other Tuesday.
Using an SD card for apps is more mixed. When it works, it can help with large games and apps that store big resource files. But performance depends heavily on the card. A slow card can make apps open sluggishly, load screens drag on, and updates behave unpredictably. This is why an A1 or A2-rated microSD card is worth buying. It may cost a little more, but it saves you from the emotional journey of tapping an app and waiting long enough to reconsider your life choices.
Another lesson from practical Android storage management is that every phone brand behaves differently. On one Android device, the SD card setup screen may clearly offer “Use as internal storage.” On another, especially many Samsung Galaxy models, you may only get portable storage options. That does not mean you are doing anything wrong. It simply means the manufacturer designed storage that way. In that case, focus on moving media, changing camera storage, and adjusting app download locations individually.
It is also smart to treat SD cards as helpful storage, not permanent storage. Important photos, work files, tax documents, and once-in-a-lifetime videos should live in more than one place. Use cloud backup, a computer, or an external drive. SD cards are small, convenient, and surprisingly easy to misplace. They are great helpers, but they should not be the only copy of something precious.
The smoothest experience comes from a simple routine: once a month, open your file manager, move large downloads and videos to the SD card, delete duplicates, clear app caches where appropriate, and check available storage. It takes five minutes and prevents storage panic later. Think of it as flossing for your phone: not glamorous, but your future self will be grateful.
Final Thoughts
Using an SD card as default storage on Android is possible, but the exact method depends on your phone. If your device supports internal or adoptable storage, you can format the SD card so Android treats it as part of the phone’s storage. If your device does not support that feature, you can still use the SD card wisely by saving photos, videos, downloads, music, and supported app files to it.
The safest approach is simple: use internal storage for essential apps and system performance, then use the SD card for media and large files. Choose a reliable A1 or A2 microSD card, back up important data, and avoid removing a card that has been formatted as internal storage. Done correctly, an SD card can give your Android phone breathing room, reduce storage warnings, and delay the need for a new device.
Your phone may never say “thank you,” but when it stops complaining about low storage, that is basically the same thing.





