Table of Contents >> Show >> Hide
- Why Sealing Windows Matters More Than Most People Think
- Caulk vs. Weatherstripping: Use the Right Tool for the Right Gap
- Before You Seal: Find the Leaks First
- Your Sealing Toolkit (Simple, Not Fancy)
- Step-by-Step: How to Seal Windows and Cut Energy Waste
- Common Mistakes That Quietly Kill Your Savings
- When Sealing Isn’t Enough: Smart Upgrade Options
- Indoor Air Quality: Seal Tighter, Breathe Smarter
- Costs, Payback, and Incentives
- Room-by-Room Mini Plan
- 500-Word Experience Section: What Homeowners Actually Notice After Sealing Windows
- Conclusion
If your home feels like it has a “winter breeze” setting even when every window is closed, you’re not imagining things.
Drafty windows are one of the sneakiest energy-wasters in a house. They make your HVAC system work harder, your rooms feel uneven,
and your wallet feel personally attacked by utility bills. The good news: you can fix a lot of this without replacing every window.
This guide is built from real U.S.-based best practices and research (not internet folklore), combining practical advice from major
organizations such as the U.S. Department of Energy, ENERGY STAR, EPA, IRS, USA.gov, RESNET, NFRC, CDC, and additional home-performance
references. You’ll get a clear, step-by-step plan for sealing window leaks, understanding when upgrades are worth the money, and avoiding
the classic DIY mistakes that turn “quick project” into “why is there caulk on my shirt?”
Why Sealing Windows Matters More Than Most People Think
Windows are comfort heroes when they work welland budget villains when they don’t. Heat gain and heat loss through windows account
for a large chunk of residential heating and cooling energy use, and leaks around frames or sashes add even more waste.
Even small cracks can create noticeable drafts and force longer HVAC run times.
Translation: every little gap is like leaving a tiny window open all season. Seal enough of them, and your home feels warmer in winter,
cooler in summer, quieter year-round, and generally less dramatic.
Caulk vs. Weatherstripping: Use the Right Tool for the Right Gap
Use caulk for stationary joints
Caulk is for cracks that do not move: window trim to wall, frame corners, and fixed exterior joints. If the joint stays put,
caulk is your friend.
Use weatherstripping for moving parts
Weatherstripping is for operable windows and doorsanywhere parts slide, lift, or swing. Think sash-to-frame contact points, not fixed trim.
Quick memory trick
- Moves? Weatherstripping.
- Doesn’t move? Caulk.
Before You Seal: Find the Leaks First
Great sealing starts with good detective work. Do a walkthrough on a windy or cold day and check for:
- Visible daylight around frame edges
- Rattling window sashes (movement often means leakage)
- Cracked, missing, or brittle old caulk
- Worn or flattened weatherstripping
- Rooms that are always colder or hotter than the rest of the house
For whole-home clarity, a professional energy audit and blower door test can pinpoint leaks you won’t notice with a quick visual check.
That’s especially useful if your home has comfort issues in multiple rooms.
Your Sealing Toolkit (Simple, Not Fancy)
- Caulk gun
- Exterior-grade and interior-grade caulk (as needed)
- Foam backer rod for wider gaps
- Weatherstripping (V-strip, foam tape, or sash-specific products)
- Putty knife / scraper
- Utility knife and scissors
- Rubbing alcohol or mild cleaner
- Rags and painter’s tape
- Gloves and safety glasses
Pro tip: buy weatherstripping with durability matched to the location. A busy, high-friction window track needs tougher material than a light-use window.
Step-by-Step: How to Seal Windows and Cut Energy Waste
Step 1: Clean and prep the surface
Remove old, failing caulk. Clean dust and oils so new sealant actually adheres. A perfect bead on a dirty surface is still a failing seal.
Step 2: Fill larger gaps correctly
If a crack is wide, don’t flood it with caulk. Insert backer rod first, then caulk over it. This creates a cleaner seal, uses less material,
and improves durability.
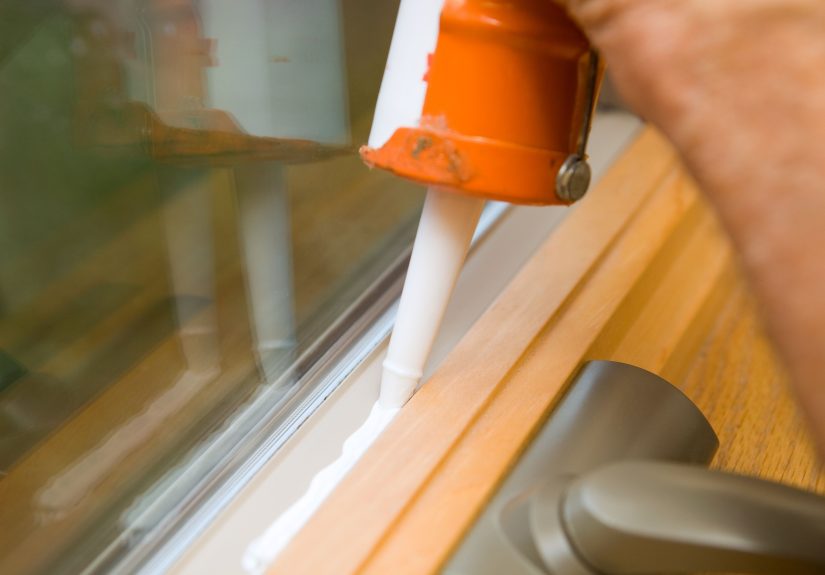
Step 3: Caulk fixed frame joints
Apply a steady bead where window trim meets wall and where fixed frame joints show cracks. Smooth immediately for full contact.
On exteriors, use weather-resistant products suitable for sun and temperature swings.
Step 4: Install weatherstripping on operable parts
Place weatherstripping where sash meets frame. The seal should compress when closed but not make operation difficult.
If a window becomes hard to close, you likely used too thick a strip.
Step 5: Test the seal
Close and lock the window. Check for airflow with your hand on a windy day. No draft? Nice. Still drafty?
Re-check corners and meeting rails.
Step 6: Repeat exterior check
Don’t skip outside. Exterior gaps are where many leaks begin. Also inspect for water intrusion points while you’re there.
Air and water often travel together, and both are expensive.
Common Mistakes That Quietly Kill Your Savings
- Caulking moving joints: It cracks fast and fails early.
- Skipping prep: Old residue = weak adhesion.
- Overstuffing weatherstripping: Hard-to-close windows get left open or damaged.
- Sealing without ventilation planning: Comfort improves, air quality can worsen if ignored.
- Ignoring attic/basement leaks: Window sealing helps, but whole-home leakage still matters.
When Sealing Isn’t Enough: Smart Upgrade Options
1) Low-E storm windows (high value, lower cost)
If your primary windows are older but still functional, low-E storm windows can deliver meaningful savings at a much lower price than full replacement.
In many cases, they improve comfort quickly and can be a strong “middle path” upgrade.
2) Energy-efficient window coverings
Tight-fit cellular shades can significantly reduce winter heat loss and summer solar heat gain. Translation:
a better indoor feel without touching the window frame itself.
3) Full replacement windows
Replacement can make sense when windows are failing structurally, constantly fogging, or beyond repair. Look for
ENERGY STAR certification and NFRC performance labels (U-factor and SHGC) so you buy for your climatenot just for looks.
Indoor Air Quality: Seal Tighter, Breathe Smarter
A tighter home is great for energy use, but tighter homes can also trap pollutants and moisture if ventilation isn’t addressed.
If you improve air sealing, also make sure kitchen and bath exhaust fans are used properly, and consider professional guidance
if you have combustion appliances, persistent humidity, or previous mold issues.
Moisture control is non-negotiable: condensation on cold window surfaces can feed mold growth over time.
Better sealing helps, but ventilation habits and humidity management still matter.
Costs, Payback, and Incentives
Here’s why people love air sealing projects: the return can be fast. Basic caulking and weatherstripping are among the most cost-effective
home upgrades, and many homes feel better almost immediately after leaks are sealed.
You may also have financial support options:
- Utility rebates: Often available for qualifying efficiency upgrades.
- Weatherization programs: Eligible households may receive support for energy-saving home improvements.
- Tax credits: Federal rules can apply for qualifying improvements in specific tax years (verify the latest IRS guidance before filing).
Scam warning: if someone promises “free government money today” and asks for upfront fees, walk away. Use official channels to confirm benefits.
Room-by-Room Mini Plan
Bedrooms
Prioritize comfort and noise reduction. Seal frame gaps, add weatherstripping at sash contact points, and use insulating shades for nighttime retention.
Living areas
Focus on frequently used windows. If one large window wall stays drafty, consider storm panels before full replacement.
Kitchen and bath windows
Seal leaks, but maintain ventilation. These rooms add moisture quickly, so fan use is key to avoid condensation and mold issues.
Older homes (especially pre-1978)
Be cautious when disturbing painted surfaces around windows. Lead-safe work practices may be required. If you’re unsure, hire certified professionals.
500-Word Experience Section: What Homeowners Actually Notice After Sealing Windows
The most interesting thing about window sealing is that the biggest win is often comfort, and the bill savings follow right behind.
In real homes, the “before” story is surprisingly similar: one room is always too cold, the thermostat gets bumped up, and everyone argues
about whether the house is “fine” or “basically a wind tunnel.”
In one older bungalow, the homeowner kept two space heaters running in winterone in the office and one near the couch. The heating system worked,
but the rooms still felt uneven. We did a simple leak-hunt: visible daylight at one sash corner, cracked exterior caulk at two windows,
and completely flattened weatherstripping on a side window that had probably seen better decades. After resealing and replacing strips,
the immediate feedback was, “The room stopped feeling drafty by dinner.” The utility impact showed up over the next billing cyclenot magical,
but meaningful enough that the space heaters were rarely needed afterward.
In a newer suburban home, the issue wasn’t obvious drafts. It was temperature swings: too warm in late afternoon, chilly after sunset.
Instead of jumping straight to full window replacement, the owners started with targeted sealing and then added tight-fit cellular shades
in two sun-heavy rooms. Their takeaway was classic: “We should’ve done this first.” The house felt steadier through the day, and HVAC cycling
looked less aggressive. They still plan to replace a few windows later, but now they can do it strategically rather than all at once.
Renters can win here too. In one apartment, permanent exterior work wasn’t allowed, so the resident used removable seasonal film,
temporary weatherstripping, and heavier drapes closed at night. It wasn’t glamorous, but it was effective. The biggest result wasn’t only cost;
it was sleep qualityno cold draft hitting the bed at 2 a.m. Sometimes the “best” solution is not the fanciest one; it’s the one you can actually install this weekend.
Across these examples, the same pattern keeps showing up:
- People overestimate how much sealing costs and underestimate how much comfort improves.
- The first 20% of effort usually delivers the biggest practical gains.
- Once drafts are gone, people set thermostats more reasonably.
- Noise reduction becomes a bonus nobody expected.
One more practical lesson: homes are systems, not isolated parts. If you tighten windows but ignore ventilation in moisture-heavy rooms,
condensation can still show up. If you seal beautifully but leave attic bypasses untouched, you still lose performance. The winning mindset is:
fix obvious window leaks first, measure results, then decide whether to layer in storm windows, coverings, or selected replacements.
That sequence protects your budget and avoids unnecessary upgrades.
So yes, sealing windows can absolutely save on your energy billbut the everyday victory is walking into your home and not immediately checking
whether someone secretly opened a window.
Conclusion
If you want lower utility bills without a full renovation, sealing your windows is one of the smartest places to start.
Use caulk for fixed gaps, weatherstripping for moving parts, and verify leaks before buying materials. Then evaluate upgrade options
(storm windows, insulating shades, selective replacements) based on your climate, budget, and window condition.
Done right, window sealing delivers a rare home-improvement combo: lower costs, better comfort, and fast payback.





