Table of Contents >> Show >> Hide
- Why Pulled Pork Gets So Juicy
- The Best Cut of Pork for Pulled Pork
- Ingredients for Juicy Pulled Pork
- How to Make Juicy Pulled Pork Step by Step
- How to Shred Pork 4 Different Ways
- How to Keep Pulled Pork Moist
- Common Pulled Pork Mistakes to Avoid
- How to Serve Pulled Pork
- How to Store and Reheat Pulled Pork
- Experience and Practical Lessons from Making Pulled Pork at Home
- Conclusion
- SEO Tags
There are few kitchen victories more satisfying than a tray of juicy pulled pork that practically collapses when you look at it. It is smoky, savory, deeply comforting, and just dramatic enough to make you feel like a barbecue genius, even if your “pit” is really just a Dutch oven and a healthy sense of optimism. The good news is that pulled pork is not complicated. The better news is that once you understand a few fundamentals, it becomes one of the easiest crowd-pleasing meals you can make.
This guide walks you through exactly how to make juicy pulled pork at home, plus how to shred pork four different ways depending on your tools, your patience level, and how badly you want dinner on the table right now. You will also learn which cut of pork works best, how to keep the meat moist instead of stringy, and how to avoid the classic mistake of turning a gorgeous pork shoulder into dry beige sadness.
Why Pulled Pork Gets So Juicy
The secret to great pulled pork is not magic, although a well-cooked pork shoulder does feel suspiciously magical. It is all about fat, connective tissue, and time. Pork shoulder, also called Boston butt or pork butt, has enough marbling and collagen to stay flavorful during a long cook. As that collagen slowly breaks down, it turns into gelatin, which gives pulled pork its luscious texture and rich mouthfeel.
That is why pulled pork loves low-and-slow cooking. A lean cut like pork loin can taste fine when sliced, but it is not ideal for shredding because it does not have enough fat and connective tissue to stay juicy through a long roast. Pork shoulder does. It is basically the overachiever of the barbecue world.
The Best Cut of Pork for Pulled Pork
If you want juicy pulled pork, buy a pork shoulder or Boston butt. Bone-in is excellent for flavor, but boneless is easier to cut and fit into a slow cooker. Either works well. Look for a roast in the 4- to 7-pound range if you are feeding a family or planning leftovers, which you absolutely should because leftover pulled pork is one of life’s great meal-prep gifts.
A thick fat cap is not necessarily better. You want some exterior fat, but not a giant helmet of it. Trim off any overly thick hard fat and leave the rest alone. The meat needs enough fat to baste itself during cooking, but not so much that you end up shredding around rubbery chunks nobody wants to eat.
Ingredients for Juicy Pulled Pork
You do not need a shopping cart full of mystery powders. A simple pulled pork recipe can taste incredible with pantry basics:
- 1 pork shoulder or Boston butt, about 4 to 7 pounds
- Kosher salt
- Black pepper
- Brown sugar
- Smoked paprika or regular paprika
- Garlic powder
- Onion powder
- Ground cumin
- A little cayenne, if you like heat
- Apple cider vinegar, apple juice, broth, or a mix for moisture and balance
- Barbecue sauce, optional for serving
This combination gives you the classic pulled pork flavor profile: savory, slightly sweet, lightly smoky, and bright enough to cut through the richness. You can absolutely customize it, but this base is a dependable place to start.
How to Make Juicy Pulled Pork Step by Step
1. Season It Like You Mean It
Pat the pork dry first so the seasoning actually sticks instead of sliding around like it is on a water park ride. Mix your salt, pepper, brown sugar, paprika, garlic powder, onion powder, cumin, and cayenne. Rub it all over the pork, pressing it in well. If you have time, let the seasoned roast sit in the refrigerator for a few hours or overnight. That extra time helps the seasoning settle in and gives you a deeper, better-developed flavor.
2. Sear It, If You Want More Flavor
This step is optional, but it is a good one. Browning the pork in a hot pan before slow cooking builds extra flavor and gives the final meat more depth. If you skip it, your pulled pork will still be tasty. If you do it, your kitchen will smell fantastic and you will feel impressively competent.
3. Cook It Low and Slow
You have several good options here. The method matters less than the texture you are aiming for.
Oven Method
Place the pork in a covered Dutch oven or tightly covered roasting pan with a little liquid in the bottom. Cook at 275°F to 300°F for several hours until the meat is deeply tender.
Slow Cooker Method
Put sliced onions or a small amount of liquid in the bottom, add the pork, cover, and cook on low for 8 to 10 hours or on high for 5 to 7 hours, depending on size.
Smoker Method
If you are going full barbecue mode, smoke the pork low and slow until it develops bark and becomes tender enough to pull apart easily.
Pressure Cooker Method
This is the speedier route. You will still get tender, shreddable meat, though usually with less bark and less concentrated flavor than oven or smoker versions.
4. Do Not Stop at “Safe.” Cook Until Tender.
This is where many beginners get tripped up. Pork is safe to eat at a lower temperature than classic pulled pork requires. For shredding, you usually need to keep cooking until the roast reaches the high 190s or low 200s and feels probe-tender. In plain English, that means a thermometer or skewer slides in with little resistance, the bone wiggles easily if there is one, and the meat looks ready to collapse into juicy strands.
Cooking by time alone is risky because every roast is a little different. Temperature helps, but texture is the real boss here. If it still feels tight, it is not done yet.
5. Rest the Pork Before Shredding
Once the pork is tender, let it rest for 15 to 30 minutes before shredding. This gives the juices time to settle back into the meat. Shredding immediately can send all that moisture rushing onto the cutting board instead of staying where it belongs.
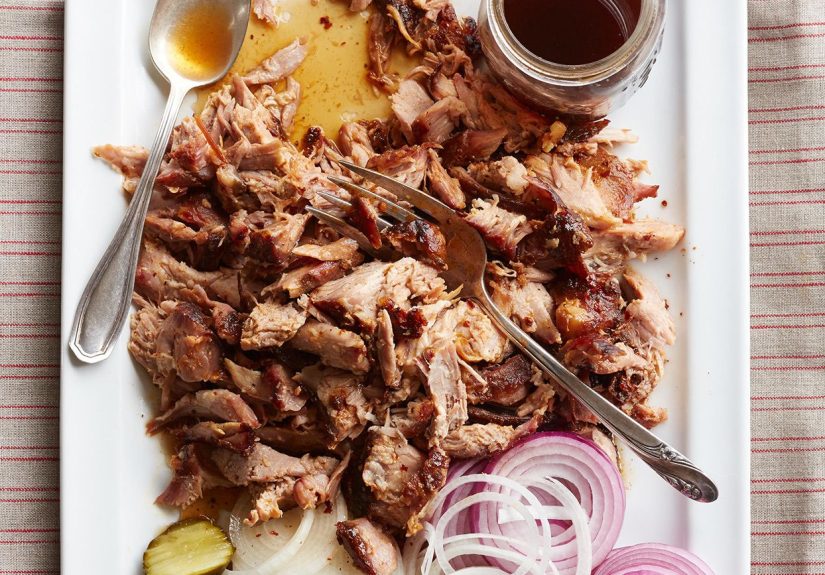
Also, save the cooking juices. This is not optional if your goal is juicy pulled pork. Skim excess fat, then spoon some of the flavorful liquid back into the shredded meat. That is the difference between succulent pork and a dry pile of stringy meat wearing barbecue sauce like a disguise.
6. Shred and Moisten
After resting, remove any large pieces of fat and discard the bone if using bone-in shoulder. Shred the meat using one of the methods below, then toss it with some reserved juices. Add barbecue sauce if you want, but do not drown the meat. The pork should still taste like pork, not like sweet bottled smoke soup.
How to Shred Pork 4 Different Ways
1. Two Forks
This is the classic method and the one most people start with. Hold the pork steady with one fork and pull the meat apart with the other. Repeat until the roast becomes shreds.
Best for: Small batches, traditionalists, and anyone who enjoys a little kitchen therapy.
Pros: No special tools needed, easy to control shred size.
Cons: Slower than other methods, especially with a large roast.
2. Your Hands, with Heatproof Gloves
Once the pork is cool enough to handle safely, put on food-safe heatproof gloves and gently pull the meat apart by hand. This method gives you excellent control and makes it easier to remove bits of fat as you go.
Best for: Large roasts and cooks who like a more natural, hands-on method.
Pros: Fast, intuitive, easy to feel and remove undesirable bits.
Cons: Messy, and you need to wait until the pork cools enough to handle.
3. Stand Mixer
Put chunks of warm cooked pork into the bowl of a stand mixer and use the paddle attachment on low speed for a short burst. In seconds, the pork turns into evenly shredded meat. It is one of those kitchen tricks that feels slightly illegal because it works so fast.
Best for: Big batches, parties, and people who value efficiency over theatrical fork action.
Pros: Extremely fast, consistent shreds, very little effort.
Cons: Easy to overdo and turn the pork too fine if you walk away or get distracted by your phone.
4. Meat Claws
Meat claws look dramatic, which is part of their charm, but they are also genuinely useful. They grip hot meat well and make quick work of large roasts.
Best for: Hot pork straight from the smoker or roasting pan.
Pros: Fast, sturdy, good for hot meat, mildly makes you feel like a barbecue superhero.
Cons: Another gadget to store, and honestly, forks or gloved hands can do nearly the same job.
How to Keep Pulled Pork Moist
If you remember only three things, make them these: use pork shoulder, cook until truly tender, and mix some reserved juices back into the meat. That trio solves most pulled pork problems before they begin.
Here are a few extra moisture-saving moves:
- Do not trim away all the fat before cooking.
- Do not cook by time alone; test for tenderness.
- Rest the meat before shredding.
- Season generously because shredded meat needs flavor in every strand.
- Add a splash of vinegar or a bit of cooking liquid after shredding to brighten the richness.
- Sauce at the end, not at the beginning, if you want more control over the final texture.
Common Pulled Pork Mistakes to Avoid
Using the Wrong Cut
Pork loin is lean and tidy. Pulled pork is not supposed to be tidy. Use shoulder.
Stopping Too Early
If the pork slices nicely but refuses to shred, it is undercooked for this purpose. Keep going.
Throwing Away the Juices
The pan liquid is flavor insurance. Save it, skim it, use it.
Over-Saucing
Good pulled pork should taste rich and porky even before sauce enters the chat.
Shredding It Too Fine
You want texture, not pork confetti. Leave some chunkier bits for a better bite.
How to Serve Pulled Pork
Once you have a batch of juicy pulled pork, dinner gets very easy. Pile it onto toasted buns with slaw for classic pulled pork sandwiches. Tuck it into tacos with pickled onions. Scatter it over nachos. Spoon it onto baked potatoes. Add it to rice bowls, quesadillas, mac and cheese, or breakfast hash. This is one of the rare proteins that somehow gets more useful after day one.
How to Store and Reheat Pulled Pork
Let the pork cool slightly, then store it in shallow containers with a little of the juice to help keep it moist. Refrigerate it promptly rather than letting it lounge around on the counter like it pays rent. Pulled pork keeps well in the refrigerator for several days and freezes beautifully for longer storage.
To reheat, warm it gently with a splash of reserved juices, broth, or water. Cover it so the moisture stays trapped. Whether reheating on the stove, in the oven, or in the microwave, heat it thoroughly so it is steaming hot all the way through.
Experience and Practical Lessons from Making Pulled Pork at Home
One of the most useful things I have learned about making pulled pork is that the process is less about chasing perfection and more about recognizing the moment when the meat finally gives in. Early on, many home cooks assume pulled pork is finished when it looks brown and smells amazing. Unfortunately, pork shoulder can smell incredible and still be stubborn as a tax form. The first time you try to shred it and it resists, that is usually not failure. It is just the roast telling you it needs more time.
Another big lesson is that juicy pulled pork is built in layers. The seasoning matters, but not as much as patience. The cooking liquid matters, but not as much as tenderness. The sauce matters, but not as much as the juices you save from the pan. Once you realize that moisture comes from both the meat itself and the liquid you return to it after shredding, your pulled pork gets better immediately. Many people try to rescue dry pork with extra barbecue sauce. That works about as well as putting more frosting on a stale cake. The real fix is giving the shredded meat back some of its own flavorful juices.
I have also found that shred size changes the eating experience more than people expect. Very fine shreds are great for sandwiches because they pile neatly and soak up sauce evenly. Slightly chunkier pulled pork is better for tacos, rice bowls, and nachos because it has more texture and does not disappear into the other toppings. That is why the shredding method matters. Forks give you control. Hands let you feel what should stay and what should go. A stand mixer is brilliant when you are feeding a crowd, but you have to watch it closely or it can take the pork from beautifully shredded to suspiciously fluffy in record time.
The make-ahead advantage is another reason pulled pork earns a permanent place in real kitchens. A pork shoulder may take hours to cook, but the leftovers solve meals for days. The flavor often improves after a night in the refrigerator because the juices redistribute and the seasoning settles in. That means pulled pork is not just a weekend project. It is a strategy. Make one roast and you can turn it into sandwiches one night, tacos the next, and loaded baked potatoes after that. Suddenly dinner looks a lot less stressful.
Most of all, pulled pork teaches confidence. It is forgiving, flexible, and friendly to cooks who are still figuring things out. Maybe your bark is not perfect. Maybe your sauce is a little tangier than planned. Maybe you shredded half with forks and half with your hands because you got impatient. None of that ruins the meal. If the pork is tender, juicy, and well-seasoned, people will be thrilled. They will not ask whether your rub had exactly the right ratio of paprika to brown sugar. They will ask for seconds, and that is the only review that really matters.
Conclusion
If you want to know how to make juicy pulled pork, the formula is simple: start with pork shoulder, season it well, cook it slowly until it is truly tender, rest it, shred it, and mix some of the juices back in. That is the whole game. From there, you can shred pork with two forks, gloved hands, a stand mixer, or meat claws depending on what works best for you. Once you nail the basics, pulled pork becomes less of a recipe and more of a superpower.




