Table of Contents >> Show >> Hide
- Why a Wood Cubby Works So Well in a Kids Room
- Plan the Size Before You Cut Anything
- Best Materials for a DIY Wood Cubby
- A Simple Cut List for a 4-Cubby Unit
- How To Build the Wood Cubby Step by Step
- Step 1: Measure and Mark Carefully
- Step 2: Cut the Panels
- Step 3: Dry Fit the Pieces
- Step 4: Pre-Drill the Screw Holes
- Step 5: Assemble the Outer Box
- Step 6: Install the Dividers
- Step 7: Add the Back Panel
- Step 8: Fill Holes and Sand Everything Smooth
- Step 9: Prime and Paint or Stain
- Step 10: Anchor the Cubby to the Wall
- Design Ideas To Make Your Cubby Look Custom
- Common Mistakes To Avoid
- How To Make the Cubby More Kid-Friendly
- Conclusion
- Extra Experience and Practical Lessons From Building a Wood Cubby for a Kids Room
- SEO Tags
If your kid’s room looks like a toy store lost a bar fight, a wood cubby can save the day. It gives books, bins, stuffed animals, puzzles, and random plastic dinosaurs a place to live besides your floor. Better yet, a DIY wood cubby is one of those rare projects that is both practical and satisfying. You get useful storage, a custom size, and the deeply rewarding experience of saying, “Yes, I made that,” every time someone notices it.
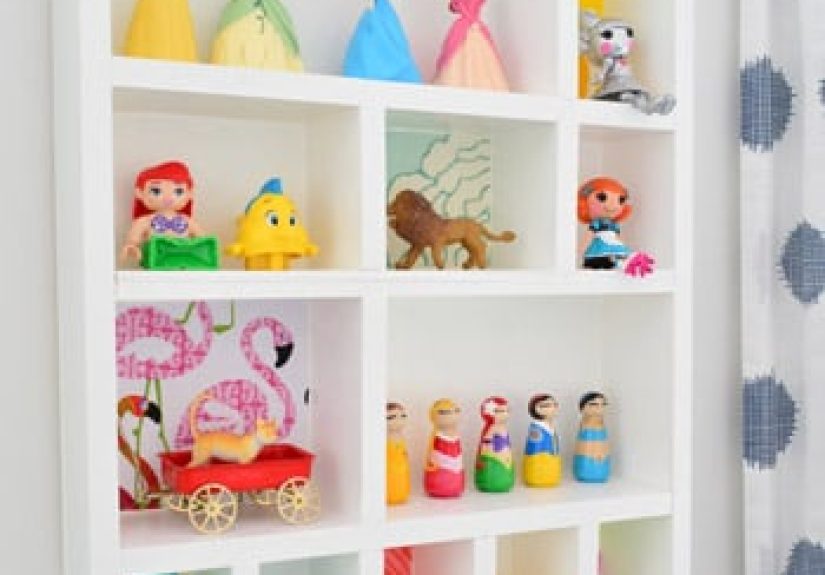
The good news is that you do not need a giant workshop or a beard full of sawdust to build one. A simple wood cubby for a kids room can be made with plywood, glue, screws, basic tools, and a little patience. The even better news? You can customize it for your space, your child’s height, and your decorating style. Paint it white for a clean built-in look, go bright and playful, or stain it for a warm wood finish that says, “This family reads books and occasionally remembers where the crayons are.”
In this guide, you will learn how to make a sturdy, kid-friendly wood cubby from start to finish. We will cover planning, materials, dimensions, cutting, assembly, sanding, painting, safety, and a few real-world lessons that can keep you from saying the classic DIY phrase: “Well, that did not go according to plan.”
Why a Wood Cubby Works So Well in a Kids Room
A wood cubby is one of the smartest storage pieces you can build for a child’s bedroom or playroom because it does several jobs at once. It can hold books, fabric bins, toys, shoes, art supplies, and even folded clothes. It also helps kids see their stuff clearly, which makes cleanup less mysterious. When storage is at their height, they are more likely to use it. That is the theory, anyway. Actual results may vary if your child believes the floor is also a valid storage system.
Compared with flimsier storage units, a wood cubby has a more solid feel and lasts longer. It can also be built to fit an exact wall, nook, or corner. That means you are not stuck trying to force a store-bought organizer into a space it clearly hates. A homemade cubby also lets you choose safer finishes, smoother edges, and stronger materials, which matters in a room where furniture gets climbed on, bumped into, and used as a stage for stuffed-animal concerts.
Plan the Size Before You Cut Anything
The best DIY projects start with measuring, not guessing. Before you buy wood, measure the wall or area where the cubby will go. Think about width, height, and depth. For a kids room, a low, wide cubby is often the sweet spot because children can reach the compartments easily and the top can double as a display shelf.
A beginner-friendly size is about 48 inches wide, 15 to 16 inches deep, and 30 inches high. That gives you a practical four-cubby unit arranged in two rows and two columns. If you want more storage, you can go with six cubbies or even nine, but once the unit gets taller, you need to pay extra attention to wall anchoring and overall stability.
Also think about what the cubby will hold. If you want to use fabric storage bins, check the bin dimensions first. If the cubbies are mostly for books and toys, you have more flexibility. A cubby that is too shallow will look neat but may not actually hold much. A cubby that is too deep becomes a tiny cave where toys vanish for months.
Best Materials for a DIY Wood Cubby
Choose the Right Wood
For most people, 3/4-inch plywood is the easiest and smartest choice. It is strong, stable, widely available, and easier to work with than solid hardwood for a project like this. A sanded plywood or project panel will usually give you a smoother surface that is easier to paint. If you want a more furniture-like finish, you can choose a hardwood veneer plywood such as birch or oak.
You can build a cubby with MDF or particleboard, but plywood tends to handle everyday life better. In a kids room, that matters. You want something sturdy enough for bins, books, and the occasional unauthorized climbing attempt.
Recommended Materials
- One or two sheets of 3/4-inch plywood, depending on the cubby size
- 1/4-inch plywood for the back panel if you want extra rigidity
- Wood glue
- 1-1/4-inch wood screws
- Wood filler
- Sandpaper in 80, 120, and 180 grit
- Primer and paint or a child-friendly water-based finish
- Edge banding or trim, optional, for a cleaner look
- Wall anchor hardware for safety
Tools You Will Need
- Tape measure
- Pencil
- Circular saw or table saw
- Drill and driver bit
- Clamps
- Combination square or speed square
- Sander or sanding block
- Paintbrush or mini roller
- Stud finder for anchoring
A Simple Cut List for a 4-Cubby Unit
Here is a basic example for a 48-inch-wide, 30-inch-high, 15-inch-deep cubby made from 3/4-inch plywood. Always double-check your own measurements and blade thickness before cutting.
- Top and bottom: 2 pieces at 48 x 15 inches
- Sides: 2 pieces at 28-1/2 x 15 inches
- Vertical divider: 1 piece at 28-1/2 x 15 inches
- Horizontal divider: 1 piece at 46-1/2 x 15 inches
- Back panel, optional: 1 piece at 48 x 30 inches from 1/4-inch plywood
The exact divider length can vary depending on how you join the parts, so do a quick sketch before cutting. This is the moment when a ten-minute drawing can prevent a two-hour muttering session in the garage.
How To Build the Wood Cubby Step by Step
Step 1: Measure and Mark Carefully
Use a tape measure and square to mark every cut line clearly. Label each piece as you go. Do not trust your memory. Every DIY builder thinks they will remember which panel is which. Every DIY builder is wrong.
Step 2: Cut the Panels
Cut the plywood pieces using a circular saw with a straightedge guide or a table saw. Take your time. Clean, accurate cuts make assembly easier and help the finished cubby look polished. If your home improvement store offers cutting services, you can have the large sheet broken down there and do the final trimming at home.
Step 3: Dry Fit the Pieces
Before you use glue or screws, stand the panels up and check the fit. Make sure the top, bottom, sides, and dividers line up the way you planned. This dry fit helps you catch mistakes early, when they are still funny instead of tragic.
Step 4: Pre-Drill the Screw Holes
Pilot holes are your friend. Pre-drilling helps prevent splitting, especially near the edges of plywood, and it makes the assembly much cleaner. Mark your screw locations evenly and keep them consistent so the cubby looks intentional, not like it survived a screw storm.
Step 5: Assemble the Outer Box
Apply wood glue to the ends of the side panels, position them between the top and bottom pieces, clamp if needed, and drive in the screws. Check for square before tightening everything fully. If the frame is not square now, it will not magically fix itself later. Wood is many things, but self-correcting is not one of them.
Step 6: Install the Dividers
Measure and mark the placement of your vertical and horizontal dividers. Apply glue, clamp, and screw them in place. Recheck for square as you work. The dividers are what turn a box into a cubby, so getting their spacing right makes a big visual difference.
Step 7: Add the Back Panel
If you are using a back panel, attach it after the main frame is assembled and squared. A back panel adds rigidity and helps keep the unit from racking or wobbling. Nail or screw it on carefully, checking that the cubby stays square while you fasten it.
Step 8: Fill Holes and Sand Everything Smooth
Fill screw holes, dents, and rough plywood edges with wood filler. Once dry, sand the whole unit thoroughly. Start with a coarser grit where needed, then move to finer grits for a smooth finish. Round over sharp corners and ease the edges a bit. In a kids room, “slightly softened corners” is a much better design choice than “tiny wooden ankle trap.”
Step 9: Prime and Paint or Stain
If you are painting the cubby, use a good primer first, especially on plywood edges, which tend to drink paint like they are emotionally processing something. Sand lightly between coats for a smoother result. A water-based paint or water-based clear coat is a practical choice for indoor furniture, especially in a child’s room where strong odors are not welcome.
Step 10: Anchor the Cubby to the Wall
This step is not optional if the cubby is tall, narrow, heavily loaded, or placed in an active kids space. Use anti-tip hardware and secure the unit to wall studs whenever possible. Even a well-built piece of furniture can become dangerous if a child pulls, climbs, or hangs on it. Safety hardware is not dramatic, but neither is a trip to the emergency room, and that is exactly the point.
Design Ideas To Make Your Cubby Look Custom
Add a Face Frame
If you want the cubby to look more like built-in furniture, add a simple face frame made from 1×2 boards. This hides plywood edges and gives the whole project a more finished appearance.
Use Edge Banding
Iron-on edge banding is an easy shortcut if you want smooth edges without extra trim work. It is especially useful if you are staining the wood and want a cleaner furniture-style finish.
Choose a Fun Color
White is classic, but soft blue, sage green, butter yellow, or even a two-tone look can make the cubby feel playful without turning the room into a cartoon explosion. If the room already has bold wallpaper or bright bedding, a neutral cubby can keep things balanced.
Add Labels or Bins
Fabric bins, wicker baskets, or labeled toy boxes make the cubby more functional. Labels can help kids learn where things belong. Whether they actually put the things back there is a separate parenting storyline.
Common Mistakes To Avoid
Skipping the planning. A cubby that is too deep, too shallow, or too tall will annoy you every day. Measure your space and your storage bins first.
Using low-quality panels without checking them. Warped or damaged wood will fight you during assembly. Pick the straightest, smoothest sheets you can find.
Not pre-drilling. Splits, blowouts, and crooked screws are the sort of excitement no one asked for.
Ignoring plywood edges. Raw plywood edges can look rough after paint if you do not sand and fill them properly.
Forgetting the wall anchor. In a kids room, furniture safety is part of the project, not a bonus feature.
How To Make the Cubby More Kid-Friendly
A good wood cubby for a kids room should not just look nice. It should work for real family life. Keep the height low enough for your child to reach the top cubbies. Smooth every edge. Choose a finish that cures well and is easy to wipe clean. Avoid tiny decorative parts that can loosen over time. If you add legs, make sure the base is still stable and secure.
You can also personalize the unit with name tags, favorite colors, or themed bins for books, art, dress-up clothes, and building toys. The goal is not museum perfection. The goal is a room that feels organized, warm, and usable by actual children with actual chaos in their hearts.
Conclusion
Learning how to make a wood cubby for a kids room is one of the most rewarding beginner woodworking projects because the result is both attractive and genuinely useful. With 3/4-inch plywood, careful measuring, pilot holes, wood glue, solid sanding, and a child-friendly finish, you can build a cubby that looks polished and stands up to daily life. Keep the design simple, focus on clean cuts and square assembly, and never skip the wall anchor.
Once the cubby is in place, you will have a storage piece that helps the room function better, teaches kids where things belong, and makes the whole space feel calmer. That may not guarantee a perfectly tidy room forever, but it definitely gives the mess fewer places to hide.
Extra Experience and Practical Lessons From Building a Wood Cubby for a Kids Room
One of the biggest surprises people have after building their first wood cubby is how much the little details matter. On paper, a cubby looks like a very simple box with dividers. In real life, the difference between a cubby that looks homemade in a charming way and one that looks homemade in a “well, at least you tried” way often comes down to alignment, sanding, and finishing. The first time I built one, the structure itself went together quickly. The sanding took longer than expected, and honestly, it made the biggest difference. Once the edges were softened and the screw holes were filled properly, the piece suddenly looked intentional instead of rushed.
Another lesson is that kids use furniture differently from adults. Adults see a cubby and think, “storage.” Kids see a cubby and think, “fort, stage, climbing challenge, secret treasure vault, and maybe storage.” That is why strength and stability matter so much. A flimsy organizer may survive in a guest room, but in a kids room, furniture needs to be built with the assumption that it will be bumped, leaned on, dragged a few inches, and tested by gravity in creative ways.
I have also learned that depth is more important than many people expect. A very shallow cubby looks sleek, but it may not hold board books, toy bins, or bulkier stuffed animals very well. A slightly deeper cubby is usually more useful over time. At the same time, making it too deep can create a black hole where small toys disappear behind baskets and you rediscover them in another season. The best builds are the ones that match the family’s real habits, not just a pretty photo.
Paint choice matters too. In a kids room, there is a huge quality-of-life difference between a finish that wipes clean easily and one that scuffs every time a toy truck touches it. A durable water-based finish usually makes life simpler. It dries faster, smells less intense, and generally feels more practical for indoor family furniture. If you are building for a very young child, letting the finish cure fully before use is one of those unglamorous choices that pays off later.
There is also a strong case for keeping the design simpler than your imagination wants. It is tempting to add fancy trim, decorative feet, unusual cutouts, and special compartments for every type of toy. Sometimes that works. Often, it creates more work without making the cubby much better. A clean rectangular design with smooth edges, good paint, and matching bins usually looks better in the long run than an overcomplicated unit with too many visual ideas fighting each other.
Finally, the best part of building a wood cubby is that it changes the room almost immediately. Even before every toy is perfectly sorted, the space feels more settled. There is a visual anchor. There is a place for books. There is somewhere for bins to go besides the middle of the room. And there is a quiet little pride in knowing that you built something useful with your own hands. It may not make your child love cleanup overnight, but it absolutely gives your home a smarter, sturdier, more personal storage solution. That is a pretty great return on a few sheets of plywood and a weekend of sawdust.




