Table of Contents >> Show >> Hide
- What Is a School Survival Kit?
- Before You Start: Two Rules That Prevent 90% of Kit Fails
- Step 1: Choose the Right Container (AKA: Your Kit’s Home)
- Step 2: Add Your “Identity + Info” Essentials
- Step 3: Build the “Academic Rescue” Core
- Step 4: Add “Fix-It Fast” Tools for School Supplies
- Step 5: Create a Hygiene Mini-Kit (Your Future Self Will Thank You)
- Step 6: Pack a Small (School-Appropriate) First Aid Kit
- Step 7: Add Food + Hydration Backup (Because Hunger Has Opinions)
- Step 8: Add Tech + Power Essentials (Low Battery Is a Lifestyle, Apparently)
- Step 9: Prepare for Weather and “Unexpected Wetness”
- Step 10: Add “Social Emergency” Items (Confidence Boosters)
- Step 11: Decide What Lives in Your Backpack vs. Locker
- Step 12: Customize by Grade, Activities, and Real Life
- How to Keep Your Kit From Turning Into a “Random Stuff Museum”
- Common Mistakes (So You Don’t Learn Them the Hard Way)
- Extra: of Real-World Experiences and Lessons
- Conclusion
A “school survival kit” isn’t about preparing for a zombie apocalypse (although, yes, the cafeteria mystery meat has asked some tough questions).
It’s about being the person who’s ready for the normal chaos of a school day: a broken pencil, a surprise rainstorm, a headache, a phone at 3%,
or the moment a teacher says, “Everyone take out scissors,” and half the class stares into the void.
This guide walks you through building a practical, lightweight school survival kit that fits in a backpack or locker, stays within school rules,
and actually gets used. You’ll end up with a kit that keeps you calm, organized, and just a tiny bit smug (the healthy kind of smug).
What Is a School Survival Kit?
A school survival kit is a small set of essentials you keep in your backpack (and optionally your locker) to handle common school-day problems:
minor messes, small injuries, hygiene emergencies, tech hiccups, and “I forgot my…” moments. Think of it as a personal support crewjust smaller,
quieter, and way easier to feed.
Before You Start: Two Rules That Prevent 90% of Kit Fails
Rule 1: Follow school policies
Schools vary on what’s allowed (especially meds, sprays, and anything scented). If your school has a nurse’s office or a handbook rule about
medications, follow it. Your kit should reduce stress, not generate a principal meeting.
Rule 2: Build for your day, not someone else’s “perfect” list
Your kit should match your schedule, activities, allergies, climate, and commute. A band kid’s kit doesn’t look like a cross-country runner’s kit,
and a kindergartener’s kit won’t match a college commuter’s kit. The best kit is the one you’ll carry and maintain.
Step 1: Choose the Right Container (AKA: Your Kit’s Home)
Start with something small, durable, and easy to spot in the bottomless pit known as “a backpack.” Good options include:
- A zip pouch (great for middle/high school)
- A clear toiletry bag (easy to find items fast)
- A mini pencil case (perfect for a “just-in-case” basics kit)
- A locker bin (for bigger backups that don’t need to travel)
Pro tip: Pick a bright color or add a keychain. If it blends in, it will become one with the backpack ecosystem.
Step 2: Add Your “Identity + Info” Essentials
This step is boring in the way seatbelts are boring: you only appreciate them when you really need them.
- Emergency contact card (names + phone numbers, printed)
- Any critical medical info (allergies, conditions, needed accommodations)
- A small card sleeve for your student ID, bus pass, or library card
- A short “if found” note inside the pouch (name + a way to return it)
Step 3: Build the “Academic Rescue” Core
This is the stuff that saves your grade (or at least your dignity) when something goes missing at 8:02 a.m.
- 2–3 pens (blue/black) and 1 mechanical pencil or regular pencil
- Small eraser + mini sharpener (if using pencils)
- Highlighter (one is enough; you’re not opening a neon store)
- Mini sticky notes for reminders
- Paper clip(s) or a tiny binder clip for loose papers
- A spare scantron/blue book (only if your school uses them and allows it)
Step 4: Add “Fix-It Fast” Tools for School Supplies
These items handle small, annoying issues quicklyno dramatic sighing required.
- Mini tape or a couple of pre-cut strips wrapped around an old gift card
- Glue stick (mini size)
- Small scissors (only if permitted)
- White-out tape (cleaner than liquid correction fluid)
Step 5: Create a Hygiene Mini-Kit (Your Future Self Will Thank You)
School days are long. Bodies are real. Life happens. A simple hygiene kit keeps you comfortable and confident.
- Tissues (a pocket pack)
- Alcohol-based hand sanitizer (travel size)
- Individually wrapped wipes (hand/face wipes are clutch after lunch or PE)
- Deodorant (travel size or wipes)
- Lip balm
- Dental basics (mints, floss picks, or orthodontic wax if needed)
- Menstrual products (pads/tampons, plus a spare pair of underwear if you’ve got room)
If you’re packing sanitizer for younger kids, make sure it’s used safely and appropriately. If your school has rules about fragrances or aerosols,
skip perfume/body spray and stick to low-scent options.
Step 6: Pack a Small (School-Appropriate) First Aid Kit
You’re not building a hospital. You’re building a “handle minor stuff until the nurse exists” kit.
- Assorted bandages (including blister bandages if you walk a lot)
- Gauze pad(s) (small) + medical tape (optional, but useful)
- Antiseptic wipes
- Small packet of antibiotic ointment (if allowed)
- Disposable gloves (optional)
Medication rules vary widely. If you need pain relievers or prescription meds, follow your school’s policy (often through the nurse).
Step 7: Add Food + Hydration Backup (Because Hunger Has Opinions)
Even if you eat breakfast, schedules slip. Lunch trades get weird. Practice runs long. Keep a small backup plan:
- Refillable water bottle (leak-proof, easy to clean)
- Non-perishable snack (granola bar, crackers, applesauce pouch, trail mixchoose allergy-safe options for your environment)
- Electrolyte packet (optional for athletes or hot climates)
If your school is allergy-aware, pick snacks without common allergens or clearly label and keep them sealed.
Step 8: Add Tech + Power Essentials (Low Battery Is a Lifestyle, Apparently)
If you rely on a phone, tablet, or laptop for schoolwork, this step is non-negotiable.
- Charging cable that matches your device
- Wall plug (compact)
- Portable power bank (small, school-appropriate)
- Wired earbuds (some classrooms still prefer them)
Keep cords in a small zip pouch so they don’t become a knot sculpture.
Step 9: Prepare for Weather and “Unexpected Wetness”
Weather loves surprises. So do leaky water bottles. Add light, packable options:
- Foldable poncho or compact umbrella
- Spare hair tie (yes, it counts as weather gear in humidity)
- Small pack of tissues (againtissues do everything)
- Zip-top bag (for wet items, messy items, or “please do not touch this” items)
Step 10: Add “Social Emergency” Items (Confidence Boosters)
These aren’t required, but they help you feel put-together when life throws a pop quiz at your appearance.
- Stain remover pen (tiny, powerful, feels like magic)
- Mini lint roller (optional, but oddly satisfying)
- Comb or small brush
- Safety pins (for wardrobe malfunctions and heroic moments)
Step 11: Decide What Lives in Your Backpack vs. Locker
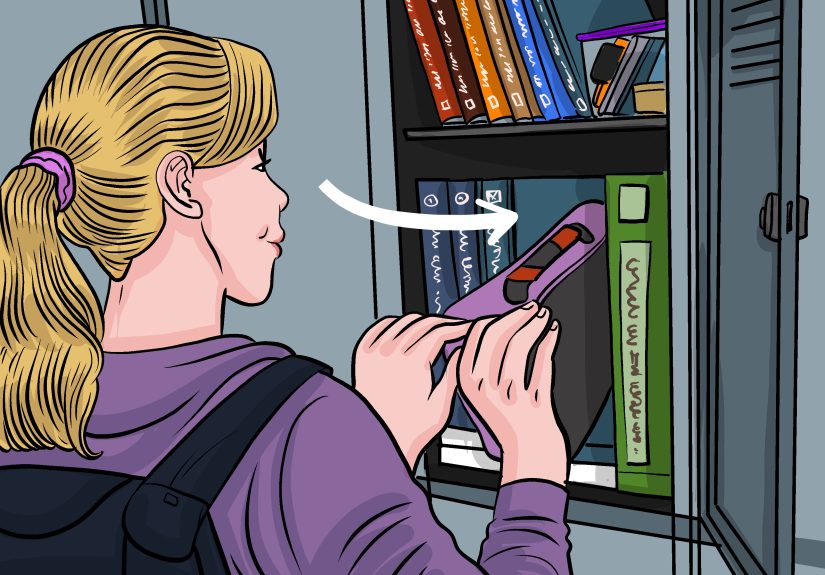
If you have a locker, split your kit into two zones:
Backpack kit (daily, lightweight)
- Hygiene basics, snack, charger, bandages, pens
Locker kit (bigger backups)
- Spare notebook, extra pencils, deodorant backup, extra snack, an extra hoodie, spare PE socks, and anything bulky
Step 12: Customize by Grade, Activities, and Real Life
Your kit should match what your day actually looks like. Here are smart add-ons by situation:
Elementary school
- Extra mask if required, spare shirt, simple snacks, tissues, and a note with caregiver contact info
Middle school
- Lock combo backup, deodorant, wipes, period products, and a power bank if phones are allowed
High school
- Blister care, stain remover, extra charger, earbuds, breath mints, and a small planner system
College / commuter students
- Portable charger, small first aid upgrades, a backup meal/snack, copies of key documents, and weather layers for long days
Sports, band, clubs, and after-school life
- Extra hair ties, athletic tape (if allowed), electrolyte packets, small towel, and a post-practice snack
How to Keep Your Kit From Turning Into a “Random Stuff Museum”
A survival kit works only if it’s maintained. Try this simple routine:
- Monthly reset: Replace snacks, wipes, and anything that ran out.
- Quarterly cleanout: Toss dried-out pens and mystery wrappers.
- Seasonal swap: Poncho in rainy months, lip balm and lotion in winter, sunscreen in warmer seasons if needed.
Common Mistakes (So You Don’t Learn Them the Hard Way)
- Overpacking: If it’s too heavy, you’ll stop carrying it. Minimal wins.
- Ignoring school rules: Especially around meds, sprays, and sharp objects.
- Forgetting the basics: A snack and a charger prevent the most drama per ounce.
- Not labeling: The world is full of identical black pouches. Yours should not vanish into the crowd.
Extra: of Real-World Experiences and Lessons
When people talk about “school survival kits,” the funniest part is how quickly the kit becomes a mirror of real life. The first version usually
looks like a Pinterest dream: perfectly arranged supplies, color-coded pouches, and enough tiny containers to run a miniature space station.
Then school happens. By week two, the kit becomes less “aesthetic” and more “functional chaos,” and that’s actually a good signit means you’re
using it.
One of the most common lessons families learn is that the best kit items are the ones that solve problems fast without creating new ones.
For example, a stain remover pen is small, inexpensive, and fixes the kind of everyday disaster that can ruin your whole mood:
spaghetti sauce on a white shirt during picture day. Same with an extra hair tie, a couple of safety pins, or a spare penciltiny tools, big impact.
Another pattern that comes up again and again: students underestimate how much “comfort” matters. A kit isn’t just about emergencies;
it’s about staying regulated. A snack can prevent a headache. A water bottle can prevent a slump. A wipe can make you feel human again after lunch.
These are not luxuries; they’re stability tools. The kit works best when it supports your ability to focus, participate, and feel confident.
People also discover the power of the “friend upgrade.” Once a student carries a kit, they often become the person who can help someone else:
offering a bandage, a tissue, a spare pad, or a charger for five minutes. That kind of preparedness builds social goodwill fastwithout being flashy.
The key is boundaries: pack enough for you first, and then add one or two “shareable” items if you have space.
Maintenance is where real life really shows. Snacks get eaten. Pens disappear. Wipes dry out if they’re not sealed well.
The students who stick with the habit tend to use a simple trigger: the first weekend of the month (or the first time they hear the words
“we have a quiz today”) becomes their reminder to restock. Some families keep a small “refill bin” at home with travel-size items so restocking
takes two minutes instead of a full shopping trip.
Finally, there’s a quiet confidence that comes from being prepared. Not the dramatic “I have a gadget for everything” vibe, but the calm sense
that minor problems won’t derail your day. That’s the real goal of a school survival kit: fewer interruptions, less stress, and more energy for
the parts of school that actually matterlearning, friendships, and showing up as your best self (even if your best self occasionally forgets
where they put their homework).
Conclusion
A great school survival kit is small, realistic, and personal. Start with the basics (info card, school supplies, hygiene, mini first aid, snack,
and charging), keep it organized, and restock it like you mean it. You’ll handle the everyday surprises of school with less stressand way fewer
“can I borrow…” emergencies.




