Table of Contents >> Show >> Hide
- What Makes a Puppet “Muppet Style”?
- Tools and Materials You’ll Need
- Step 1: Design Your Puppet Character
- Step 2: Make the Mouth Plate
- Step 3: Build the Foam Head
- Step 4: Cover the Head with Fleece
- Step 5: Add Eyes, Nose, Hair, and Personality
- Step 6: Create the Body, Arms, and Hands
- Step 7: Test the Puppet on Camera
- Common Mistakes to Avoid
- Budget and Time Estimate
- Experience Notes: What Actually Helps When Making a Muppet Style Puppet
- Conclusion
- SEO Tags
A Muppet style puppet has a special kind of magic: a big expressive mouth, soft rounded features, eyes that look like they know something, and a personality that seems to arrive before the glue is even dry. The good news? You do not need a Hollywood workshop, a secret puppet cave, or a suspiciously wealthy frog to build one. With foam, fleece, a sturdy mouth plate, basic sewing, and a little character design, you can create a handmade puppet that talks, reacts, sings, complains about snacks, and generally steals the show.
This guide walks you through how to make a Muppet style puppet from planning to performance. The goal is not to copy a copyrighted character, but to build an original foam-and-fleece hand puppet inspired by the classic television puppet look: flexible, colorful, friendly, and wonderfully ridiculous in the best possible way.
What Makes a Puppet “Muppet Style”?
Before you start cutting foam like a caffeinated craft wizard, it helps to understand the design language. A Muppet style puppet is usually a soft hand-and-mouth puppet with a large movable jaw. The puppeteer’s hand operates the mouth from inside the head, while optional arm rods make the hands wave, point, clap, or dramatically blame someone else for the mess on the craft table.
The most recognizable features are a rounded foam head, fleece or fur skin, exaggerated eyes, a clear mouth shape, and a body that hides the performer’s arm. The puppet should be lightweight enough to hold above your head, durable enough to survive practice, and expressive enough that a tiny eyebrow tilt can say, “I have opinions.”
Main Parts of the Puppet
- Foam head: Gives the puppet shape while staying light and flexible.
- Mouth plate: The hinge-like structure that opens and closes the mouth.
- Fleece or fur covering: Creates the polished puppet “skin.”
- Eyes, nose, and features: Bring the character to life.
- Body and sleeve: Hide your hand and support performance.
- Arms and rods: Optional, but great for character movement.
Tools and Materials You’ll Need
You can make a simple DIY puppet on a small budget, or you can use professional puppet-making materials for a cleaner finish. For your first puppet, aim for sturdy, affordable, and forgiving. Your first puppet does not need to be perfect. It needs to exist. Perfection can wait until Puppet Number Two, who will judge Puppet Number One silently from the shelf.
Basic Materials
- 1/2-inch or 1-inch upholstery foam for the head and body
- Fleece, nylon puppet fleece, anti-pill fleece, or short-pile faux fur
- Felt, velvet, or black fabric for the inside of the mouth
- Flexible plastic, craft foam, gasket rubber, or thin foam board for the mouth plate
- Ping-pong balls, plastic spoons, wooden beads, or craft eyes for eyes
- Felt, fleece, foam, yarn, faux fur, or fabric scraps for features
- Needle and thread, sewing machine, or fabric glue
- Contact cement, hot glue, or strong craft adhesive
- Scissors, craft knife, marker, ruler, and paper for patterns
- Optional arm rods made from wire, dowels, or lightweight rods
Safety First
Adhesives can be strong, smelly, and occasionally dramatic. Use contact cement, spray adhesive, and hot glue in a well-ventilated area. Keep sharp blades away from children, pets, and your own overconfident fingers. If you are building with kids, let adults handle cutting and high-heat glue. Puppets are fun. Emergency room puppetry is less fun.
Step 1: Design Your Puppet Character
Every great puppet starts with a personality. Is your puppet a nervous librarian monster? A tiny chef with big dreams and no knife skills? A space chicken? Sketch the character before you build. You do not need to be a professional artist. Circles, blobs, and arrows are perfectly acceptable. Your sketch should answer three questions: What shape is the head? Where are the eyes? How big is the mouth?
For a beginner Muppet style puppet, keep the head simple. Round, oval, pear-shaped, and bean-shaped heads are easier to build than complicated animal forms. Choose two or three main colors. A puppet with one strong color and one accent color usually looks cleaner than a puppet wearing the entire craft store.
Character Example
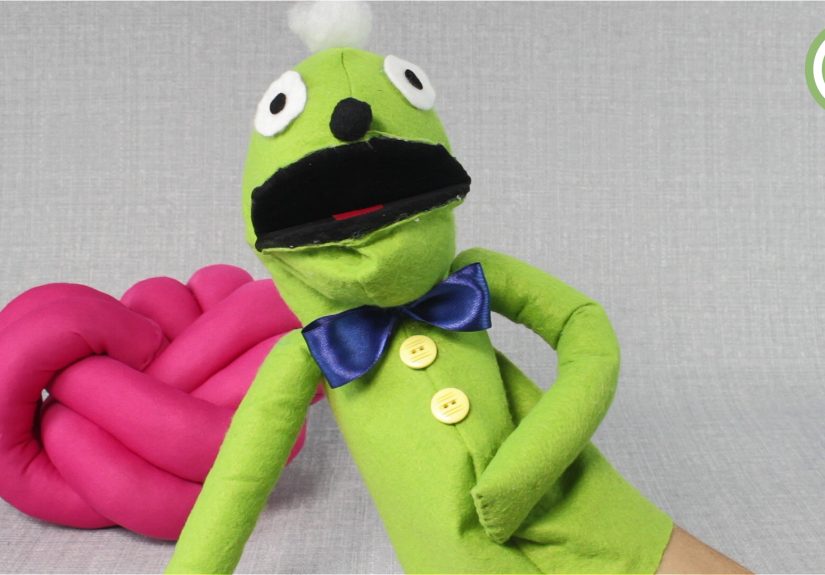
Imagine a puppet named Wally Wobbleton. Wally has a lime-green fleece head, orange eyelids, a huge smile, shaggy blue hair, and a nervous habit of giving terrible advice. His shape is basically a soft oval with a wide mouth. That is a buildable first puppet: memorable, simple, and goofy enough to survive mistakes.
Step 2: Make the Mouth Plate
The mouth plate is the heart of a Muppet style puppet. It controls expression, speech, timing, and attitude. A weak mouth plate makes the puppet look floppy. A good mouth plate gives the puppet crisp movement and a clear “talking” shape.
Start by drawing an oval or rounded rectangle on paper. The shape should be about the size of your palm when your hand is slightly open. Fold the pattern in half to keep it symmetrical, then cut it out. Trace the shape onto flexible plastic, stiff craft foam, thin foam board, or gasket rubber. Cut two matching pieces: one for the top jaw and one for the bottom jaw.
How to Build the Hinge
Place the two mouth plate halves together with a small gap between them. Use strong tape, fabric, or a flexible strip of material to create a hinge. The hinge should bend easily without ripping. Cover the inside of the mouth with black felt, red felt, velvet, or fleece. Add a tongue from pink felt if your puppet looks like it has something important to say, which it probably does.
Add Finger Grips
For better control, glue elastic loops or foam grips to the back of the mouth plate. Your thumb will control the lower jaw, while your fingers control the upper jaw. Test the movement before attaching the head. Open and close the mouth while saying a few nonsense words. If the puppet can say “banana bureaucracy” convincingly, you are on the right track.
Step 3: Build the Foam Head
Foam gives your puppet its soft shape. You can create a head using a simple foam pattern, or you can build it freehand by shaping and gluing pieces together. For beginners, a basic two-piece head pattern works well. Draw a side profile of the head, cut two matching foam pieces, and glue them along the top and back edges, leaving the mouth area open.
Contact cement is commonly used for foam because it creates strong seams. Apply a thin coat to both edges, let it become tacky, then press the pieces together carefully. Hot glue can work for quick builds, but it may create stiff lumps if overused. Use less glue than your inner chaos goblin recommends.
Attach the Foam to the Mouth Plate
Place the mouth plate inside the head opening. Mark the center points of the upper jaw, lower jaw, and side corners. These marks matter because they keep the face from twisting into a mysterious potato expression. Glue the foam edges to the mouth plate a little at a time. The upper foam connects to the upper plate, and the lower foam connects to the lower plate.
Shape the Face
Once the head is attached, trim small areas of foam to refine the cheeks, brow, and jaw. Add foam pieces for a snout, brow ridge, chin, or nose base. Keep checking the puppet in a mirror or phone camera. Puppets often look different on camera than they do on the table, and the camera is brutally honest, like a tiny director with no snacks.
Step 4: Cover the Head with Fleece
The fleece covering turns your foam construction into a finished character. Professional builders often use nylon puppet fleece because it stretches well and hides seams beautifully. Beginners can use anti-pill fleece, polar fleece, or short faux fur. Choose fabric with a bit of stretch, especially around the mouth and cheeks.
To make a fabric pattern, wrap the foam head in plastic wrap, then cover it with painter’s tape. Draw seam lines down the back and around the mouth. Cut the tape shell off, flatten the pieces, and trace them onto paper. Add seam allowance before cutting your fleece. This method helps the fabric fit the foam head instead of wrestling it like a tiny upholstered alligator.
Sew and Fit the Skin
Sew the fleece pieces with the right sides together. Turn the skin right-side out and slide it over the foam head. Align the mouth opening carefully. Glue or hand-stitch the fleece around the mouth edge, tucking raw edges neatly inside. If you want a cleaner professional look, use a ladder stitch to close visible seams by hand.
Hide Seams Like a Pro
Brush the fleece fibers gently over seams. If the fabric has nap, make sure all pieces run in the same direction. For fur puppets, trim the fur from the seam allowance before sewing to reduce bulky ridges. A smooth seam can make the difference between “professional puppet” and “sock that got promoted too quickly.”
Step 5: Add Eyes, Nose, Hair, and Personality
The eyes are the soul of the puppet. Their placement controls the character’s focus, mood, age, and intelligence level. Put the eyes slightly close together for a friendly, focused look. Place them wider apart for a sillier or more innocent expression. Tilt pupils inward slightly so the puppet appears to look at the audience instead of admiring the ceiling.
You can make eyes from ping-pong balls, plastic spoons, foam balls, wooden beads, or purchased puppet eyes. Add pupils with adhesive vinyl, felt circles, paint, or black buttons. Test eye placement with temporary tape before gluing. Move the eyes around and watch the character change. One millimeter can turn “adorable” into “knows where the bodies are buried.”
Build the Nose and Features
A simple foam ball covered in fleece makes a great nose. Felt eyebrows, fleece eyelids, yarn hair, faux fur eyebrows, and foam ears can all add personality. Use contrast wisely. Big features read well on camera and stage. Tiny delicate details may disappear unless the puppet is filmed close-up.
Give the Puppet a Signature Detail
Every memorable puppet needs one strong visual hook. It might be one eyebrow, a wild hair tuft, a striped scarf, a tooth, glasses, freckles, or a crooked bow tie. This detail makes the puppet easier to remember and gives the performer something to play with emotionally.
Step 6: Create the Body, Arms, and Hands
The body can be as simple as a fabric tube or as shaped as a foam torso. For a basic hand puppet, sew a loose body sleeve that fits your forearm comfortably. Attach it to the bottom of the head. The sleeve should be long enough to hide your wrist when performing.
For arms, cut long fabric tubes, sew them, turn them right-side out, and lightly stuff them with polyfill or foam. Hands can be mitten-shaped, four-fingered, or simple rounded paddles. If you want the classic hand-and-rod puppet effect, attach thin rods to the wrists or hands. Rods allow the puppet to gesture, wave, point, shrug, and deliver Oscar-worthy disappointment.
Make It Comfortable to Perform
Comfort matters. If your puppet is too heavy, your arm will start negotiating retirement after five minutes. Keep the head light, balance the body, and make sure your hand can open and close the mouth naturally. The puppet should feel like an extension of your arm, not a craft project trying to defeat you.
Step 7: Test the Puppet on Camera
A puppet is not finished when it looks good on the table. It is finished when it performs well. Put your phone on a tripod or stack of books and record a short test. Make the puppet say hello, look left and right, react silently, and speak a few lines. Watch the footage without mercy but with kindness.
Check whether the mouth opens cleanly, the eyes focus toward the camera, and the body hides your hand. Notice whether the puppet bobs too much when speaking. Beginners often flap the mouth on every syllable. Instead, open the mouth mainly on strong sounds and keep the head alive with small movements.
Simple Performance Tips
- Keep the puppet’s eyes aimed at the audience or scene partner.
- Move the lower jaw more than the whole head when talking.
- Use stillness; a puppet that pauses can be funnier than one that wiggles constantly.
- Practice entrances and exits so the puppet appears alive before it speaks.
- Give the puppet a voice that matches its face, size, and attitude.
Common Mistakes to Avoid
The biggest beginner mistake is rushing the mouth. If the mouth plate is crooked, the entire puppet will look uncomfortable, as if it just read your browser history. Mark center lines, test the hinge, and glue slowly. Another common mistake is placing the eyes too high or too far apart. Eyes should support focus and expression, not wander into separate zip codes.
Too much glue is another problem. Heavy glue makes foam stiff and fabric lumpy. Use thin, even layers. Also avoid overbuilding the head. A giant foam skull may look impressive until you try to hold it above your head for a scene. Lightweight construction is your friend.
Finally, do not skip practice. Puppet building and puppeteering are separate skills. A simple puppet performed well will beat a fancy puppet performed like a damp grocery bag. Build the character, then learn how it breathes, listens, reacts, and moves.
Budget and Time Estimate
A beginner Muppet style puppet can cost around $25 to $75 if you use craft-store materials, recycled plastic, basic fleece, and homemade eyes. A more polished puppet using nylon puppet fleece, specialty eyes, quality foam, and professional adhesives may cost $100 or more. The build can take one weekend for a simple puppet or several weeks if you redesign, repaint, resew, and generally fall into the glorious puppet-making rabbit hole.
If this is your first build, start simple. Make one basic head, one mouth plate, one body, and one strong character feature. You will learn more from finishing a simple puppet than from planning a masterpiece that never escapes the sketchbook.
Experience Notes: What Actually Helps When Making a Muppet Style Puppet
The most useful experience in making a Muppet style puppet is learning to slow down at exactly the moments when your brain says, “Eh, good enough.” Puppet building rewards patience in sneaky ways. For example, when placing the mouth plate, it is tempting to glue the whole thing at once. Do not do that. Attach it gradually, starting at the center points and working toward the corners. This keeps the mouth balanced and prevents the dreaded diagonal smile, which makes even the happiest puppet look like it is hiding a tax problem.
Another lesson: temporary placement is your best friend. Before permanently gluing eyes, nose, eyebrows, ears, or hair, use pins, tape, or tiny dots of removable adhesive. Then take photos from the front, side, and slightly above. Puppets change dramatically depending on camera angle. A nose that looks cute on the table may block the mouth on camera. Eyes that look centered in your hand may stare into the void once the puppet is upright. Testing saves heartbreak and, more importantly, saves fleece.
Fleece direction matters more than many beginners expect. If one piece of fleece has the nap running upward and another runs downward, the puppet may look like it has accidental weather patterns. Before cutting, rub the fabric and notice which direction looks smooth. Mark the back of each pattern piece with arrows. This tiny habit makes the finished puppet look more intentional.
Also, build for performance, not just display. A puppet can look adorable sitting on a desk and still be awkward to operate. Put your hand inside often during construction. Check whether your fingers reach the mouth grips comfortably. Make sure the neck opening is not too tight. Test the weight before adding hair, horns, hats, glasses, and a full emotional support wardrobe. Every extra decoration adds personality, but it also adds weight.
One of the best creative tricks is to give the puppet a flaw on purpose. Maybe one eyebrow is higher. Maybe the hair leans left. Maybe the teeth are uneven. Perfect symmetry can look lifeless, while a small irregularity creates charm. Many handmade puppets become more lovable because they are not factory-perfect. They look like characters with history, opinions, and probably a favorite sandwich.
Finally, do a voice test before declaring the puppet finished. The face may suggest a voice you did not expect. A tiny puppet might have a huge opera voice. A giant monster might whisper like a shy accountant. Once you find the voice, you may want to adjust the eyebrows, eyelids, or mouth color to match the personality. The best puppet builds are conversations between the maker and the character. Sometimes the puppet wins. Honestly, let it.
Conclusion
Learning how to make a Muppet style puppet is part craft project, part character design, and part comedy experiment. Start with a strong idea, build a flexible mouth plate, shape a lightweight foam head, cover it with fleece, and add features that clearly express personality. Keep the design simple enough to finish, but bold enough to perform.
The real magic happens after the glue dries. When you put your hand inside the puppet, aim its eyes, open the mouth, and give it a voice, the pile of foam and fabric becomes a character. That moment is why puppet makers keep building. One puppet leads to another, and before long, your workspace is full of eyes, fleece scraps, and small handmade creatures silently demanding better lighting.





