Table of Contents >> Show >> Hide
- Why a Cracked Exhaust Manifold Matters
- Common Signs You May Have a Cracked Exhaust Manifold
- How to Fix a Crack in an Exhaust Manifold: 12 Steps
- Step 1: Confirm the symptoms before blaming the manifold
- Step 2: Treat any cabin fumes as urgent
- Step 3: Only inspect after the engine is fully cool
- Step 4: Scan for trouble codes
- Step 5: Figure out whether the problem is the manifold, the gasket, or the hardware
- Step 6: Check vehicle-specific repair information before any major work
- Step 7: Decide whether a temporary patch is even worth considering
- Step 8: Plan for replacement as the primary long-term fix
- Step 9: Replace related parts instead of reusing tired ones
- Step 10: Pay attention to gasket design and sealing surfaces
- Step 11: Verify the repair before calling it done
- Step 12: Prevent the next crack
- Patch, Weld, or Replace?
- Mistakes That Make Exhaust Manifold Repairs Worse
- When You Should Hand It Off to a Professional
- Experience-Based Lessons Drivers Learn the Hard Way
- Final Thoughts
- SEO Tags
If your engine suddenly sounds like it swallowed a coffee can full of angry bees, there is a decent chance the exhaust manifold is trying to get your attention. A cracked exhaust manifold is one of those problems that starts as a “we should probably look at that” issue and can turn into a noisy, smelly, expensive mess if you keep driving and pretending the radio is a diagnostic tool.
The exhaust manifold has a hard job. It collects extremely hot exhaust gases from the engine and routes them into the rest of the exhaust system. Because it deals with repeated heat cycles, vibration, rust, and old-fashioned wear, it can crack, warp, or leak around the gasket. When that happens, you may hear ticking on cold starts, smell exhaust fumes, notice black soot near the manifold, or feel that your vehicle has lost some pep. In some cases, the check engine light joins the party too.
Here is the honest truth: the safest and most reliable fix is usually a correct diagnosis followed by a proper repair or replacement using the right gasket, hardware, and torque specs for your exact vehicle. That is especially true because manifold work happens around very hot components, tight spaces, and harmful fumes. So while this guide uses the phrase “fix a crack,” the smarter goal is to handle the problem the right way rather than gamble on a shortcut that lasts about as long as a snowflake on a muffler.
Why a Cracked Exhaust Manifold Matters
A small crack can seem minor at first. The vehicle still starts. It still moves. It still gets you to school, work, or the drive-thru. But exhaust leaks near the engine can create several problems at once. First, escaping gases are loud, hot, and unpleasant. Second, the leak can throw off oxygen sensor readings and reduce fuel efficiency or performance. Third, if fumes make their way toward the cabin, you are dealing with a safety issue, not just a repair bill.
That is why a cracked manifold should never be treated like a cosmetic defect. It is a drivability problem, an emissions problem, and potentially a health problem wrapped into one rusty, heat-cycled piece of metal.
Common Signs You May Have a Cracked Exhaust Manifold
1. Ticking or tapping on startup
This is the classic clue. Many leaks are loudest when the engine is cold and may quiet down a bit as the metal expands with heat. If your engine sounds like it is making a tiny typewriter noise for the first few minutes, the manifold or its gasket should be on your suspect list.
2. Exhaust smell under the hood or in the cabin
You should not be smelling exhaust where people breathe. If fumes show up near the firewall, hood, or vents, stop treating the symptom like “just an old car thing.” It is not charming. It is a warning.
3. Visible soot or a hairline crack
Escaping exhaust often leaves black soot around the leak point. Sometimes the crack itself is visible. Sometimes the manifold looks fine but the gasket has failed, which creates very similar symptoms.
4. Less power and worse fuel economy
Modern engines are sensitive to exhaust flow and sensor data. A leak can affect backpressure, skew readings, and make the engine work less efficiently. That can show up as sluggish acceleration or more frequent fuel stops.
5. Heat damage nearby
Because the manifold sits near wires, shields, plastic parts, and hoses, escaping hot gas can cook things that were not meant to be grilled. If you see melting, discoloration, or burned-looking nearby components, act fast.
How to Fix a Crack in an Exhaust Manifold: 12 Steps
The 12 steps below are a safety-first, repair-planning approach designed for real-world vehicle owners. They focus on diagnosis, decision-making, and proper repair direction rather than risky improvisation.
Step 1: Confirm the symptoms before blaming the manifold
Not every exhaust noise means the manifold itself is cracked. A failed manifold gasket, loose heat shield, broken stud, leaking flange, or cracked front pipe can mimic the same sounds. Start by noting when the noise happens, whether fumes are present, and whether the check engine light is on.
Step 2: Treat any cabin fumes as urgent
If you smell exhaust inside the vehicle, move this repair to the top of your list. Do not treat it like something to “get around to next month.” Exhaust fumes near occupants are a safety concern, especially in traffic, while idling, or during short trips with windows up.
Step 3: Only inspect after the engine is fully cool
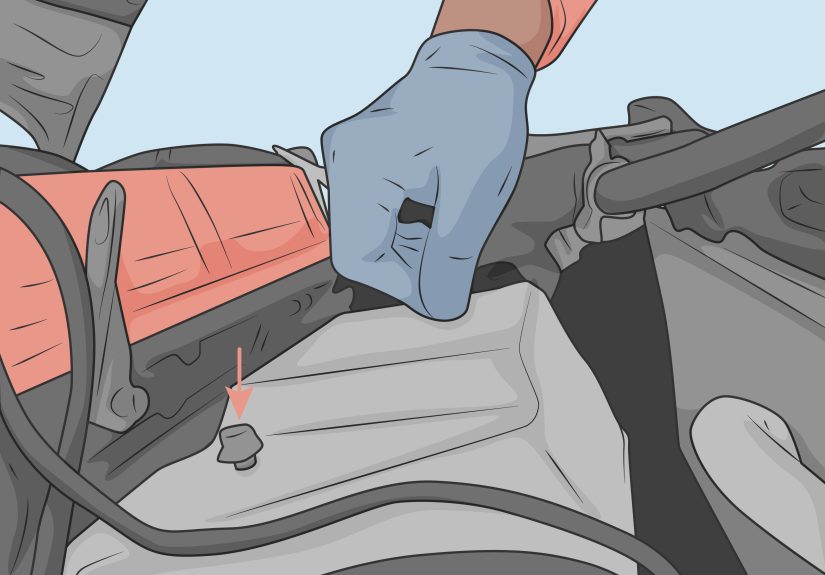
The manifold gets brutally hot. A safe inspection starts with a cold engine and plenty of light. Look for soot streaks, broken studs, obvious warping, or a visible fracture. If the area is cramped or hidden behind heat shields, that is a clue the job may require professional access and model-specific procedures.
Step 4: Scan for trouble codes
An exhaust manifold crack can coincide with oxygen sensor or mixture-related issues. A basic scan helps you avoid guessing. Trouble codes do not automatically prove the manifold is cracked, but they can support the diagnosis and reveal how long the leak may have been affecting performance.
Step 5: Figure out whether the problem is the manifold, the gasket, or the hardware
This matters more than many drivers realize. A failed gasket can often sound like a cracked manifold. A warped flange or broken fastener can create the same leak. Replacing the wrong part wastes money and leaves the noise exactly where it started: under your hood, mocking you.
Step 6: Check vehicle-specific repair information before any major work
Exhaust manifold jobs are not one-size-fits-all. Some engines have limited access, common broken-bolt issues, heat shields that must come off in sequence, or torque patterns that matter a great deal. Before repair begins, verify the parts, gasket style, fasteners, and procedure for your exact year, make, engine, and trim.
Step 7: Decide whether a temporary patch is even worth considering
Temporary exhaust repair products exist, and some are marketed for cracks or small gaps in exhaust manifolds. But let us keep it real: a temporary patch is just that. It may buy a little time on a minor surface issue, but it is not the same thing as restoring structural integrity to a manifold that sees huge heat swings every time you drive. If the crack is significant, the manifold is warped, or hardware is failing, replacement is usually the grown-up answer.
Step 8: Plan for replacement as the primary long-term fix
In many cases, replacement is the most reliable solution. A fresh manifold or properly repaired original unit, paired with the correct gasket and hardware, gives you the best chance of solving the noise, restoring sealing, and preventing repeat leaks. When a source says replacement is the easiest and most effective route, that usually translates to one beautiful concept: do it once, not three times.
Step 9: Replace related parts instead of reusing tired ones
A solid repair often includes more than the manifold alone. Depending on the vehicle, that may mean a new manifold gasket, flange gasket, fresh studs or bolts, and any related seals that were disturbed during disassembly. Reusing rusty hardware is a classic way to save twelve dollars and create two hundred dollars of regret.
Step 10: Pay attention to gasket design and sealing surfaces
Exhaust gaskets live in a brutal environment. They need clean mating surfaces and the correct orientation. Some designs have a metallic side that faces a specific direction, and modern replacements are engineered to deal with heat, motion, and less-than-perfect surfaces. A manifold can only seal as well as the surfaces and parts allow.
Step 11: Verify the repair before calling it done
Once the repair is complete, the vehicle should be checked for noise, smell, performance, and codes. A proper post-repair verification matters because a manifold leak that seems gone at idle can still show up under load, during a cold start, or after a few heat cycles.
Step 12: Prevent the next crack
After the fix, prevention becomes the new job. Address oil leaks that drip onto hot exhaust parts. Replace missing heat shields or failed mounts. Avoid ignoring misfires and fuel system issues that increase exhaust heat. And if your vehicle platform is known for broken manifold bolts or repeat failures, use the correct upgraded hardware and keep an ear out for the first sign of trouble.
Patch, Weld, or Replace?
Temporary patch
A patch may be useful in a narrow set of circumstances: a very small crack, limited use, and a clear plan for permanent repair soon after. It is not a magic cure for a warped manifold, missing hardware, or a leak that is already affecting drivability in a big way.
Welding
Welding can work on some manifolds, especially cast iron units, but success depends on material, crack location, prep, and technique. It is not beginner-friendly, and a poor weld can fail once the part returns to full operating temperature. In many real-world cases, welding makes sense only when done by a shop that understands exhaust castings and can inspect the manifold for warping too.
Replacement
Replacement is often the best long-term option because it addresses structural damage directly. It also gives you a clean chance to renew the gasket and hardware, inspect nearby components, and stop the cycle of recurring leaks.
Mistakes That Make Exhaust Manifold Repairs Worse
- Ignoring the crack for too long. What starts as a tick can become sensor issues, melted nearby parts, or a cabin-fume problem.
- Replacing parts without confirming the leak source. Heat shields, pipes, flanges, and gaskets can imitate manifold failure.
- Reusing stretched, corroded, or broken hardware. The seal is only as good as the clamping force holding it together.
- Skipping the gasket details. Wrong gasket choice or wrong orientation can create an instant comeback repair.
- Trusting a shortcut more than a diagnosis. A tube of repair compound is not a substitute for understanding what actually failed.
When You Should Hand It Off to a Professional
Some jobs are technically possible at home but still not wise for most drivers. Exhaust manifold repair belongs in that category more often than people want to admit. Professional help is the better move when:
- the leak is near the cabin and fumes are noticeable inside the vehicle,
- you suspect broken studs or seized fasteners,
- the manifold is hard to access,
- the vehicle has turbo plumbing, shields, or components crowded around the repair area,
- you are considering welding but do not have experience with high-heat cast components,
- or the vehicle has repeat manifold failures that may involve design quirks or service bulletins.
There is no shame in paying for the right repair. The shame is doing the same job twice because the first fix was powered by optimism and a socket set with a missing 13 mm.
Experience-Based Lessons Drivers Learn the Hard Way
One of the most common experiences drivers report with a cracked exhaust manifold is how easy it is to dismiss the first symptom. The vehicle starts with a faint tick, maybe only on cold mornings, and the owner assumes it is an old-engine noise, a loose shield, or some harmless quirk. A week later the sound is louder. A few days after that, the cabin gets a whiff of exhaust at stoplights. Then the check engine light appears, fuel economy drops, and the “small noise” becomes a full repair decision. In other words, exhaust manifold problems rarely become cheaper because someone waited for extra drama.
Another real-world pattern is that many people guess wrong about the source. They buy an exhaust patch kit, apply it to the area they can see, and feel optimistic for about a weekend. Then the noise comes back because the real issue was a failed gasket, a warped flange, or a broken stud hiding behind a shield. This is why experienced technicians spend so much effort confirming the leak source first. Correct diagnosis is not the boring part of the repair. It is the part that saves money.
Drivers also learn that manifold leaks do not always behave the same way hot and cold. Cold-start ticking that fades once the engine warms up is a classic pattern because metal expands with heat. That little detail can fool people into thinking the problem “fixed itself.” It did not. It just got sneakier. The leak may still be there, only quieter, while the underlying damage continues.
Another lesson comes from vehicles with rusty hardware. On paper, replacing a manifold sounds straightforward. In practice, old bolts and studs often turn a simple plan into a frustrating afternoon. That is why experienced repair shops rarely treat manifold replacement like a quick bolt-on job. They expect corrosion, inspect fasteners closely, and plan for related parts instead of pretending every old bolt will leave politely.
There is also a strong pattern with temporary repairs. People love the idea of a cheap, fast fix, especially when the vehicle still drives. And sometimes a temporary seal really can reduce noise or buy time. But long-term satisfaction usually comes from proper replacement, fresh gaskets, and correct hardware. That is the repair people stop thinking about. The shortcut repair, on the other hand, tends to become a sequel.
Finally, drivers who handle this problem best usually do one thing right: they respect the safety side of the issue. They do not shrug off exhaust smell in the cabin. They do not run the engine in enclosed spaces for extended troubleshooting. They do not assume “a little leak” is harmless. That mindset matters. A cracked exhaust manifold is not just about noise. It is about heat, fumes, performance, and the long-term health of the entire exhaust system. The smartest experience-based takeaway is simple: diagnose early, repair correctly, and never let a ticking manifold convince you it is just asking for attention. Sometimes it is asking for action.
Final Thoughts
If you want the shortest possible version, here it is: a cracked exhaust manifold is not a “wait and see” issue. Confirm the symptoms, take fumes seriously, identify whether the manifold, gasket, or hardware has failed, and aim for a proper long-term repair instead of a hopeful shortcut. The job may begin with a weird noise, but the right response is quiet confidence, not loud denial.
Done correctly, the fix restores a quieter engine, better sealing, safer operation, and one less mystery smell in your life. And really, that is the kind of peace every car owner deserves.





