Table of Contents >> Show >> Hide
- Before You Start: Know What You’re Working With
- Tools & Supplies Checklist (So You Don’t End Up Using a Spoon)
- Step-by-Step: How to Change a Motorcycle Tire
- Step 1: Prep your workspace and the bike
- Step 2: Remove the wheel
- Step 3: Deflate completely (and remove the valve core)
- Step 4: Break the bead (aka “the part that convinces people to pay a shop”)
- Step 5: Remove the tire from the rim
- Step 6: Inspect the wheel, rim strip, and valve setup
- Step 7: Mount the new tire (orientation first!)
- Step 8: Seat the bead and inflate safely
- Step 9: Balance the wheel (yes, you really should)
- Step 10: Reinstall the wheel (slow downthis is where mistakes hide)
- Troubleshooting: The Stuff That Usually Goes Wrong
- Cost, Time, and When to Let a Shop Handle It
- After the Tire Change: Don’t Skip These Final Checks
- What It’s Like in Real Life: of Tire-Changing Experience
- Conclusion
Changing your own motorcycle tire is one of those skills that feels like wizardry the first time you do itand
feels like “why did I ever pay for this?” by the third time. It’s also a job that can go from satisfying to
swear-jar-filling in about 12 seconds if you skip the basics (or if your tire decides it’s auditioning for a role
as an uncooperative rubber donut).
This guide walks you through a safe, practical, step-by-step motorcycle tire changecovering tubeless and tube-type
setups, bead breaking, mounting, bead seating, balancing, and reinstallation. It’s written for real humans, not
tire-changing robots with perfect grip strength and zero feelings.
Before You Start: Know What You’re Working With
Tube-type vs. tubeless (this changes everything)
The fastest way to make a motorcycle tire change miserable is treating a tube-type wheel like it’s tubelessor
vice versa.
- Tubeless tires typically run on cast wheels (and some sealed-spoke adventure wheels). The tire bead seals directly to the rim.
- Tube-type tires use an inner tube to hold air (common on traditional spoked wheels). Pinching the tube is the #1 rookie mistake.
Front vs. rear: similar job, different headaches
Rear wheels often add complexity: chain adjustment, cush drive, sprocket carrier, and sometimes limited clearance
around brakes or fenders. Front wheels can include ABS rings/sensors and tight caliper clearances. Both require
correct re-torquing and alignment.
Directional arrows and “why does the tread look backwards?”
Many motorcycle tires have a rotation arrow. Always mount according to the arrow, even if the tread pattern looks
“reversed” on the front compared to the rear. That’s normalfront and rear tires handle forces differently.
Tools & Supplies Checklist (So You Don’t End Up Using a Spoon)
You can change a tire with minimal tools, but the right tools turn it from “battle scene” into “Saturday project.”
Must-haves
- Service manual (or at least torque specs and wheel removal steps for your model)
- Rear/front stand, center stand, or safe lifting method
- Correct sockets/hex tools for axle nuts, pinch bolts, caliper bolts
- Valve core tool and a reliable tire pressure gauge
- Bead breaker (or bead-breaking method; more on that soon)
- Tire irons/spoons (2–3 is ideal) and rim protectors
- Tire mounting lube (or a safe substitute like properly mixed soapy water)
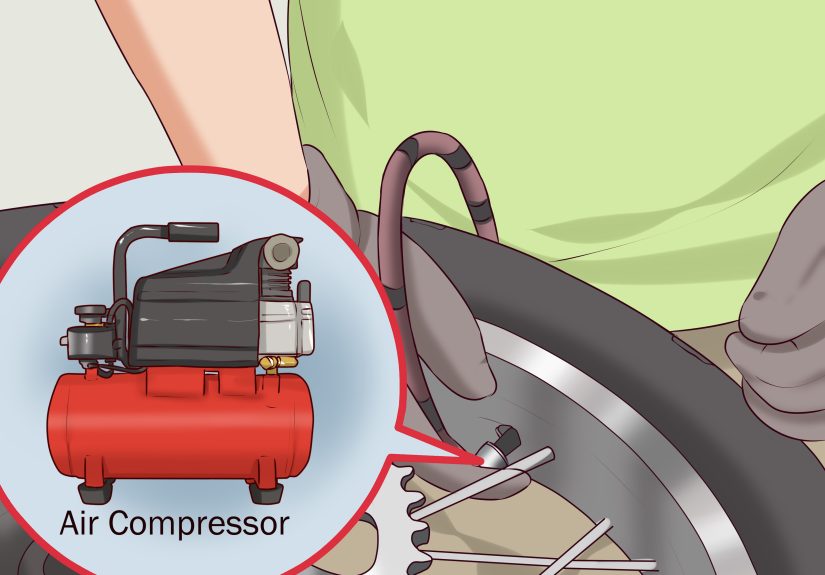
- Air source (compressor preferred for tubeless bead seating)
Strongly recommended
- New valve stem (tubeless) and/or new tube (tube-type)
- Balancing setup: static balancer + stick-on weights
- Torque wrench (because “tight enough” is not a unit of measurement)
- Gloves and eye protection
Nice-to-have (a.k.a. the “I like my hands” category)
- Bead buddy (holds the bead down in the drop center while you lever the other side)
- Tire changing stand or wheel vise
- Warmth (sunlight or a warm room to make stiff tires more flexible)
Step-by-Step: How to Change a Motorcycle Tire
Step 1: Prep your workspace and the bike
- Work on a flat, stable surface with good lighting.
- Lay down cardboard or a mat to protect the wheel and brake discs.
- Before lifting the bike, crack loose the axle nut and any pinch bolts (don’t remove them yet).
- Lift/support the bike securely (center stand, paddock stand, jack points per manual).
Pro move: Take a quick photo of wheel spacers, axle orientation, and any ABS ring placement before you pull anything apart.
Future-you will thank you. Loudly.
Step 2: Remove the wheel
Exact steps vary by bike, but the rhythm is usually:
- Remove the brake caliper(s) if required for clearance (support themdon’t let them hang by the brake line).
- Loosen pinch bolts (if your fork or swingarm uses them).
- Slide the axle out while supporting the wheel.
- Collect spacers in order and set them aside like they’re rare coins.
Step 3: Deflate completely (and remove the valve core)
Remove the valve cap, then remove the valve core to fully deflate the tire. This also helps later when seating
the bead because it allows faster airflow.
Step 4: Break the bead (aka “the part that convinces people to pay a shop”)
The bead is the tire edge that locks into the rim. Breaking it means separating that bead from the rim’s bead seat.
Common bead-breaking options
- Dedicated bead breaker tool: Fastest and most controlled.
- Bead-breaking tire irons: Some lever sets are designed to help pop the bead.
- Improvised methods: Possible, but riskier for rims and rotors. If you improvise, protect the wheel and go slowly.
Work around the tire in small sections until the bead is fully loose on one side, then repeat on the other.
Use lube along the bead to reduce friction.
Step 5: Remove the tire from the rim
Golden rule: keep the opposite side in the drop center
Every motorcycle rim has a “drop center” channel. If you keep the bead pushed into that channel on the side opposite
where you’re levering, you create slack. If you don’t, you’ll feel like the tire is made of reinforced concrete.
Removal process (works for most tires)
- Lubricate the bead and rim edge.
- Start near the valve stem (or follow your wheel’s best access point) and insert rim protectors.
- Use two irons: one to lift a small section over the rim, the second to continue a few inches away.
- Take small bites (1–2 inches). Big bites = bent rims, pinched tubes, and regret.
- Once the first bead is off, flip and remove the second bead.
If your wheel uses a tube
- After the first bead is off, gently pull the tube out.
- Inspect it. If you’re replacing the tire, it’s smart to replace the tube tooespecially if it’s old, patched repeatedly, or looks tired.
Step 6: Inspect the wheel, rim strip, and valve setup
This is where you prevent future problems. Check:
- Rim condition: dents, cracks, burrs, corrosion
- Bead seats: clean and smooth (dirt can prevent sealing)
- Rim strip (tube-type spoked wheels): if torn or shifted, replace it
- Valve stem: if tubeless, replace the stem if it’s old or questionable
Step 7: Mount the new tire (orientation first!)
Check direction and markings
- Find the rotation arrow and match it to the direction the wheel rotates when moving forward.
- If your tire has a balance dot (often indicating the light spot), many manufacturers advise aligning it with the valve stem to reduce balance weights.
Mounting the first bead
- Lubricate both beads and the rim’s bead seats.
- Set the wheel flat and start pushing the first bead over the rim by hand.
- Use irons only if needed, and again: keep the opposite side down in the drop center.
Tube-type: install the tube (without pinching it)
- Lightly inflate the new tube so it holds shape (not “balloon,” more like “soft taco”).
- Insert the tube into the tire and route the valve stem through the rim hole.
- Thread the valve nut on a couple turnsjust enough to keep it in place.
Mounting the second bead
- Start near the valve stem (common best practice) and work around.
- Use small bites with irons, staying mindful of the tube (if you have one).
- Keep the bead opposite your irons pressed into the drop center the entire time.
Step 8: Seat the bead and inflate safely
Tubeless bead seating tips
- Remove the valve core for faster airflow.
- Use adequate lube and ensure the tire is centered on the rim.
- Inflate until the bead seats (often you’ll hear distinct “pops”).
- Do not exceed the maximum seating or sidewall pressure guidancefollow your tire and motorcycle manufacturer recommendations.
Tube-type bead seating tips
- Inflate gradually and check that the tire’s bead line (witness line) is even around the rim on both sides.
- Deflate and re-inflate once if needed to help the tube settle naturally inside the tire.
Check for leaks
Spray soapy water around the bead and valve area. Bubbles mean air is escaping. Fix leaks now, not halfway through
a ride while mentally composing your “this is fine” meme.
Step 9: Balance the wheel (yes, you really should)
An unbalanced wheel can cause vibration, uneven wear, and handling issuesespecially at highway speeds. A simple
static balance is enough for most riders doing DIY tire changes.
- Place the wheel on a balance stand.
- Let it rotate freely; the heavy spot will settle at the bottom.
- Add small stick-on weights opposite the heavy spot (top) until the wheel no longer consistently settles in one position.
Tip: Clean the rim with alcohol before sticking weights so they don’t fly off the first time you hit a pothole.
Step 10: Reinstall the wheel (slow downthis is where mistakes hide)
Reinstallation is the reverse of removal, but with more responsibility:
- Reinstall spacers in the correct order.
- Ensure the brake rotor sits correctly between pads.
- Torque axle nut and pinch bolts to spec (service manual).
- Adjust chain tension/alignment if rear wheel.
- If you removed calipers, torque them properly and pump the brake lever until firm before riding.
Troubleshooting: The Stuff That Usually Goes Wrong
“The bead won’t seat.”
- Remove valve core for more airflow.
- Add more lube and ensure both beads are positioned evenly.
- Push the tire sidewalls outward to help form an initial seal (some people use a strap carefully; avoid risky hacks).
- If you still can’t seat it, a shop with a high-flow air system can do it quicklythis is a common stopping point for DIY.
“I pinched the tube.”
Welcome to the club. Patch or replace the tube, then re-mount using smaller iron bites and keeping the tube
slightly inflated so it can’t fold into danger zones.
“The tire direction seems wrong.”
Trust the rotation arrow on the tire. Some front tires have tread grooves that look “backwards” compared to the rear.
That doesn’t mean it’s installed wrong.
“The wheel wobbles or vibrates after install.”
- Re-check axle torque and pinch bolts.
- Confirm wheel spacers are correct and seated.
- Balance the wheel again (or at all).
- Inspect bead seating lineuneven bead seating can mimic balance problems.
Cost, Time, and When to Let a Shop Handle It
DIY can save money long-termespecially if you ride a lot and burn through tires. But the first tire change is
rarely “quick.” Plan a relaxed afternoon, not a rushed 40-minute window before dinner.
Consider using a shop if:
- You lack a safe way to lift the bike and support it securely.
- You can’t seat a tubeless bead with your air setup.
- You’re dealing with complex hardware (tight clearances, fragile sensors, unfamiliar axle systems).
- You’d rather spend your Saturday riding than negotiating with rubber.
After the Tire Change: Don’t Skip These Final Checks
- Set cold tire pressures to your motorcycle manufacturer’s recommendations (adjust for load/passenger as needed).
- Re-check pressure after 24 hours (and after your first ride).
- Scrub in new tires gentlynew rubber can be slick until it’s heat-cycled and scuffed.
- Inspect for leaks, bead seating, and any odd noises or rubbing.
What It’s Like in Real Life: of Tire-Changing Experience
The first time you change a motorcycle tire, you learn two important truths. First: motorcycles are masterpieces
of engineering. Second: tires are petty, vindictive circles of rubber that take personal offense to your confidence.
My “welcome to DIY tires” moment happened on a well-used dual-sport wheel. I had the tire irons, a valve core tool,
and the unstoppable optimism of someone who has watched exactly one video and thinks that’s the same as experience.
The wheel came off smoothly, which felt like the universe giving me a thumbs-up. Then I met the bead.
Breaking the bead was like trying to convince a jar lid to open using motivational quotes. I pushed, I pried, I
repositioned, I questioned my life choices. When it finally popped free, it wasn’t a “nice” pop. It was a loud,
triumphant sound that made me look around like, “Did anyone see that? Because I would like credit.” That’s when the
next challenge arrived: actually removing the tire without turning the rim into modern art.
Here’s the real lesson most guides mention, but your muscles won’t understand until they feel it: the drop center
is everything. The first few tries, I kept levering harder and harder, convinced the tire was just “tight.”
It wasn’t tight. I was wrong. Once I started deliberately pushing the bead opposite my irons down into the drop
center, the tire suddenly acted like a normal object governed by physics instead of pure spite. It was the
difference between wrestling a bear and folding a stubborn lawn chair.
The tube installation was my next humbling moment. I did the classic move: I got impatient on the second bead,
took a bigger bite with the iron, and created a pinch flat so clean it should’ve come with a certificate.
The leak showed up immediatelytiny bubbles around the valve area during a soapy water check. Annoying? Yes.
Valuable? Absolutely. It forced me to slow down, take smaller bites, keep the tube slightly inflated, and
pay attention to where the iron’s tip was going. The second attempt took longer, but it was calmer. That calm is
the real skill you’re building.
By the time I’d done a few tire changes, I had a routine: warm the tire so it flexes, lay everything out in order,
lube the bead like it’s going on a slip-n-slide, and never forget to check the rotation arrow before you do the
“final victory inflate.” I also learned to treat balancing like flossing: it’s not glamorous, but skipping it
eventually makes something unpleasant happen. The payoff is real, though. When you roll out on fresh rubber that
you mounted yourselfand the bike tracks straight, the wheel spins smooth, and nothing leaksyou get that quiet,
satisfied feeling of “Okay. I actually know how my motorcycle works.” That’s worth a little sweat and a few new
words added to your vocabulary.
Conclusion
If you take one thing from this guide, let it be this: changing a motorcycle tire is less about brute strength and
more about techniqueespecially keeping the bead in the drop center, using proper lubrication, mounting in the
correct rotation direction, and finishing with bead seating checks and balancing.
Start slow, prioritize safety, and don’t hesitate to use a shop for the parts that require specialized equipment.
Do it a couple times, and you’ll go from “I hope this works” to “hand me the irons” faster than you think.




