Table of Contents >> Show >> Hide
- What Makes a Great Obstacle Course (Spoiler: It’s Not Just Chaos)
- Safety First: The “Fun Insurance” Checklist
- Step 1: Pick Your Location (Backyard, Driveway, Park, Living Room)
- Step 2: Decide the Goal (Play, Fitness, Party Game, Team Challenge)
- Obstacle Menu: Mix-and-Match Stations That Actually Work
- Materials List (Budget Tiers)
- Step-by-Step: Build Your Course in One Afternoon
- Three Sample Layouts (Copy-Paste These Ideas)
- Make It Ridiculously Fun: Themes, Challenges, and “Rules Lawyers”
- Troubleshooting: Common Mistakes (and How to Fix Them)
- Conclusion
- Experience Section: What You Learn After You Build One (The Real-World Part)
An obstacle course is basically a choose-your-own-adventure story… except the plot twist is always
“my legs are tired.” The good news: you don’t need fancy equipment, a giant backyard, or a reality-TV
announcer yelling “WARPED WALL!” to build something fun. With a little planning, a few everyday
items, and a strong commitment to not putting LEGO bricks in the running lane, you can build a
DIY obstacle course that works for kids, teens, and adults.
This guide walks you through safety, layouts, obstacle ideas, and simple build stepsplus real-world
lessons at the end (because the course you plan and the course you actually run are rarely the same thing).
What Makes a Great Obstacle Course (Spoiler: It’s Not Just Chaos)
The best obstacle courses feel varied and “flowy.” That means you’re mixing movement types instead of
making everyone do 14 jumping stations in a row like it’s a kangaroo convention.
- Variety: balance + crawl + jump + carry + zigzag
- Progression: easy warm-up obstacles first, harder stuff later
- Clear rules: everyone knows what “counts” (and what counts as “creative interpretation”)
- Safety-first setup: stable, soft-ish landing areas, and no surprise ankle traps
Safety First: The “Fun Insurance” Checklist
If you want people to remember your obstacle course as “awesome” and not “the day I learned what an ice pack is,”
start here. This section matters even more if you’re building obstacles for mixed ages or doing timed runs.
1) Choose a safe surface and clear the zone
- Remove tripping hazards: cords, toys, garden tools, loose rugs, slick leaves, and anything your foot can “discover.”
- Avoid hard landing zones for jumping or climbing stations (concrete and packed dirt are not your friends).
- For higher-risk obstacles, use softer surfacing (mulch/wood chips, sand, rubber mulch) and keep it deep enough to stay protective as it compresses and shifts.
- Give each station “breathing room” so people aren’t launching into the next obstacle like a human pinball.
2) Warm up like you mean it
Especially for adults (and competitive kids), do 5–10 minutes of easy movement first: brisk walk, arm circles,
leg swings, light jogging in place. Save long static stretching for after the course when muscles are warm and
everybody’s telling heroic stories about that one cone they “totally didn’t clip.”
3) Hydration + weather rules
- In heat or humidity, schedule earlier or later in the day and add water breaks.
- Use light clothing, sunscreen, and shade breaks for outdoor courses.
- If it’s wet, skip slick-foot obstacles (balance beams and wet grass are a betrayal).
4) Make obstacles age-appropriate
- Kids: lower heights, softer materials, more “skills” (crawl, hop, balance) than “max power.”
- Adults: add intensity via time, repetitions, or carriesnot by building a questionable 8-foot tower.
- Supervise climbing stations and keep “one at a time” rules where collisions are likely.
Step 1: Pick Your Location (Backyard, Driveway, Park, Living Room)
Your space determines your design more than your ambition. A hallway can be a great “speed lane,” while a yard
is perfect for wider zigzags and throwing stations. If you’re using a public park, be respectful and avoid
blocking paths or creating hazards for other people.
Quick location tips
- Indoor: use tape lines, pillows, chairs, and crawling tunnels; protect corners and remove breakables.
- Outdoor: stakes and pool noodles work great; make sure the ground is even and not full of sneaky holes.
- Small space: build a “loop” with stations in a circle or rectangle so people keep moving.
Step 2: Decide the Goal (Play, Fitness, Party Game, Team Challenge)
A kids’ birthday course is about laughs and variety. An adult course might be a workout circuit. A family course
needs adjustable difficulty so a 7-year-old and a 37-year-old can both feel victorious.
Three popular formats
- Just-for-fun flow: no timer, just complete every station
- Timed run: fastest time wins (add penalties for missed steps)
- Circuit workout: rotate stations for rounds (great for adults)
Obstacle Menu: Mix-and-Match Stations That Actually Work
Think in “movement categories.” Aim for 6–12 stations depending on attention span, space, and how much
shouting you can tolerate.
Balance + coordination
- Tape line balance: walk heel-to-toe on a taped line (easy), then add a beanbag on the head (spicy).
- DIY balance beam: a low, wide board on stable supports (keep it close to the ground).
- Stepping stones: cardboard squares indoors; flat pavers or rubber spots outdoors.
Crawl + climb (kid-favorite, adult-humbling)
- Blanket tunnel: drape a blanket over chairs for a crawl-through tunnel.
- Box tunnel: large cardboard boxes taped together (remove staples; keep edges smooth).
- “Spiderweb” string maze: tape yarn or painter’s tape across a doorway or between two supports to crawl under/step through carefully.
Jump + hop (easy to build, easy to overdo)
- Hula hoop hops: lay hoops in a path; hop in each one (two feet), then try single-leg for advanced.
- Pool noodle hurdles: set noodles low and stable; raise difficulty with more hurdles, not more height.
- Hopscotch grid: tape or chalk squares; add rules (“only odd numbers,” “hands on head,” etc.).
Zigzag + agility (great for adults and teens)
- Cone weave: weave through cones or water bottles spaced a few steps apart.
- Agility ladder: a real ladder or tape squares on the ground; do in-in-out-out steps, side shuffles, or quick feet.
- Stop-and-go sprints: run to a marker, touch it, backpedal to start (keep it short if the surface is uneven).
Carry + control (the secret sauce for adult courses)
- Farmer carry: carry two moderately heavy items (water jugs, sandbags) to a line and back.
- Bucket relay: carry a bucket without spilling (add water for difficulty; add a towel for comedy).
- Balance carry: carry a light object on a tray while walking a line (kids love this; adults get oddly serious).
Throw + aim (low-impact, high-drama)
- Beanbag toss: hit targets in buckets at different distances.
- Ball roll: roll a ball to knock over plastic bottles (safer than throwing indoors).
- Ring toss: toss rings onto cones or bottles for points.
Materials List (Budget Tiers)
$0 “Use What You Have” kit
- Painter’s tape or masking tape
- Chairs, pillows, couch cushions, blankets
- Cardboard boxes
- Plastic cups/bottles (as cones)
- Backpack (for a light “carry” station)
Under $30 “Backyard Classic” kit
- Pool noodles
- Hula hoops or jump rope
- Sidewalk chalk
- A few cones (or bright cups)
- Beanbags or soft balls
Weekend upgrade (still reasonable)
- Agility ladder (or tape squares)
- Sandbags or water jugs for carries
- Low DIY balance beam materials (wide board, stable supports)
- Optional: outdoor hanging obstacles or slackline-style setups (installed correctly and used with supervision)
Step-by-Step: Build Your Course in One Afternoon
-
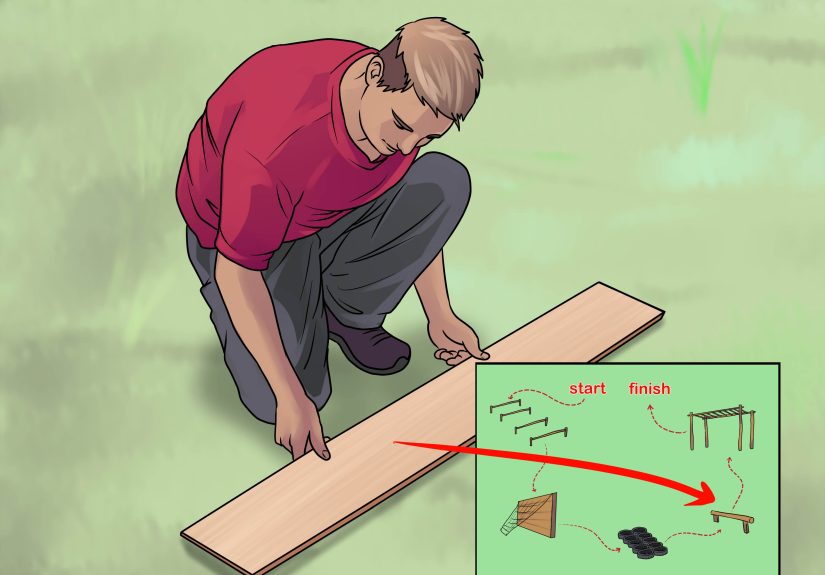
Sketch a simple map.
Pick a start and finish, then place stations in a loop or straight line. Leave space between stations for stopping and resetting. -
Start with 6–8 stations.
You can always add more. (You can also remove the station that makes everyone suddenly “need water.”) -
Alternate movement types.
Example: balance → crawl → hop → weave → throw → carry → sprint finish. -
Build low and stable first.
Especially for beams, hurdles, and anything elevated. Your goal is repeatable success, not a viral fail compilation. -
Test-run it yourself.
Walk it, jog it, then do one “real” run. Fix wobble, adjust spacing, and remove anything sketchy. -
Write rules on sticky notes or paper.
At each station, list exactly what to do: “Hop through all hoops,” “Weave without touching cones,” “Land the beanbag in the bucket.” -
Add difficulty knobs.
Have an “easy” and “challenge” option at each station so kids and adults can both play:
fewer hoops vs. more hoops, walk vs. run, lighter carry vs. heavier carry. -
Set your scoring.
Timed run? Add 5-second penalties for missed targets. Just-for-fun? Give points for effort, style, and dramatic sound effects.
Three Sample Layouts (Copy-Paste These Ideas)
1) Backyard course for kids (8 stations, 10–15 minutes)
- Start: run to the chalk line
- Hopscotch grid (tape or chalk)
- Pool noodle hurdles (low)
- Cardboard box tunnel crawl
- Cone weave (5–8 cones)
- Balance beam (low board) or tape-line balance
- Beanbag toss (3 throws to land 1 in)
- Finish: sprint to the “victory zone” and do a superhero pose
2) Indoor rainy-day course (apartment-friendly)
- Tape line balance down the hallway
- Pillow “stepping stones” across the living room
- Chair tunnel crawl (blanket over chairs)
- Tape ladder quick-feet steps
- Stuffed-animal toss into a laundry basket
- Bear crawl back to start
3) Adult fitness course (6 stations, 3 rounds)
- Agility ladder: 2 passes (in-in-out-out)
- Cone shuttle: touch-and-return x 4
- Farmer carry: 30–60 seconds
- Low hurdle steps or hops: 10–20 reps (scale to joints and skill)
- Plank station: 30–45 seconds
- Target toss: hit 2 targets before moving on
Want it harder? Reduce rest. Want it safer? Reduce jumping and increase carries, crawls, and controlled footwork.
Make It Ridiculously Fun: Themes, Challenges, and “Rules Lawyers”
- Ninja training: “quiet feet” balance, stealth crawl, rope pull (with safe setup)
- Spy mission: laser-string crawl, code word at each station, “retrieve the artifact” (a foam ball)
- Family Olympics: teams, relays, silly medals, and one judge who takes the job way too seriously
Easy scoring ideas
- Time + penalties: +5 seconds for a knocked cone, +10 for skipping a station
- Points: each station is worth 10 points; bonus points for clean runs
- Team relay: best combined time wins (great for parties)
Troubleshooting: Common Mistakes (and How to Fix Them)
-
Mistake: Too many stations.
Fix: Keep it tight. More than 10–12 stations usually turns into waiting in line. -
Mistake: Too much jumping, too soon.
Fix: Put jump stations after a warm-up obstacle, keep heights low, and offer step-over options. -
Mistake: Wobbly obstacles.
Fix: Stabilize or downgrade. “Sketchy” is not a difficulty level. -
Mistake: Confusing rules.
Fix: One sentence per station. If you need a paragraph, you built a legal contract, not an obstacle course. -
Mistake: The course is “one-size-fits-none.”
Fix: Add easy/challenge options so everyone can play without feeling stuck.
Conclusion
Building an obstacle course for kids or adults is really about designing a sequence of small wins.
Start with safety and stable setups, mix movement types, and add adjustable challenges so everyonefrom
tiny tornadoes to weekend warriorshas a good time. Keep it playful, keep it clear, and remember:
the goal is not perfection. The goal is movement, laughter, and at least one person yelling,
“RUN IT BACK, I CAN DO IT FASTER!”
Experience Section: What You Learn After You Build One (The Real-World Part)
Here’s what tends to happen the first time you build a DIY obstacle courseno matter how organized your plan is.
First, everyone shows up with wildly different expectations. Kids arrive like they’re entering an action movie:
they sprint the course at full speed, skip half the instructions, and somehow still declare themselves champion.
Adults arrive with confidence, then meet the balance station and realize their ankles have been quietly freelancing
for years. This is normal. Encourage laughter, not perfection.
Second, the “hardest” obstacle is rarely the one you think. You might assume the crawl tunnel will be the drama
station, but it’s often the simple tape-line balance that causes the most chaos. Why? Because it demands control.
People can brute-force a hurdle with a big hop, but they can’t bully their way through slow, precise footwork.
When you notice that, you can design smarter courses: mix power moves with control moves so the experience feels
challenging without feeling dangerous.
Third, you’ll learn that flow matters more than features. A fancy-looking station that causes traffic jams can
kill the fun fast. If you have a bottlenecklike a single target toss that everyone missesadd more targets,
shorten the distance, or turn it into a “best of three” so people move on quickly. At parties, momentum is
everything. Kids are happiest when they’re moving; adults are happiest when they’re not standing around
pretending they aren’t winded.
Fourth, the best obstacle courses have “dials,” not fixed difficulty. The secret is building in quick ways to
scale: move hoops closer or farther, reduce the number of cones, switch hopping to stepping, lighten the carry,
or let beginners do a practice run without a timer. Once people get a clean run, they naturally want a harder
version. That’s when you flip the dial: add a time challenge, make the weave tighter, or require a target hit
before advancing. This keeps the course fun for mixed ages without making anyone feel singled out.
Fifth, safety becomes simpler when you treat it like designnot like a speech. Instead of shouting “be careful!”
(which translates to “ignore me!”), build safety into the course: keep elevated obstacles low, put soft/low-risk
stations after fast running lanes to force a speed reset, and avoid slick surfaces. Indoors, remove rugs that
slide, pad sharp corners, and keep glassy décor far away. Outdoors, do a quick ground check for holes and
uneven spots, especially where people land or pivot.
Finally, your best course improvements will come from watching people play. You’ll see where they hesitate,
where they cheat (affectionately), and where they light up. The station that makes everyone laugh? Keep it.
The station that makes everyone argue about rules? Simplify it. The station that makes people quietly walk
away rubbing their knees? Swap it for something lower-impact. After one or two sessions, you’ll have a course
that feels custom-built for your groupand that’s the point. The obstacle course isn’t just a set of challenges.
It’s a shared little tradition you can tweak, remix, and run again whenever you need movement and a mood boost.




