Table of Contents >> Show >> Hide
- First: What CC Cream Actually Does (So You Don’t Expect It to Solve Taxes)
- Step 0: Pick the Right CC Cream (Because Application Can’t Fix the Wrong One)
- Step 1: Prep Your Skin Like You’re About to Be Photographed (Because You Might Be)
- Step 2: Apply CC Cream in Thin, Buildable Layers
- Step 3: Pick Your Tool (Fingers, Sponge, or Brush) and Use It Correctly
- Step 4: Targeted Coverage Without the Cake
- Step 5: Set It (But Only Where You Need It)
- Common CC Cream Problems (and How to Fix Them Fast)
- Real-Life CC Cream Routines (Pick Your Adventure)
- How to Reapply Sun Protection Without Wrecking Your Makeup
- Conclusion: Flawless CC Cream Is Mostly “Less, Then Better”
- Real-World Experiences: What Applying CC Cream Feels Like (and What People Learn)
CC cream is the overachiever of the makeup bag: part “your-skin-but-better,” part tone-correcting wizard, and part “I overslept but still want compliments.” Apply it well and you get a smooth, even complexion that looks like you drank water, slept eight hours, and never once cried over a group chat.
This guide breaks down how to apply CC cream for flawless coveragewithout cakiness, weird streaks, or that classic “why is my face a different color than my neck?” surprise.
First: What CC Cream Actually Does (So You Don’t Expect It to Solve Taxes)
CC cream typically stands for “color correcting” (or “complexion corrector”), and it’s designed to even out tone issues like redness, dullness, sallowness, and the occasional “why do I look gray today?” moment. It generally sits between a tinted moisturizer and a foundation: lighter and quicker than foundation, but often more pigment-packed than a basic skin tint.
Many CC creams also include skincare-friendly ingredients and SPF. That’s greatjust remember: makeup with SPF is best treated as a bonus layer, not your only sun protection.
Step 0: Pick the Right CC Cream (Because Application Can’t Fix the Wrong One)
Choose based on what you want to correct
- Redness (around the nose, cheeks, chin): look for “redness correction” or green-toned color-correcting claims.
- Dullness/sallowness: peachy, warm, or brightening claims can help your skin look more awake.
- Dark spots/uneven tone: a more pigmented, buildable CC cream (sometimes “full coverage CC”) behaves closer to foundation.
Match your finish to your skin type
- Oily or combo: look for “matte,” “soft matte,” or “oil control.” Set lightly through the T-zone.
- Dry: look for “hydrating,” “dewy,” or “glow.” Skip heavy powder unless you love crunchy cheeks.
- Acne-prone/sensitive: aim for fragrance-free (when possible) and non-comedogenic claims, and patch-test new products.
- Mature skin: a radiant or natural finish often looks more skin-like than a super-matte formula.
Shade match like a pro (even if you’re not one)
Swatch along the jawline (not the wrist), check it in natural light, and make sure it blends seamlessly into your neck. If you’re between shades, choose the one that disappears more easilyCC cream is meant to melt in, not announce itself.
Step 1: Prep Your Skin Like You’re About to Be Photographed (Because You Might Be)
CC cream looks best on calm, hydrated skin. Think of skincare as the “primer” before primer. The goal: smooth texture, balanced moisture, and no flaky patches that grab pigment like a clingy ex.
1) Cleanse and moisturize
Use a gentle cleanser, then moisturize based on your skin type. If you’re oily, choose a lightweight lotion or gel moisturizer. If you’re dry, go richer. Let it sink in for a minute or two.
2) Sunscreen (yes, even if your CC cream has SPF)
Apply a broad-spectrum sunscreen as your last skincare step. Give it a few minutes to set before makeup so your base doesn’t slide around. If you rely only on SPF makeup, most people don’t apply enough product to get the labeled protectionso treat SPF in CC cream as extra credit, not the whole assignment.
3) Optional: primer (use it if you actually need it)
- For visible pores/texture: a smoothing primer can help blur and prevent “dotty” coverage.
- For long wear: a gripping primer can help CC cream last through heat, humidity, and emotional support iced coffee.
- If your CC cream already wears well: you can skip primer and live your best minimalist life.
Step 2: Apply CC Cream in Thin, Buildable Layers
How much CC cream should you use?
Start smallabout a pea- to dime-size amount for the face. You can always build coverage, but taking off excess base makeup mid-morning is… a journey.
Where to place it first
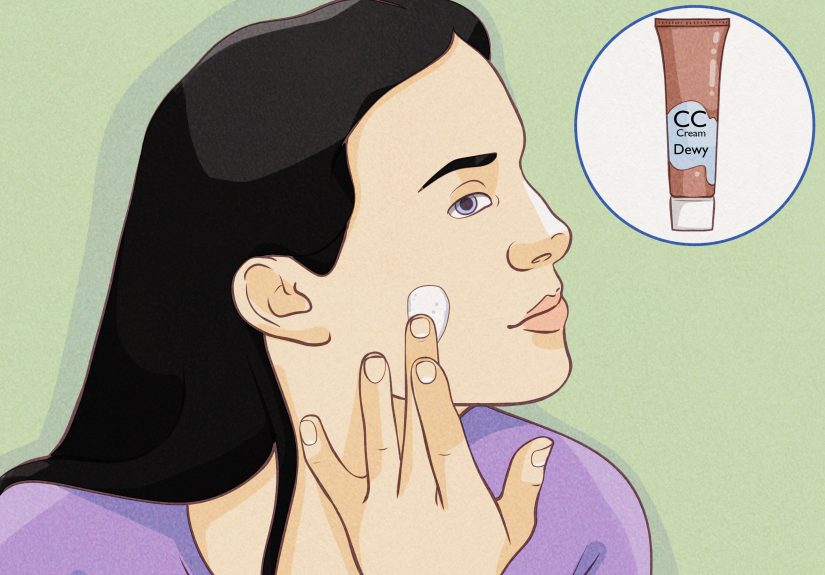
Put CC cream where you need correction most: usually the center of the face (around the nose, cheeks, chin), then blend outward. This keeps coverage concentrated where tone is uneven, while the perimeter stays natural.
The blending rule: outward, downward, and don’t forget the edges
Blend from the center out toward the hairline and jaw. Then lightly feather down the neck if needed. Pay attention to the “borders”: jawline, hairline, around the ears, and under the chin. Most base makeup fails at the borders. Be better than most.
Step 3: Pick Your Tool (Fingers, Sponge, or Brush) and Use It Correctly
The “best” tool depends on your finish goals. The good news: CC cream is usually flexibleyou can use your fingers, a sponge, or a brush.
Option A: Fingers (fast, natural, and oddly satisfying)
- Best for a skin-like finish and quick mornings.
- Warm the product slightly between fingers, then press and smooth it in.
- Use light tapping around the nose and under-eyes where texture shows more easily.
Option B: Damp sponge (seamless, slightly sheerer coverage)
- Best for a “blurred” finish with minimal streaks.
- Dampen the sponge, squeeze out excess water, then bounce (don’t drag) over the skin.
- Great for blending edges and preventing buildup in smile lines.
Option C: Brush (most coverage, most precision)
- Best if your CC cream is fuller coverage or you want a foundation-like result.
- Use a dense buffing brush for coverage; use light circular motions to blend.
- Finish by lightly pressing with a sponge (optional) to soften any brush lines.
Step 4: Targeted Coverage Without the Cake
For redness around the nose
After your first layer, add the tiniest extra dot around the nostrils and blend with tapping motions. Tapping deposits pigment; swiping can lift it back off. If your skin gets shiny there, plan to set that area.
For dark spots or blemishes
Build coverage only where needed. Dot a pinhead amount on the spot, let it sit for 5–10 seconds (so it “grips” a bit), then tap the edges to blend. If you over-blend, you’ll sheer it out and wonder why your blemish is still clocking in for work.
Under-eye coverage: keep it thin
CC cream can work under the eyes, but go easy. Use a tiny amount and tap with your ring finger or the tip of a sponge. If you need more coverage, add concealer sparingly after CC creamespecially if creasing is a concern.
Step 5: Set It (But Only Where You Need It)
Setting is not an all-or-nothing situation. The goal is to lock in wear while keeping skin texture… looking like skin.
If you get oily
- Lightly set the T-zone with a finely milled translucent powder.
- Press powder in with a puff or sponge for longevity, then dust off excess.
If you’re dry or want glow
- Skip powder on the cheeks; set only around the nose and chin if needed.
- Use a setting spray to help the layers melt together and look more natural.
Common CC Cream Problems (and How to Fix Them Fast)
“It looks streaky.”
- Cause: too much product or a dry brush/sponge dragging it around.
- Fix: apply less, blend in thin layers, and use a damp sponge to press it smooth.
“It’s pilling.”
- Cause: skincare underneath hasn’t absorbed, or you’re layering incompatible textures (common with some silicones).
- Fix: wait a few minutes after sunscreen/moisturizer, use less product, and apply with pressing motions instead of rubbing.
“It’s clinging to dry patches.”
- Cause: dehydration or flaky skin grabbing pigment.
- Fix: moisturize well, gently exfoliate as needed (not right before sensitive events), and tap product on instead of swiping.
“It looks too shiny by noon.”
- Cause: dewy formula + natural oils + weather doing weather things.
- Fix: blot first, then add a touch of powder only where you’re shiny.
“My face looks darker later.”
- Cause: oxidation (some formulas deepen as they interact with oils).
- Fix: try a shade lighter, prep with a primer, and set strategicallyespecially in the T-zone.
Real-Life CC Cream Routines (Pick Your Adventure)
The “5-minute, camera-ready” routine
- Sunscreen + let it set.
- Pea-size CC cream, apply with fingers, blend outward.
- Tap extra coverage around the nose and chin.
- Concealer only where needed.
- Powder the T-zone. Done. Be admired.
The “humid day” routine
- Lightweight moisturizer + sunscreen.
- Gripping primer on the T-zone.
- CC cream with a damp sponge (thin layers).
- Press powder into the center of the face.
- Setting spray to seal and remove the “powdery” look.
The “dry skin glow” routine
- Hydrating moisturizer + sunscreen.
- Mix a tiny drop of moisturizer into CC cream (optional) for extra slip.
- Apply with fingers, then refine edges with a damp sponge.
- Set only around the nose if needed; keep cheeks juicy.
How to Reapply Sun Protection Without Wrecking Your Makeup
If you’re outside for long periods, sun protection needs reapplication. Since reapplying a full, even layer of sunscreen over makeup can be tricky, many people use SPF powders or SPF setting sprays for touch-ups. Just remember: these are helpful additions, but they’re not always applied as evenly or generously as classic sunscreen. When possible, start your day with a proper base layer of sunscreen, then use makeup-friendly reapplication methods to top it up.
Conclusion: Flawless CC Cream Is Mostly “Less, Then Better”
The secret to flawless CC cream coverage isn’t piling it onit’s using the right formula, prepping your skin, and applying in thin layers with smart blending. Start small, build only where needed, and set strategically. Your goal is even, natural, and comfortablelike your skin, but upgraded.
Real-World Experiences: What Applying CC Cream Feels Like (and What People Learn)
If you’ve ever tried CC cream for the first time, the most common experience is surpriseusually the good kind. A lot of people expect it to behave like foundation, then realize it’s closer to “skin with benefits.” The first lesson tends to be: start with less. In real-life routines, people often squeeze out too much, spread it everywhere, and then wonder why it’s sitting on top of the skin instead of blending in. When they switch to a pea-size amount and apply in two thin passes, the finish suddenly looks smoother, more natural, andmysteriouslymore expensive.
Another common “aha” moment shows up around the nose and cheeks. Many people notice that the first layer looks great on the outer face but fades around the nostrils where redness lives. The fix most people land on is simple: apply a normal layer everywhere, then add a tiny second dot only around the nose and tap it in. That tapping motion becomes a favorite trick because it deposits coverage without moving product around. It’s one of those techniques that feels small but makes a “whoa, that worked” difference.
Tool choice creates its own set of experiences. Fingers often win for speed and comfortespecially for people who want a quick, skin-like finish. But sponges tend to win for the “I don’t want anyone to know I’m wearing base makeup” crowd because bouncing a damp sponge softens edges and prevents streaks. Brushes can feel like a power move: they’re great when someone wants more coverage, but they can also create that “why do I see brush lines?” moment if the formula is thick or the brush is too dry. Many people end up combining tools: brush first, sponge second, and suddenly everything looks airbrushed without looking heavy.
Then there’s the SPF reality check. A lot of people have the same experience: they buy an SPF CC cream, feel very responsible, then learn that most of us don’t apply enough base makeup to reach the labeled SPF. That discovery often changes routines in a good waypeople start applying sunscreen underneath, letting it set, and using CC cream on top. The CC cream still helps, but now it’s truly a bonus layer instead of the only line of defense.
Finally, the most satisfying real-world experience is the “mirror double-take” at the end: CC cream days often look more like youjust more even, rested, and confident. It’s the product people reach for when they want to look polished but not overdone: school drop-offs, Zoom calls, grocery runs, casual dates, and those “I’m not doing makeup” hangouts where you absolutely want your skin to behave. When applied with restraint and blended with intention, CC cream becomes the reliable friend who doesn’t steal the spotlightjust makes the whole situation look better.





