Table of Contents >> Show >> Hide
- Quick Answer: Baking Times by Temperature (Most Common Sizes)
- What “Chicken Quarters” Are (and Why They Take Longer)
- The Only Doneness Test That Never Lies: A Thermometer
- Picking the Right Oven Temperature (and What You’ll Get)
- Step-by-Step: Foolproof Baked Chicken Quarters
- Sheet-Pan Dinner Timing: Chicken Quarters + Vegetables
- Troubleshooting: When Chicken Quarters Misbehave
- Food Safety Notes (Short, Practical, Non-Scary)
- FAQ: The Questions Everyone Google-Types Mid-Cook
- Real-Kitchen Lessons: of “Why Didn’t Anyone Tell Me This?”
- Conclusion
Chicken quarters (a.k.a. leg quarters) are the unsung heroes of the meat case: big flavor, budget-friendly, and
basically impossible to offend with seasoning. The only real “gotcha” is timingbecause leg quarters are thicker
than drumsticks and often come with extra bone/back attached, they cook a little longer than people expect.
The goal is simple: juicy dark meat, crispy skin, and a safe internal temperaturewithout turning dinner into an
all-night event. Let’s roast these beauties the smart way.
Quick Answer: Baking Times by Temperature (Most Common Sizes)
For bone-in, skin-on chicken quarters (about 10–16 oz each), placed on a rimmed
sheet pan or shallow roasting pan, here are reliable ranges. Always confirm with a thermometer.
| Oven Temperature | Approx. Time | Best For |
|---|---|---|
| 350°F | 55–70 minutes | Extra forgiving, juicy, gentler heat |
| 375°F | 45–60 minutes | Balanced cooking + browning |
| 400°F | 40–55 minutes | Better browning, faster finish |
| 425°F | 35–50 minutes | Crispy skin, roastier flavor |
Food safety baseline: chicken is considered safe when the thickest part reaches
165°F. For leg quarters, many cooks prefer pulling them closer to
175–190°F in the thigh for more tender dark meat (that’s a texture choice, not a safety
requirement).
What “Chicken Quarters” Are (and Why They Take Longer)
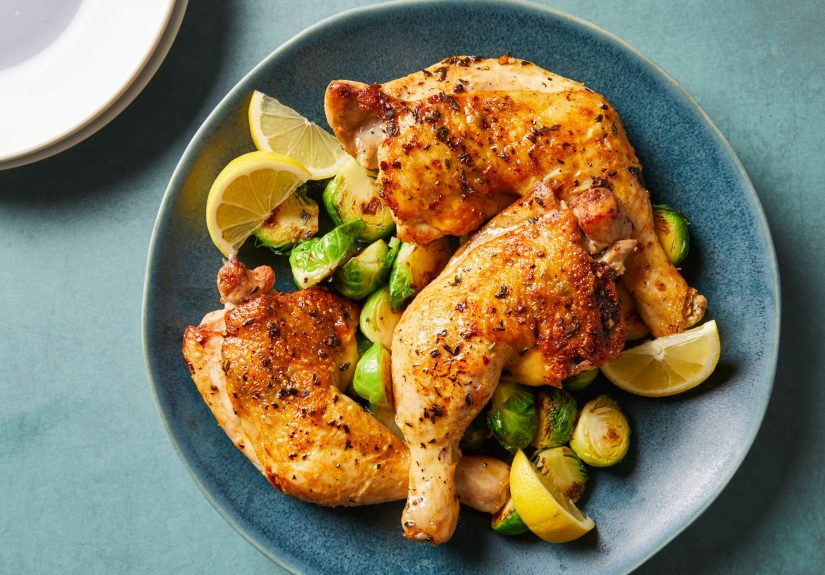
A chicken quarter usually means the thigh + drumstick as one piece, often with a bit of
the back attached. That extra bone and thickness changes heat flowtranslation: you can’t use “drumstick timing”
and expect perfect results.
Timing is influenced by:
- Size/weight: bigger quarters need more time.
- Bone + connective tissue: dark meat gets nicer as collagen softens at higher temps.
- Starting temperature: straight-from-the-fridge takes longer than slightly tempered.
- Pan crowding: overcrowding steams the chicken and slows browning.
- Oven personality: some ovens run hot, cold, or “mysteriously dramatic.”
The Only Doneness Test That Never Lies: A Thermometer
If you want consistently perfect baked chicken quarters, use an instant-read thermometer. Visual cues like “juices
run clear” can help, but they’re not as dependable as temperature.
Where to check
- Probe the thickest part of the thigh, aiming near (but not touching) bone.
- If you’re cooking multiple quarters, check at least two pieces. Sizes vary.
- For safety, confirm the thickest area hits 165°F.
Carryover cooking (a.k.a. “it keeps cooking after you stop cooking”)
When you pull chicken from the oven, internal temperature can rise a few degrees as it rests. That’s why many
cooks remove chicken a little early and let carryover finish the jobespecially helpful for avoiding dryness and
keeping timing sane.
Picking the Right Oven Temperature (and What You’ll Get)
350°F: The slow-and-steady route
Choose 350°F if you want maximum margin for error and don’t mind a longer bake. Expect
55–70 minutes. Skin can still brown, but it may be less shatter-crisp unless you finish with a
quick broil.
375°F: The “most people should start here” setting
375°F is a classic roasting temp for leg quartersenough heat to brown, enough time for the meat to stay juicy.
Plan on 45–60 minutes depending on size.
400°F: Faster with better browning
If you like a deeper roast flavor and crispier skin without going full blast, 400°F is a sweet spot. Typical time
is 40–55 minutes.
425°F: Crisp-skin mode
High heat gives you faster cooking and more dramatic skin crisping. Most quarters finish around
35–50 minutes. Watch closely near the endespecially if your seasoning contains sugar.
Convection oven (fan) adjustment
Using convection? A common approach is to reduce temperature by ~25°F or start checking for
doneness 10–15% earlier. The fan speeds browning and can shorten cook time.
Step-by-Step: Foolproof Baked Chicken Quarters
This method works across temperatures and focuses on what actually matters: dry skin, space on the pan, accurate
temp, and a rest.
1) Prep for crisp skin
- Preheat the oven (don’t “kinda” preheatactually preheat).
- Pat the chicken very dry with paper towels. Drier skin = better browning.
- Lightly coat with oil (or melted butter), then season generously with salt and pepper.
2) Add flavor without extra effort
Great seasoning combos for chicken quarters:
- Classic roast: garlic powder, onion powder, paprika, black pepper
- Herby: thyme + oregano + lemon zest
- Smoky: smoked paprika + cumin + a pinch of cayenne
- BBQ-ish: chili powder + paprika + brown sugar (use higher heat carefully)
3) Pan setup that prevents soggy bottoms
- Use a rimmed sheet pan or shallow roasting pan.
- For best airflow, place chicken on a rack set inside the pan (optional but helpful).
- Arrange pieces skin-side up with space between them.
4) Bake, then verify temperature
Bake using the time ranges above, but start checking early. When the thigh reads:
- 165°F: safe to eat.
- 175–190°F: darker meat often turns more tender and “pull-apart” pleasant.
5) Rest (don’t skip this)
Rest the chicken 5–10 minutes before serving. This helps juices redistribute and makes timing
less stressfulbecause the chicken isn’t instantly cooling off into sadness.
Optional: Broil for extra crisp
If the meat is done but the skin isn’t as crisp as you want, broil for 1–3 minutes, watching
closely. Broilers go from “nice” to “charcoal audition” very fast.
Sheet-Pan Dinner Timing: Chicken Quarters + Vegetables
Chicken quarters are perfect for a one-pan meal, but vegetables don’t all cook at the same rate. A simple strategy:
start the chicken first, then add vegetables partway through.
- Potatoes/carrots: add with chicken (they need time).
- Broccoli/green beans/asparagus: add in the last 15–20 minutes.
- Cherry tomatoes/zucchini: add in the last 10–15 minutes.
Pro tip: toss veggies in oil and salt separately so they roast instead of steam. Crowding is the enemy of
caramelization.
Troubleshooting: When Chicken Quarters Misbehave
“They’re browned, but undercooked near the bone.”
- Lower the oven temp to 375°F and continue baking, or loosely tent with foil.
- Check thermometer placementtouching bone can give a false reading.
“The skin is rubbery.”
- Pat the chicken drier next time and leave space between pieces.
- Use 400–425°F, or finish with a short broil.
- A rack helps air circulate and keeps the underside from steaming.
“The outside is getting too dark.”
- Too much sugar in the rub? Sugar browns fast. Reduce sugar or cook at 375–400°F.
- Tent loosely with foil to slow browning while the inside finishes.
“The meat tastes dry.”
- Check your final internal tempif you overshoot by a lot at high heat, moisture drops.
- Try 375–400°F or dry-brine (salt) the chicken for a few hours uncovered in the fridge.
- Don’t cut immediatelyresting matters.
Food Safety Notes (Short, Practical, Non-Scary)
- Don’t wash raw chicken. It can spread germs around the sink and countertops.
- Use separate cutting boards/utensils for raw poultry.
- Cook to at least 165°F in the thickest part.
- Refrigerate leftovers promptly and reheat thoroughly (use a thermometer if unsure).
FAQ: The Questions Everyone Google-Types Mid-Cook
Do I need to flip chicken quarters while baking?
Usually no. Baking skin-side up the whole time maximizes crisping. Flip only if you’re using a method that starts
skin-side down for rendering, or if your oven browns unevenly.
Can I bake chicken quarters from frozen?
It’s better (and more even) to thaw in the refrigerator first. If you must cook from frozen, expect a longer bake
and rely on the thermometerbecause time guesses get extra wobbly.
Is 165°F enough for leg quarters?
165°F is the widely recognized safety threshold. But many people prefer leg quarters at a higher internal temp
(often 175–190°F) for more tender dark meatespecially if the pieces are large.
What’s the “best” temperature overall?
If you want a dependable, crowd-pleasing default: 400°F for about 45–55 minutes (for average
quarters), then rest. If you want extra crisp, go 425°F and start checking early.
Real-Kitchen Lessons: of “Why Didn’t Anyone Tell Me This?”
Ask a bunch of home cooks how chicken quarters turn out, and you’ll notice a pattern: most “failures” aren’t about
seasoningthey’re about moisture management and timing. The first lesson is that skin crispiness starts
before the oven. People can buy the fanciest spice blend on earth, but if the chicken goes onto the pan
wet (or packed shoulder-to-shoulder like a rush-hour subway), it’s going to steam. Steamed chicken is still edible,
but the skin texture lands somewhere between “soft hoodie” and “sad balloon.” Dry the skin, give it space, and
suddenly your oven feels like it got an upgrade.
Second lesson: leg quarters are not dainty. They’re thicker than drumsticks, and the thigh area
near the bone is the last place to finish. That’s why “my recipe said 35 minutes” sometimes ends with “my family
ate side dishes while I put the chicken back in.” A thermometer fixes this instantly. It also stops the ritual of
slicing into chicken to “check” itbecause every time you cut too early, you’re basically letting the juices file
a complaint and leave the building.
Third lesson: 165°F is the safety line, not the tenderness finish line. Dark meat contains more
connective tissue, and many people like it better when it goes a bit higher, especially for big quarters. That’s
when the texture shifts from “firm” to “wow, that’s surprisingly tender.” The funny part is that this feels like
breaking a rulebecause we’ve been trained to fear the word “overcooked.” With leg quarters, “a little more” can
be exactly right (as long as you don’t go so far that everything dries out at high heat).
Fourth lesson: the pan matters more than people think. A deep casserole dish can trap moisture,
while a sheet pan lets heat circulate and encourages browning. A rack helps even more, but you don’t need fancy
equipmentjust avoid crowding. If you want gravy-like drippings, keep the quarters on the pan; if you want cleaner
crispness, elevate them.
Finally, there’s the “confidence” lesson: once you’ve baked chicken quarters a few times, you stop chasing exact
minutes and start cooking by signalsbrowning level, sizzling sound, and internal temperature.
That’s when this becomes one of those reliable, weeknight-in-your-back-pocket meals. It’s hard to beat a dinner
that’s inexpensive, forgiving, and somehow makes the whole house smell like you tried.
Conclusion
To bake chicken quarters perfectly, pick your oven temperature based on your goal (juicy vs. extra-crispy), start
checking early, and let a thermometer make the final call. Hit 165°F for safety, consider
175–190°F in the thigh for extra tenderness, and always rest before serving. That’s the whole
gamesimple, repeatable, and delicious.