Table of Contents >> Show >> Hide
- Why Hydrangeas and Pumpkins Work So Well Together
- Supplies You Will Need
- Step-by-Step: How to Make a DIY Fall Floral Centerpiece With Hydrangeas and Pumpkins
- Color Palette Ideas for Fall Hydrangea Centerpieces
- Where to Display Your Centerpiece
- How to Make the Centerpiece Last Longer
- Common Mistakes to Avoid
- Budget-Friendly Tips
- of Real-Life Experience: What Actually Makes This Centerpiece Work
- Conclusion
- SEO Tags
There is something wonderfully dramatic about a fall table. One minute it is just a dining table, and the next it is wearing pumpkins, hydrangeas, candles, leaves, and enough autumn charm to make your guests consider taking photos before touching the mashed potatoes. A DIY fall floral centerpiece with hydrangeas and pumpkins is one of the easiest ways to make your home feel seasonal without turning every corner into a haunted hayride.
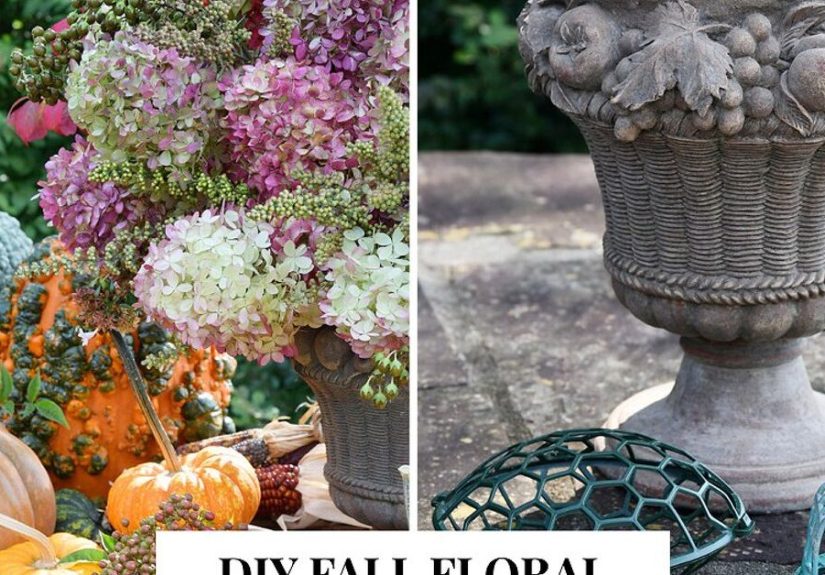
The beauty of this project is its balance. Hydrangeas bring softness, volume, and a slightly romantic “I casually live in a magazine” look. Pumpkins add shape, harvest color, and that unmistakable fall personality. Together, they create a centerpiece that works for a Thanksgiving table, a fall dinner party, an entryway console, a kitchen island, or even a coffee table that deserves a little seasonal applause.
This guide walks you through how to design a centerpiece that looks polished but is completely doable for beginners. You do not need professional floral training, a greenhouse, or a secret barn full of heirloom pumpkins. With a few fresh or dried hydrangeas, small pumpkins, greenery, and a smart container strategy, you can create a centerpiece that feels cozy, elegant, and impressively custom.
Why Hydrangeas and Pumpkins Work So Well Together
Hydrangeas are the overachievers of floral arranging. One bloom can fill the space of several smaller flowers, which means you get a lush look without buying an entire florist cooler. Their rounded shape pairs beautifully with pumpkins because both have soft, full silhouettes. The result is visually harmonious, not fussy.
Pumpkins, meanwhile, bring structure. Mini pumpkins can be tucked around flowers like decorative accents, while a medium pumpkin can become the vessel itself. White pumpkins create a calm farmhouse look, orange pumpkins feel classic and cheerful, and muted green or blue-gray pumpkins add a more modern, designer-inspired mood.
Fresh, Dried, or Faux Hydrangeas?
You have three good options. Fresh hydrangeas look lush and vibrant, especially when the centerpiece is for a party or special dinner. Dried hydrangeas add texture and last longer, making them ideal for displays you want to enjoy for weeks. Faux hydrangeas are best when you want a reusable arrangement or live somewhere warm where fresh flowers tend to faint dramatically by lunchtime.
For the most natural look, mix materials. Try fresh hydrangeas with dried wheat, preserved leaves, and real pumpkins. Or pair dried hydrangeas with faux pumpkins and moss for a centerpiece that can come back every fall like a very pretty seasonal employee.
Supplies You Will Need
Before you begin, gather your materials. The list below is flexible, so do not panic if you are missing one item. Fall decorating is forgiving. A slightly crooked pumpkin can look “rustic.” A gap in the arrangement can be called “negative space.” We are thriving.
Basic Materials
- 5 to 8 hydrangea blooms, fresh or dried
- 1 medium pumpkin or low bowl for the main vessel
- 5 to 10 mini pumpkins or gourds
- Greenery such as eucalyptus, magnolia leaves, salal, dusty miller, or olive branches
- Dried accents such as wheat, seed pods, dried leaves, grasses, or berries
- Floral shears or sharp scissors
- A glass, jar, floral frog, chicken wire, or floral foam for support
- Waterproof liner if using a real pumpkin as a vase
- Table runner, tray, wood board, or shallow basket
- Optional: flameless candles, ribbon, pinecones, acorns, or moss
Choosing the Right Pumpkin Vessel
If you want the arrangement to look extra special, use a pumpkin as the vase. Choose a medium pumpkin with a flat bottom so it will not roll around like it has somewhere better to be. Cinderella pumpkins, white pumpkins, and squat heirloom-style pumpkins are especially good because they have a wide shape and a stable base.
For fresh flowers, never pour water directly into a pumpkin. The inside will soften quickly, and your centerpiece may become less “autumn elegance” and more “science experiment.” Instead, hollow the pumpkin and place a glass, jar, or plastic container inside. This keeps water contained and helps the pumpkin last longer.
Step-by-Step: How to Make a DIY Fall Floral Centerpiece With Hydrangeas and Pumpkins
Step 1: Prepare Your Work Area
Cover your table or counter with newspaper, kraft paper, or an old towel. Pumpkins, leaves, and stems can create a little mess, and it is much more fun to design when you are not worrying about hydrangea crumbs on the floor.
Set out all your materials by category: flowers, pumpkins, greenery, dried accents, and tools. This helps you see your color palette before you start. A good fall centerpiece usually needs contrast: soft blooms, hard pumpkins, smooth leaves, rough seed pods, and maybe one slightly weird gourd for personality.
Step 2: Create a Base
Start with a tray, wood board, woven basket, or table runner. This creates a visual boundary and makes the centerpiece feel intentional. For a long dining table, a runner works beautifully. For a round table, use a shallow bowl, pedestal dish, or circular tray.
If you are building inside a pumpkin, cut a round opening at the top and scoop out the seeds and pulp. Place a jar or waterproof cup inside. If the pumpkin opening is too wide, use chicken wire shaped into a loose ball over the jar opening to help hold stems in place. Chicken wire is reusable and gives stems good access to water.
Step 3: Condition the Hydrangeas
Hydrangeas need hydration, especially because their woody stems can be stubborn. Remove leaves that would sit below the waterline. Cut each stem at an angle with sharp shears, then place it into water right away. If using fresh garden hydrangeas, cut them early in the morning when they are naturally more hydrated.
If a bloom starts to wilt, do not immediately throw it into the compost with dramatic disappointment. Hydrangeas can often recover after a cool-water soak. The petals can absorb moisture, so a short bath may help revive tired blooms before arranging.
Step 4: Add Greenery First
Greenery is the skeleton of your centerpiece. Start by placing eucalyptus, magnolia, salal, olive branches, or dusty miller around the rim of your vessel. Let some pieces drape slightly over the sides for a relaxed, natural shape.
For a traditional fall look, use warm-toned leaves, oak branches, or magnolia leaves with coppery undersides. For a softer, modern look, choose silver-green eucalyptus, dusty miller, or pale olive branches. The greenery should create width before you add the big hydrangea blooms.
Step 5: Place the Hydrangeas
Hydrangeas are large, so add them in odd numbers: three, five, or seven blooms usually look natural. Put the largest bloom slightly off center, not perfectly in the middle. A centerpiece that is too symmetrical can feel stiff, like it is waiting for school picture day.
Angle the other blooms around it at different heights. Let some sit low and full near the edge, while others rise slightly in the center. If your hydrangeas are very round, rotate them so their best side faces outward. Yes, flowers have good sides. They are basically celebrities.
Step 6: Tuck in Pumpkins and Gourds
Now add mini pumpkins around the base. Use a mix of sizes and colors for depth. White pumpkins lighten the arrangement, orange pumpkins warm it up, and green gourds add earthy contrast. Avoid lining them up like soldiers. Instead, cluster them in small groups of two or three.
If you are decorating a long table, let pumpkins trail outward from the main floral arrangement. This creates a low, flowing tablescape that feels abundant but still leaves room for plates, glasses, and the very important bowl of rolls.
Step 7: Add Dried Fall Accents
Dried accents give your centerpiece its autumn texture. Add wheat stalks for height, seed pods for rustic charm, dried grasses for movement, and preserved leaves for color. Use these pieces sparingly at first. You can always add more, but removing a tangle of dried grass after it has attached itself to everything is a humbling experience.
For a refined look, choose two accent materials and repeat them throughout the arrangement. For example, use wheat and eucalyptus for a farmhouse style, or use burgundy leaves and dried pods for a moodier fall dinner table.
Step 8: Finish With Candlelight
Flameless candles are the safest and easiest option, especially if dried flowers, leaves, or grasses are involved. Place candles around the centerpiece rather than inside it. Vary the heights with short votives, small pillars, or glass hurricanes.
Warm candlelight softens the hydrangeas and makes pumpkins look richer. It also helps the whole table feel cozy, even if the actual dinner involved last-minute grocery store pie and a heroic amount of whipped cream.
Color Palette Ideas for Fall Hydrangea Centerpieces
Classic Harvest
Use orange pumpkins, cream hydrangeas, burgundy leaves, wheat, and bronze accents. This palette is perfect for Thanksgiving and traditional fall decor. It feels warm, welcoming, and instantly seasonal.
Soft Neutral Farmhouse
Choose white pumpkins, pale green hydrangeas, eucalyptus, beige grasses, and wood elements. This style works beautifully in modern farmhouse homes and neutral dining rooms. It feels calm and elegant without being boring.
Moody Autumn Garden
Combine deep purple hydrangeas, blue-gray pumpkins, dark red foliage, black taper candles, and antique brass. This is a dramatic option for evening dinners, Halloween-adjacent styling, or anyone who believes fall should come with a little mystery.
Fresh and Coastal Fall
Use white hydrangeas, pale blue pumpkins, driftwood, silver greenery, and cream linens. This is a great option for coastal homes or anyone who wants fall decor without heavy orange tones.
Where to Display Your Centerpiece
The dining table is the obvious choice, but it is not the only one. A hydrangea and pumpkin centerpiece looks beautiful on a kitchen island, entryway table, mantel, buffet, or coffee table. For a buffet, create extra height with a pedestal bowl or cake stand. For a coffee table, keep the arrangement low so it does not block conversation or the remote control, which is apparently the most important household object.
If using the centerpiece outdoors, place it in shade and protect it from wind. Fresh hydrangeas do not love direct sun once cut. Dried hydrangeas also fade faster in bright light, so a covered porch or shaded patio is best.
How to Make the Centerpiece Last Longer
For fresh hydrangeas, start with mature blooms that feel slightly papery rather than newly opened. Remove excess leaves, keep stems in clean water, and refresh the water every couple of days. Recut stems when changing water to improve hydration.
If using a real pumpkin vessel, keep the arrangement cool when possible. You can also extend the display by using a jar inside the pumpkin and removing the flowers at night to refrigerate them. For a longer-lasting centerpiece, use dried hydrangeas, faux pumpkins, preserved greenery, and a reusable bowl or basket.
Common Mistakes to Avoid
Using Too Many Large Blooms
Hydrangeas are generous flowers. Too many can overwhelm the arrangement and hide the pumpkins. Leave space for greenery, dried accents, and seasonal texture.
Making the Centerpiece Too Tall
A dining table centerpiece should not force guests to lean around it like they are spying through a hedge. Keep the tallest elements either below eye level or place them in a buffet arrangement instead.
Skipping the Water Container
If you hollow a pumpkin, always place a jar or liner inside. This keeps the pumpkin fresher and prevents leaks on your table.
Forgetting Texture
Hydrangeas and pumpkins are beautiful, but texture makes the design feel complete. Add leaves, grasses, berries, vines, moss, or seed pods to create depth.
Budget-Friendly Tips
You can make a stunning fall centerpiece without spending a fortune. Use hydrangeas from your yard if you have them. Check grocery stores for affordable flower bunches. Choose mini pumpkins from a farm stand or supermarket. Forage clean, safe branches or leaves from your yard, avoiding anything treated with chemicals.
Invest in reusable basics such as a wood tray, faux pumpkins, chicken wire, and flameless candles. These pieces can be styled differently each year. One year they can feel rustic, the next they can look elegant, and the next they can be part of a “I decorated in 12 minutes before guests arrived” masterpiece.
of Real-Life Experience: What Actually Makes This Centerpiece Work
After making several fall floral centerpieces with hydrangeas and pumpkins, the biggest lesson is simple: do not overthink the shape at the beginning. Many DIY arrangements look awkward for the first ten minutes. The hydrangeas may seem too large, the pumpkins may roll into strange positions, and the greenery may look like it is staging a small rebellion. Keep going. The arrangement usually comes together during the layering stage, especially once the dried accents are added.
One of the most reliable tricks is starting with a low, wide base. A shallow basket, long tray, or wood board makes the arrangement feel grounded. Without a base, the pumpkins can look scattered, almost like you emptied a grocery bag on the table and called it “seasonal styling.” A base tells the eye that everything belongs together.
Another helpful experience is to place the centerpiece where it will actually be used before making final adjustments. A design that looks perfect on the kitchen counter may be too tall on the dining table. Sit down in a chair and check the sightline. If you cannot see the person across from you, trim the stems or move the tallest pieces to the sideboard. Pretty decor should not require guests to conduct dinner conversation by leaning left and right.
Fresh hydrangeas are gorgeous, but they can be dramatic. If you are making the centerpiece for an event, buy or cut the flowers a day early and condition them properly. This gives you time to notice if one bloom is wilting and needs extra hydration. The best-looking arrangements often use hydrangeas that are slightly mature, not brand-new soft blooms. Mature blooms hold their shape better and sometimes dry beautifully after the event.
Color restraint also makes a big difference. It is tempting to use every fall color at once: orange, yellow, red, burgundy, brown, green, cream, copper, and maybe plaid for emotional support. But a centerpiece usually looks more expensive when the palette is edited. Choose three main colors and let texture do the rest. For example, white pumpkins, green hydrangeas, and amber leaves look polished without trying too hard.
Finally, remember that imperfection is part of the charm. A slightly bent stem, an uneven pumpkin, or a leaf curling at the edge can make the arrangement feel natural. Fall decor should feel abundant and welcoming, not like it is afraid someone might touch it. The best DIY fall floral centerpiece with hydrangeas and pumpkins is the one that makes your table feel warm, your room feel finished, and your guests say, “Wait, you made that?” That is the sweet spot: beautiful, personal, and just a little bit brag-worthy.
Conclusion
A DIY fall floral centerpiece with hydrangeas and pumpkins is one of the most rewarding seasonal projects because it delivers a big visual impact with simple materials. Hydrangeas provide fullness, pumpkins bring autumn personality, and greenery or dried accents add the texture that makes the whole design feel complete. Whether you prefer a classic harvest palette, soft neutral farmhouse style, or moody autumn garden look, this centerpiece can be customized to fit your home and your table.
Best of all, it does not need to be perfect. Fall decorating is about warmth, abundance, and a little creative layering. Start with a stable base, condition your hydrangeas, tuck in pumpkins naturally, and finish with texture and candlelight. The result is a centerpiece that looks thoughtful, seasonal, and ready for every cozy gathering from early October dinners to Thanksgiving celebrations.




