Table of Contents >> Show >> Hide
- Before You Start: Choose Gourds That Are Ready to Dry
- Way 1: Dry Gourds on a Rack or Screen
- Way 2: Hang Gourds to Dry
- Way 3: Use Assisted Indoor Curing for Humid Homes
- How to Know When Gourds Are Fully Dry
- Cleaning Dried Gourds Before Decorating
- Decorating Ideas for Dried Gourds
- Common Mistakes to Avoid When Drying Gourds
- Personal Experience: What Drying Gourds Teaches You
- Conclusion: The Best Way to Dry Gourds for Decorating
Drying gourds for decorating is one of those cozy fall projects that sounds simple until your “future centerpiece” turns into a suspicious science experiment behind the laundry basket. The good news? Gourds are wonderfully patient, sturdy little things when you treat them correctly. The bad news? They do not care about your schedule, your Thanksgiving tablescape deadline, or your Pinterest board titled “Rustic Autumn Magic.”
Whether you grew them in the garden, picked them up from a farmers market, or rescued a lumpy basket of them from the grocery store because they looked “too charming to leave behind,” drying gourds is all about maturity, airflow, cleanliness, and time. Once properly cured, gourds can become birdhouses, bowls, garlands, painted ornaments, Thanksgiving table accents, farmhouse shelf decor, Halloween props, or the kind of handmade gift that makes people say, “Wait, you made this?”
This guide walks through three reliable ways to dry gourds for decorating: the classic rack method, the hanging method, and the assisted indoor curing method for humid homes or extra-large gourds. You will also learn how to choose the right gourds, prevent rot, deal with harmless surface mold, and finish dried gourds so they look like decor instead of something found under the porch by a raccoon with hobbies.
Before You Start: Choose Gourds That Are Ready to Dry
The first secret to drying gourds successfully is not the drying method. It is the harvest. A gourd picked too early usually shrivels, softens, or collapses before it becomes useful decor. A mature gourd, on the other hand, already has the tough shell and internal structure needed to cure into a long-lasting craft piece.
How to Tell If a Gourd Is Mature
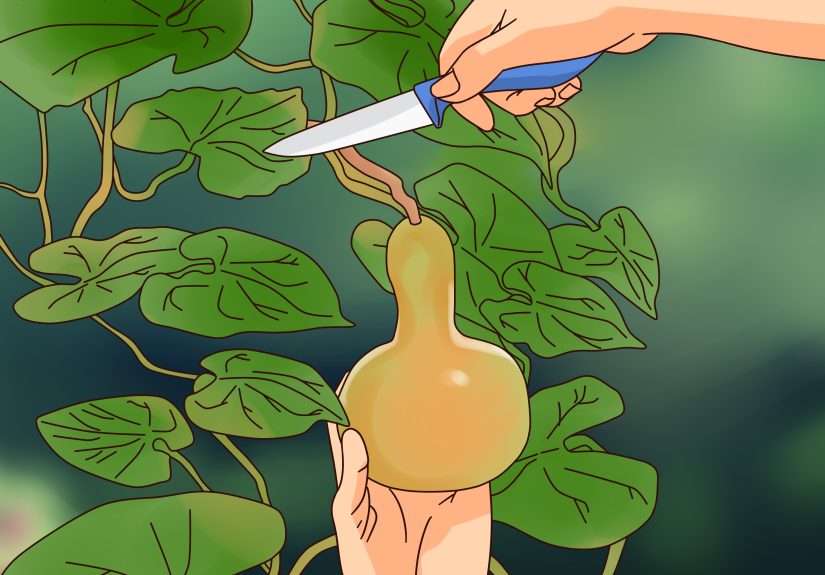
A mature gourd usually has a hard rind, full color, and a stem that has started to dry, brown, or wither. If you grew the gourds yourself, cut them from the vine instead of pulling them. Leave one to three inches of stem attached because the stem helps the gourd look decorative and reduces the chance of damage around the top. A gourd without a stem can still dry, but it is a little like a teapot without a handle: technically usable, emotionally disappointing.
Hard-shell gourds, often used for birdhouses, bowls, dippers, and carved crafts, can take months to dry fully. Smaller ornamental gourds may cure faster, especially if they are thin-skinned. Luffa gourds are another category; when fully mature and dry, their inner fiber can become a natural sponge. The drying time depends on type, size, shell thickness, humidity, and airflow.
Clean Them First
Before drying, gently wash gourds with mild soapy water to remove soil and debris. Then dry them with a soft towel. Some gardeners also wipe the surface with a diluted household disinfectant solution to reduce decay organisms on the rind. If you use bleach or another disinfectant, work in a ventilated area, wear gloves, and never mix cleaning products. Gourds are cute; chemical fumes are not part of the aesthetic.
Way 1: Dry Gourds on a Rack or Screen
The rack method is the easiest and most reliable way to dry decorative gourds at home. It works well for small ornamental gourds, medium gourds, and many hard-shell varieties. The goal is simple: give each gourd plenty of air on all sides while keeping it dry, shaded, and separated from its gourd neighbors.
What You Need
You need a drying rack, screen, wire shelf, old window screen, bread tray, or any ventilated surface that allows air to move underneath the gourds. Newspaper can work in a pinch, but racks are better because they reduce moisture buildup. If you use newspaper, replace damp paper often.
Choose a warm, dry, well-ventilated place such as a garage, shed, porch, basement room, spare room, or covered outdoor area. Avoid direct sunlight because it can fade colors and may heat the rind unevenly. Avoid damp corners, sealed plastic bins, and anywhere that smells like forgotten gym socks.
Step-by-Step Rack Drying Method
Place the cleaned gourds in a single layer on the rack. Do not let them touch. This spacing matters because rot can spread from one gourd to another. Airflow is the unpaid intern doing most of the work here, so give it room to do its job.
Turn the gourds every few days during the first week or two, then weekly as curing continues. Check for soft spots, leaking, or mushy areas. If one gourd begins to collapse or smell bad, discard it immediately. One rotten gourd can spoil the group faster than one dramatic guest can ruin a dinner party.
Surface drying usually happens first. The rind becomes firmer, the color may dull slightly, and small patches of surface mold may appear. This can look alarming, but on hard-shell gourds, light surface mold is often part of the drying process. If the gourd remains firm, wipe or scrub the surface outdoors with a cloth or soft brush. Wear a mask if you are sensitive to mold or dust. If the gourd turns soft, blackened, wet, or foul-smelling, it is not curing; it is retiring.
How Long Rack Drying Takes
Small decorative gourds may dry in a few weeks to a couple of months. Large hard-shell gourds can take three to six months, sometimes longer. A fully dried gourd feels light, has a hard shell, and often rattles when shaken because the seeds have loosened inside.
This method is best for people who want dependable results and do not mind waiting. It is also the safest choice if you are drying many gourds at once for fall centerpieces, wreaths, painted ornaments, or holiday table decor.
Way 2: Hang Gourds to Dry
Hanging is an excellent way to dry larger gourds, long-handled dipper gourds, bottle gourds, and birdhouse gourds. It keeps the gourd off surfaces entirely, which improves airflow and reduces flat spots. It also makes your drying area look like a tiny botanical chandelier, which is either charming or mildly witchy depending on your lighting.
When Hanging Works Best
Use the hanging method when gourds have strong stems, necks, or shapes that can support tying. This is especially useful for long gourds that might bend awkwardly on a shelf or develop pressure marks. Hanging also works well in sheds, garages, barns, covered porches, and airy utility rooms.
How to Hang Gourds Properly
After cleaning and drying the surface, tie heavy twine, jute, cotton cord, or wire around the stem or neck. Hang each gourd so it does not touch walls, shelves, or other gourds. Keep the area dry and ventilated. A small fan can help in humid climates, but do not blast gourds with hot air. The goal is steady drying, not turning them into autumn popcorn.
If a gourd does not have a secure stem, place it in a mesh bag and hang the bag instead. Onion bags, produce netting, or breathable craft mesh can work. Avoid sealed plastic bags because they trap moisture and invite rot. The gourd needs air, not a sauna appointment.
Special Tip for Birdhouse Gourds
Birdhouse gourds are often dried whole before cutting. Once dry, they can be cleaned, drilled, sanded, and finished. Some crafters drill a small drainage or hanging hole after drying, while others make small holes during curing to encourage airflow in large specimens. If you do make a small hole before the gourd is fully dry, be prepared for liquid drainage and keep the gourd away from finished floors, rugs, and anything you still love.
How Long Hanging Takes
Hanging gourds can take several weeks to several months. Large hard-shell gourds commonly need a long curing period. When the gourd feels light and the seeds rattle, it is ready for cleaning and decorating.
This method is ideal for decorative birdhouses, painted hanging ornaments, rustic garlands, porch displays, and natural fall decorations. It is also great when you have limited shelf space but plenty of overhead room.
Way 3: Use Assisted Indoor Curing for Humid Homes
If you live where fall air is damp, rainy, or stubbornly humid, gourds may need help drying indoors. Assisted curing does not mean rushing them with an oven, microwave, or hair dryer. Those methods can crack, cook, or ruin the gourd. Instead, assisted indoor curing means improving the environment: more airflow, lower humidity, better spacing, and regular inspections.
Create the Right Drying Zone
Pick a room with good ventilation and stable warmth. A heated basement, spare room, garage, enclosed porch, or utility room can work. Place gourds on racks, screens, or pallets so air can move around them. Keep them out of direct sun and away from wet concrete floors. If the space is humid, use a fan on low or a household dehumidifier nearby.
Darkness can help preserve color, especially for ornamental gourds. Warmth encourages drying, but excessive heat can cause uneven curing. Think “dry pantry,” not “desert survival challenge.”
Inspect More Often in Humid Conditions
During the first two weeks, check gourds daily or every other day. Wipe away condensation, replace damp newspaper, and remove any gourd that softens. If light surface mold appears on a firm gourd, wipe it outdoors and return the gourd to the rack once dry. If mold returns heavily, increase airflow and spacing.
For very large decorative gourds, some crafters make a small hole at the blossom end to speed internal drying. This can help moisture escape, but it should be done carefully because cutting into an immature or fragile gourd may increase the risk of rot. If the gourd is meant for a birdhouse or carved project, a small hole may not matter. If you want a perfect whole gourd for painting, skip the hole and let time do its slow, boring, effective work.
Do Not Seal Too Early
One common mistake is decorating or sealing a gourd before it is completely dry. Paint, wax, varnish, or clear coat can trap moisture inside. The result may look beautiful for a week and then become soft, stained, or smelly. Wait until the gourd is light, hard, and rattling before finishing it.
Assisted indoor curing is best for people drying gourds in humid climates, apartments, rainy fall weather, or homes without an outdoor shed. It is also a smart backup method when the weather turns cold and wet before your gourds are fully cured.
How to Know When Gourds Are Fully Dry
A dry gourd gives several clues. First, it feels lighter than expected. Second, the shell is hard and no longer cool or damp to the touch. Third, many gourds rattle when shaken because the seeds have dried and loosened. Fourth, the stem feels dry and woody. Finally, the gourd no longer changes much from week to week.
Do not judge by the outside alone. A gourd can look dry on the surface while still holding moisture inside. This is why patience matters. If you plan to cut, drill, paint, or seal the gourd, wait until it is fully cured. Gourds are not in a hurry, which is rude but educational.
Cleaning Dried Gourds Before Decorating
Once gourds are fully dry, clean the surface before turning them into decor. Soak or wipe them with warm soapy water, then scrub gently with a soft brush or kitchen scrub pad. Work outdoors or in a ventilated area, especially if the surface is dusty or moldy. Let the gourds dry completely again before painting or sealing.
For a natural look, you can leave the gourd unfinished. For a polished look, apply furniture wax, clear acrylic spray, shellac, or craft sealant. Painted gourds look great with acrylic paint, chalk paint, metallic accents, stencils, or hand-lettered designs. If you are making birdhouses, use outdoor-safe finishes and make sure drainage and ventilation holes are included.
Decorating Ideas for Dried Gourds
Fall Centerpieces
Arrange dried gourds in a shallow wooden bowl with pinecones, acorns, dried leaves, wheat stems, or mini pumpkins. Use different shapes and sizes for texture. A bumpy gourd, a smooth bottle gourd, and a tiny pear-shaped gourd together can make a table look styled without trying too hard.
Painted Holiday Ornaments
Small dried gourds can become ornaments for Halloween, Thanksgiving, Christmas, or Easter. Paint them like ghosts, turkeys, snowmen, woodland animals, or speckled eggs. Add twine loops to the stems and hang them from branches, garlands, or a seasonal tree.
Birdhouses and Garden Decor
Hard-shell gourds are famous for birdhouses. Once fully dry, cut an entrance hole, remove seeds and pulp, sand rough edges, and add drainage holes. Hang the finished birdhouse in a suitable outdoor location. You can paint it brightly or keep it natural for a rustic garden look.
Bowls, Dippers, and Rustic Crafts
Large gourds can be cut into bowls, scoops, ladles, and planters for dried arrangements. Always wear a dust mask when sanding or cutting dried gourds because the dust can irritate your lungs. Clean the inside thoroughly, let it dry, and seal the surface if the piece will be handled often.
Common Mistakes to Avoid When Drying Gourds
The biggest mistake is picking gourds before they are mature. Immature gourds usually do not cure well. The second mistake is crowding them together. Gourds need space. If they touch, trapped moisture can lead to rot. The third mistake is storing them in plastic containers before they are fully dry. Plastic traps moisture and turns a drying project into a compost preview.
Another mistake is panicking over every patch of surface mold. Mold on the outside of a hard, drying gourd can be normal. The key question is whether the gourd is still firm. Firm gourds can often be cleaned later. Soft gourds should be removed. Finally, do not paint too soon. A fully dry gourd is a craft supply. A half-dry gourd is a ticking decorative mystery.
Personal Experience: What Drying Gourds Teaches You
Drying gourds sounds like a craft, but it feels more like a tiny lesson in patience. The first time you set a batch of gourds on a rack, you may expect them to transform in a week. You imagine yourself holding a perfect little dried gourd, painting delicate vines on it, and casually becoming the sort of person who says, “Oh, I made that from my garden.” Then week two arrives, and the gourds look almost exactly the same, except one has developed a fuzzy spot and another has rolled behind the shelf like it is avoiding responsibility.
The best experience comes when you stop trying to rush the process. A good drying setup becomes part of the rhythm of the season. You check the gourds when you walk through the garage. You turn them after taking out the trash. You remove one sad, soft gourd and feel oddly betrayed. You celebrate the first rattle like it is a tiny maraca announcing victory.
One practical lesson is that spacing matters more than people think. A crowded tray of gourds may look beautiful at first, but it dries poorly. Give each gourd its own airspace. Another lesson is that stems are precious. A gourd with a stem is easier to hang, prettier in arrangements, and less likely to have damage at the top. When harvesting, use pruners and leave the stem attached. Pulling gourds from the vine may feel faster, but it can bruise the rind or snap the stem.
Cleaning also matters. Dirt on the rind may carry organisms that encourage decay. A gentle wash before curing can save a surprising number of gourds. Still, even with perfect care, not every gourd survives. That is normal. Drying gourds is partly selection. The strongest, most mature, least bruised gourds make it to the craft table.
Another experience many decorators discover is that dried gourds rarely keep the exact bright colors they had when fresh. Some fade, darken, or develop mottled patterns. At first, this can feel disappointing. Later, it becomes part of the charm. A dried gourd has character. It looks aged, earthy, and handmade before you even touch a paintbrush. Those natural marks can become part of the design, especially for rustic, farmhouse, woodland, or vintage-style decor.
If you plan to use gourds for a specific event, start early. Drying gourds for Thanksgiving in the same month as Thanksgiving is brave, optimistic, and probably doomed. For reliable decorating, cure gourds months ahead or buy already-dried gourds for immediate crafting. Fresh gourds are perfect for temporary fall displays, but dried gourds are what you want for projects that last year after year.
The most satisfying moment is decorating a gourd that has fully cured. It feels light but strong. The seeds rattle inside. The shell takes paint beautifully. A simple coat of white paint can turn a pear gourd into a winter ornament. A natural bottle gourd can become a birdhouse. A cluster of small gourds in a bowl can make a dining table look warm and seasonal without plastic leaves, glitter explosions, or anything that requires batteries.
In the end, drying gourds is not difficult. It is slow. That is the difference. Give them maturity, airflow, dryness, and time, and they will reward you with decor that feels natural, handmade, and wonderfully imperfect. In a world of instant decorations shipped in two days, a dried gourd is a small, lumpy reminder that some of the best things still take a season.
Conclusion: The Best Way to Dry Gourds for Decorating
The best way to dry gourds depends on your space, climate, and gourd type. For most people, rack drying is the easiest and most dependable method. Hanging is excellent for large or long-handled gourds. Assisted indoor curing helps when humidity, rain, or cold weather threatens the process.
No matter which method you choose, the rules stay the same: start with mature gourds, clean them gently, keep them spaced apart, provide airflow, check them often, remove rotting gourds, and wait until they are fully dry before decorating. When the seeds rattle and the shell feels hard, your gourd is ready for its second life as a centerpiece, ornament, birdhouse, bowl, or quirky little masterpiece.
Drying gourds is not the fastest fall project, but it is one of the most rewarding. It turns garden leftovers into decor with personality. And honestly, any craft that begins with a weird vegetable and ends with a charming handmade display deserves a place on the autumn to-do list.




