Table of Contents >> Show >> Hide
- 1. Start by unplugging everything and sorting what you actually use
- 2. Mount your power strip under the desk
- 3. Create one main cable route instead of letting cords freestyle
- 4. Bundle cables by purpose with hook-and-loop ties
- 5. Use cable clips to control the “drop zone” on your desktop
- 6. Hide bulky adapters and extra slack in a cable box or tray
- 7. Label every cable, especially the ones that look identical
- 8. Build a dedicated charging station instead of charging everywhere
- 9. Go wireless where it genuinely reduces clutter
- 10. Follow a few basic safety rules while making things look nice
- Final Thoughts
- What I Learned After Finally Organizing My Desk Cables
- SEO Tags
If your desk looks less like a workspace and more like a spaghetti convention, you are not alone. Modern desks have a funny habit of collecting wires the way pockets collect receipts: slowly, mysteriously, and with absolutely no regard for aesthetics. Between your monitor, laptop, phone charger, lamp, speakers, keyboard, webcam, and that one cable you swear you still need, cable clutter can turn a clean setup into visual noise.
The good news is that desk cable management does not require a custom-built office, a toolbox worthy of a contractor, or a full weekend of rage-cleaning. A few smart habits and a handful of inexpensive accessories can make your workspace look cleaner, feel more functional, and become much easier to maintain.
Below are 10 simple ways to organize desk cables without turning the project into a home improvement documentary. These tips combine practicality, safety, and a little design sense so your desk can finally stop looking like it lost a fight with an octopus.
1. Start by unplugging everything and sorting what you actually use
The fastest way to improve cable organization is not buying more gear. It is getting honest about what belongs on your desk in the first place. Before you stick, clip, wrap, or hide anything, unplug every cable and sort it into categories: daily-use, occasional-use, and why-do-I-still-own-this.
This step matters because clutter multiplies when old cables stay mixed in with active ones. If your desk is hosting chargers for devices you no longer own, duplicate HDMI cords, or a mystery USB cable from the Obama era, no organizer on Earth will save the setup. Remove damaged cords, recycle outdated accessories when possible, and keep only what supports your current workflow.
Think of this as editing before decorating. A desk with fewer cables is automatically easier to manage, easier to clean, and easier to troubleshoot when something stops working.
2. Mount your power strip under the desk
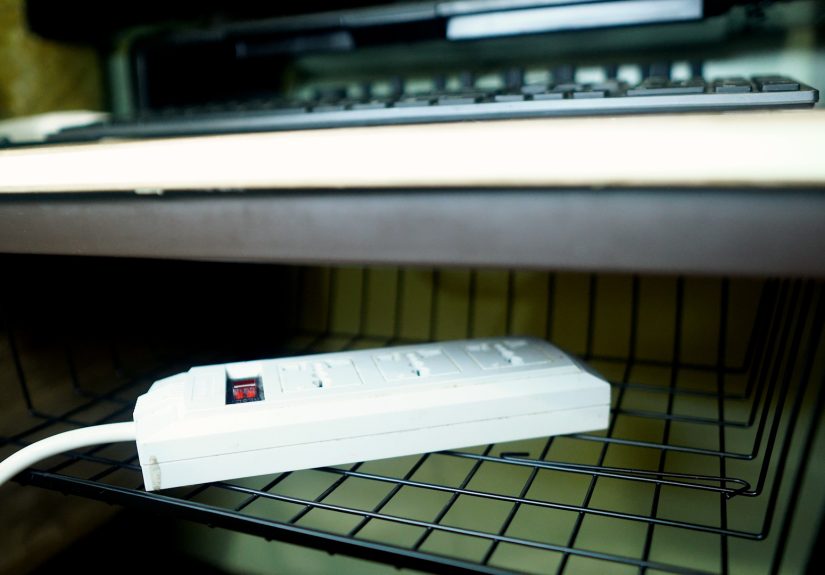
One of the biggest sources of cable chaos is the power strip sitting on the floor like a tiny plastic city where every road leads to doom. Moving it under the desk instantly shortens visible cable runs, keeps plugs off the floor, and makes the whole setup look more intentional.
Why this works
When the power strip is mounted beneath the desktop, cables no longer have to drop all the way to the floor before climbing back up to your devices. That means less dangling, less tangling, and fewer opportunities for dust bunnies to claim squatters’ rights.
How to do it
Use screws, adhesive brackets, or an under-desk cable tray designed to hold a surge protector. Place it where you can still reach the switch if needed, but not where your knees will stage a rebellion. This one move often creates the biggest visual improvement with the least effort.
3. Create one main cable route instead of letting cords freestyle
Cables look messy when each one takes its own dramatic path to the outlet. A cleaner setup happens when you choose a single route for most wires to follow, usually along the back edge of the desk, down one leg, or through an under-desk tray.
Think of your cable path like a hallway. If everyone walks through the hallway, the room stays orderly. If everyone climbs through the windows, things get weird fast. Use adhesive clips, raceways, or sleeves to guide cables along the same line so they appear deliberate instead of accidental.
This method works especially well for standing desks, where a defined route helps cables move more neatly with the frame. It also makes future changes easier because you know exactly where wires are supposed to go.
4. Bundle cables by purpose with hook-and-loop ties
Not all cables should be bundled together like one giant technological braid. The trick is grouping them by function. For example, monitor and dock cables can form one bundle, charging cables another, and peripherals like speakers or a webcam a third.
Reusable hook-and-loop ties are usually the easiest choice because they are adjustable and friendly to people who change setups often. Zip ties can work too, but they are better for more permanent arrangements. If you regularly swap laptops, upgrade accessories, or pretend you are going to keep your desk minimal while buying three new gadgets a month, hook-and-loop ties are the smarter option.
Keep the bundles snug but not overly tight. Cables need a little breathing room, and yanking them into a death grip can make replacement or troubleshooting a headache later.
5. Use cable clips to control the “drop zone” on your desktop
You know the moment when a charging cable slips behind the desk and disappears into the void? Cable clips solve that tiny daily annoyance that somehow feels deeply personal. By attaching clips to the back or edge of your desk, you keep frequently used cords exactly where you need them.
This is especially useful for phone chargers, smartwatch cables, earbuds, or any cord you plug in and unplug often. Instead of fishing around behind furniture like you are bobbing for apples in a dark lake, you can keep the cable end parked neatly within reach.
A simple clip system also helps define where certain cables belong. Once every charger has a home, your desk feels less chaotic and far more user-friendly.
6. Hide bulky adapters and extra slack in a cable box or tray
The ugliest part of most desk setups is not the cables themselves. It is the collection of oversized plugs, power bricks, and extra cord length lounging under the desk like they pay rent. A cable management box or under-desk tray helps hide that visual clutter without making the setup harder to access.
Use a box if you want a quick, renter-friendly fix. Use a tray if you want a more built-in look. Either way, the goal is the same: keep excess cable length and chunky adapters contained in one controlled space.
This approach works particularly well in home offices that double as guest rooms, bedrooms, or shared living spaces. A tidy cable box can make a workstation feel like part of the room instead of a temporary electronics pile that gained legal residency.
7. Label every cable, especially the ones that look identical
Cable labels are not glamorous, but they save time, frustration, and several unnecessary muttered insults. If you have ever unplugged the monitor when you meant to unplug the laptop dock, you already understand the value.
Label both ends when possible. Use a label maker, masking tape, color-coded tags, or pre-made cable labels. Keep the names simple: “Monitor,” “Dock,” “Phone Charger,” “Printer,” or “Webcam.”
This becomes even more important with modern USB-C setups. Many cables look the same but do very different jobs. Some are mainly for charging, while others handle data or video connections too. A labeled cable system helps you avoid the classic mystery of why one USB-C cord powers your laptop while another acts like it has never met a monitor in its life.
8. Build a dedicated charging station instead of charging everywhere
One reason desk cables multiply is that charging happens wherever there is empty space. A phone cable appears near the keyboard, a tablet charger migrates to a side shelf, and suddenly your desk has become a public utility grid. A dedicated charging station stops that spread.
What it can look like
Your charging station can be as simple as a small tray, drawer, basket, or desktop corner with a multi-port charger or dock. The point is to assign one place for the devices that regularly need power.
Why it helps
It corrals cables into one predictable zone, prevents chargers from sprawling across the work surface, and makes it easier to grab the right cord quickly. It also reduces the temptation to leave cables draped across the desk like decorative vines from a very disappointing jungle theme.
9. Go wireless where it genuinely reduces clutter
Cable management is not always about managing more cleverly. Sometimes it is about needing fewer cables. If your setup allows it, switching to a wireless mouse, keyboard, headset, or charging pad can reduce visible clutter dramatically.
That said, do not force wireless into places where it makes your workflow worse. A wired monitor is still normal. A wired desktop microphone may still be the better choice. The idea is selective reduction, not a purity test. Replace the cables that add annoyance, not the ones that reliably do their jobs.
In many cases, swapping even two or three constantly visible cords for wireless alternatives makes the desk feel calmer and more open.
10. Follow a few basic safety rules while making things look nice
A well-organized desk should not just look better. It should also be safer. Good cable management is part design project, part common sense. As you tidy things up, avoid creating hidden electrical problems in the name of a cleaner aesthetic.
Do not daisy-chain power strips. Do not route flexible power cords through walls, floors, windows, or doorways. Do not rely on extension cords as a permanent solution. Keep cords out of walkways where they can become tripping hazards, and replace damaged cables instead of giving them one last heroic season.
Also, avoid covering cords in ways that trap heat or put strain on the plug. Neat should never mean jammed, pinched, or unsafe. The best cable setup is one that stays easy to inspect, easy to update, and boring in the best possible way.
Final Thoughts
Desk cable organization is one of those projects that seems small until you do it and suddenly wonder why you waited so long. A cleaner cable setup makes your desk easier to use, easier to clean, easier to troubleshoot, and a whole lot easier on the eyes. Better still, it does not require perfection. You do not need an Instagram-ready workstation with invisible wires and a Scandinavian desk lamp posing in natural light. You just need a system that makes sense for your space and your habits.
Start with the highest-impact changes: remove what you do not need, mount the power strip, define one cable route, and label the essentials. Then add clips, trays, sleeves, or a charging station depending on how much structure your setup needs. Once your desk stops fighting you every time you plug something in, you will wonder how you tolerated the cable nest for so long.
What I Learned After Finally Organizing My Desk Cables
My own experience with desk cables started the way many cable horror stories begin: with confidence. I thought I had a “simple” setup. One monitor, one laptop, one lamp, one phone charger, one speaker, one keyboard, one mouse, and a docking station. That sounded manageable in theory. In practice, it looked like I had tried to knit a sweater out of electronics.
The first thing I learned was that the mess was not caused by having too much technology. It was caused by having no system. Every time I added a new device, I plugged it in wherever it was convenient at that exact moment. I told myself I would fix it later. Later, apparently, was a mythical date never listed on any calendar.
Once I finally unplugged everything, the biggest surprise was how many cables were not doing anything useful. I had backups of backups, chargers for devices I no longer owned, and random cords I kept out of pure optimism. Throwing out the dead weight made the rest of the project feel much easier. It turns out half of cable management is simply refusing to store electronic fossils.
The second lesson was that under-desk organization matters more than desktop organization. I used to focus on what I could see on the surface, but the real chaos lived underneath. Mounting the power strip and guiding cables along one desk leg changed the entire look of the setup. Suddenly, the desk looked intentional instead of temporary, like I actually meant for it to be there.
I also learned that labels are embarrassingly effective. Before labeling, unplugging one cable felt like a high-stakes game show. After labeling, it became impossible to confuse my monitor cable with my charging cable or my dock connection with my lamp cord. That tiny step saved more time than any fancy accessory.
And then there was the daily quality-of-life upgrade I did not expect: cable clips. Keeping my phone charger from slipping behind the desk sounds minor, but it removed one of those tiny irritations that quietly chips away at your patience. Good desk organization is often less about dramatic transformation and more about eliminating annoying little frictions you have normalized.
The most practical lesson of all was this: cable management is not a one-time makeover. It is a maintenance habit. Every new gadget is a chance to either protect the system or sabotage it. Now, when I add something new to my desk, I try to route it properly on day one, label it immediately, and decide whether it belongs in an existing bundle or needs its own path. That small discipline keeps the mess from creeping back in like it pays utilities.
If you are staring at a knot of desk cables right now, the encouraging truth is that you do not need to solve everything at once. Pick one improvement. Move the power strip. Add clips. Label the chargers. Create a charging zone. Do one thing well, then do the next thing. The transformation is usually faster than expected, and the payoff shows up every single day you sit down to work.




