Table of Contents >> Show >> Hide
- Choose Your French Script Style (Because “Paris” Has Many Moods)
- Materials and Tools (Pick the Version That Matches Your Patience Level)
- Step 1: Figure Out What You’re Painting (Wood, Veneer, or “Surprise Plastic”)
- Step 2: Clean Like You Mean It (Yes, Even If It “Looks Fine”)
- Step 3: Sand Smart (The Goal Is Grip, Not a Woodworking Documentary)
- Step 4: Fix the Stuff Your Eyes Keep Staring At
- Step 5: Prime (The Step That Feels Skippable Until It Isn’t)
- Step 6: Paint the Base Color (Thin Coats WinAlways)
- Step 7: Add the French Script (Three Methods That Actually Work)
- Step 8: Make It Look “Collected,” Not “Just Finished”
- Step 9: Seal the Top (Because Dinner Tables Live Dangerous Lives)
- Step 10: Styling the Finished Table (So It Looks Like It Belongs There)
- Troubleshooting: Fix the Common “Why Is It Doing That?” Moments
- Time and Cost Reality Check
- Wrap-Up: Your “New” Table, Same Great Bones
- Experiences from the Makeover Journey (What It’s Actually Like)
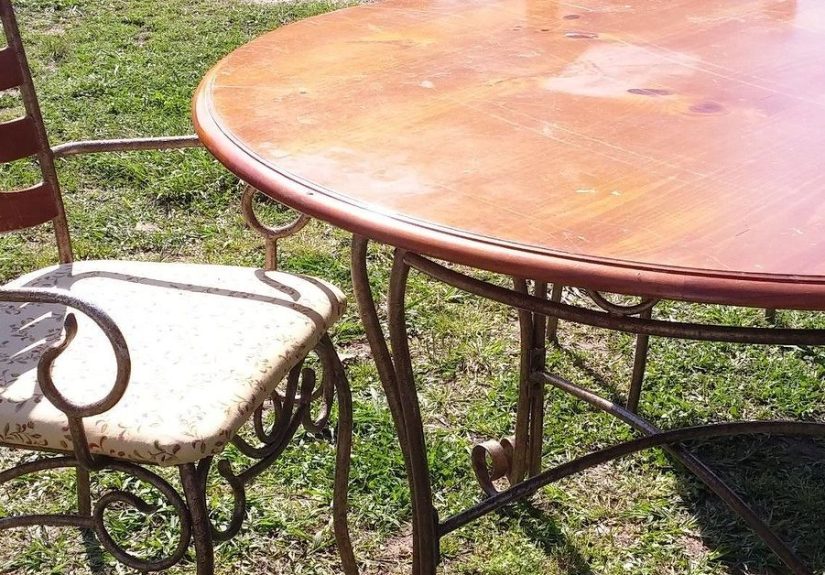
Every house has that table. The one that’s structurally fine but aesthetically… tired. Maybe it’s covered in mystery scratches,
maybe the finish is blotchy, or maybe it simply screams “college apartment circa 2014.” The good news: a worn dining table is basically a
blank canvas with legs. And with the right prep, paint, and a little French script flair, you can turn “meh” into “ooh la la.”
This guide walks you through a durable, real-life-friendly makeover: a refreshed base color plus charming French script (think vintage letters,
old receipts, café menus, handwritten notes), sealed well enough to survive weeknight dinners, homework marathons, and the occasional dramatic
fork drop. You’ll get multiple methods for adding the script, smart product choices, and the small details that make the result look
intentionally boutiquenot accidentally crafty.
Choose Your French Script Style (Because “Paris” Has Many Moods)
“French script” doesn’t have to mean one specific look. Before you touch sandpaper, decide how you want the tabletop to feel when it’s done.
Here are four solid directions, from easiest to fanciest:
1) Subtle Script Accent (Elegant, Not Loud)
You paint the table a soft neutral (cream, warm gray, muted blue), then add script in just a few areaslike the center panel or a border.
It reads “French farmhouse” without shouting “I own exactly one beret.”
2) All-Over Script (The Statement Piece)
Script covers most of the top, like an antique ledger page. This works best when the lettering is slightly faded or layered, so it feels aged
instead of printed yesterday.
3) Script + Distress (Rustic Bistro Energy)
You distress edges and high-touch areas for that “this table has seen a thousand baguettes” look. Great for farmhouse or cottage interiors,
and especially forgiving if the original tabletop has dents or wear you can’t completely erase.
4) Script Under Glassy Protection (Busy Family Approved)
If this is your main dining table, you’ll want a tough topcoat. You can still keep a vintage look, but choose a protective finish that resists
water rings and wipe-downs.
Materials and Tools (Pick the Version That Matches Your Patience Level)
Core Supplies
- Cleaner/degreaser (simple dish soap works for many tables)
- Sandpaper (120, 180/220; plus a sanding block or sponge)
- Vacuum and a lint-free cloth
- Painter’s tape and drop cloth
- Primer (bonding primer if the surface is slick or glossy)
- Paint (cabinet/trim enamel, furniture paint, or chalk-style paint)
- Brush + small foam roller (foam roller is the secret to smoother tabletops)
- Topcoat (water-based polyurethane or a durable furniture topcoat)
For the French Script
- Rub-on transfer or decal (fast, crisp, very “printed”)
- Stencil (slightly artsy, customizable placement)
- Decoupage paper/fabric (layered, vintage collage vibe)
If you’re choosing just one method for your first try, rub-on transfers or stencils are the easiest to control. Decoupage can look stunning,
but it rewards the patient and mildly punishes the rushed.
Step 1: Figure Out What You’re Painting (Wood, Veneer, or “Surprise Plastic”)
Not all “wood tables” are actually wood. Here’s why it matters: solid wood forgives you; veneer demands gentleness; laminate demands bonding.
Check the underside and edges. If you see a thin outer layer with a different core, it may be veneer. If the surface feels very slick and
uniform with no grain, you could be dealing with laminate.
If your table is very old or has multiple unknown paint layers, be cautious about sanding dust. Use a clean, contained work area and consider
safer prep methods (like wet wiping and minimal sanding) when you’re unsure about old coatings.
Step 2: Clean Like You Mean It (Yes, Even If It “Looks Fine”)
Furniture fails at the same place relationships do: poor communication and leftover residue. A tabletop can look clean and still
be coated with oils from hands, furniture polish, cooking film, or that one candle that “barely dripped” (it did).
Wash with a degreasing cleaner or warm water + dish soap. Rinse with clean water and dry completely. If the table lived a hard life near a stove,
do a second clean. Paint hates grease. Grease laughs at paint. Don’t let grease win.
Step 3: Sand Smart (The Goal Is Grip, Not a Woodworking Documentary)
You’re not trying to sand the table into a brand-new board. You’re creating toothmicroscopic texture that helps primer and paint bond.
For most tables, a scuff sand with 180–220 grit is enough if the existing finish is stable. If the finish is peeling or bumpy, start at 120,
then move up to 180/220 to smooth.
After sanding: vacuum the dust thoroughly, then wipe with a lint-free cloth. Dust left behind becomes tiny bumps you’ll see foreverespecially
when sunlight hits the tabletop and reveals your “texture decisions.”
Step 4: Fix the Stuff Your Eyes Keep Staring At
Fill dents and gouges with wood filler and let it dry fully. Tighten wobbly legs and check corner joints. A French script table is adorable,
but a French script table that rocks like a boat at sea is less charming. Repairs now prevent regret later.
Step 5: Prime (The Step That Feels Skippable Until It Isn’t)
Priming is how you avoid paint peeling when someone drags a plate across the top or when humidity decides to get creative.
Use a bonding primer if the surface is glossy, laminate, or previously sealed with a slick finish. Use a stain-blocking
primer if you suspect tannin bleed (common with certain woods and knots).
Apply primer in thin, even coats. Let it dry as directed. Then lightly sand the primer with fine grit (around 220) to knock down texture and
create a smoother base for paint. Wipe away dust again. This is the “boring” step that makes the finished table look expensive.
Step 6: Paint the Base Color (Thin Coats WinAlways)
For dining tables, durability matters. A cabinet/trim enamel or a furniture-grade paint is a strong choice because it’s formulated for wear.
Chalk-style paint is easier to use but often needs a protective topcoat (and it can mark more easily if left unsealed).
How to Get a Smooth Top (Without Becoming a Professional Sprayer)
- Use a small foam roller for the flat top and a brush for edges and details.
- Apply thin coats. If it looks slightly streaky on coat one, that’s normal.
- Let each coat dry fully, then lightly sand between coats for a smoother finish.
- Two to three coats is common for solid coverage, especially with light colors.
Color tip: For a classic French look, consider warm white, creamy ivory, soft greige, dusty blue, or muted sage. Bright white can look modern
unless you add aging details. Dark colors look dramatic but show dust and crumbs like they’re on a mission.
Step 7: Add the French Script (Three Methods That Actually Work)
This is the fun partwhere your table goes from “freshly painted” to “found at a charming market near a café that definitely serves perfect croissants.”
Choose one of the methods below based on the vibe you want and how much control you like.
Method A: Rub-On Transfers or Decals (Crisp, Fast, Vintage-Print Look)
Transfers are great if you want lettering that looks professionally printed. The best results come from applying them on a smooth, fully cured
surface. A lightly sealed base can help adhesion and reduce the chance of the transfer grabbing too aggressively in the wrong spot.
- Let paint cure thoroughly (especially if it’s a soft, chalk-style finish).
- If recommended for your transfer type, apply a thin water-based sealer and let it dry.
- Position the transfer, tape it in place, and burnish in sections.
- Slowly lift the carrier sheet; if anything stays behind, lay it back down and rub again.
- Once fully applied, gently buff with a soft cloth to seat the design.
Important: Avoid wax under transfers. Wax can prevent proper adhesion and sealing, which is basically the craft version of trying to ice a cake
while it’s still in the oven.
Method B: Stenciling (Handmade Charm, Easy to Customize)
Stencils shine when you want script to look slightly imperfect and old. You can create faded areas, overlap lines, and “weather” the text
so it feels authentic.
- Secure the stencil with painter’s tape.
- Use a stencil brush or dense sponge and very little paint (dab off excess first).
- Pounce lightly, building color slowly to avoid bleed under edges.
- Shift the stencil to create layered lines or broken phrases for a vintage effect.
Pro move: Use two close shades of script color (like soft charcoal plus warm gray) and alternate lightly. It creates depth without making the
table look busy.
Method C: Decoupage Script (Layered, Romantic, “Antique Paper” Vibe)
Decoupage works beautifully for all-over script. You can use printed tissue, thin paper, or even fabric with script. The key is thin layers,
smoothing patiently, and sealing well.
- Cut or tear script pieces so edges blend naturally (torn edges hide better than sharp cuts).
- Apply decoupage medium to the tabletop in sections.
- Lay your script paper/fabric gently and smooth from the center outward to push out air.
- Apply a thin top layer of decoupage medium over the paper and let it dry fully.
- Repeat with overlapping pieces until you like the coverage.
If you’re using fabric, pre-coating it with decoupage medium and letting it dry first can make it behave more like paper, which is helpful when
you’re trying to avoid bubbles and wrinkles.
Step 8: Make It Look “Collected,” Not “Just Finished”
A French script table often looks best when it has a bit of softnesslike it’s been loved for years.
You can achieve that without going full “shabby apocalypse.”
Easy Aging Options
- Light distressing: Sand edges and corners very gently after paint dries.
- Soft glaze: A thin glaze in crevices adds depth and antique character.
- Faded script: Lightly sand over parts of the lettering once it’s sealed enough to handle it.
Keep it believable: most wear happens at edges, near seats, and where hands naturally rest. If you distress the dead center in a perfect circle,
it can look less “vintage” and more “target practice.”
Step 9: Seal the Top (Because Dinner Tables Live Dangerous Lives)
Dining tables deal with heat, moisture, scraping, wiping, and the occasional craft project that begins with “Don’t worry, I put newspaper down.”
Use a topcoat that matches your lifestyle.
Water-Based vs. Oil-Based Protection (Quick, Practical Guidance)
- Water-based topcoats dry clear and stay clearer over timegreat for light colors and crisp script.
- Oil-based topcoats can add warmth/ambering and may deepen over timepretty on wood tones, less ideal for bright whites.
Apply multiple thin coats, letting each one dry properly. Lightly sand between coats (fine grit) for a smoother feel. For a high-use dining
table, more protective coats generally mean longer-lasting peace.
Care Tip That Saves Heartbreak
Many finishes feel dry long before they’re fully cured. Treat the table gently for the first couple of weeks: use placemats, avoid standing water,
and don’t drag heavy items across the top like you’re auditioning for a furniture-moving competition.
Step 10: Styling the Finished Table (So It Looks Like It Belongs There)
French script is charming, but the styling makes it sing. Try a simple linen runner, a low bowl of fruit, or a small vase with greenery.
If your chairs are modern, consider adding soft seat cushions to bridge the style. If your room is already farmhouse-heavy, keep accessories
minimal so the tabletop stays the star.
Troubleshooting: Fix the Common “Why Is It Doing That?” Moments
Paint is peeling or scratching too easily
Usually a prep or primer issue. Clean/degrease more thoroughly next time, use a bonding primer on slick surfaces, and allow full cure time.
Brush marks on the tabletop
Use a foam roller for the flat areas, apply thinner coats, and sand lightly between coats. Also: step away from over-brushing. The paint needs
to level, and it can’t do that if you keep “helping.”
Transfer looks patchy
Burnish more firmly and slowly, and work in small sections. Make sure the base is smooth and properly sealed if the transfer instructions call for it.
Decoupage has bubbles or wrinkles
Work in smaller sections, smooth from the center outward, and use thinner paper. For stubborn bubbles, you can sometimes slice a tiny slit and
smooth it down with a bit more medium once dry.
Time and Cost Reality Check
Most table makeovers take a weekend of hands-on time plus drying/curing time in between. Cost depends on what you already own, but the biggest
“worth it” spend is usually the primer and topcoatbecause a gorgeous table that chips immediately is just a sad craft story waiting to happen.
Wrap-Up: Your “New” Table, Same Great Bones
The magic of this makeover isn’t just the French script (though it’s adorable). It’s the idea that you can take something worn and make it feel
special againwithout buying a new table, without perfect woodworking skills, and without pretending you enjoy sanding (nobody does; they’re lying).
With good prep, a thoughtful design, and a protective finish, your once-tired table can become the kind of piece people ask about when they visit.
Experiences from the Makeover Journey (What It’s Actually Like)
If you’ve never refinished furniture before, transforming a tired old dining table into a cute French script showpiece can feel like a mini
adventurepart creative project, part patience training, and part “why is there sanding dust in places I don’t even go?” The experience usually
starts with a burst of confidence: you see the table, you picture the final look, and you think, “This will be quick.” Then you meet the true
timeline of DIY: prep, dry, wait, repeat.
The cleaning stage is oddly satisfying. You wipe down the surface and realize the table wasn’t just “a little dull”it was wearing a thin film of
old polish and daily life. It’s the moment you understand why paint sometimes peels: it wasn’t the paint’s fault; it was the table’s secret
skincare routine. Once the surface is genuinely clean, sanding feels more purposeful. It’s not glamorous, but there’s something calming about
turning a slick, tired finish into a softly scuffed surface that’s finally ready to change careers.
Painting brings the first real dopamine hit. The base coat looks patchy and questionable at firstthis is normal, and also the moment many people
panic-text a friend. By the second coat, the color settles in and suddenly the table looks fresh. A foam roller on the top often feels like a cheat
code: fewer streaks, smoother coverage, less “handmade in the wrong way.” When you lightly sand between coats, you’ll notice the surface gets
smoother with each pass, and that’s when the project starts to feel professional.
Adding the French script is the “big reveal” phase. Transfers can be thrilling because you see crisp lettering appear almost instantlylike magic,
except the wand is your burnishing tool and your spell is “please don’t misalign.” Stencils feel more artistic, and they give you the freedom to
fade letters, overlap phrases, or keep it subtle. Decoupage feels like collage-making for grown-ups: you’re layering pieces, smoothing them down,
and watching the tabletop develop that vintage-paper depth. It’s also where you learn the universal truth of decoupage: rushing equals bubbles,
and bubbles equal regret.
The topcoat stage is where you shift from “artist” to “protector of the realm.” This part can test your patience because the table may look done,
but you know it needs protectionand it needs time. You start treating the table like a freshly baked cake: no touching, no dragging, no setting
things down too soon. Waiting for cure time can feel annoying, but it pays off when your finish holds up to real life. Many people describe this
moment as the point when the piece stops being a project and becomes furniture againsomething you can actually use.
The final experience is the most fun: styling and living with it. You place a runner, a bowl, a vasethen you step back and realize you made
something that looks like it belongs in your home on purpose. It’s common to notice tiny imperfections only you will ever see, but those details
tend to fade the moment someone says, “Wait… you did this yourself?” The best part is that the table carries a story now. It’s not just where you
eatit’s proof that a worn-out piece can get a second life with a little work, a little creativity, and a very reasonable amount of “oops, let me
sand that again.”





