Table of Contents >> Show >> Hide
- Why a $1 Plastic Pumpkin Is the Ultimate DIY Blank Canvas
- The Best Makeover: “High-End Stoneware” Pumpkin (A.K.A. The $1 Pumpkin With Taste)
- More $1 Plastic Pumpkin Makeovers (Pick Your Personality)
- 1) Modern Marble (The “Paint Pour” Pumpkin)
- 2) Decoupage Pumpkins (Maps, Book Pages, or Fancy Napkins)
- 3) Velvet-Wrapped Pumpkin (Soft, Luxe, and Surprisingly Easy)
- 4) Faux Mercury Glass (Old-Hollywood Halloween)
- 5) Lace Silhouette Pumpkin (Instant “Halloween Chic”)
- 6) Disco Ball Pumpkin (Because Fall Can Have Sparkle)
- 7) Terrazzo Confetti Pumpkin (Playful, Modern, Not Too “Spooky”)
- 8) Farmhouse Painted Pumpkin (Soft White With Shading)
- 9) Pumpkin Planter or Vase (The “I Decorate Like a Pro” Trick)
- How to Make Paint Stick to Plastic (Without Tears)
- Common Mistakes (and How to Fix Them)
- Time and Cost: What to Expect
- Conclusion: Your $1 Pumpkin’s Glow-Up Era Starts Now
- Extra: The “Real Life” Experience of Giving a $1 Plastic Pumpkin a Makeover (500+ Words of Honest Craft-Table Wisdom)
Somewhere out there, a lonely $1 plastic pumpkin is sitting in a discount bin, glowing the exact shade of
“traffic cone orange,” quietly begging for a second chance. And honestly? That little pumpkin deserves it.
Because with a few smart upgrades, you can turn bargain-bin plastic into fall decor that looks like it came
from a boutiquewithout spending boutique money.
This guide is all about making the most of the cheapest pumpkin you can find. You’ll get one “best makeover”
(the kind that makes guests squint and ask, “Wait… that’s from where?”), plus a menu of other high-impact
transformations, and practical tips for getting paint to actually stick to plastic.
Why a $1 Plastic Pumpkin Is the Ultimate DIY Blank Canvas
Real pumpkins are charming, but they’re also dramatic. They bruise, rot, attract bugs, and occasionally
collapse into a sad puddle right before your party. A plastic pumpkin, on the other hand, is the low-maintenance
friend who shows up on time, never complains, and can be reused every year.
- It’s durable: It won’t dent like foam and won’t rot like the real deal.
- It’s safer: No carving requiredperfect for no-mess decorating.
- It’s predictable: Same shape, same size, same vibeideal for matching sets and styling.
- It’s cheap: You can test bold ideas without the fear of “ruining” anything.
The only downside? Plastic can be slick and glossy, which means paint sometimes behaves like a toddler on a
sugar rushslipping around and refusing to cooperate. Don’t worry. We’ll fix that.
The Best Makeover: “High-End Stoneware” Pumpkin (A.K.A. The $1 Pumpkin With Taste)
If you want one makeover that looks expensive, feels trendy, and fits almost any home stylefrom modern minimal
to cozy farmhousego for a matte, textured “stoneware” finish. Think: pottery-inspired neutrals, subtle speckling,
and a stem that doesn’t scream “I am made of plastic.”
This finish is popular because texture hides imperfections, matte reads “designer,” and neutral pumpkins can stay
out from early fall through Thanksgiving without clashing with everything you own.
What You’ll Need (Budget-Friendly)
- $1 plastic pumpkin
- Dish soap and water (for cleaning)
- Primer made for slick surfaces or plastic (optional but helpful)
- Matte acrylic craft paint (cream, warm white, greige, or charcoal)
- Texture booster: baking soda (or fine household powder like flour for a softer grit)
- Small paintbrush or sponge
- Optional: a little dark paint for shading
- Optional: wax or matte sealer for durability
- Optional stem upgrade: a real twig, cinnamon stick bundle, or a nicer faux stem
Safety note: If you use spray primer/paint, do it outdoors or in a well-ventilated area and get an
adult to help. Same goes for hot glue or cutting tools.
Step-by-Step: How to Get the Stoneware Look
-
Clean first (don’t skip this): Wash the pumpkin with mild dish soap and water to remove oils and
factory residue. Let it dry completely. Paint hates greasy plastic. -
Prep the surface for grip: If the pumpkin is super shiny, a very light scuff with fine sandpaper
can help. Wipe dust away. If sanding isn’t an option, a bonding primer or plastic-friendly spray paint can do the
heavy lifting. -
Mix your “stoneware” paint: In a disposable cup or plate, stir a spoonful of baking soda into
your base paint. You’re aiming for a slightly gritty, yogurt-like consistencyspreadable but not watery. -
Apply in thin, textured coats: Dab or stipple the mixture on with a sponge or stiff brush. This
creates a pottery-like surface. Two light coats usually look more realistic than one thick coat. -
Add subtle depth: Once dry, dry-brush a slightly darker shade into the grooves (or lightly
sponge it on), then soften it with your base color. This mimics the natural shading of real pumpkins and keeps the
finish from looking flat. -
Upgrade the stem: The quickest way to make a fake pumpkin look real is to improve the stem. If
yours is removable, swap it for a twig or a cinnamon bundle. If not, paint it a matte brown and add faint lighter
streaks. -
Seal if it’ll be handled: If the pumpkin will sit on a porch or be touched a lot, a matte sealer
helps protect the finish. If it lives indoors on a shelf, you can often skip sealing.
Style It Like You Bought It at a Fancy Store
- Group in odd numbers: Three pumpkins of different sizes looks intentional and styled.
- Go tonal: Use shades of cream, warm white, and greige for a modern, calming palette.
- Add one “accent” pumpkin: A single charcoal or deep olive pumpkin makes neutrals pop.
- Centerpiece cheat code: Set your pumpkin on a tray with candles and dried florals. Instant fall table moment.
More $1 Plastic Pumpkin Makeovers (Pick Your Personality)
The stoneware look is the “best” all-around upgrade, but you might want something more playful, glam, or bold.
Here are crowd-pleaser options that work beautifully on plastic.
1) Modern Marble (The “Paint Pour” Pumpkin)
For a high-art look, use a controlled “paint dump” or swirl technique with acrylics. The trick is sticking to a
limited palette (two main colors plus white) so it reads chic instead of chaotic. Finish with a glittery or metallic
stem for extra drama.
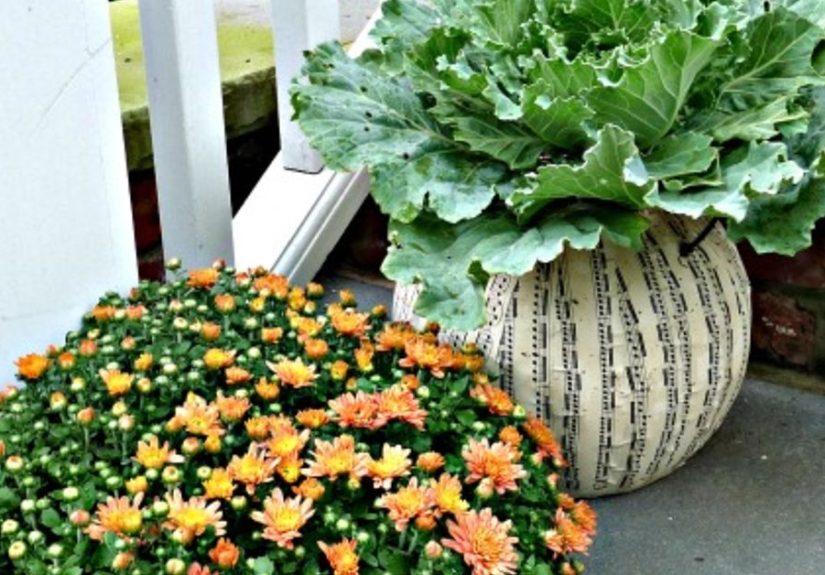
2) Decoupage Pumpkins (Maps, Book Pages, or Fancy Napkins)
Decoupage is basically giving your pumpkin a wardrobe change. Tear paper into strips or use napkin patterns for a
designer vibechinoiserie, botanicals, vintage maps, you name it. Because you’re layering over a surface, it’s
forgiving and hides plastic shine beautifully.
3) Velvet-Wrapped Pumpkin (Soft, Luxe, and Surprisingly Easy)
Velvet pumpkins look expensive because texture reads “intentional.” Wrap your pumpkin in stretchy velvet ribbon or
fabric and tuck the edges neatly. It’s cozy, classic, and looks amazing in jewel tones like deep green, navy, or
burgundy.
4) Faux Mercury Glass (Old-Hollywood Halloween)
A speckled metallic finish gives you that antique “mercury glass” vibe. It’s perfect if your decor leans glam or
vintage. Pair with black taper candles and suddenly you’re the kind of person who owns a velvet blazer “for fun.”
5) Lace Silhouette Pumpkin (Instant “Halloween Chic”)
Paint the pumpkin a dark base (black or deep charcoal), then wrap lace over it for texture and pattern. This look is
popular because it’s dramatic without being messyand it photographs beautifully.
6) Disco Ball Pumpkin (Because Fall Can Have Sparkle)
Go full party mode: use a metallic base, then add a grid with tape or paint marker for a disco vibe. If you want to
take it further, tiny reflective tiles can create a true mirror-ball effect (best for indoor display).
7) Terrazzo Confetti Pumpkin (Playful, Modern, Not Too “Spooky”)
Paint the pumpkin a clean neutral base, then add scattered “chips” in muted colors using a small sponge. Terrazzo
looks fresh and design-forward, and it works well if you keep the colors soft (sage, clay, blush, and cream).
8) Farmhouse Painted Pumpkin (Soft White With Shading)
A creamy white pumpkin with gentle shading in the grooves looks more realistic than a flat coat of paint. Add a
natural stem and it becomes the perfect “neutral fall” accent for bookshelves, mantels, and kitchen counters.
9) Pumpkin Planter or Vase (The “I Decorate Like a Pro” Trick)
If your plastic pumpkin is a treat bucket or has an opening, turn it into a mini vase or planter for faux florals,
branches, or fall leaves. This is a great porch idea because you get height and color without committing to a full
wreath situation.
How to Make Paint Stick to Plastic (Without Tears)
The biggest challenge with a plastic pumpkin makeover isn’t creativityit’s adhesion. Here’s how to stack the odds
in your favor.
Prep Like You Mean It
- Clean thoroughly: Mild soap and water, then dry completely.
- Reduce shine: A light scuff sanding helps paint grip, especially on glossy plastic.
- Use the right primer or paint: A bonding primer can help topcoats stick to difficult surfaces.
- Choose smart products: Some spray paints are formulated to bond well to plastics, which can save time.
Application Tips That Make a Real Difference
- Thin coats win: Multiple light layers look smoother and resist drips.
- Give it time: “Dry to the touch” is not the same as “fully cured.” If you can, let it sit overnight.
- Seal for durability: Especially if it’ll be outside or handled frequently.
Common Mistakes (and How to Fix Them)
“My paint is streaky.”
Totally normal on the first coatespecially with light colors. Let it dry and add a second thin coat. Texture (like
baking soda paint) also hides streaks better than smooth paint.
“It’s peeling when I touch it.”
That usually means the surface wasn’t cleaned, the plastic was too glossy, or it needed a bonding layer. If it’s
already peeling, gently remove loose paint, clean the surface, and add primer before repainting.
“It looks… still cheap.”
Upgrade the stem. Add texture. Use matte finishes. Those three changes do the most to erase the “toy plastic”
effect.
Time and Cost: What to Expect
The stoneware makeover can be done in an afternoon, but it looks best if you let coats dry properly and give it an
overnight rest before styling. Cost depends on what you already have:
- Budget mode: $1 pumpkin + craft paint + baking soda (often already in the kitchen)
- Upgrade mode: Add primer, matte sealer, and a stem swap for a more durable “boutique” finish
Conclusion: Your $1 Pumpkin’s Glow-Up Era Starts Now
A $1 plastic pumpkin makeover is the ultimate low-risk, high-reward DIY. It’s cheap enough to experiment, sturdy
enough to reuse, and flexible enough to match any stylemodern, rustic, glam, spooky, soft-neutral, you name it.
If you only do one transformation, go for the matte stoneware look: it’s timeless, stylish, and ridiculously
convincing. Then make a second pumpkin in something funmarble, velvet, discobecause fall decor should have
personality. And because you deserve at least one craft project that doesn’t turn into a glitter-based life event.
Extra: The “Real Life” Experience of Giving a $1 Plastic Pumpkin a Makeover (500+ Words of Honest Craft-Table Wisdom)
Let’s talk about what it actually feels like to do this projectbecause the internet makes DIY look like a calm,
candle-lit montage where nothing ever sticks to your fingers. In real life, your first five minutes will probably
include at least one of the following thoughts: “Why is this pumpkin so shiny?” and “Who designed this stem, and
were they mad at pumpkins?”
Most people discover the first big lesson immediately: plastic doesn’t behave like wood, paper, or real pumpkin
skin. It’s slick. It reflects light in a way that makes cheap decor look extra cheap. And it has an invisible layer
of “factory vibes” (dust, oils, mystery residue) that paint absolutely refuses to befriend. That’s why the cleaning
step feels boring but pays off like a responsible choice you’ll brag about later.
Next comes the “ugly middle.” This is the part where you apply your first coat and it looks worse than when you
started. Light colors can look patchy. Brush strokes show up like they’re auditioning for a close-up. You might
start considering a completely different hobby, like staring at walls. This is also normal. The makeover doesn’t
become magical until the second coat, the texture layer, or the shading step pulls everything together.
Texture finisheslike the stoneware/baking-soda looktend to be emotionally supportive. They hide streaks. They
disguise little bumps. They make the surface feel intentional, like you didn’t “mess up,” you “added character.”
People often say this is the moment the pumpkin stops looking like a toy and starts looking like decor.
Another common experience: you’ll realize the stem matters more than you expected. You can paint a pumpkin the
prettiest greige in the universe, but if the stem still looks like molded plastic wearing a bad tan, the illusion
breaks. The fastest “wow” upgrade is swapping the stem or giving it a more realistic finish. It’s a small detail
with big payoff, and it’s usually the part where people suddenly get excited and start planning a whole pumpkin
family.
You may also find yourself getting weirdly confident halfway through. One minute you’re cautious, dabbing paint like
it might explode, and the next you’re mixing custom colors and saying things like, “Maybe we should do a terrazzo
one.” This is the slippery slope of seasonal crafting. It starts with one $1 pumpkin and ends with a bin labeled
“FALLDO NOT TOUCH” that lives in a closet year-round.
Finally, there’s the “styling high.” Once your pumpkin is dry, you put it on a tray, step back, and realize you just
made something that looks surprisingly grown-up. The experience is part creativity, part problem-solving, and part
satisfaction that you didn’t have to spend $28 on a pumpkin that still would’ve been made of plastic. The best
feeling? When someone asks where you bought itand you get to say, casually, “Oh, this? It was a dollar.”




