Table of Contents >> Show >> Hide
- Why Raised Beds Are the Lazy-Genius Move
- Plan It Like a Pro (So You Don’t Rebuild It Like a Pro)
- Materials: The Good, the Better, and the “It’ll Be Fine (Probably)”
- The Super Easy Build: A 4×8 Bed You Can Finish Before Your Coffee Gets Cold
- How Much Soil Do You Need? (The Math That Won’t Hurt Your Feelings)
- The Dirt on Soil Mix (Because “Random Bags” Is Not a Strategy)
- Planting Plans That Make You Look Like You Know What You’re Doing
- Watering and Maintenance (Because Plants Don’t Read Your Calendar)
- Common Rookie Mistakes (And How to Avoid Them)
- Real-World Experiences ( of “What You’ll Learn Fast”)
- Conclusion
- SEO Tags
If your backyard soil has the texture of a brick, the pH of a mystery, and the personality of a parking lot,
you’re in the right place. A raised garden bed is basically you saying: “I would like to garden… but with
fewer regrets.” And the “super easy” version? That’s the one you can build in an afternoonwithout needing
a workshop, a degree in carpentry, or a pep talk from three different friends.
This guide walks you through a beginner-friendly 4×8 raised bed build (the classic), plus the stuff that
actually makes it succeed: sizing it right, choosing materials that won’t betray you, mixing soil that plants
love, and setting up watering so you’re not chained to a hose all summer.
Why Raised Beds Are the Lazy-Genius Move
Raised beds aren’t “extra.” They’re strategic. Here’s what you get for your effort:
- Earlier planting: soil warms faster in spring, so you can get a head start.
- Better access: less bending, less kneeling, fewer dramatic groans when you stand up.
- Cleaner soil control: you choose the soil mix instead of gambling on whatever’s in your yard.
- Less compaction: you work from pathways, not on top of your plants’ roots.
- Help with sketchy ground: raised beds can reduce risk if native soil has contamination concerns.
Plan It Like a Pro (So You Don’t Rebuild It Like a Pro)
1) Pick a spot: sun + water = happiness
Put your bed where it’s easy to water (future you will be tired and it will be hot). For sun-loving crops like
tomatoes, peppers, and eggplants, aim for a spot that gets 6–8 hours of sunlight a day. If you have
less sun, you can still grow plenty of leafy greens and quick cropsjust adjust expectations (and bragging rights).
2) Choose a size you can actually reach
The most common beginner mistake is building a bed you can’t comfortably reach into. The sweet spot is a bed
that’s no wider than about 4 feet so you can reach the center from either side. Length is flexible,
but 8 feet is a popular “easy to manage” choice. If you’re buying lumber, planning around standard board
lengths (8, 10, 12 feet) helps reduce wasteyour wallet will approve.
3) Decide the height (a.k.a. “How tall is tall enough?”)
Many plants do well with a rooting zone around 6–12 inches, and deeper is often betterespecially for
root crops and for keeping moisture more stable. Taller beds can also be more comfortable to garden in, but they
cost more to fill. A practical beginner height is 10–12 inches (often one 2×12 board). If you want a
more accessible setup, taller beds can be builtjust know soil volume (and cost) climbs fast.
Materials: The Good, the Better, and the “It’ll Be Fine (Probably)”
Wood choices (the usual suspects)
- Cedar/redwood: naturally rot-resistant, lasts longer, costs more.
- Pine/fir: budget-friendly, breaks down faster, may need replacing sooner.
- Pressure-treated lumber: longer-lasting and often economical, but some gardeners prefer to avoid it for food beds.
Pressure-treated wood: a calm, practical reality check
The big concern people remember is older arsenic-based treatments (like CCA). For homeowner uses, those products
were discontinued years ago. Modern residential treatments commonly use copper-based preservatives (different formulas
depending on region and wood species). Research-based guidance generally suggests plant uptake is very small, but
comfort levels varyand that’s okay.
If you do use pressure-treated lumber, use boards labeled for “ground contact” and consider simple
mitigation steps if you’re cautious: line the inside edges with a heavy plastic barrier (allowing drainage), or
paint/stain the exterior surfaces per extension recommendations. If you want to follow strict organic growing rules,
many people choose untreated rot-resistant wood or non-wood materials.
Non-wood options (low fuss, high durability)
Metal beds, stone, bricks, and concrete blocks can last a long time. They often cost more upfront, but they can
be a “buy once, cry once” situationespecially if you’re tired of replacing wood every few seasons.
The Super Easy Build: A 4×8 Bed You Can Finish Before Your Coffee Gets Cold
Shopping list (simple version)
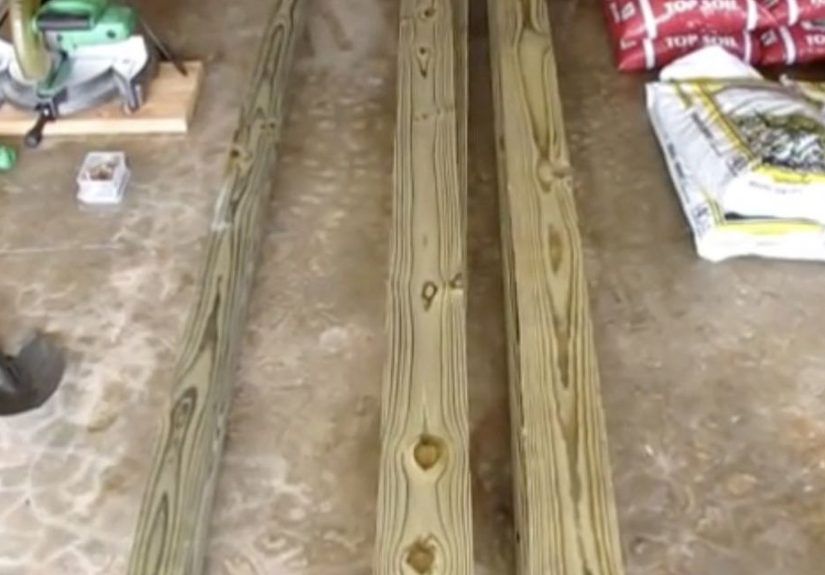
- Boards: two 8-foot boards + two 4-foot boards (or buy three 8-foot boards and cut one in half at the store)
- Fasteners: exterior-rated deck screws (about 3 to 3½ inches)
- Tools: drill/driver, tape measure, square (optional but helpful)
- Optional: corner stakes or interior braces for extra strength, especially for taller beds
Pro tip: pick the straightest boards you can find. Don’t feel bad rejecting warped lumber. You’re building a garden
bed, not a modern art sculpture titled “Why Is My Rectangle a Banana?”
Step-by-step build
- Mark your rectangle. Lay out a 4×8 footprint using boards or string. Make sure you have room to walk around it.
- Prep the ground. Remove grass and level the area. Your bed doesn’t need to be on perfect soil, but it should sit flat so it doesn’t wobble.
- Assemble the frame. Predrill holes to reduce splitting, then screw boards together at each corner (3–4 screws per corner is common).
- Check for level. If the frame rocks, scrape high spots or add a little soil under low spots until it sits steady.
- Reinforce if needed. For taller beds, add interior braces or corner stakes. A common guideline is to use supports that keep walls from bowing once soil pressure builds.
Optional (but awesome) upgrades
- Hardware cloth at the bottom: Add a barrier under the bed to reduce tunneling pests (especially if you’ve ever lost a carrot to the underground snack brigade).
- Hoops for season extension: You can add hoops to support row cover or plastic for a quick DIY cold-frame effect. This can protect plants from cold snaps and heavy weather.
- A sitting edge: A wider top board can create a place to sit while planting (your knees will write you thank-you notes).
How Much Soil Do You Need? (The Math That Won’t Hurt Your Feelings)
Soil volume is simply: Length × Width × Depth (in feet) = cubic feet of soil needed.
- Example: 4 ft × 8 ft × 1 ft (12 inches) = 32 cubic feet
- Convert to cubic yards: 32 ÷ 27 ≈ 1.2 cubic yards
Expect the soil to settle over time as organic material continues to break downplan to top it off later with compost.
The Dirt on Soil Mix (Because “Random Bags” Is Not a Strategy)
The best raised-bed soil is fluffy, drains well, holds moisture, and contains enough organic matter to feed plants
without turning into swamp pudding.
Three reliable approaches
-
Classic topsoil + compost blend: Many extension guides suggest a mix roughly around ½–⅔ topsoil and
⅓–½ compost. Adjust for your situationif topsoil is clay-heavy, add something to improve structure. -
Structured “40/40/20” mix: 40% compost, 40% topsoil, 20% aeration material (like coarse sand, pine bark fines, or perlite).
This helps prevent compaction and improves drainage. -
Bulk “three-way/four-way” blends: Landscape suppliers often sell three-way mixes (topsoil/sand/compost) and four-way mixes
(topsoil/sand/compost + a drainage component like vermiculite or similar).
Buying in bulk by the cubic yard is usually cheaper than buying a mountain of bagsunless you enjoy carrying 40-pound
bags as your primary hobby.
What about super-tall beds?
If your bed is taller than about 2 feet, filling the entire thing with premium soil can get expensive fast.
Many gardeners use “layering” techniques (sticks, leaves, compostable yard material, then soil/compost on top).
This saves moneybut it also settles as it breaks down, so you’ll be topping off soil over time.
Planting Plans That Make You Look Like You Know What You’re Doing
The square-foot trick (simple, tidy, and weirdly satisfying)
You can divide a 4×8 bed into thirty-two 1-foot squares and plant by square. Example: one tomato plant can take one
full square (or more, depending on variety), while smaller crops like lettuce can share space. This style is great
for beginners because it prevents the “I planted 47 zucchini plants” situation.
A practical 4×8 starter layout
- North side (with a trellis): cucumbers or pole beans (they climb, you win)
- Middle row: 2 tomatoes spaced out + basil nearby
- Edges: lettuce, scallions, radishes, or herbs (easy wins that keep you motivated)
Rotate plant families each year if you can. It helps reduce disease and pest pressure over time, and it’s the closest
gardening gets to “preventative maintenance.”
Watering and Maintenance (Because Plants Don’t Read Your Calendar)
Water smarter, not harder
Raised beds can dry out faster than in-ground gardens, especially taller ones. A soaker hose or drip setup makes
watering easier and more efficient than overhead sprinkling.
- Soaker hose: snake it up and down the bed, pin it in place, and water deeply.
- Drip lines: some guides suggest placing drip tubing slightly below the surface and spacing lines to cover the bed evenly.
Mulch is your secret weapon
Mulch helps retain moisture and suppress weeds. If you’re using a soaker hose, avoid super-fine mulch that can clog it.
Straw, shredded leaves, or chunkier mulch are often easier to manage.
Feed the bed (gently)
Add compost annually, and consider soil testing every couple of years to keep pH and nutrients in the sweet spot.
Raised beds are productivebut they’re also hungry.
Common Rookie Mistakes (And How to Avoid Them)
- Making the bed too wide: if you can’t reach the center, you’ll step in the bed and compact the soil.
- Skipping leveling: an uneven bed leads to uneven watering and a wobbly frame.
- Buying random soil bags: you want a consistent mix, not a “mystery casserole” of media.
- Underestimating water needs: raised beds are containers; containers dry out faster.
- Planting too much: leave space for air flow, roots, and your future optimism.
Real-World Experiences ( of “What You’ll Learn Fast”)
Most first-time raised bed builders have the same three experiences, and none of them involve gracefully sipping lemonade
while butterflies land on your shoulder. Let’s start with the classic: you will underestimate soil.
You’ll do the math, feel proud, buy what you think is enough… and then stand in the bed staring at a half-filled box
like it personally betrayed you. Soil settles. Compost breaks down. Air pockets disappear. The fix is simple: plan to
top off with compost after the first few waterings, and again mid-season if the level drops.
Second: the frame will teach you humility. Even if you build a perfect rectangle, the ground may not be perfectly flat.
When your bed rocks slightly, it’s not “fine.” It’s an invitation to cracked joints and bowed boards later. The easiest
solution is to take five extra minutes up front: scrape high spots, fill low spots, and make the frame sit steady
before you load it with hundreds of pounds of soil. This is one of those “small effort, big payoff” moments that
separates a bed that lasts one season from a bed that lasts many.
Third: watering will become your main relationship. Raised beds are incredibly productive, but they can also dry out
faster than you expectespecially in heat, wind, or full sun. The first time you grow leafy greens, you’ll learn that
“just a quick sprinkle” is not a plan. Deep, consistent watering is the goal. Many gardeners fall in love with soaker
hoses because they make watering almost automatic: lay it out, pin it down, turn it on, and you’re done. Drip systems
can be even more precise, but soakers are a perfect beginner upgrade.
Another common lesson: your bed will try to become a weed hotel if you skip the base prep. If you install a bed right
on top of grass without removing or smothering it, the grass may fight back. A simple approach is to remove sod or use
a weed-suppressing layer beneath the bed (and then add your soil mix on top). If burrowing pests are an issue where you
live, adding hardware cloth at the bottom is one of those upgrades you’ll only appreciate after the first time something
tunnels in and treats your garden like an all-you-can-eat buffet.
Finally: your “perfect plan” will change. You might start with tomatoes, herbs, and lettuce, then realize you really
want cucumbers climbing a trellis, or that you’d rather grow cut-and-come-again greens for weeks instead of one big
harvest. That’s the best part. Raised beds are flexible. Each season, you’ll tweak spacing, swap varieties, add mulch
earlier, and get better results with less effort. The bed doesn’t have to be perfectit just has to be yours, built
smart, and maintained with small, consistent habits.
Conclusion
A super easy DIY raised garden bed is one of the fastest upgrades you can make to your home gardenespecially if your
native soil is tough, compacted, or just not fun to work with. Keep it reachable (about 4 feet wide), keep it level,
choose materials that match your budget and comfort, and fill it with a soil mix that drains well and feeds plants.
Add a simple watering setup, mulch early, and you’ll spend more time harvesting and less time troubleshooting.




