Table of Contents >> Show >> Hide
- Why You’ll Love These Red Velvet Cheesecake Bars
- Ingredients for Red Velvet Cheesecake Bars
- Equipment You’ll Need
- Step-by-Step: How to Make Red Velvet Cheesecake Bars
- Tips for Perfect Red Velvet Cheesecake Bars
- Flavor Variations and Fun Twists
- Serving Ideas: When to Make Red Velvet Cheesecake Bars
- Frequently Asked Questions
- 500-Word Baking Experience: Living with Red Velvet Cheesecake Bars
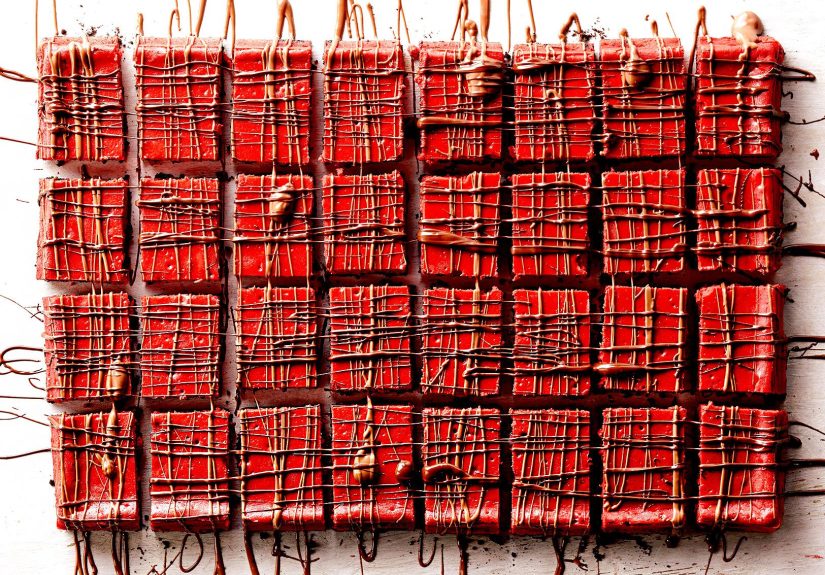
If red velvet cake and classic New York–style cheesecake had a baby, it would be these
red velvet cheesecake bars. They’re rich, tangy, chocolatey, and somehow feel both
fancy enough for Valentine’s Day and casual enough for a Tuesday night “I deserve
dessert” moment.
This red velvet cheesecake bars recipe combines a soft, cocoa-kissed red velvet base
with a creamy vanilla cheesecake layer and an easy swirl on top. You bake everything in
one pan, chill, slice into bars, and suddenly you’re the person everyone asks to bring
dessert to the party. Not a bad reputation to have.
Why You’ll Love These Red Velvet Cheesecake Bars
- Two desserts in one: You get the flavor of red velvet cake plus the creamy, tangy goodness of cheesecake.
- Great for sharing: Bars are easier to slice, serve, and transport than a full cheesecake.
- Make ahead friendly: Chilling actually improves the texture and flavor, so they’re ideal for parties and holidays.
- Holiday-ready color: That vibrant red velvet layer makes them perfect for Valentine’s Day, Christmas, birthdays, and potlucks.
- Customizable: Swap crusts, add chocolate chips, or drizzle with ganache to match your mood.
Ingredients for Red Velvet Cheesecake Bars
For the Red Velvet Base
- 1/2 cup (1 stick) unsalted butter, melted and slightly cooled
- 1 cup granulated sugar
- 2 large eggs, at room temperature
- 2 teaspoons vanilla extract
- 1 tablespoon red liquid food coloring (more if you like a deeper red)
- 3/4 cup all-purpose flour
- 2 tablespoons unsweetened cocoa powder
- 1/4 teaspoon baking powder
- 1/4 teaspoon fine sea salt
- 1 teaspoon white vinegar or apple cider vinegar (for classic red velvet tang)
For the Cheesecake Layer
- 16 ounces cream cheese, softened (two 8-ounce blocks, full-fat for best texture)
- 2/3 cup granulated sugar
- 1/4 cup sour cream or plain Greek yogurt, at room temperature
- 2 large eggs, at room temperature
- 1 teaspoon vanilla extract
- 1 tablespoon all-purpose flour (helps the cheesecake set in bar form)
- Pinch of salt
Optional Toppings
- Powdered sugar, for dusting
- Chocolate shavings or mini chocolate chips
- Fresh berries for serving
Equipment You’ll Need
- 9×13-inch baking pan
- Parchment paper
- Mixing bowls (one large, one medium)
- Electric mixer (hand or stand mixer)
- Rubber spatula
- Toothpick or butter knife for swirling
Step-by-Step: How to Make Red Velvet Cheesecake Bars
1. Prep Your Pan and Oven
- Preheat your oven to 350°F (175°C).
- Line a 9×13-inch pan with parchment paper, leaving an overhang on two sides so you can lift the bars out later. Lightly grease the parchment and any exposed sides of the pan.
2. Make the Red Velvet Base
- In a large mixing bowl, whisk together the melted butter and sugar until glossy and combined.
- Add the eggs one at a time, whisking well after each addition.
- Stir in the vanilla and red food coloring. The mixture should turn a vibrant red.
- In a separate bowl, whisk together the flour, cocoa powder, baking powder, and salt.
- Fold the dry ingredients into the wet mixture just until there are no streaks of flour. Do not overmix or the bars can become tough.
- Stir in the vinegar at the end. This gives the batter that classic red velvet tang and helps with color.
- Reserve about 1/3 cup of the red velvet batter for the swirl and spread the remaining batter evenly into the prepared pan. Use a spatula to smooth it into an even layer.
3. Make the Cheesecake Layer
- In a medium bowl, beat the softened cream cheese with an electric mixer on medium speed until completely smooth and creamy, 2–3 minutes. Scrape the bowl as needed.
- Add the sugar and beat again until combined and slightly fluffy.
- Mix in sour cream (or Greek yogurt), vanilla, and a pinch of salt until smooth.
- Add the flour and mix on low just until incorporated.
- Beat in the eggs one at a time on low speed. As soon as they are fully mixed in and the cheesecake batter looks silky, stop mixing to avoid incorporating too much air.
4. Assemble and Swirl
- Pour the cheesecake mixture over the red velvet base in the pan. Use a spatula to spread it into an even layer, all the way to the corners.
- Drop small spoonfuls of the reserved red velvet batter over the cheesecake layer.
- Using a toothpick, skewer, or thin butter knife, gently drag through the drops of red batter to create swirls. Don’t over-swirl or everything will just turn pink3–4 passes in different directions is enough.
5. Bake
- Bake at 350°F for 28–35 minutes, or until the edges are set and just slightly puffed, and the center only jiggles a bit when you gently shake the pan.
- A toothpick inserted about 2 inches from the edge should come out mostly clean or with moist crumbs, not wet batter.
6. Cool, Chill, and Slice
- Remove the pan from the oven and let the bars cool completely at room temperature.
- Once cool, cover the pan and refrigerate for at least 4 hours, preferably overnight. This step is key for clean slices and a firm, creamy cheesecake texture.
- Use the parchment overhang to lift the slab out of the pan and place it on a cutting board.
- Use a sharp knife to cut into bars (anywhere from 16 to 24, depending on how generous you want to be). Wipe the knife with a warm, damp cloth between cuts for super neat edges.
Tips for Perfect Red Velvet Cheesecake Bars
Bring Ingredients to Room Temperature
Softened cream cheese and room temperature eggs are non-negotiable. Cold cream cheese leads
to lumps in the cheesecake layer, and cold eggs don’t mix in as smoothly. Taking everything
out of the fridge 30–45 minutes before baking makes a big difference.
Don’t Overbake
Cheesecake is happiest when it’s slightly underbaked and then finished by chilling. If the top
is browning deeply or cracking, it’s probably overdone. Look for set edges and a center that
still has a gentle wobble when you tap the side of the pan.
Respect the Chill Time
It’s tempting to cut in early, but chilling allows the cheesecake layer to firm up and the red
velvet base to fully set. It also lets the flavors meld so the tang, cocoa, and vanilla come
through more clearly.
Storage and Freezing
Store leftover red velvet cheesecake bars in an airtight container in the refrigerator for up
to 4–5 days. For longer storage, wrap individual bars in plastic wrap and place them in a
freezer-safe container; they can be frozen for about 1–2 months. Thaw overnight in the fridge
before serving for the best texture.
Flavor Variations and Fun Twists
1. Oreo Crust Red Velvet Cheesecake Bars
Instead of the red velvet base, use a simple Oreo crust: pulse chocolate sandwich cookies
(filling and all) into crumbs, mix with melted butter, and press into the pan. Add a red velvet
cheesecake layer on top and bake as directed. It’s ultra-chocolatey and perfect if you love
cookies-and-cream vibes.
2. No-Bake Shortcut
Want to skip the oven? Use a no-bake cheesecake filling over a cookie crumb crust and stir red
velvet crumbs or red velvet cookie pieces into the filling. Chill until firm, slice into bars,
and you’ve got a summer-friendly, oven-free version of red velvet cheesecake bars.
3. Festive Toppings
- Holiday look: Add red and white sprinkles or chocolate curls on top for Christmas or Valentine’s Day.
- Berry finish: Serve each bar with a few fresh raspberries or strawberries to complement the tangy cheesecake.
- Extra chocolate: Drizzle cooled bars with melted dark or white chocolate before chilling.
4. Smaller Batch Bars
Baking for two? Halve the recipe and bake it in an 8×8-inch pan. Start checking for doneness a
few minutes earlier, since a smaller pan can bake slightly faster.
Serving Ideas: When to Make Red Velvet Cheesecake Bars
- Valentine’s Day: That red-and-white contrast basically screams “romantic dessert.”
- Birthday dessert table: Slice into bite-sized squares so guests can sample them alongside cake.
- Potlucks and office parties: Easy to transport and sliceno plates of half-eaten cake to drag home.
- Holiday cookie swaps: Bars count as “cookies” if you bring enough enthusiasm and sugar.
Frequently Asked Questions
Can I use a red velvet cake mix instead of making the base from scratch?
Yes. If you’re short on time, you can mix a boxed red velvet cake mix with melted butter and an
egg or two to create a thicker, brownie-like base. Press it into the pan, bake for a few minutes
to set slightly, then pour on the cheesecake layer and finish baking. The texture will be a bit
softer and more cakey, but still delicious.
Can I make red velvet cheesecake bars ahead of time?
Absolutely. In fact, they’re better when made ahead. One day in advance is ideal, but you can
bake them up to two days ahead and keep them tightly covered in the fridge until serving.
Do I have to use red food coloring?
Technically, no. You can skip the coloring and have “cocoa cheesecake bars” instead. The flavor
will still be great; you’ll just lose the signature red velvet look. If you prefer natural
coloring, there are plant-based red food colorings availablejust know they may produce a more
muted shade.
Why is there vinegar in the batter?
Vinegar is classic in red velvet recipes. It reacts lightly with the baking powder and cocoa and
adds a subtle tang that keeps the flavor from being one-note. You won’t taste “vinegar” in the
final barsjust a balanced, slightly tangy chocolate flavor.
500-Word Baking Experience: Living with Red Velvet Cheesecake Bars
The first time you make red velvet cheesecake bars, it feels a bit like hosting a tiny science
experiment in your oven. You start with this intense ruby red batter that looks almost suspicious,
then layer on a creamy white cheesecake mixture, swirl them together, and just hope the result
looks like Pinterest and not “crime scene in a pan.”
Here’s what usually happens: while the bars are baking, your kitchen smells like a mashup of
warm cocoa, vanilla, and bakery heaven. Someone wanders in asking, “What are you making?” in the
exact tone of voice people use when they’re ready to volunteer as official taste tester. As the
edges puff slightly and the cheesecake top sets, you get that moment of panic where you’re not
sure if it’s done. You jiggle the pan, question your life choices for a second, then trust the
gentle wobble and pull it from the oven.
The hardest part is the wait. Red velvet cheesecake bars are not a “bake and eat in 10 minutes”
kind of dessert. They’re more like, “I’ll reward you for your patience.” You cool them on the
counter, slide the pan into the fridge, and go live the rest of your life for a few hours.
Meanwhile, everything inside that pan is settling down, firming up, and turning into beautifully
sliceable layers.
When you finally cut them, that’s the payoff moment. The knife slides through a thin top layer
of cheesecake, then the soft red velvet base. If you remembered to wipe the knife between cuts,
you get those super-clean edges: creamy white and vivid red, with marbled swirls on top. Even
people who swear they’re “not dessert people” tend to mysteriously reach for “just a small
piece.”
What you’ll discover quickly is that these bars are crowd-pleasers across the board. Dessert
fans love the richness. Cheesecake loyalists appreciate the tang. Chocolate lovers get their
cocoa fix. People who just came for the coffee suddenly add a slice of red velvet cheesecake
bar to their plate “for color balance.”
They’re also surprisingly forgiving. Maybe your swirl isn’t evenly distributed. Maybe one corner
baked a little more than the others. Once they’re chilled, sliced, and dusted with a touch of
powdered sugar or topped with a few berries, none of that matters. They still look like bakery
treats, and they taste even better than they look.
Over time, these bars can easily become your signature dessert. You’ll tweak the recipe a little
each timemaybe you try an Oreo crust for a party, or add mini chocolate chips to the cheesecake
layer for extra richness. You might learn that they travel beautifully in a sealed container and
that they hold up well even after a couple of days in the fridge, making them a smart choice for
potlucks and holiday gatherings.
Most importantly, you’ll gather stories around them. The year you brought red velvet cheesecake
bars to a Valentine’s potluck and they were gone before anyone touched the heart-shaped cookies.
The time your family requested them instead of birthday cake. The moment a friend texted you a
week later: “Hey, do you still have that red velvet cheesecake bars recipe?” That’s when you know
this dessert has officially moved from “something I tried once” to “part of my baking identity.”





