Table of Contents >> Show >> Hide
- What You’ll Learn
- Why Mason Jars Work (and Where They Don’t)
- Pick Your Setup: Soil, Self-Watering, or Hydro-Style
- Best Herbs for a Mason Jar Herb Garden
- Supplies Checklist
- How to Build a Soil-Based Mason Jar Herb Garden
- How to Build a Self-Watering Mason Jar Herb Garden (Wick Method)
- How to Grow Herbs in Water (Mason Jar “No Dirt” Style)
- Care Basics: Light, Water, Temperature, and Feeding
- Troubleshooting: The Usual Suspects
- Design Ideas That Don’t Sabotage Your Herbs
- FAQ
- Wrap-Up: Your Kitchen, But Make It Fresh
- Experiences: What It’s Like to Actually Run a Mason Jar Herb Garden (The Honest Version)
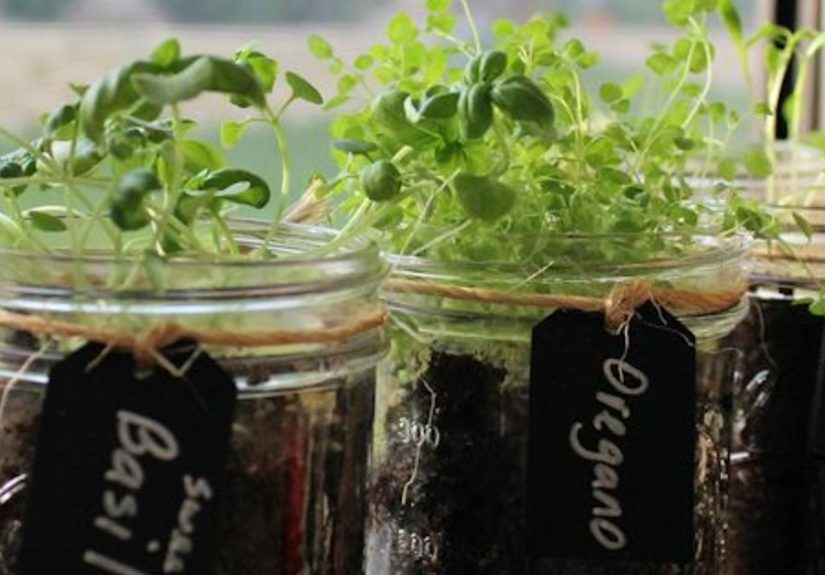
Fresh herbs are one of life’s tiny flexes. You add a few basil leaves to pasta and suddenly you’re the kind of person who owns a linen apron and says things like “notes of brightness.” A mason jar herb garden is the easiest way to get that vibewithout needing a backyard, a greenhouse, or a complicated relationship with compost.
This guide covers multiple mason-jar-friendly ways to grow herbs (soil, self-watering, and water-rooted), how to keep them thriving on a windowsill, and how to avoid the classic “I made soup… out of my plant” overwatering moment. Expect practical steps, smart shortcuts, and a few laughsbecause gardening is basically optimism with dirt under its fingernails.
Why Mason Jars Work (and Where They Don’t)
Mason jars are basically the multitool of home decor: storage, drinking glass, vase, candle holder, Pinterest trophy. As planters, they’re popular for three big reasons:
- Small-space friendly: Perfect for kitchen counters, windowsills, and apartments.
- They’re transparent: You can see moisture levels, root growth, and whether you’ve created a swamp.
- They look intentional: Even if you’re winging it, jars make it look like a “system.”
The one big caveat
Most mason jars don’t have drainage holes. Drainage is the #1 thing that keeps herb roots from rotting. So the secret to a successful mason jar herb garden is simple: choose a jar method that handles water responsibly.
That’s why this article gives you three approacheseach with a different strategy for water management.
Pick Your Setup: Soil, Self-Watering, or Hydro-Style
There isn’t one “right” mason jar herb garden. There’s the one that matches your lifestyle, your light situation, and your ability to remember watering schedules.
| Method | Best For | Pros | Watch Outs |
|---|---|---|---|
| Soil + drainage layers | People who like classic potting soil | Simple, cheap, familiar | No real drainage; must water carefully |
| Jar as a “cachepot” (pot inside jar) | Low-drama plant parents | Real drainage; easiest to keep alive | Needs a nursery pot or inner cup |
| Self-watering wick | Frequent travelers / forgetful waterers | More consistent moisture | Can stay too wet for Mediterranean herbs |
| Water rooting / passive hydro | Minimal mess + science vibes | No soil gnats; easy to monitor | Needs clean water habits (and nutrients long-term) |
If you want the easiest success rate: use the cachepot approach (plant in a small pot with drainage, then set that pot inside the jar). If you want a cute DIY project: soil layers. If you want a “set it and mostly forget it” option: wick. If you want to feel like a kitchen botanist: water-rooting/hydro-style.
Best Herbs for a Mason Jar Herb Garden
Not all herbs love being confined to jar life. Some thrive. Some tolerate it. Some will file a formal complaint.
Top picks (happy in containers indoors)
- Basil: Fast, productive, and forgiving (as long as it gets plenty of light).
- Chives: Compact, tough, and regrows quickly after harvest.
- Mint: Loves moisture and grows like it’s trying to pay rent. (Keep it contained or it’ll take over.)
- Parsley: Steady, moderate light needs, good for beginners.
- Thyme & oregano: Great flavor, prefer drier soil, do best with strong light and careful watering.
Trickier indoors (still doable)
- Cilantro: Tends to bolt (go to seed) and can be dramatic about heat/light swings.
- Rosemary: Wants strong light and airflow; hates constantly wet roots.
Pro tip: Start with 2–3 herbs you actually cook with. A jar full of tarragon is impressive, but only if you’re not staring at it like, “Now what?”
Supplies Checklist
Gather your gear once and you’ll feel like a competent adult the rest of the week.
For soil-based jars
- Wide-mouth mason jars (pint or quart)
- Small rocks/pebbles (or aquarium gravel)
- Perlite (optional but helpful for aeration)
- Horticultural/activated charcoal (optional)
- Potting mix (not garden soil)
- Herb seedlings (easiest) or seeds (slower)
- Labels (because “mystery herb roulette” is not relaxing)
For wick/self-watering jars
- Jar + lid ring
- Inner cup/pot (plastic cup with holes works)
- Cotton wick (cotton cord, strip of fabric, or thick cotton string)
- Potting mix
For water-rooting / passive hydro
- Jar
- Clean scissors/snips
- Herb cuttings (especially basil or mint)
- Fresh water (and eventually hydro nutrients if you keep them long-term)
- Optional: clay pebbles (LECA) + net cup for a more “hydro” setup
How to Build a Soil-Based Mason Jar Herb Garden
This is the classic “Pinterest jar herb garden” build: layers at the bottom, soil on top, herbs living their best windowsill life. The goal is to create a buffer so roots aren’t sitting in water.
Step 1: Add a drainage buffer layer
Pour ½–1 inch of small rocks into the bottom of each jar. This creates a space where extra water can collect away from the roots. (It’s not true drainage, but it helps.)
Step 2: Add perlite (optional but recommended)
Add another ½–1 inch of perlite. Perlite helps keep the soil from compacting and improves airflow around rootsextra important in a container that can’t breathe like terracotta.
Step 3: Add charcoal (optional)
A thin layer of horticultural/activated charcoal can help with freshness and odors. It’s not magic, but it can reduce that “closed container funk” if you’re prone to heavy watering.
Step 4: Add potting mix and plant
Fill with potting mix, leaving room for your herb’s root ball. If you’re transplanting a seedling, gently loosen the roots a bit, set it in, and backfill with soil. Press lightlydon’t pack it down like you’re building a sandcastle for a competitive league.
Step 5: Water lightly (seriously)
Water slowly and stop early. Your jar layers work only if you don’t turn the bottom into a permanent pond. The soil should be moist, not soggy.
Step 6: Place in bright light and rotate
Put your jars where they’ll get the strongest light you have. Rotate the jars every few days so plants don’t lean like they’re trying to eavesdrop on your neighbors.
Best pairing: Basil + chives + parsley in separate jars. Their watering needs are more similar than, say, rosemary and cilantro (which is a chaotic pairing that ends in passive-aggressive leaf drop).
How to Build a Self-Watering Mason Jar Herb Garden (Wick Method)
If your plant care style is “I love you dearly and I will forget you exist,” wick watering is your friend. The jar becomes a reservoir, and a cotton wick pulls water up into the soil as it dries.
Step 1: Make an inner pot
Use a small nursery pot, net cup, or even a sturdy plastic cup with holes punched in the bottom and sides. The inner pot holds soil and provides airflow.
Step 2: Thread the wick
Feed the cotton wick through the bottom holes so a few inches hang below. That dangling end will sit in the water reservoir.
Step 3: Fill the jar reservoir
Add water to the mason jar (not all the way to the top). You want the wick end submerged, but you do not want the soil itself sitting in water.
Step 4: Add soil and plant
Fill the inner pot with potting mix, plant your herb, and set the pot into the jar. Top up water as needed.
Best herbs for wick jars: mint, basil, parsley. Use caution with thyme/rosemary (they prefer drying out between waterings).
How to Grow Herbs in Water (Mason Jar “No Dirt” Style)
This method is delightfully clean and surprisingly effective for some herbs. It’s also the fastest way to feel like a plant wizard because you can literally watch roots appear.
Option A: Root cuttings in water (simplest)
- Snip a healthy stem (about 4–6 inches is ideal).
- Remove lower leaves so they won’t sit in water and rot.
- Place the cutting in a jar with clean water. Keep leaves above the waterline.
- Put it in bright light (not scorching midday sun), and change the water every few days.
Basil and mint are champions here. Once roots are established, you can keep the plant in water for a whilejust remember: long-term growth usually needs nutrients, not just water.
Option B: Passive hydro jar (more structured)
If you want a sturdier setup, use a net cup + clay pebbles (LECA). The jar holds water and diluted nutrients; the net cup holds the plant and media. Keep the water level so roots can access moisture, but the crown of the plant stays dry.
Why people love this: fewer fungus gnats, easier monitoring, and less soil mess near food prep areas.
Care Basics: Light, Water, Temperature, and Feeding
Light: the make-or-break factor
Herbs indoors generally want bright light for many hours. A sunny south- or southwest-facing window is the classic choice. If your home is more “cozy cave,” consider a small LED grow light. Many indoor herb setups do best when you can provide extended light duration with grow lights (think: a long “day”).
Watering: stop trying to be “consistent,” start trying to be “observant”
- Soil jars: water slowly and sparingly. Check moisture with a finger; the top inch can dry before you water again.
- Cachepot jars: remove the inner pot to water over the sink, let it drain, then return it to the jar.
- Wick jars: keep water in the reservoir, but don’t drown the soil cup.
- Water-rooted jars: change water regularly; keep leaves out of water; add nutrients if keeping long-term.
Temperature + humidity
Indoor herbs generally like typical room temps and dislike cold drafts. In winter, window glass can get chilly at night, so don’t let tender herbs press against it. If your indoor air is desert-dry, a pebble tray nearby can help, or simply cluster plants together.
Feeding (don’t overdo it)
For soil-grown herbs, use a gentle, balanced fertilizer sparingly during active growth. For hydro/water setups, use hydroponic nutrients at the recommended dilution. Overfeeding can cause weak, floppy growth and off flavorsaka “congrats, you grew salad water.”
Harvesting: how to get more herbs, not fewer
- Basil: pinch above a leaf node to encourage branching and bushiness.
- Chives: snip what you need; they regrow quickly.
- Mint: harvest aggressively; it loves it.
- Thyme/oregano: light, frequent trims keep them compact.
Regular harvesting is the cheat code. You’re not “taking away” growthyou’re signaling the plant to make more.
Troubleshooting: The Usual Suspects
Problem: Leggy, floppy herbs
Cause: not enough light. Fix: move closer to the brightest window, rotate jars, or use a grow light. Pinch back growth to encourage branching.
Problem: Yellow leaves + soggy soil smell
Cause: overwatering (common in non-draining jars). Fix: let soil dry more between waterings; consider switching to the cachepot method for true drainage.
Problem: Mold on soil surface
Cause: soil staying wet with low airflow. Fix: water less, improve light and airflow, scrape off the top layer, and top-dress with fresh potting mix. Avoid splashing and keep leaves dry.
Problem: Green algae in water jars
Cause: light hitting nutrient-rich water. Fix: change water more often, rinse jars, and consider wrapping the jar with paper or using an opaque sleeve to block light.
Problem: Tiny flying bugs (fungus gnats)
Cause: consistently wet soil. Fix: let soil dry more, use sticky traps, and consider switching to water-rooting or passive hydro if gnats are your personal nemesis.
Design Ideas That Don’t Sabotage Your Herbs
You can make your mason jar herb garden look great without accidentally creating a plant obstacle course.
- Label smart: chalkboard stickers, popsicle sticks, or simple masking tape.
- Group by needs: thirsty herbs together (basil/parsley) and dry-loving herbs together (thyme/oregano).
- Use a tray: makes rotating and moving jars easier (and catches drips).
- Think height: taller herbs in back, compact ones in front if you’re lining a windowsill.
- Skip tight clusters: herbs like airflow; crowded jars invite mildew and pests.
If you’re tempted to hang mason jars: remember they’re heavy when watered. Choose sturdy hardware and keep the plants light and small.
FAQ
Can herbs live in mason jars without drainage holes?
Yes, but it’s riskier. The safest workaround is putting the herb in a small pot with drainage and using the jar as a decorative outer container (cachepot). If you plant directly in the jar, water lightly and let the soil dry more between waterings.
What’s the easiest herb for beginners?
Basil and chives are popular starter herbs. Mint is also easy, but it grows fastgreat if you want “unlimited mojito energy.”
Do I need charcoal at the bottom?
No. It can help with freshness in closed containers, but the bigger factor is not overwatering and giving roots air.
Can I grow grocery-store herb plants in jars?
Yes, but many grocery-store herb pots are overcrowded. Split them into smaller clumps so each plant has room to breathe and grow.
How long do water-rooted herbs last?
Cuttings can last weeks to months depending on the herb, water cleanliness, and whether you provide nutrients. Basil and mint can do well; woody herbs are usually happier in soil.
Wrap-Up: Your Kitchen, But Make It Fresh
A mason jar herb garden is one of those rare DIY wins that’s cute and useful. Start small, match the method to your habits, and prioritize light. If you do that, you’ll have a steady supply of herbs ready to upgrade everything from eggs to ramen to “I swear this was a frozen pizza five minutes ago.”
And if you mess up? Congratsyou’ve officially joined the global gardening tradition of learning by accidentally loving something to death. Adjust, replant, and keep going.
Experiences: What It’s Like to Actually Run a Mason Jar Herb Garden (The Honest Version)
Let’s talk about the part that glossy tutorials skip: the lived reality of jar herbs. The truth is, a mason jar herb garden feels a little like owning a tiny, leafy pet. It’s low maintenanceuntil it’s notand it has opinions, especially about light and water.
The first week is pure dopamine. You set up the jars, line them up on your windowsill, label them like a responsible grown-up, and suddenly your kitchen looks like a cozy cooking show set. If you try the water-rooting method, this week can feel downright magical: you check the jar andboomlittle white roots start showing up like your cutting just unlocked a new skill tree. It’s the kind of progress that makes you think, “Wow, I should also start baking sourdough and running at sunrise.”
Week two introduces humility. This is when many people notice basil leaning hard toward the window, like it’s trying to catch gossip from outside. You rotate the jar, it leans again. That’s normal. It’s also when you may realize your “sunny” windowsill is actually “kind of bright for two hours.” If the stems start stretching and leaves space out (legginess), you learn the golden rule: indoor herbs don’t want vibesthey want light. People who add a small grow light often describe it as a turning point, like switching from struggling Wi-Fi to fiber internet.
Watering becomes a personality test. Overwaterers learn fast that jars are unforgiving. The bottom can stay wet for a long time, and herbs respond with yellowing leaves, sad droop, or that unmistakable “swampy” smell. Underwaterers, meanwhile, get dramatic wilt eventsespecially with basilwhere the plant looks like it’s fainting on a Victorian couch. The good news? Many herbs bounce back quickly once you dial in a simple routine: check moisture, water slowly, and don’t treat every droop like an emergency that requires a flood.
Harvesting is the moment you feel like a genius. The first time you snip basil above a node and it comes back bushier, you get it: this is not just decoration; it’s a system that rewards you. People who cook even a few times a week say jar herbs change their habits in a subtle waymore salads, more quick pastas, more “I added fresh chives so this is basically gourmet.” It’s also common to discover you prefer the taste of homegrown herbs because you can harvest right before using them, when the aroma is strongest.
Then there’s the “upgrade arc.” Many folks start with soil directly in jars because it’s simple, then eventually switch to the cachepot approach (pot inside jar) once they’ve had one too many overwatering close calls. Others go the opposite direction: they begin with water cuttings and later move the strongest ones into soil once roots are established. Either way, the experience tends to nudge you toward a method that fits your lifebecause your herbs will absolutely provide feedback, whether you ask for it or not.
If you want a practical mindset: treat the first month as an experiment. Try two different setups side by side (like basil in soil vs. basil in water), take quick notes, and keep what works. The best mason jar herb gardens aren’t perfectthey’re adaptive. And honestly, that’s the fun part.





