Table of Contents >> Show >> Hide
- Why Learning Excel Formulas Matters
- How to Type Formulas in Microsoft Excel: 15 Steps
- Step 1: Open your worksheet and choose the result cell
- Step 2: Start every formula with an equal sign
- Step 3: Type a simple calculation to understand the pattern
- Step 4: Use cell references instead of typing numbers manually
- Step 5: Learn the basic formula operators
- Step 6: Use parentheses to control the calculation order
- Step 7: Type a function when you need Excel to do common tasks faster
- Step 8: Open and close function parentheses correctly
- Step 9: Select ranges by dragging instead of typing them manually
- Step 10: Press Enter to complete the formula
- Step 11: Copy formulas to nearby cells with the fill handle
- Step 12: Lock a cell reference with dollar signs when needed
- Step 13: Use AutoSum when you want the quickest total
- Step 14: Check for formula errors if the result looks strange
- Step 15: Edit formulas in the formula bar and keep practicing
- Examples of Excel Formulas Beginners Should Try
- Common Mistakes When Typing Formulas in Excel
- Pro Tips to Make Excel Formulas Easier to Manage
- Real-World Experience: What Typing Excel Formulas Actually Feels Like After a While
- Conclusion
- SEO Tags
If Excel has ever made you feel like it is judging you from across the spreadsheet, welcome. The good news is that learning how to type formulas in Microsoft Excel is much easier than it looks. Once you understand the pattern, Excel goes from “mysterious number prison” to “helpful robot accountant.”
This guide walks you through exactly how to type formulas in Excel in 15 clear steps, with examples, beginner-friendly explanations, and practical tips you can use right away. Whether you are adding a monthly budget, calculating grades, tracking sales, or trying to make your spreadsheet look smarter than you feel before coffee, these steps will help.
Why Learning Excel Formulas Matters
Typing formulas in Microsoft Excel is one of the most useful spreadsheet skills you can learn. Formulas let Excel calculate totals, averages, percentages, dates, text combinations, and much more. Instead of doing math by hand or updating numbers every time data changes, you can let the worksheet do the heavy lifting.
Even better, once you know the rules, most formulas follow the same logic. Start with an equal sign, add values or cell references, use operators or functions, then press Enter. That is the basic recipe. Everything else is just toppings.
How to Type Formulas in Microsoft Excel: 15 Steps
Step 1: Open your worksheet and choose the result cell
Click the cell where you want the answer to appear. This is important because Excel displays the result in the selected cell, even though the actual formula will appear in the formula bar when the cell is active.
For example, if you want the total of numbers in cells A2 through A6 to appear in A7, click A7 first.
Step 2: Start every formula with an equal sign
Every Excel formula begins with =. No equal sign, no formula. Without it, Excel assumes you are entering plain text or a regular value. Think of the equal sign as the tiny doorman that tells Excel, “A calculation is coming through.”
Example:
=2+2
Step 3: Type a simple calculation to understand the pattern
Before jumping into fancy functions, try a basic arithmetic formula. This helps you understand how Excel reads your entry.
Examples:
=10+5=20-8=6*4=24/3
In Excel, multiplication uses an asterisk *, not an x. That little detail saves beginners from a lot of “Why is this not working?” moments.
Step 4: Use cell references instead of typing numbers manually
One of the biggest strengths of Excel formulas is that they can refer to cells. This means your results update automatically when the data changes.
Example:
=A2+B2
If A2 contains 15 and B2 contains 25, the formula returns 40. If you later change B2 to 30, the result updates instantly. That is where Excel starts earning its keep.
Step 5: Learn the basic formula operators
To type formulas in Microsoft Excel correctly, you need to know the standard operators:
+for addition-for subtraction*for multiplication/for division^for exponents&for joining text
Example text formula:
=A2&" "&B2
This combines the contents of A2 and B2 with a space between them. Very handy for first names and last names, or for pretending your spreadsheet has social skills.
Step 6: Use parentheses to control the calculation order
Excel follows an order of operations. If you want a certain part of a formula to happen first, use parentheses.
Compare these:
=2+3*4returns 14=(2+3)*4returns 20
Parentheses are your way of saying, “No, Excel, do this part first.” They are especially useful in longer formulas with multiple steps.
Step 7: Type a function when you need Excel to do common tasks faster
A function is a built-in formula. Instead of writing long calculations yourself, you can use a function name and let Excel handle the work.
Common beginner functions include:
=SUM(A2:A10)=AVERAGE(B2:B10)=MIN(C2:C10)=MAX(C2:C10)=COUNT(D2:D10)
Functions save time, reduce errors, and make you look dramatically more organized.
Step 8: Open and close function parentheses correctly
When you type a function, place the function name right after the equal sign, then add parentheses. Inside the parentheses, enter the arguments Excel needs.
Correct:
=SUM(A1:A5)
Incorrect:
=SUMA1:A5
If your formula breaks, missing parentheses are often the culprit. Excel is many things, but forgiving is not always one of them.
Step 9: Select ranges by dragging instead of typing them manually
You do not always need to type every cell reference by hand. After typing the opening parenthesis, you can click and drag to select the range you want.
For example, type:
=SUM(
Then drag from A2 to A10. Excel will insert A2:A10 for you. This is faster and cuts down on typing errors, especially in large worksheets.
Step 10: Press Enter to complete the formula
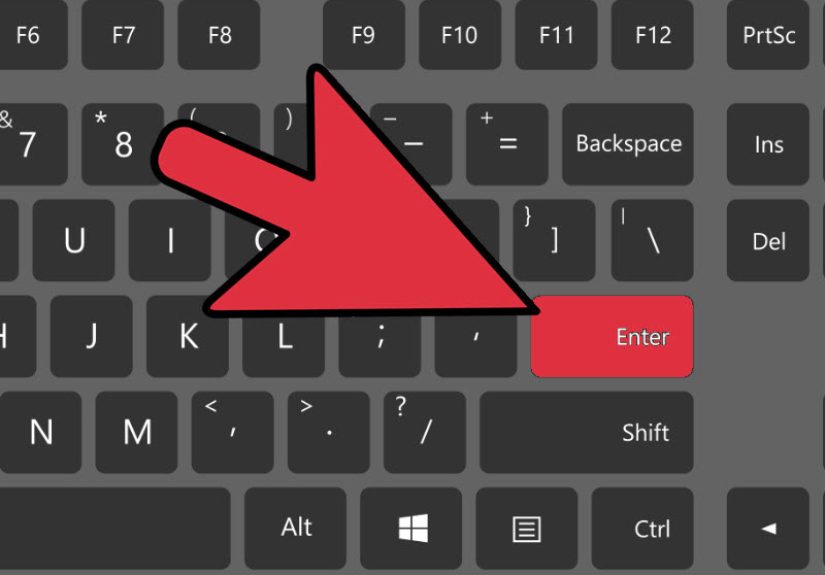
Once the formula looks right, press Enter. Excel will display the result in the cell. If you click the cell again, the formula itself appears in the formula bar.
This sometimes confuses beginners. They type a formula, press Enter, and panic because the formula “disappeared.” It did not disappear. Excel is just showing the result, which is actually the point.
Step 11: Copy formulas to nearby cells with the fill handle
If you need the same formula pattern in multiple rows or columns, do not retype it. Click the cell with the formula, then drag the small square in the bottom-right corner of the cell down or across.
Example:
If C2 contains =A2+B2, dragging it down to C3 changes it to =A3+B3. This automatic adjustment uses relative references, which is one of Excel’s most useful features.
Step 12: Lock a cell reference with dollar signs when needed
Sometimes you want part of a formula to stay fixed when copied. That is where absolute references come in.
Example:
=A2*$F$1
If F1 contains a tax rate or discount percentage, the dollar signs keep the formula pointing to F1 as you copy it downward. Without the dollar signs, Excel would shift the reference to F2, F3, and so on. That is fine for some jobs, but terrible for tax calculations unless you enjoy chaos.
Step 13: Use AutoSum when you want the quickest total
If your goal is simply to total a row or column, AutoSum is the shortcut hero. Select the cell next to the numbers, use AutoSum, and Excel inserts the SUM formula automatically.
You can still type the formula yourself:
=SUM(B2:B8)
But AutoSum is perfect when you want speed and fewer keystrokes.
Step 14: Check for formula errors if the result looks strange
If Excel shows an error such as #NAME?, #VALUE!, or #REF!, something in the formula needs attention. Common causes include misspelled function names, missing quotation marks, broken references, or deleted cells.
Smart troubleshooting questions include:
- Did I start with
=? - Did I close every parenthesis?
- Did I spell the function correctly?
- Did I refer to the right cells?
- Did I use quotes around text when needed?
Step 15: Edit formulas in the formula bar and keep practicing
To change a formula, click the result cell and edit the formula in the formula bar or directly in the cell. This is useful when formulas get longer and you want to see the entire structure clearly.
The more formulas you type, the more natural Excel feels. Start with basic math, then move to SUM, AVERAGE, IF, COUNTIF, and text formulas. That is how beginners become the person everyone in the office quietly sends spreadsheets to.
Examples of Excel Formulas Beginners Should Try
Once you understand the 15 steps above, test these formulas in a practice sheet:
- Addition:
=A2+B2 - Subtraction:
=B2-C2 - Percentage:
=B2*10% - Total sales:
=SUM(D2:D12) - Average score:
=AVERAGE(E2:E12) - Simple IF formula:
=IF(F2>=70,"Pass","Fail") - Join text:
=A2&" - "&B2
These examples cover math, logic, and text. In other words, they handle most beginner spreadsheet drama.
Common Mistakes When Typing Formulas in Excel
Even experienced users make mistakes in Excel. The difference is that experienced users complain about them with more confidence. Here are the most common issues to avoid:
- Forgetting the equal sign at the beginning
- Using x instead of
*for multiplication - Leaving out a closing parenthesis
- Typing text without quotation marks inside a formula
- Copying a formula without locking a fixed reference
- Using the wrong range in a function
- Expecting a formula cell to show the formula instead of the result
The best fix for most mistakes is simple: slow down, read the formula piece by piece, and test small formulas before building giant ones.
Pro Tips to Make Excel Formulas Easier to Manage
- Use short, clean data layouts so formulas are easier to read
- Keep labels clear so you always know what each column contains
- Use named ranges when formulas get more complex
- Break large calculations into helper columns if needed
- Double-check copied formulas for shifted references
- Practice with real-life examples like budgets, invoices, and grade sheets
Fancy spreadsheets are nice, but clear spreadsheets win more often.
Real-World Experience: What Typing Excel Formulas Actually Feels Like After a While
When people first learn how to type formulas in Microsoft Excel, they usually think the challenge is remembering the syntax. That is part of it, sure, but the real learning curve is more emotional than technical. In the beginning, every equal sign feels like the opening scene of a suspense movie. You type =SUM(, click a range, close the parenthesis, and hope nothing explodes. Then you press Enter and feel oddly proud that the spreadsheet did not fight back.
After a bit of practice, formulas start to feel less like code and more like sentence building. You stop seeing =A2*B2 as a random string and start reading it as “price times quantity.” That is the moment Excel becomes useful in a real-world way. You can look at a messy worksheet and immediately imagine how formulas can organize it. Sales report? Use SUM. Attendance sheet? Use COUNTIF. Grades? Try AVERAGE and IF. Budget tracker? Welcome to your new relationship with subtraction.
One of the most relatable experiences is discovering absolute references for the first time. Before that, many people copy formulas downward and wonder why everything turns into nonsense. The first time you lock a cell with dollar signs and watch the formula behave properly, it feels like discovering a secret lever behind the wall. Suddenly, tax rates, commission percentages, and exchange rates become much easier to manage.
Another common experience is learning that long formulas are not impressive if nobody can understand them, including the person who wrote them two weeks earlier. That is why experienced Excel users often simplify formulas, use helper columns, and name ranges. Future-you is a real person, and future-you deserves mercy.
There is also a funny confidence curve with Excel. At first, typing one SUM formula feels powerful. Then you learn IF statements and become almost unbearable for a day or two. Then a nested formula humbles you immediately. That cycle repeats forever, which is honestly part of the charm. Excel always has another level, but the basics keep paying off.
In work settings, typing formulas well saves enormous time. Instead of manually recalculating data every week, you update a few values and let Excel do the rest. In personal life, formulas help with travel budgets, household spending, debt tracking, meal planning, and side-hustle income. It is one of those skills that sounds boring until it quietly makes life easier.
Most importantly, getting good at Excel formulas is not about memorizing every function in existence. It is about understanding how formulas are built, knowing where to look when something breaks, and being comfortable experimenting. You do not need wizard-level spreadsheet powers on day one. You just need to know how to start with =, think logically, and keep practicing. That is how the blank grid turns into something genuinely useful.
Conclusion
Learning how to type formulas in Microsoft Excel is one of the fastest ways to become more efficient with spreadsheets. Start with the equal sign, use cell references, understand operators, and practice common functions like SUM and AVERAGE. From there, move into absolute references, IF statements, and more advanced formulas as your confidence grows.
The secret is not perfection. It is repetition. Type a few formulas, test them, fix mistakes, and keep going. Before long, you will stop fearing spreadsheets and start using them like a pro. Or at least like the most organized person in the room, which is close enough.