Table of Contents >> Show >> Hide
- Why Nail Trims Turn Into a Drama Series (and Why They Matter)
- Gear That Makes This Easier (and Safer)
- The No-Drama Game Plan: Cooperative Care in Plain English
- Step-by-Step Nail Trim for the “Absolutely Not” Dog
- Troubleshooting: Common Problems (and Smart Fixes)
- When to Call in the Pros (This Is a Power Move, Not a Failure)
- Maintenance: How to Make Future Trims Easier
- Key Takeaway
- Experiences From Real Life: Lessons Pet Parents Learn (So You Don’t Have To)
- Final Word
- SEO Tags
If your dog treats nail trims like you’re trying to steal their paws for a secret black-market toe-bean operation, you’re not alone.
“Uncooperative” usually doesn’t mean “bad dog.” It means your dog has feelingsbig onesabout foot handling, strange tools, past scary
experiences, or plain old “I did not consent to this spa day.”
The good news: You don’t have to win a wrestling match. In fact, you shouldn’t. The most reliable way to trim an uncooperative dog’s nails
is to make the process smaller, calmer, and more predictableso your dog can learn, “Oh. This again. I can handle this.” This guide breaks
down expert-backed techniques (including Fear Free and cooperative care principles) into practical steps you can actually use at home.
Why Nail Trims Turn Into a Drama Series (and Why They Matter)
Overgrown nails aren’t just noisythey can be uncomfortable
A little “click-click” on the floor is often your first clue that nails are getting too long. When nails grow past a comfortable length, they
can change how a dog stands and walks, snag on carpet, and make footing less stableespecially for seniors or dogs with joint issues.
As a general rule, if nails are touching the ground when your dog is standing or you hear frequent clicking on hard floors, it’s time to trim.
The quick: the tiny part everyone fears
Each nail has a blood vessel and nerve inside called the quick. Cut into it and you’ll get bleeding, pain, and a dog who now suspects you’ve
been training for villainy. The quick is easier to spot in light nails (often pink). In dark nails, you usually can’t see it clearly, so the safest
strategy is “tiny trims, often,” rather than “one heroic chop.”
Gear That Makes This Easier (and Safer)
Clippers vs. grinders vs. files vs. scratch boards
- Scissor-style or plier-style clippers: Fast and effective for most dogs. Best when you can confidently control the paw and see what you’re doing.
- Grinders (rotary nail tools): Great for taking off small amounts gradually and smoothing sharp edges. Some dogs dislike the sound or vibration.
- Nail files: Slow but helpful for smoothing or for dogs who fear clipping.
- Scratch boards: Useful for front nails (dogs “file” their own nails by scratching). Not a perfect solution for back nails, but a fantastic option for dogs who hate traditional tools.
Your “don’t panic” kit
Set yourself up like a calm professional, not a person improvising at 11:47 p.m. with kitchen scissors (please don’t).
Gather:
- Styptic powder (or cornstarch/flour as a backup)
- High-value treats (tiny pieces you can feed rapidly)
- Good lighting so you can see the nail clearly
- Non-slip mat so your dog feels stable
- A lick mat with dog-safe peanut butter or wet food (optional, but magical for many dogs)
- Towel or blanket to help position and comfort (not restrain like a burrito of doom)
The No-Drama Game Plan: Cooperative Care in Plain English
Think “micro-sessions,” not “full manicure”
Cooperative care (also called consent-based care) is about teaching your dog to participate voluntarily. Instead of forcing the trim, you build
trust with tiny steps your dog can toleratethen you stop before they panic. This reduces fear over time and makes trims safer for everyone.
Your new goal for an uncooperative dog might be:
One nail per session. Or even: touch paw → treat → done. That’s not “giving up.” That’s training.
Read the room: simple body-language traffic lights
- Green: loose body, normal breathing, taking treats, curious or neutral.
- Yellow: stiffening, pulling paw away, lip-licking, turning head away, taking treats more slowly.
- Red: growling, snapping, freezing hard, wide eyes, refusing treats, trying to escape.
If you’re seeing yellow, make the step easier (shorter session, better treats, less pressure). If you’re seeing red, stop. Pushing through red
signals can create bigger fearand bigger risknext time.
Step-by-Step Nail Trim for the “Absolutely Not” Dog
1) Prep your environment (and your expectations)
- Exercise first (a walk or play) so your dog is less “extra.”
- Pick a quiet space with good lighting and minimal distractions.
- Decide your tiny goal: one nail, two nails, or just tool introduction.
- Start a treat stream: tiny treats delivered one after another to build a positive association.
2) Introduce the tool like it’s harmless (because it is)
For many dogs, the tool is the villain in the story. Fix that by pairing the tool with great stuff:
- Show clippers/grinder → treat.
- Touch tool to paw (no cutting) → treat.
- Open/close clippers nearby (no cutting) → treat.
- Turn grinder on briefly at a distance → treat.
Do this for days if needed. If your dog is already calm with the tool, move on. If not, this step is the whole game.
3) Choose a position your dog actually tolerates
Not every dog wants to lie down and offer paws like a tiny aristocrat. Some do better standing. Some do better sitting. Some prefer being next to you,
not facing you. The “best” position is the one that keeps your dog safest and calmest.
If your dog hates having paws held, try a “support hold” instead of a “grip hold”: keep the paw close to the ground and stabilize gently,
rather than lifting high and pulling the leg outward.
4) Clip: tiny slivers, not big chunks
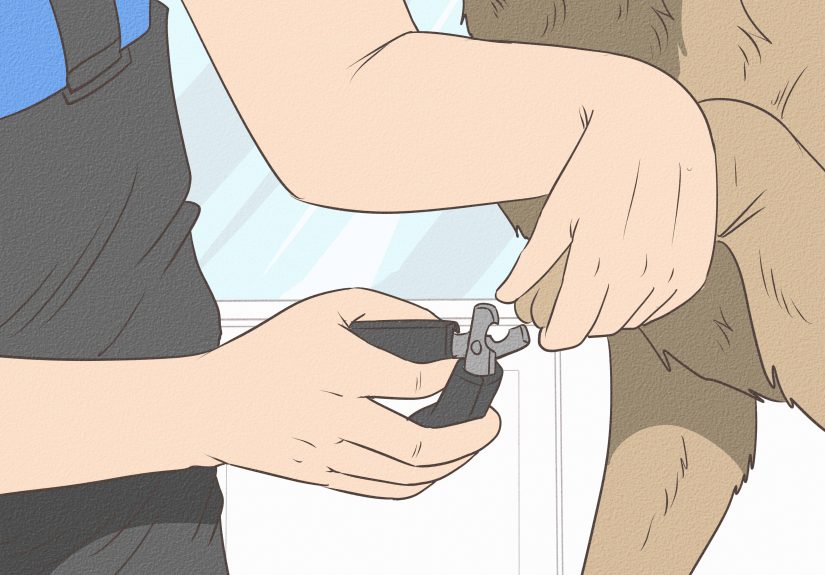
- Hold the toe gently but securely so the nail extends.
- Clip just the tip, straight across or at a slight angle that matches the nail’s natural growth.
- Reward immediately. Release the paw. Take a breath.
- Repeat if your dog stays in the “green zone.”
If nails are long, the quick may also be longer. Frequent tiny trims (every few days) can help the quick recede gradually over time, letting you
return to a healthier nail length without a painful “one-and-done” cut.
5) Grind: short touches to prevent heat
Grinders are excellent for nervous beginners because they remove nail slowlyBUT friction can create heat. Use gentle pressure and brief contact:
touch the nail, lift off, touch again. If your dog is noise-sensitive, start with the grinder off, then on at a distance, then closer over time.
6) Don’t forget dewclaws
Dewclaws (the “thumb” nail on the inside of the leg) often don’t wear down naturally. They can overgrow and curl, so check them regularlyespecially
on dogs who don’t do much rough-surface walking.
Troubleshooting: Common Problems (and Smart Fixes)
“My dog has black nails and I can’t see the quick.”
Welcome to Hard Mode. Your safest approach is:
clip tiny slivers, and stop early. Many pros look for subtle cues like a change in the nail’s center as you get closer to the quick,
but if you’re unsure, don’t chase the perfect trim. Aim for “a little shorter than before,” done often.
“My dog yanks the paw away every time.”
That’s a consent cue. Instead of gripping harder, go smaller:
hold paw for half a second → treat → release. Build up slowly. You’re teaching your dog that paw handling ends quickly and predictablyand that
they don’t need to fight to get away.
“My dog screams like I’m removing the whole foot.”
Some dogs are dramatic. Some dogs are in pain. If your dog vocalizes the moment you touch the paw (before any trimming), consider:
sore joints, arthritis, paw sensitivity, or past bad experiences. If you suspect pain, talk with your veterinarian before continuing.
“I hit the quicknow what?”
First: don’t panic. Your dog will be reading your face like it’s breaking news.
- Apply styptic powder to the nail tip (or use cornstarch/flour if that’s what you have).
- Apply gentle pressure and keep your dog calm.
- If bleeding doesn’t stop within several minutes, contact your veterinarian.
Then take a break for the day. You can rebuild confidence later with easy “wins” like paw touches and treats.
When to Call in the Pros (This Is a Power Move, Not a Failure)
Use a groomer or vet when safety is a question
If your dog is snapping, trying to bite, or panicking hard, bring in professional help. Veterinary teams and skilled groomers can use low-stress
handling techniques and work efficiently. In some casesespecially when nails are severely overgrownyour vet may recommend medication or even a
light sedative so the nails can be trimmed without fear and struggle.
Muzzles can be humane safety equipment (when trained properly)
If bite risk exists, a properly fitted basket muzzle can allow panting and taking treats while keeping everyone safer. The key is
positive muzzle trainingnever “strap it on and hope.” If your dog already fears the muzzle or the nail process, work with a qualified
trainer or your veterinarian to create a plan.
Maintenance: How to Make Future Trims Easier
Build a weekly “paw spa” habit
Several times a week (for 30–60 seconds), do a super-easy routine:
touch paw → treat; spread toes → treat; tap nail with clipper (no cutting) → treat. Keep it light and end while your dog is still relaxed.
You’re teaching, “This is normal, and it pays.”
Use “one nail, then party” scheduling
For many uncooperative dogs, the winning strategy is consistency over intensity. Clip one nail every day or every other day. It sounds slow,
but it’s faster than fighting your dog once a month and resetting progress back to zero.
Key Takeaway
Trimming an uncooperative dog’s nails is less about restraint and more about strategy. Go smaller than you think you need to. Reward generously.
Stop before stress spikes. And if you need professional supporttraining, grooming, veterinary care, or medicationthat’s not “cheating.”
That’s choosing a safer, kinder plan for you and your dog.
Experiences From Real Life: Lessons Pet Parents Learn (So You Don’t Have To)
The stories below are composites of common situations shared by pet parents, trainers, groomers, and veterinary teamsbecause while every dog is unique,
the patterns are surprisingly familiar.
Experience #1: The rescue dog who “failed” three nail trims in a row
A newly adopted rescue arrives with long nails and zero tolerance for paw handling. The first attempt is the classic mistake: a helper holds tight,
the dog thrashes, everyone gets stressed, and the dog learns that nail trims are a trap. On the second attempt, the owner tries “being quick,”
which only confirms the dog’s suspicion that the clippers are fast, loud, and terrifying. The turning point comes when the goal changes from
“finish all nails” to “earn trust.” They start with five-second sessions: touch paw, treat, release. A week later, they add “tap nail with clipper,”
then “clip one tiny sliver.” It’s not glamorous progress, but it’s real. After a month, the dog can calmly offer a paw for a single nail at a time.
The big lesson: for fearful dogs, success is measured in comfort, not speed.
Experience #2: The black-nail nightmare that became a routine
Black nails make confident people feel like rookies. One family tried to “solve” it by cutting more per nail so they wouldn’t have to do it often.
That plan ended with a quicked nail, a bleeding paw, and a dog who sprinted under the bed whenever anyone said the word “clip.” The fix was
almost boring: better lighting, a calmer setup, and a strict ruleonly tiny trims. They switched to trimming every 3–4 days, taking off
paper-thin slivers. The dog stopped anticipating pain because pain stopped happening. Within a few weeks, the nails were noticeably shorter,
the quick had receded, and the dog’s confidence returned. The lesson: you don’t need to see the quick perfectly if you commit to small, frequent trims.
Experience #3: The “I’m fine at home” dog who wasn’t fine at all
Some dogs tolerate nail trims… until they don’t. One senior dog who had always been “manageable” started pulling away and growling. The owner assumed
it was stubbornness and tried firmer restraint. That escalated quicklybecause the real issue was pain. A vet visit revealed arthritis and
sensitivity in the wrists. The solution wasn’t stronger hands; it was a kinder plan: trimming with the dog standing comfortably, supporting the paw
close to the ground, and doing fewer nails per session. On tougher days, the vet team helped with low-stress handling and, when needed,
medication to reduce fear and discomfort. The lesson: sudden resistance is informationespecially in older dogs. Listen to it.
Experience #4: The bite-risk dog and the basket muzzle “breakthrough”
A dog who snaps during nail trims is scarynot because the dog is “mean,” but because everyone’s safety matters. One owner tried a muzzle
as a last resort, but the first attempt was rushed and the dog panicked. They paused and started over with proper muzzle training:
muzzle appears → treats rain from the sky; nose goes in → more treats; buckle for one second → jackpot; then off. Over time, the muzzle predicted
snacks, not restraint. With that safety layer in place, they returned to micro nail sessions: one nail, treat, done. Eventually the dog could wear
a basket muzzle calmly for short grooming tasks, reducing anxiety for both dog and human. The lesson: safety tools work best when they’re introduced
with patience and positive reinforcementnot as emergency armor.
Final Word
Nail trimming doesn’t have to be a monthly showdown. With cooperative care, tiny steps, and the right support, most “uncooperative” dogs can learn
to toleratesometimes even volunteer forpaw handling. And if your best move is a groomer, a vet visit, or a medication-assisted trim, that’s still
a win: safe nails, less fear, and a stronger bond.




