Table of Contents >> Show >> Hide
- Why Aloe Vera Needs Transplanting
- Signs It Is Time to Repot Aloe Vera
- Best Time to Transplant Aloe Vera
- What You Need Before You Start
- How to Choose the Right Potting Mix
- Step-By-Step: How to Transplant Aloe Vera
- Step 1: Check the Plant Before You Repot
- Step 2: Prepare the New Pot
- Step 3: Remove the Aloe Vera from Its Old Pot
- Step 4: Inspect the Roots
- Step 5: Separate Pups if You Want New Plants
- Step 6: Set the Plant in the New Pot
- Step 7: Skip the Immediate Soak
- Step 8: Place the Plant in Bright, Gentle Light
- How to Care for Aloe Vera After Repotting
- Common Aloe Vera Repotting Mistakes
- Can You Transplant Aloe Vera Outdoors?
- How Often Should You Repot Aloe Vera?
- Conclusion
- Real-World Experiences and Lessons From Repotting Aloe Vera
Aloe vera has a funny reputation. It is somehow both the easiest houseplant in the room and the one most likely to collapse into a mushy green puddle after a burst of overconfidence. One minute it is thriving in a sunny window like a champion. The next, it is leaning sideways like it just heard bad news from the potting bench.
The good news is that transplanting aloe vera is not difficult once you understand what the plant actually wants. And spoiler alert: what it wants is not a giant decorative pot, soggy soil, or a weekly watering schedule written with the enthusiasm of a golden retriever. Aloe prefers a snug but not cramped home, gritty fast-draining soil, and a gentle hand during repotting.
In this step-by-step repotting guide, you will learn when to transplant aloe vera, how to pick the right container, how to divide pups, what to do with damaged roots, and how to help your plant settle in without drama. Whether your aloe is rootbound, top-heavy, multiplying like a green rabbit, or simply overdue for fresh soil, this guide will help you repot it the right way.
Why Aloe Vera Needs Transplanting
Aloe vera is a succulent with shallow, spreading roots. That growth habit matters because aloe usually does not want a deep bucket of wet soil. It wants a container that matches its root system and dries out reasonably fast between waterings. Over time, even a happy aloe can outgrow its pot, exhaust its potting mix, or produce a cluster of offsets, often called pups, around the base.
Transplanting aloe vera solves a few common problems at once. It gives crowded roots more space, refreshes old compacted soil, improves drainage, and lets you inspect the plant for rot or damage. It is also the best moment to separate pups if you want more aloe plants without spending another dime at the garden center.
Think of repotting as a combination haircut, home renovation, and therapy session. Your aloe gets fresh footing, better airflow, and a chance to stop wrestling with exhausted soil.
Signs It Is Time to Repot Aloe Vera
1. Roots are circling the pot or growing from the drainage hole
If roots are escaping from the bottom or forming a dense mass inside the pot, your aloe is probably rootbound. That is one of the clearest signals that transplanting is overdue.
2. The plant is top-heavy or leaning
Mature aloe plants can become wider than their containers. When the leaves fan out and the whole plant looks like it is trying to make a break for it, a sturdier pot can restore balance.
3. There is more root than soil
If you slip the plant out and find an impressive tangle of roots with very little potting mix left, your aloe has basically eaten its apartment.
4. Pups are crowding the mother plant
Aloe vera often produces little offshoots around the base. These babies are charming, but too many of them can crowd the pot and compete for space.
5. The soil dries oddly or stays wet too long
Old potting mix can become compacted, crusty, or unevenly absorbent. If water rushes straight through, or the lower soil seems wet forever, transplanting into fresh mix can reset the situation.
Best Time to Transplant Aloe Vera
The best time to repot aloe vera is during active growth, usually in spring or early summer. That is when the plant is most capable of recovering from disturbed roots and adjusting to fresh soil. You can repot in other seasons if the plant is in trouble, especially if you suspect rot, but routine transplanting is easier on the plant when it is ready to grow.
Try not to repot while the plant is flowering or during a sluggish dormant spell unless there is a pressing reason. Aloe is resilient, but it still appreciates good timing.
What You Need Before You Start
- A new pot with at least one drainage hole
- Cactus or succulent potting mix
- Extra perlite, pumice, or coarse sand if you want faster drainage
- Clean scissors, pruners, or a knife
- Gloves or a towel for handling spiky leaves
- A small trowel or scoop
- Newspaper or a tray to catch loose soil
For the pot, go only slightly larger than the current container. Bigger is not always better with aloe vera. A pot that is too large holds excess moisture and can increase the risk of root rot. Because aloe has a shallow, spreading root system, a wider pot often works better than a much deeper one. Terracotta is a popular choice because it dries faster than plastic, but any container with good drainage can work.
How to Choose the Right Potting Mix
Regular garden soil is a bad roommate for aloe vera. It is usually too dense, too moisture-retentive, and too quick to turn into a soggy mess indoors. A quality cactus or succulent mix is the easiest option because it is designed for faster drainage and better aeration.
If you like to customize, you can lighten a commercial mix with extra perlite, pumice, granite grit, or coarse sand. The goal is simple: water should soak through the potting mix, but the roots should not stay damp for long stretches. Aloe likes a gritty home, not a swamp.
Step-By-Step: How to Transplant Aloe Vera
Step 1: Check the Plant Before You Repot
Look over the leaves, base, and soil. If the plant has pests, mushy stems, or obvious disease, deal with that as part of the repotting process. Also check the soil moisture. You do not want a waterlogged root ball, but bone-dry roots can be brittle. A lightly moist root ball is often easier to remove from the pot without tearing everything apart.
Step 2: Prepare the New Pot
Add enough fresh succulent mix to the bottom of the new pot so the aloe will sit at roughly the same height it did before. This part matters more than people think. Do not bury the crown, and do not let the lower leaves rest on the soil surface. Aloe leaves touching damp mix are basically sending an engraved invitation to rot.
Step 3: Remove the Aloe Vera from Its Old Pot
Tip the pot sideways and gently ease the plant out by holding near the base, not by yanking a leaf like you are starting a lawn mower. If it is stuck, tap the pot sides and bottom. For stubborn plants in flexible nursery pots, squeeze the sides to loosen the root ball.
Once the plant is out, shake or brush off some old soil. You do not need to bare-root it aggressively unless the old mix is compacted, waterlogged, or contaminated.
Step 4: Inspect the Roots
Healthy aloe roots are usually firm and pale. Dead or rotting roots tend to be mushy, brown, fragile, or foul-smelling. Trim away obviously damaged roots with clean tools. If the root system looks badly rotted, remove all affected tissue, let the healthy parts dry briefly, and replant in a clean pot with fresh mix.
This is also a great time to trim away completely dead or collapsed lower leaves. Keep the grooming modest. Your aloe is moving house, not auditioning for a makeover show.
Step 5: Separate Pups if You Want New Plants
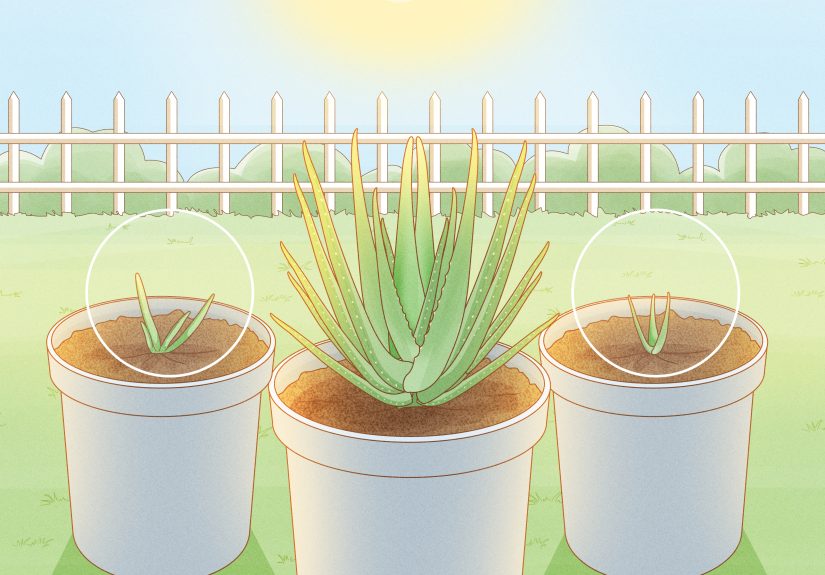
If your aloe has pups, decide whether to leave them attached or divide them. Pups with some roots of their own are easiest to transplant. Gently tease them away from the mother plant. If you need to cut them free, use a clean knife.
Rooted pups can often be potted up right away. Pups with a fresh cut and little or no root system should be allowed to dry and callus for several days before planting. That pause helps reduce the chance of rot. It requires patience, which is rude but useful.
Step 6: Set the Plant in the New Pot
Place the aloe in the center of the new container, or slightly off-center if that improves balance. Make sure the base sits at the same depth as before. Then fill around the roots with fresh mix, firming it gently with your fingers. The goal is support, not compression. Do not pack the soil like you are sealing a driveway.
Leave about half an inch to an inch of space below the rim so watering is easier later.
Step 7: Skip the Immediate Soak
Many beginners assume repotting must be followed by a heroic drenching. Aloe disagrees. If the roots were disturbed or trimmed, waiting a day or two before watering can help those tiny injuries dry and settle. For recently cut pups, wait even longer if needed so wounds can callus properly.
When you do water, water the soil directly and let excess moisture drain freely. Never let the pot sit in standing water.
Step 8: Place the Plant in Bright, Gentle Light
After repotting, keep the aloe in bright light, but avoid blasting it immediately with intense direct sun if it has been stressed or recently divided. Give it several days to adjust. Once it perks up, return it to the bright conditions aloe loves. A sunny south- or west-facing window often works well indoors.
How to Care for Aloe Vera After Repotting
Water Carefully
The biggest mistake after transplanting aloe vera is overwatering. Let the soil dry before watering again. Aloe stores moisture in its leaves, so it can handle a little patience much better than soggy roots.
Hold Off on Fertilizer
Fresh potting mix already gives the roots a new environment, and the plant needs time to reestablish itself. Wait a few weeks before fertilizing, and even then, use a light hand.
Watch for Shock
Mild drooping, slight color changes, or a temporary sulk can happen after repotting. That is transplant shock. Usually, the plant recovers if light, drainage, and watering are handled sensibly. If the leaves turn mushy, yellow rapidly, or the base softens, the issue is probably too much moisture rather than ordinary shock.
Common Aloe Vera Repotting Mistakes
- Using a pot that is much too large: extra soil holds extra moisture.
- Choosing decorative containers without drainage: pretty pots do not impress rotting roots.
- Burying the crown or lower leaves: aloe needs the base to stay dry and airy.
- Using heavy houseplant or garden soil: dense mix stays wet too long.
- Watering too soon and too often: the classic aloe downfall.
- Moving it straight into harsh sunlight after stress: a rough transition can scorch leaves.
Can You Transplant Aloe Vera Outdoors?
Yes, but only in warm climates where frost is not an issue. Aloe vera prefers well-drained soil and bright conditions, but outdoor plants should be introduced gradually if they were grown indoors. A sudden move from a windowsill to full blazing sun can cause sun stress. Think of it as the plant version of walking out of a movie theater at noon in July.
If you transplant aloe outdoors, choose a spot with sharp drainage and avoid low areas where water lingers after rain. In wetter climates, containers are often safer than open ground.
How Often Should You Repot Aloe Vera?
Most aloe vera plants do not need constant repotting. Every two to five years is common, though some vigorous plants need it sooner, especially if they produce lots of pups or become top-heavy. The plant will tell you when it is ready. Roots escaping, crowded offsets, unstable growth, and tired old soil are the clues.
Conclusion
Transplanting aloe vera is less about doing something fancy and more about avoiding the usual houseplant crimes. Give it a pot with drainage, use gritty succulent mix, keep the leaves above the soil, and do not smother it with water after repotting. That is the heart of the process.
Once you learn how aloe grows, the whole job becomes much less intimidating. A slightly wider pot, fresh soil, careful root inspection, and sensible aftercare can turn a cramped or struggling plant into a sturdy one again. And if you separate a few pups along the way, congratulations: you have accidentally become the person who gives aloe plants to friends.
Real-World Experiences and Lessons From Repotting Aloe Vera
One of the most common experiences people have when repotting aloe vera is realizing that the plant looked calm on the surface but chaotic underneath. From above, it may seem perfectly fine, with a neat rosette and plump leaves. Then the pot comes off and suddenly there is a solid knot of roots, a pile of hidden pups, and barely any soil left. That moment is surprisingly helpful because it explains problems that seemed mysterious before, like a plant drying out too fast, leaning badly, or refusing to sit upright.
Another frequent lesson is that aloe vera often does better after a modest upgrade rather than a dramatic one. Many growers assume a much larger pot will help the plant “grow into it,” but in practice, oversized containers tend to keep the mix wet longer than aloe likes. A pot that is just a bit wider usually gives better results. The plant settles faster, the soil dries more predictably, and the risk of root rot drops. It is not a glamorous lesson, but aloe vera is often healthier when you resist the urge to give it a mansion.
People also learn quickly that pups can be both a gift and a complication. It is exciting to discover several baby plants clustered around the base, especially if you were hoping to propagate aloe vera. But pups also crowd the mother plant, steal space, and complicate watering. In real-life repotting, the most successful divisions are usually the pups that already have a few roots of their own. Tiny offsets without roots can still be saved, but they need more patience, more caution, and less water than most beginners expect.
There is also the classic watering lesson. After repotting, many plant owners feel a strong emotional need to water immediately, as if the aloe has just completed a marathon and requires a sports drink. Then they learn that aloe vera prefers calm, not panic. Waiting a little before watering, especially after root disturbance, often leads to a better recovery. This can feel counterintuitive at first, but it is one of the most useful habits experienced growers develop.
Light adjustment is another detail that shows up in real homes. A freshly repotted aloe may look a little tired for a few days, and moving it into harsh sun right away can make that worse. Many people get the best results by giving the plant bright, indirect light briefly, then easing it back into stronger sun once it looks settled. This gentle transition matters even more for aloes moved outdoors for the first time in warm weather.
Perhaps the biggest experience-based takeaway is that aloe vera is forgiving when the fundamentals are right. Even plants that arrive at repotting day leaning, cramped, or a bit rootbound often recover well with fresh gritty soil, sensible pot size, and a slower watering rhythm. In other words, aloe does not need perfection. It just needs you to stop loving it so aggressively.





