Table of Contents >> Show >> Hide
- Why Proper Plywood Storage Matters
- Step 1: Pick the Driest, Most Stable Spot in the Garage
- Step 2: Keep Plywood Off the Concrete Floor
- Step 3: Support the Full Sheet, Not Just the Ends
- Step 4: Sort by Size, Type, and Use
- Step 5: Protect Plywood from Humidity, Dust, and Damage
- Step 6: Make the Storage Easy to Use
- Common Mistakes to Avoid
- Best Storage Setup for Most Home Garages
- Real-World Experience: What Actually Works Over Time
- Final Thoughts
If you have ever leaned a sheet of plywood against the garage wall and thought, “Perfect, I’ll deal with that later,” congratulationsyou have joined a very large club. Unfortunately, plywood has a way of turning “later” into “why does this sheet look like a giant potato chip?” Garages are convenient, but they are also famous for dust, damp floors, temperature swings, and random chaos involving ladders, holiday bins, and that bike nobody admits is broken.
The good news is that storing plywood well is not complicated. You do not need a commercial warehouse, a forklift, or a sacred woodworking chant. You just need a system that keeps sheet goods flat, dry, supported, and easy to reach. When plywood is stored the right way, it stays usable longer, cuts cleaner, and is far less likely to warp, sag, or become an obstacle course hazard.
In this guide, you will learn exactly how to store plywood in a garage in six simple steps. We will cover where to put it, how to support it, what to avoid, and how to make your storage setup work whether you have one sheet or a small mountain of leftovers from your last “weekend project” that lasted three months.
Why Proper Plywood Storage Matters
Plywood may be more stable than solid wood, but it is not invincible. It still reacts to moisture, poor support, and rough handling. In a garage, those problems show up fast. A sheet left directly on concrete can absorb moisture from below. A sheet leaned carelessly against a wall can slowly bow. A stack with no center support can sag in the middle like it just gave up on life.
Proper plywood storage matters for three big reasons: performance, safety, and cost. Performance matters because flat sheets are easier to measure, cut, and assemble. Safety matters because full sheets are heavy, awkward, and not fun when they slide. Cost matters because replacing damaged plywood is a great way to spend money you could have used on better tools, more clamps, or snacks for the workshop.
Step 1: Pick the Driest, Most Stable Spot in the Garage
The first step is location. Not all corners of a garage are created equal. The best place to store plywood is away from garage doors, leaky walls, dripping pipes, and any area where rainwater or condensation tends to show up uninvited. If one side of your garage gets damp every storm season, that side should not become home base for sheet goods.
Look for a spot with the most stable conditions possible. That usually means an interior wall, a cleaner section of the floor, and a place with decent airflow. If your garage gets muggy in summer or damp in winter, even basic ventilation helps. In very humid garages, a dehumidifier can make a real difference. Plywood does not need a spa day, but it does appreciate less moisture drama.
What to check before you store anything
- No standing water or damp concrete in the storage area
- No direct exposure to roof leaks, wall seepage, or sprinkler overspray
- Enough room to move sheets without scraping them across everything you own
- A location where full-size 4-by-8 sheets can be supported properly
If your garage is extremely damp, fix the moisture problem before you build a fancy plywood rack. Otherwise, you are basically giving plywood a nice organized place to warp.
Step 2: Keep Plywood Off the Concrete Floor
This step is non-negotiable. Never store plywood directly on a garage floor for long periods. Concrete may look harmless, but it can transfer moisture to the wood, especially in humid weather or after rain. Even a clean garage slab can be the slow, silent villain in your plywood story.
Raise your sheets off the floor using sleepers, stringers, a pallet-style base, or a dedicated rack. The goal is simple: create a buffer between the plywood and the concrete. Even a few inches of clearance is better than none. That gap also improves airflow and makes it easier to clean underneath, which is handy in a garage where dust reproduces at night.
Good off-floor support options
- Pressure-treated 2×4 sleepers laid flat and level
- A simple plywood cart with a sturdy base
- A shop-built sheet-goods rack
- Heavy-duty wall-mounted storage arms for small quantities
Whatever you use, make sure the base is level. If the bottom support is twisted, the plywood will not magically ignore that and remain perfect. Wood is cooperative, but not that cooperative.
Step 3: Support the Full Sheet, Not Just the Ends
If you want to keep plywood flat, support matters more than good intentions. A common mistake is storing a stack with support only at the ends. That leaves the middle free to sag over time, especially with thicker, heavier sheets stacked together. Full support across the length is the safest choice for long-term storage.
If you are stacking plywood horizontally, use at least three evenly spaced supports under 8-foot sheets: one near each end and one in the middle. More support is even better, especially if the stack is heavy. Keep the supports aligned so the weight is distributed evenly. Random scrap blocks thrown under the pile are not a “system.” They are a cry for help.
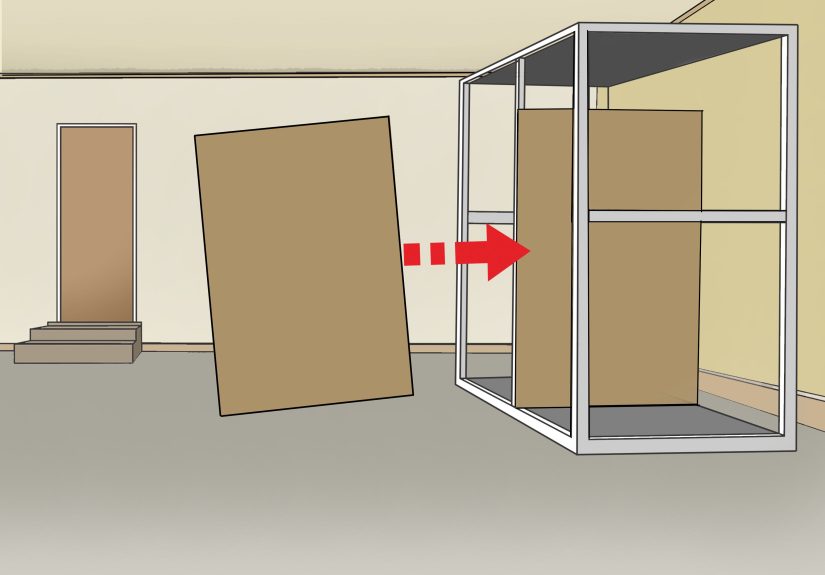
If space is tight, vertical storage can work, but only when done correctly. The sheet should sit on a flat base, lean slightly backward for stability, and remain fully supported so it does not bow under its own weight. Vertical storage is popular in many small shops because it saves floor space and makes sheets easier to sort, but it needs a purpose-built racknot just a wall and a prayer.
Horizontal vs. vertical storage
Horizontal storage is best for long-term flatness, especially if you have enough room for a proper rack or low platform. Vertical storage is better when garage space is limited and you need easier access to individual sheets. Both methods work if the plywood stays supported, dry, and secure.
Step 4: Sort by Size, Type, and Use
A stack of mixed sheet goods becomes a headache fast. One full birch plywood sheet, two mystery offcuts, a piece of MDF, half a cabinet panel, and something you are pretty sure is from 2019 is not an inventory system. It is a wood-based scavenger hunt.
Store plywood by category. Put full sheets together. Keep cutoffs in a separate section. Group materials by thickness if possible: 1/4-inch, 1/2-inch, 3/4-inch, and so on. If you use different sheet goods, separate plywood from MDF, OSB, melamine, and hardboard. This saves time, reduces damage from shuffling pieces around, and helps you find what you need before you buy duplicates you did not actually need.
Easy ways to organize sheet goods
- Use dividers in a rolling rack for full sheets and partial sheets
- Label cutoff bins by thickness or material
- Keep best-quality cabinet-grade plywood separate from rough shop stock
- Store smaller usable scraps vertically in a narrow bin so they stay visible
Visibility matters. When scraps disappear behind larger sheets, they tend to remain hidden until you finally clean the garage and discover enough plywood to build a small navy.
Step 5: Protect Plywood from Humidity, Dust, and Damage
Garage storage is not just about where plywood sits. It is also about what happens around it. Temperature and humidity swings can stress wood-based materials over time. Dust piles up. Tools get leaned against sheet goods. Bicycles bump corners. Someone stores a paint can too close. Suddenly your clean plywood looks like it survived a minor event.
To protect your plywood, keep the storage area as clean and dry as you can. Good ventilation helps. A dehumidifier is worth considering in persistently damp climates. Avoid covering plywood tightly with plastic unless you are controlling condensation, because trapped moisture is not a helpful houseguest. A breathable cover or light dust protection is often the better choice in a garage.
Also protect edges and corners. That is where damage shows up first. If you move sheets often, consider adding sacrificial edge strips or using spacers between sheets to reduce scuffing. For valuable hardwood plywood, this small step can save a lot of frustration later.
Quick protection tips
- Do not store plywood near wet gardening supplies, fertilizers, or leaking containers
- Keep it away from direct sun coming through windows or open doors for long periods
- Use spacers if stacking nice veneer plywood to reduce surface wear
- Clean the rack area regularly so dust and grit do not scratch the faces
Step 6: Make the Storage Easy to Use
The best plywood storage system is not just safe. It is convenient. If getting one sheet out requires moving seven other things, removing a ladder, relocating a cooler, and having a quiet talk with your lower back, the system will fail. Eventually, you will start leaning sheets in random places “just for now,” and we both know how that movie ends.
Design your storage so you can load and remove plywood without a wrestling match. Rolling carts are excellent for many garages because they save space and can be moved away from the wall when needed. Wall-mounted arms can work for smaller quantities. A dedicated vertical sheet-goods rack is often the best compromise for serious DIYers and woodworkers with limited square footage.
Leave enough clearance in front of the rack to pivot a full sheet. Think through the path from your vehicle to the storage area. If you buy plywood regularly, your future self will thank you for not creating a route that involves backing around a lawn mower and apologizing to a rake.
A smart garage plywood setup usually includes
- A stable rack or base that keeps sheets off the floor
- Enough support to prevent sagging
- Simple organization for full sheets and cutoffs
- Clear access for loading and unloading
- Protection from moisture and accidental impact
Common Mistakes to Avoid
Even well-meaning garage storage can go wrong. Here are the mistakes that cause most of the trouble:
- Leaning plywood straight against a wall for months: easy today, frustrating tomorrow
- Stacking on bare concrete: moisture risk from below
- Supporting only the ends: invites sagging in the middle
- Mixing heavy sheets and flimsy offcuts carelessly: a recipe for dents and broken corners
- Creating an inaccessible rack: if it is annoying to use, you will stop using it correctly
- Ignoring garage humidity: plywood notices even when you do not
Best Storage Setup for Most Home Garages
If you want the short version, here it is: for most homeowners, the best way to store plywood in a garage is on a dedicated rack or rolling cart that keeps sheets off the concrete, supports them evenly, and makes them easy to access. If you have room, horizontal storage is excellent for long-term flatness. If you are short on space, a properly built vertical rack is a very practical solution.
The “best” setup depends on how much plywood you keep on hand. One or two sheets? Wall-mounted storage arms or a compact vertical rack may be perfect. A serious DIY workflow with frequent sheet goods? Build or buy a sturdy rolling sheet-goods cart with dividers. Lots of offcuts? Add a separate bin so small pieces do not disappear into the plywood wilderness.
Real-World Experience: What Actually Works Over Time
Here is the part that many garage guides skip: perfect storage on paper is not always perfect in real life. In actual home garages, plywood storage succeeds or fails based on habits. You can build a beautiful rack on Saturday, but if it is awkward to use by Tuesday, the plywood will start drifting around the garage like furniture in a haunted house.
One common experience is that people begin by storing sheets flat on the floor “temporarily,” usually on cardboard or a moving blanket. It seems harmless at first. Then the weather shifts, the garage floor gets damp, and the bottom sheet ends up looking rougher than expected. This is why even a simple raised platform makes such a big difference. It does not need to be fancy. It just needs to keep the material dry and supported.
Another thing many homeowners learn is that vertical storage becomes much more appealing once they have to move a couple of full sheets by themselves. A well-designed vertical rack can be easier to manage than a flat pile, especially if you are not six-foot-five with forklift energy. You can see what you have, pull one sheet at a time, and sort cutoffs without dismantling the entire stack. But the trick is building the rack with real support, not just creating an upright “lean zone.”
Cutoffs are their own special adventure. At first, saving scraps feels wise and responsible. Then six months later you are storing seventeen pieces “just in case,” including one oddly shaped panel that might only be useful if you decide to build a cabinet for a raccoon. The best experience-based rule is simple: keep useful scraps organized by size and thickness, and let the truly useless ones go. Storage space in a garage is valuable. Do not spend it babysitting plywood confetti.
Many people also discover that garage layout matters as much as the rack itself. If the plywood is stored behind bikes, bins, and seasonal decorations, every sheet becomes a production. The easiest systems are near the garage entrance or near the work area, with enough room to turn a full sheet safely. When the storage location matches how you actually work, you are much more likely to put materials back where they belong.
Finally, there is the moisture lesson. Plenty of homeowners do not realize how much a garage environment changes throughout the year until their materials start reacting. A garage can be dry in one season and muggy in another. Small upgradesbetter airflow, fixing leaks, using a dehumidifier, or simply avoiding the dampest wallcan noticeably improve how well plywood holds up. In other words, the best plywood storage system is not always the most expensive one. It is the one that respects gravity, moisture, and human laziness all at once.
Final Thoughts
Storing plywood in a garage is not complicated, but it does require intention. Pick a dry location, keep sheets off the concrete, support them properly, organize them by size and type, protect them from moisture and damage, and make the setup easy enough that you will actually use it. Those six steps solve most plywood storage problems before they start.
Whether you are a casual DIYer, a serious woodworker, or someone who bought extra plywood because it was on sale and now needs a plan, good storage pays off. Flat sheets are easier to cut, safer to handle, and far less likely to betray you at the exact moment you are ready to build. And in a garage, that is about as close to peace as most of us get.





