Table of Contents >> Show >> Hide
- Why Drop Cloth Curtains Work So Well
- Materials and Tools
- Step 1: Choose the Right Drop Cloth
- Step 2: Pre-Wash to Soften (and Pre-Shrink)
- Step 3: Plan Your Curtain Look
- Step 4: Measure Like You Mean It
- Step 5: Choose Your Finish (No-Sew or Sew)
- Step 6: Make Them Look Custom (Easy Upgrades)
- Step 7: Hang and Fine-Tune
- Troubleshooting: Common Drop Cloth Curtain Problems
- Style Ideas: Where Drop Cloth Curtains Look Best
- Experience-Based Add-On: Lessons DIYers Learn the Fun Way (500+ Words)
- Conclusion
If your windows currently look like they’re wearing “default settings,” drop cloth curtains are the glow-up you didn’t know you needed.
They’re budget-friendly, surprisingly stylish, and they come with built-in bragging rights: “These? Oh, I made them.”
The best part is you can go fully no-sew (hello, clip rings) or do a little simple sewing for a more tailored look.
Either way, you’ll end up with curtains that feel relaxed like linen, sturdy like canvas, and expensive like… well, expensive.
This guide walks you through choosing the right drop cloth, planning the perfect length and fullness, and finishing your panels so they look intentional
not like you panic-hung painter’s supplies five minutes before guests arrived. (We’ve all been there. No judgment. Mild concern, but no judgment.)
Why Drop Cloth Curtains Work So Well
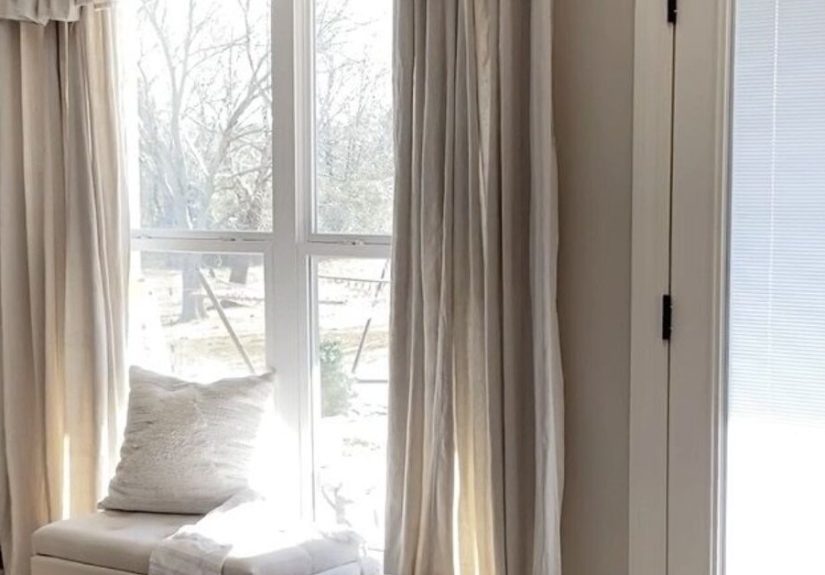
Painter’s drop cloths are typically cotton canvas (or a cotton blend), which means you get a thick, textured fabric with a soft, casual drape once washed.
That texture reads “designer neutral” in almost any roomfarmhouse, modern organic, coastal, minimalist, you-name-it.
What makes them “gorgeous” (and not just “there”)
- They hang high and wide to make windows look bigger and ceilings taller.
- They have enough fullness so the fabric stacks nicely instead of going flat like a sad tortilla.
- The hem hits the right lengthusually “kissing the floor,” not hovering awkwardly or puddling like a wet mop (unless puddling is your vibe).
- The top finish is consistent (clip rings evenly spaced, grommets aligned, or a clean rod pocket).
Materials and Tools
Core supplies
- Canvas drop cloth(s) (size depends on your window and desired fullness)
- Curtain rod (sturdy enough for canvas) + brackets + anchors
- Hanging method: clip rings, drapery hooks, grommet kit, or sewing supplies for a rod pocket
- Measuring tape
- Iron + ironing board (optional, but helps a lot)
- Fabric scissors or sharp shears
Optional but helpful
- Hem tape (iron-on) or fabric glue (for no-sew hemming)
- Bleach or oxygen bleach (if you want a lighter tonetest first)
- Rubber mallet + grommet set (if doing grommets)
- Painter’s tape (for marking consistent lengths)
- Seam ripper (for “oops” momentsaka “creative revisions”)
Step 1: Choose the Right Drop Cloth
Drop cloths come in different weights, weaves, and seam layouts. For curtains, you want something that looks intentional and hangs evenly.
Here’s what to look for:
Weight and feel
- Medium-weight canvas usually gives the best drape: sturdy, but not stiff.
- Heavier canvas looks luxe and structured, but can feel bulky and may need a stronger rod.
- Very light canvas is easier to manipulate but can look thin and wrinkly faster.
Seams (the sneaky detail people forget)
Some drop cloth sizes have a center seam. That’s not “bad,” but it can be visible depending on lighting and placement.
If you want a clean, uninterrupted look, check product photos/reviews and choose a size known for fewer seamsor plan to make the seam a “feature”
with trim, ribbon, or a faux grain-sack stripe.
Step 2: Pre-Wash to Soften (and Pre-Shrink)
Fresh drop cloths can be stiff and may shrink after washing. Pre-washing does two important jobs:
it softens the canvas so it drapes better, and it gets most shrinkage out of the way before you measure and hem.
Pre-wash tips
- Shake the cloth outside first to remove loose lint and debris.
- Wash with mild detergent. Skip harsh chemicals unless you’re intentionally bleaching or stripping.
- Use cooler water and avoid high heat if you want to reduce shrink risk.
- Dry on low or air-dry if you’re worried about losing length.
Pro move: If your drop cloth is huge and your washer is not, consider a laundromat with large-capacity machines.
Your home washer deserves peace, too.
Step 3: Plan Your Curtain Look
Before you cut anything, decide how you want the curtains to behave in real life. (Real life includes pets, toddlers, robot vacuums, and the occasional
dramatic curtain-swoosh entrance.)
Length options
- Float: ends about 1/2 inch above the floorclean and practical.
- Kiss: barely touches the floorpolished and popular.
- Puddle: extra fabric gathers on the floorromantic, but higher-maintenance.
Width and fullness
For that high-end look, aim for enough total curtain width that your panels look full even when closed.
A common target is about 2x the window width (more for sheers, less if you’re doing a very structured, minimal style).
If your drop cloth panels are narrow, use two panels per side or add a second drop cloth panel to increase fullness.
Hang them high and wide (the designer trick)
Where you place the rod matters as much as the fabric. Hanging the rod higher makes the room look taller,
and extending the rod wider lets the curtains stack off the glass so you don’t lose light.
Translation: bigger-looking windows, brighter room, instant upgrade.
Step 4: Measure Like You Mean It
Measure after you decide rod placement. If you measure first and install later, you’ll often end up with “almost right” curtains,
which is the decorating equivalent of “almost coffee” (tragic).
How to measure length
- Install (or at least mark) the rod height.
- Decide your hanging method: clip rings sit lower than a rod pocket; grommets sit differently than hooks.
- Measure from the ring clip (or top attachment point) down to your desired finished length.
- Measure in 2–3 spots across the window in case floors aren’t perfectly level.
How to estimate panel count (quick math)
Example: Your window is 60 inches wide. You want a full look, so aim for about 120 inches of total fabric width.
If each drop cloth panel is roughly 60 inches wide, you’ll want two panels total (one on each side).
If your panels are narrower, you may use two panels per side for extra fullness.
Step 5: Choose Your Finish (No-Sew or Sew)
Option A: The easiest no-sew method (clip rings)
Clip rings are the “I want curtains today” approach. They also make it easy to adjust height by moving the clip position slightly.
Plus, if you mess up? You can pretend it’s “a relaxed, organic look.” Designers do that all the time.
- Lay the drop cloth flat and find the top edge you want to use (many drop cloths already have a finished hem).
- Mark ring placement evenly across the top. Keep spacing consistent for a tailored look.
- Clip the rings on, making sure the top edge stays level.
- Hang the panel and step back. Adjust spacing if the fabric is pulling or sagging.
Option B: Hem tape (no-sew, but looks finished)
If the length is too long, hem tape is a fast fix. You iron a clean fold, tuck the tape inside, and press again.
The secret sauce is pressing first so your hem line is crisp and straight.
- Hang the panel with clips to confirm final length.
- Mark the bottom fold line with pins or painter’s tape.
- Take down the panel, press the fold, insert hem tape, then press to bond.
- Rehang and admire your suspiciously professional-looking hem.
Option C: Simple sewn hem (best for durability)
If you have a sewing machine (or access to one), a basic hem is strong and long-lastingespecially if you plan to open/close the curtains daily.
- Trim excess fabric, leaving allowance for a double-fold hem.
- Press the fold, pin, then stitch a straight line across.
- For heavier canvas, use a sturdy needle and go slow over thick seams.
Option D: Grommet top (modern + easy to slide)
Grommets make curtains glide smoothly and look crisp. Use grommet tape or carefully measured holes so the top edge stays stable.
This method takes longer, but the result is sleek and “store-bought in a good way.”
Step 6: Make Them Look Custom (Easy Upgrades)
Add trim or banding
Want “designer drape energy” without the designer invoice? Add a vertical stripe (grain-sack style), ribbon banding, or contrasting trim along the leading edge.
You can sew it, fabric-glue it, or use iron-on adhesive depending on the trim.
Create a relaxed ruffle or header
A simple fold-over header at the top can create a soft, tailored look. Even if you’re using clip rings, that top fold adds structure
and helps the fabric fall in prettier folds.
Layer for function
If you love the look of drop cloth curtains but need light control, layer them with blackout panels or a liner on a double rod.
This gives you daytime softness and nighttime privacy without compromising the vibe.
Step 7: Hang and Fine-Tune
Hang your curtains, then do a final check:
- Are the bottoms even? If not, adjust clip heights or re-press the hem line.
- Do they “stack back” off the window? If they block glass when open, widen the rod placement.
- Do they skim the floor the way you planned? Trim or re-hem if needed.
- Do they glide smoothly? If not, upgrade rings or confirm the rod isn’t bending under weight.
Troubleshooting: Common Drop Cloth Curtain Problems
“They shrank more than I expected.”
This is why pre-washing matters. If shrinkage still caught you off guard, you have options:
raise the rod slightly, use clip rings to “cheat” height, add a contrasting bottom band, or embrace a float length.
“They look wrinkly.”
Canvas loves to wrinkle like it’s auditioning for a laundry detergent commercial. Pressing helps, but so does strategy:
steam them while hanging, or accept a relaxed texture as part of the casual linen-like look.
“They feel too heavy.”
Use a stronger rod and anchors, reduce fullness, or switch to a slightly lighter drop cloth weight for the next set.
Also: clip rings can distribute weight more evenly than a tight rod pocket.
“They’re too beige for my taste.”
Add contrast with trim, dye them a warmer white, or lean into the natural tone with wood, black metal, or warm brass hardware.
Beige isn’t boringit’s just a supporting actor waiting for better lighting.
Style Ideas: Where Drop Cloth Curtains Look Best
- Living rooms: Add softness and heightespecially if you hang them close to the ceiling.
- Bedrooms: Layer with blackout for sleep and keep the outer layer breezy.
- Dining spaces: Use trim or a stripe for a tailored, “custom drapery” look.
- Home offices: A calm neutral backdrop that doesn’t steal attention from your video calls.
Experience-Based Add-On: Lessons DIYers Learn the Fun Way (500+ Words)
Let’s talk about the “experience” part of drop cloth curtainsthe stuff that doesn’t show up in your shopping cart, but absolutely shows up
the moment you start hanging fabric. Consider this your friendly heads-up from the collective wisdom of DIYers everywhere.
First, there’s the great Pre-Wash Surprise. Many people unbox a drop cloth, hold it up to the window, and think,
“Perfect. I’m basically done.” Then they wash it, and it comes out looking like it did a tiny bit of accidental time travel
shorter, softer, and slightly more opinionated. The upside is that washing makes the fabric drape better and look more like linen.
The downside is that if you measured before washing, you might be inventing new decorative words. The practical workaround is to
pre-wash first, then measure, or choose a hanging method (like clip rings) that lets you adjust height by a half inch here and there.
Next comes the Great Wrinkle Debate. Some DIYers want crisp, pressed panels; others want casual, rumpled charm.
Drop cloth curtains can do both, but your life will be easier if you pick a lane. If you want tailored, get comfortable with an iron
(or a steamer) and press the top and bottom hems at minimum. If you want relaxed, lean into the texture and focus on making the curtains
hang evenly and full. Ironing every square inch of thick canvas is the kind of optimism that feels inspiringright up until minute 47.
Then there’s the Ring Clip Reality Check: spacing matters. If your rings are uneven, your curtain folds will be uneven,
and the panel will “smile” or “frown” along the top edge. The fix is simple: mark spacing before clipping (even quick pencil marks help),
and use an odd number of rings if you want an easy center point. Also, don’t underestimate how much a sturdy rod matters here. Canvas is heavier
than typical drapery fabric, and a flimsy rod can bow in the middle like it’s trying to do yoga.
Another common experience is discovering the magic of hanging high and wide. DIYers often report that the curtains didn’t look
“wow” until they moved the rod up and out. Suddenly the same fabric looks custom. The room looks taller. The window looks grander.
It’s like switching from overhead office lighting to soft lampssame space, totally different mood. If you’re only doing one upgrade beyond
“clip and hang,” make it rod placement.
Finally, let’s talk about the “designer details” moment. Many people start with plain panels and realize they want just a little more:
a stripe, a trim edge, a bottom band, or layered sheers. That’s the fun part of drop cloth curtains: they’re a flexible base. You can add a contrasting
ribbon for a grain-sack look, paint a subtle border, or stitch on a blackout liner later without starting over. In other words, your curtains can evolve
as your style doeswhich is perfect, because home decor trends change faster than a teen’s favorite app.
In the end, the most consistent “experience” people share is this: drop cloth curtains are forgiving. They’re meant to feel lived-in.
If your hem is off by a whisper or your canvas has a little texture, it still looks charmingbecause that’s the point. The goal isn’t perfection.
The goal is that when sunlight hits those panels and the room feels calmer and finished, you get to say, “Yep. I made that.”
Conclusion
Gorgeous DIY drop cloth curtains come down to a few smart moves: choose the right cloth, pre-wash for softness, measure thoughtfully, and finish the top and bottom cleanly.
Whether you go no-sew with clip rings or take the extra step with hems and grommets, you’ll get a high-end look for a fraction of the cost
and you’ll gain the confidence to tackle the next project with fewer “creative revisions.”





