Table of Contents >> Show >> Hide
- What Is Fermented Plant Juice?
- Benefits of Fermented Plant Juice as Organic Fertilizer
- Best Plants to Use for Fermented Plant Juice
- Tools and Ingredients You Need
- How to Make Fermented Plant Juice: 10 Steps
- Step 1: Harvest Healthy Plant Material Early
- Step 2: Do Not Wash the Plants Unless Necessary
- Step 3: Chop the Plant Material
- Step 4: Weigh the Chopped Plants
- Step 5: Mix Plants and Brown Sugar Thoroughly
- Step 6: Pack the Mixture Into a Container
- Step 7: Cover With Breathable Material
- Step 8: Ferment for 3 to 7 Days
- Step 9: Strain the Finished FPJ
- Step 10: Store, Label, Dilute, and Apply
- How to Apply Fermented Plant Juice
- Common Mistakes to Avoid
- Simple FPJ Recipe for Beginners
- How FPJ Fits Into an Organic Garden System
- Troubleshooting Your Fermented Plant Juice
- Experience Notes: What Making FPJ Teaches You in the Real Garden
- Conclusion
Note: This article is written for educational gardening use and synthesizes practical guidance from U.S. agricultural extension, sustainable agriculture, organic gardening, soil health, and Korean Natural Farming resources. Fermented Plant Juice is a garden input, not a drink, so keep it labeled and away from children, pets, and snack-seeking relatives.
If your garden could text you, it might say, “Please feed me something fresh, local, and not wrapped in a plastic fertilizer bag.” That is where Fermented Plant Juice, often shortened to FPJ, enters the chat. This homemade organic fertilizer is a simple liquid plant extract made by combining fast-growing plant material with brown sugar and allowing the mixture to ferment for several days. The result is a concentrated garden input used in Korean Natural Farming and many regenerative growing systems.
Fermented Plant Juice is not magic in a jar, although the first time you strain a sweet-smelling batch and see your plants perk up, you may feel tempted to buy it a tiny wizard hat. It works because sugar draws moisture and soluble compounds from fresh plant tissue through osmosis, while naturally occurring microbes help transform the mixture. The finished FPJ is typically diluted heavily with water and applied as a soil drench or foliar spray.
This guide explains how to make fermented plant juice organic fertilizer in 10 practical steps, including what plants to choose, what mistakes to avoid, how to dilute FPJ safely, and how to use it without turning your tomatoes into over-caffeinated jungle vines.
What Is Fermented Plant Juice?
Fermented Plant Juice is a liquid organic fertilizer made from fresh, vigorous plant parts and brown sugar. It is most commonly associated with Korean Natural Farming, a low-input farming approach that uses local materials, indigenous microorganisms, and fermented inputs to support soil and plant health.
In the simplest version, you collect young plant shoots, chop them, weigh them, mix them with an equal weight of brown sugar, pack the mixture into a nonmetal container, cover it with breathable cloth, and let it ferment for about 3 to 7 days. After fermentation, the liquid is strained and stored. The final product is highly concentrated and must be diluted before use.
Why Gardeners Use FPJ
Gardeners use FPJ because it is inexpensive, local, and flexible. Instead of buying a one-size-fits-all fertilizer, you can make a small batch from the healthy plants already thriving around you. Fast-growing green tips may be useful during vegetative growth, while young fruiting materials are sometimes used when crops move toward flowering and fruiting. The idea is to capture the vitality of plants at a specific growth stage and return that energy to the garden in diluted form.
That said, FPJ should not replace good soil care. Think of it as a garden supplement, not a complete meal plan. Healthy soil still needs compost, organic matter, proper watering, mulch, crop rotation, and occasional soil testing. FPJ is the smoothie; compost is dinner.
Benefits of Fermented Plant Juice as Organic Fertilizer
When used correctly, fermented plant juice can support a more self-reliant, organic gardening routine. Here are the main benefits:
- Low cost: You can make FPJ with fresh plant material and brown sugar.
- Local ingredients: The best ingredients are often vigorous plants already growing in your area.
- Reduced waste: Healthy garden trimmings can become a useful input instead of heading straight to the compost pile.
- Gentle feeding: When properly diluted, FPJ can be used as a mild foliar spray or soil drench.
- Microbial activity: Fermentation encourages microbial transformation of plant compounds.
- Beginner-friendly: No fancy lab coat required. A jar, a scale, and common sense will do.
Best Plants to Use for Fermented Plant Juice
The best plant material for FPJ is young, healthy, fast-growing, and free from chemicals. Choose soft, juicy growth rather than woody stems. Good options may include:
- Sweet potato vine tips
- Comfrey leaves
- Alfalfa or clover tips
- Purslane
- Dandelion leaves before flowering
- Squash or pumpkin vine tips
- Bamboo shoots
- Healthy vegetable trimmings
- Young cover crop growth
Avoid poisonous plants, diseased leaves, plants sprayed with herbicides or pesticides, roadside weeds exposed to pollution, and anything you cannot confidently identify. Also avoid mature seed heads unless your hobby is creating surprise weed festivals in next season’s garden.
Tools and Ingredients You Need
Before you begin, gather everything in one place. Fermentation is easier when you are not wandering around the kitchen holding a sticky handful of chopped weeds while asking where the rubber bands went.
- Fresh plant material
- Brown sugar, equal in weight to the plant material
- Kitchen scale
- Knife or clean garden scissors
- Large mixing bowl
- Glass jar or food-grade plastic container
- Breathable cloth, paper towel, or cheesecloth
- Rubber band or string
- Strainer or colander
- Label and marker
- Clean bottle for storage
Do not use a metal fermentation container. Fermenting liquids can react with some metals, and nobody wants a fertilizer batch with a side quest in chemistry class.
How to Make Fermented Plant Juice: 10 Steps
Step 1: Harvest Healthy Plant Material Early
Collect plant material early in the morning, ideally before the sun is strong. Choose vigorous growing tips from healthy plants. The best material is tender, moist, and actively growing. Avoid harvesting during rain or immediately after rain because excess water can reduce quality and wash away helpful surface microbes.
For a small home batch, start with about 1 pound of fresh plant material. That is enough to learn the process without accidentally producing a lifetime supply of mysterious green syrup.
Step 2: Do Not Wash the Plants Unless Necessary
If the plants are clean and grown in a safe area, do not rinse them. The natural microbes on the plant surface help fermentation begin. If the material is muddy, contaminated, or questionable, do not use it. FPJ rewards clean harvesting, not heroic rescue missions from the bottom of the compost bin.
Step 3: Chop the Plant Material
Cut the plant material into 1- to 3-inch pieces. Smaller pieces expose more surface area, helping the sugar draw out moisture more effectively. You do not need to mince it like parsley for a cooking show. Rough chopping is enough.
Step 4: Weigh the Chopped Plants
Place the chopped plant material in a bowl and weigh it. Record the weight. The standard beginner ratio is simple: use an equal weight of brown sugar. For example, if you have 500 grams of plant material, use 500 grams of brown sugar.
This 1:1 ratio is one reason FPJ is so easy to teach. No algebra, no fertilizer math headache, no mysterious “three handfuls unless it feels humid” instructions.
Step 5: Mix Plants and Brown Sugar Thoroughly
Add the brown sugar to the chopped plant material. Toss and massage the mixture until the plant pieces are well coated. The sugar pulls liquid from the plant tissue through osmosis and provides food for microbes during fermentation.
The mixture should look glossy and slightly damp after a few minutes. If it starts to smell fresh, green, and sweet, you are on the right track.
Step 6: Pack the Mixture Into a Container
Place the sugared plant material into a glass jar or food-grade plastic container. Press it down firmly, but do not seal it airtight. Fermentation produces gases, and a tightly sealed jar can build pressure. That is exciting in a science fair volcano, less exciting in your pantry.
The container should settle to about two-thirds full after the first 24 hours. If it is packed to the top, remove some material. If it is far below two-thirds full, add more sugared plant material to reduce excess air space and help the batch ferment evenly.
Step 7: Cover With Breathable Material
Cover the mouth of the container with cheesecloth, muslin, a clean paper towel, or breathable fabric. Secure it with a rubber band or string. The cover keeps insects and debris out while allowing gases to escape.
Place the jar in a cool, shaded, well-ventilated area away from direct sunlight. A cupboard, shelf, or shaded garage corner can work, as long as the temperature is moderate and the container is not forgotten behind holiday decorations until next spring.
Step 8: Ferment for 3 to 7 Days
Allow the mixture to ferment undisturbed. In warm conditions, FPJ may finish in 3 to 5 days. In cooler conditions, it may take closer to 7 days. Signs of good fermentation include light bubbling, liquid collecting at the bottom, plant material floating above the liquid, and a sweet, mildly alcoholic smell.
Bad signs include a rotten odor, fuzzy mold covering the surface, blackened slime, or a smell that makes your eyebrows file a complaint. When in doubt, discard the batch into a hot compost pile and start over with cleaner material.
Step 9: Strain the Finished FPJ
When fermentation is complete, strain the liquid through a colander or fine strainer. The liquid is your finished fermented plant juice. The leftover plant solids can be added to compost if they smell sweet and normal. If they smell foul, bury them away from food crops or discard them.
Do not squeeze aggressively if the solids are slimy or unpleasant. A clean, sweet batch should strain easily and produce a brownish-green liquid with a syrupy texture.
Step 10: Store, Label, Dilute, and Apply
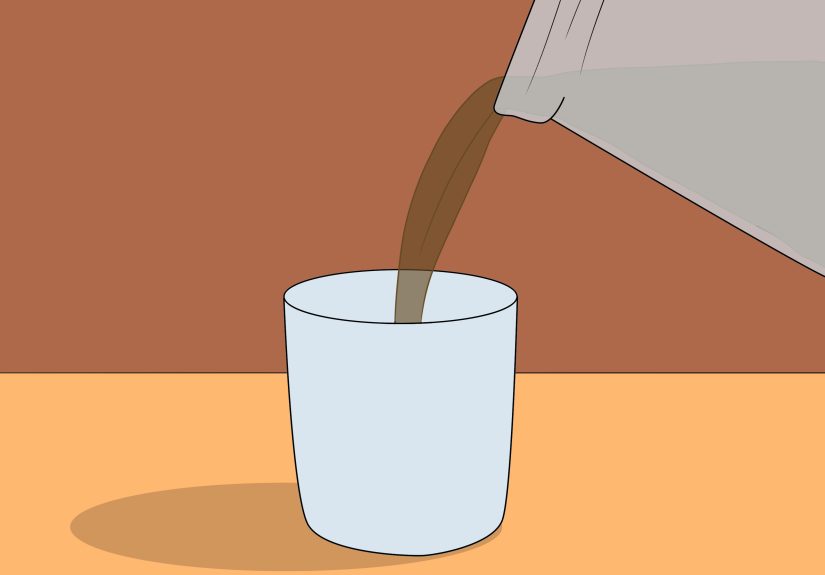
Pour the finished FPJ into a clean glass or food-grade plastic bottle. Label it with the plant used and the date made. Store it in a cool, dark place with a loose lid, especially if it is still active. For longer storage, some growers add an equal weight of brown sugar to stabilize the liquid.
Before using FPJ, dilute it heavily. A common garden dilution is about 1:500, which means roughly 1 part FPJ to 500 parts water. For a simple home-garden measure, use about 1 teaspoon of FPJ per 2 to 2.5 cups of water, or about 1.5 teaspoons per gallon. In hot weather, with young seedlings, or when mixing with other inputs, use a weaker dilution such as 1:800 or 1:1,000.
How to Apply Fermented Plant Juice
FPJ can be applied as a soil drench or foliar spray. For a soil drench, water the diluted solution around the root zone. For foliar feeding, spray leaves lightly until they are just coated, not dripping like they just stepped out of a rainstorm.
Apply early in the morning or late in the afternoon. Avoid spraying in strong midday sun because leaves can become stressed, and the solution may evaporate too quickly. Once a week is usually enough for home gardens. More is not always better. Plants are living organisms, not bottomless brunch guests.
When to Use FPJ
Use FPJ during active growth, especially when plants are establishing leaves and stems. Leafy greens, herbs, young tomatoes, peppers, cucumbers, squash, and transplants may respond well to gentle organic inputs when soil conditions are already healthy.
During flowering and fruiting, avoid overusing green, nitrogen-rich inputs. Too much vegetative encouragement can push leaves at the expense of flowers and fruit. If your tomato plant is producing a luxurious green jungle but exactly three tomatoes, it may be politely telling you to stop cheering for leaves.
Common Mistakes to Avoid
Using the Wrong Plants
Do not use toxic plants, chemically treated grass clippings, diseased leaves, or unknown weeds. FPJ concentrates plant material, so quality matters. Start with healthy plants if you want a healthy input.
Sealing the Jar Airtight
Fermentation creates gas. A sealed jar can leak, bulge, or burst. Always use a breathable cover during fermentation and a loose lid during early storage.
Applying It Too Strong
Undiluted FPJ can stress or burn plants. Always dilute before applying. If you are testing FPJ for the first time, spray a small section of one plant and wait 24 hours before treating the whole garden.
Expecting FPJ to Fix Bad Soil
FPJ is not a miracle cure for compacted, lifeless, poorly drained, or nutrient-depleted soil. Build soil first with compost, mulch, cover crops, and proper watering. Use FPJ as a supporting actor, not the entire cast.
Ignoring Soil Tests
If your garden struggles year after year, get a soil test. Many plant problems come from pH imbalance, nutrient excess, poor drainage, or low organic matter. Adding more homemade fertilizer without knowing the problem can turn a small issue into a leafy soap opera.
Simple FPJ Recipe for Beginners
Here is an easy starter recipe for a small batch:
- 500 grams fresh sweet potato vine tips, comfrey leaves, or mixed healthy greens
- 500 grams brown sugar
- 1 clean glass jar
- 1 breathable cover
Chop the plants, mix with brown sugar, pack into the jar, cover with cloth, and ferment for 3 to 7 days. Strain the liquid, label it, and dilute before use. Begin with 1:800 for seedlings or sensitive plants and 1:500 for established plants.
How FPJ Fits Into an Organic Garden System
The smartest way to use fermented plant juice is as part of a complete organic growing system. Start with healthy soil. Add compost to improve structure and water retention. Mulch to reduce evaporation and feed soil organisms. Rotate crops to reduce pest and disease pressure. Use FPJ as a gentle, homemade plant tonic during active growth.
In containers, FPJ should be used carefully because salts and nutrients can build up faster than they do in open garden soil. Use weaker dilutions, water thoroughly between applications, and watch for signs of leaf burn or stress.
For certified organic farms, homemade inputs may need approval from a certifier before use. Home gardeners do not usually need to worry about certification rules, but commercial growers should document ingredients, sources, and preparation methods.
Troubleshooting Your Fermented Plant Juice
My FPJ Smells Rotten
A rotten smell usually means the batch went anaerobic in the wrong way or the plant material was poor quality. Discard it and start again with fresh, dry, healthy plants. Make sure the container has a breathable cover and is stored in a shaded, moderate area.
There Is Mold on Top
A little white film may appear in some ferments, but fuzzy, colorful, or thick mold is a warning sign. When you are new to FPJ, it is safest to discard questionable batches. Your garden deserves better than mystery fuzz.
There Is Not Much Liquid
Woody, dry, or mature plant parts produce less juice. Use tender growing tips and coat them well with brown sugar. Also check that you used enough sugar by weight.
My Plants Look Stressed After Spraying
The solution may have been too strong, applied in hot sun, or used on sensitive leaves. Rinse the plant gently with water, skip the next application, and use a weaker dilution next time.
Experience Notes: What Making FPJ Teaches You in the Real Garden
The first lesson fermented plant juice teaches is that timing matters. A batch made from young, vibrant plant tips usually behaves better than a batch made from tired, woody stems. In practice, the best FPJ often starts during a morning walk through the garden when you notice which plants are growing like they have somewhere important to be. Sweet potato vines stretching across a bed, comfrey pushing out lush leaves, or squash tips reaching for the fence all make you think, “You, my energetic friend, may become fertilizer.”
The second lesson is that cleanliness is not the same as sterility. You want clean tools, clean containers, and clean plant material, but you are not trying to remove every microbe. Fermentation depends on living communities. The goal is to give the right microbes a comfortable environment: fresh plant sugars, brown sugar, moderate air exchange, and protection from contamination. It feels a bit like running a tiny hotel for invisible guests. If the guests are happy, the room smells sweet and mildly boozy. If they are unhappy, everyone knows.
Another useful experience is learning to start small. Many beginners see a giant patch of weeds and think, “Excellent, I shall make five gallons.” Then they discover that five gallons of fermenting plant syrup is a lot of responsibility. A quart jar is a much friendlier teacher. Small batches let you test different plants, compare smells, watch fermentation speed, and learn what finished FPJ should look like. Once you know your process, scaling up becomes much easier.
Application also teaches restraint. A common beginner mistake is thinking that because FPJ is natural, more must be better. Gardens disagree. A properly diluted FPJ spray can be useful, but an overly strong solution may stress leaves. Experienced gardeners often test a small area first, spray in the late afternoon, and observe plant response over the next day or two. Plants give feedback, just not in complete sentences.
One of the most satisfying parts of making fermented plant juice is the closed-loop feeling. You are not ordering a miracle bottle from far away. You are observing what grows well in your own space, harvesting a modest amount, fermenting it, and returning it to the garden. That process changes how you see weeds, trimmings, and vigorous plants. Suddenly, the garden is not just producing vegetables; it is producing some of its own fertility.
FPJ also makes you more observant. You begin noticing which beds have deep green growth, which plants recover quickly after pruning, which areas stay too wet, and which crops need compost more than liquid feed. In other words, the real value of FPJ is not only in the bottle. It is in the habit of paying attention. The gardener becomes less of a fertilizer shopper and more of a soil steward.
Finally, fermented plant juice works best when expectations are realistic. It will not rescue a plant with severe disease, fix compacted clay overnight, or turn a neglected garden into a magazine cover by Thursday. But as part of a thoughtful organic routine, it can be a useful, affordable, and surprisingly enjoyable tool. Plus, there is something deeply satisfying about making plant food from plants. It is gardening’s version of leftovers becoming gourmet soup.
Conclusion
Learning how to make fermented plant juice is one of the easiest ways to explore homemade organic fertilizer. With fresh plant material, brown sugar, a breathable container, and a few days of patience, you can create a concentrated liquid input for your garden. The key is to use healthy plants, follow the 1:1 plant-to-sugar ratio, ferment for 3 to 7 days, strain carefully, and dilute generously before applying.
Fermented Plant Juice is best used as part of a bigger soil-health plan that includes compost, mulch, crop rotation, good watering habits, and soil testing when needed. Used wisely, FPJ can help gardeners reduce waste, save money, and build a closer relationship with the living systems that make plants thrive. Used recklessly, it becomes a sticky reminder that “natural” still needs instructions.
Start small, label everything, trust your nose, dilute more than you think, and let your garden be the judge. If the plants respond with steady growth, rich color, and fewer dramatic leaf complaints, you are probably doing it right.




