Table of Contents >> Show >> Hide
- Why DIY farmhouse signs are still worth making
- What you need to make an easy farmhouse sign
- Choose the easiest method for your lettering
- Step-by-step: how to make a farmhouse sign the easy way
- Farmhouse sign design ideas that look charming, not cheesy
- Common mistakes to avoid
- How to make your farmhouse sign look more custom
- Experiences from real DIY-style farmhouse sign projects
- Final thoughts
If your walls are begging for personality and your budget is giving you the side-eye, a DIY farmhouse sign is one of the easiest fixes around. It is charming, customizable, beginner-friendly, and pleasantly forgiving. In other words, if your lettering is not perfectly straight, congratulationsyou may have accidentally made it look more “rustic.”
Farmhouse signs remain popular because they blend warmth, simplicity, and a handmade look that works in entryways, kitchens, laundry rooms, bedrooms, porches, and just about any corner that needs a little visual hug. The best part is that you do not need a workshop worthy of a reality TV renovation show. With a small board, paint, a stencil or printed phrase, and a bit of patience, you can make farmhouse wall art that looks far more expensive than it actually is.
This guide walks through the easiest ways to make your own farmhouse signs, including what materials to use, how to choose a phrase, how to get crisp lettering, how to create that worn-in look without making it look like it survived a tornado, and how to finish and hang your sign properly. If you have been waiting for a sign to make a sign, this is it.
Why DIY farmhouse signs are still worth making
Farmhouse signs have survived trend cycles for a reason: they are personal. You can make one with your family name, a favorite saying, a welcome message, a seasonal greeting, or simple room labels like “Gather,” “Wash & Dry,” “Bakery,” or “Fresh Eggs.” They also work with several decorating styles beyond farmhouse, including cottage, rustic, vintage, modern country, and even minimalist spaces that need one cozy focal point.
Another reason they are a smart DIY project is that the learning curve is refreshingly low. You do not need to carve wood, master calligraphy, or become best friends with a power tool. In fact, the “easy way” usually comes down to one of three methods: using a reusable stencil, tracing printed lettering onto wood, or applying a vinyl stencil or decal. Pick the method that matches your skill level and tolerance for craft chaos.
What you need to make an easy farmhouse sign
You can keep this project very simple. Here are the basic supplies:
- A wood board, plaque, or premade sign blank
- Sandpaper or a sanding sponge
- Paint, stain, or both
- Paintbrushes, foam brushes, or a small roller
- A stencil, printed phrase, or vinyl lettering
- Pencil and ruler
- Painters tape
- Protective finish such as a clear topcoat or sealer
- Hanging hardware, sawtooth hanger, D-rings, or adhesive strips depending on size and weight
For wood, pine boards, plywood plaques, reclaimed boards, and craft store sign blanks all work well. If you want the least amount of prep, start with a smooth premade plaque. If you want a more authentic rustic vibe, use a solid pine board with visible grain. Reclaimed wood can look gorgeous, but it may need extra cleaning, sanding, and patience. Reclaimed wood has character, which is a polite way of saying it sometimes fights back.
Choose the easiest method for your lettering
1. Stencil method
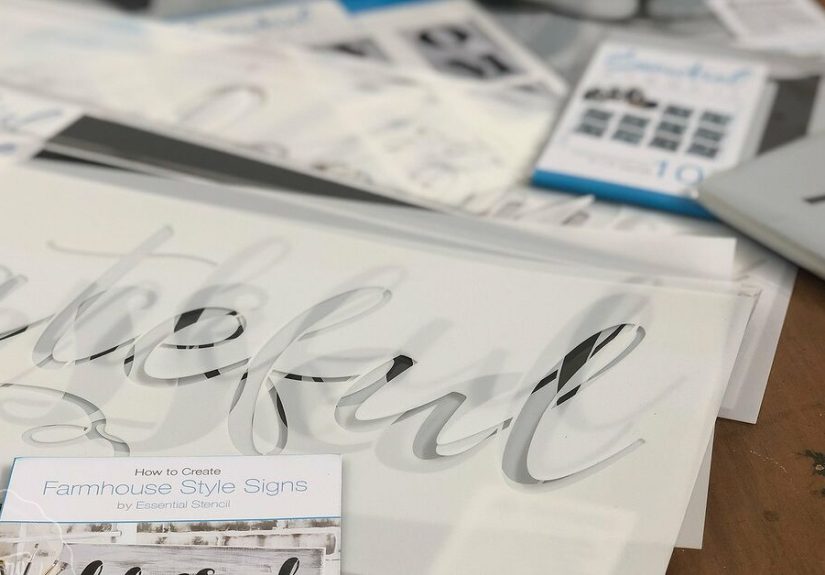
This is the easiest option for most beginners. A reusable stencil helps you keep spacing and alignment under control while making your wording look polished. It is ideal for classic farmhouse phrases, large porch signs, and simple block or script lettering.
Best for: beginners, repeat projects, crisp lettering, and signs with one short phrase.
2. Printed transfer method
If you want a custom font without buying a custom stencil, print your phrase at the exact size you want, then transfer it to the wood by tracing the back with pencil and pressing the design onto the surface. After that, you simply paint or use a paint marker over the transferred lines.
Best for: custom wording, unusual fonts, and anyone who wants the look of hand-lettering without the pressure of freehanding every letter while sweating dramatically.
3. Vinyl or adhesive stencil method
If you have access to a cutting machine or pre-cut vinyl, this can produce very clean results. Adhesive stencil film is especially helpful because it stays in place while you paint, reducing bleed under the edges.
Best for: extra-clean lines, detailed designs, and people who already enjoy using craft machines.
Step-by-step: how to make a farmhouse sign the easy way
Step 1: Pick the right size and phrase
Before touching the paint, decide where the sign will live. A long vertical porch sign needs very different proportions than a small kitchen shelf sign. Measure your wall or leaning space first. Then choose a phrase that fits the mood of the room.
Good examples include:
- Welcome
- Gather
- Home Sweet Home
- Fresh Flowers
- Wash & Dry
- Farm Fresh
- Bless This Home
Keep the wording short unless you are creating a larger horizontal sign. Farmhouse décor usually looks best when the message feels simple and readable from a distance.
Step 2: Prep the wood
Do not skip this part. Even the cutest phrase in the world cannot save a rough, dusty board with splinters that threaten to become part of the décor. Sand the surface until it feels smooth, paying attention to edges and corners. Wipe off all dust before painting or staining.
If you are staining the wood, test your color first on the back or edge. Some boards absorb stain unevenly, and that dreamy weathered oak tone can quickly become “mystery brown.” If you are painting the background, light colors such as white, cream, greige, soft black, and muted sage work especially well for farmhouse style.
Step 3: Paint or stain the background
Choose the finish based on the look you want:
- Stained wood + white lettering: classic rustic farmhouse
- White paint + black lettering: clean, modern farmhouse
- Black paint + white lettering: bold and dramatic
- Layered paint + distressing: aged, vintage look
Apply thin, even coats and let the surface dry completely between coats. If you want a more textured, old-house feel, use a dry brush technique so a little wood grain peeks through. That slight imperfection is often what makes the sign look handmade rather than mass-produced.
Step 4: Center your design
Mark the center of the board lightly with pencil. Then position your stencil or printed wording so the design feels balanced. Use painters tape to hold things in place. Stand back and look at it from a few feet away before committing.
This tiny pause can save you from creating a sign that technically says “Welcome” but emotionally says “I eyeballed this and regret everything.”
Step 5: Add the lettering
If you are using a stencil, the trick is to use less paint than you think. Dab off extra paint before touching the stencil. Too much paint is the fastest route to blurry edges and a phrase that looks like it got caught in the rain.
If you are tracing printed lettering, outline the transferred lines with a fine brush or paint pen. Slow and steady works best here. Short strokes usually look cleaner than trying to paint one dramatic, swooping masterpiece in a single move.
If you are using vinyl, apply it carefully, smooth out bubbles, and press the edges firmly before painting. Remove the stencil or vinyl while the paint is still slightly tacky for the cleanest result.
Step 6: Distress it if you want that farmhouse look
Once everything is dry, lightly sand the edges and a few high spots if you want the sign to look aged. Focus on corners, borders, and areas that would naturally wear over time. The goal is a soft, lived-in finishnot a sign that appears to have lost a fight with a belt sander.
You can also create depth by layering two paint colors and sanding through the top color in selected areas. This technique works especially well for vintage-style farmhouse pieces.
Step 7: Seal and protect the sign
If the sign will live indoors, a clear matte or satin topcoat is usually enough. If it will be on a covered porch, use a more durable protective finish and remember that direct weather exposure can still wear it down over time. A sealer helps protect paint, lettering, and stain, especially on signs you plan to keep up year-round.
Step 8: Hang it the smart way
For smaller, lightweight signs, a sawtooth hanger or adhesive hanging strips may work well. For heavier signs, D-rings, anchors, or hardware secured into studs are safer choices. In short: do not spend two hours making a beautiful sign only to hang it with optimism and vibes.
Farmhouse sign design ideas that look charming, not cheesy
The easiest way to make your sign look more elevated is to keep the design restrained. Farmhouse style usually works best with neutral colors, simple phrases, and enough empty space around the lettering. Try these ideas:
- Use one statement word in large letters
- Combine script and block fonts for contrast
- Add a thin border or frame
- Use muted colors instead of bright primary shades
- Let wood grain show through for texture
- Add a small wreath, branch motif, or botanical accent
- Create seasonal versions for fall, Christmas, spring, or summer
For example, a vertical porch sign with “Welcome” in black on a white board feels timeless. A laundry room sign with “Wash & Dry” on stained wood is playful and functional. A kitchen sign with “Gather” in off-white script on a dark charcoal board can look unexpectedly sophisticated.
Common mistakes to avoid
- Skipping surface prep: Dust and rough grain can ruin the finish.
- Using too much paint on the stencil: This causes bleeding.
- Choosing a phrase that is too long: Crowded lettering is hard to read.
- Ignoring scale: Tiny words on a huge board can look awkward.
- Over-distressing: A little wear looks intentional; too much looks accidental.
- Not sealing the finished sign: Especially important for signs in busy or semi-outdoor areas.
- Using weak hanging hardware: Pretty projects deserve secure endings.
How to make your farmhouse sign look more custom
If you want your DIY farmhouse sign to feel truly one-of-a-kind, personalize it. Add an established date, family name, house number, favorite quote, or local reference. Use a phrase that actually means something to you instead of the first thing that sounds vaguely rustic and appears on ten thousand throw pillows.
You can also customize the base itself. Try framing the sign with thin wood trim, adding faux shiplap lines, attaching metal handles for a tray-style look, or layering a smaller plaque on top of a larger board for extra depth. These small details can turn a simple beginner project into wall art with real presence.
Experiences from real DIY-style farmhouse sign projects
One of the most relatable things about making farmhouse signs is how often the project starts with confidence and ends with paint on your hands, your phone, and somehow your elbow. That is not failure. That is crafting. And honestly, farmhouse signs are one of the friendliest DIY projects for learning by doing because they rarely need absolute perfection to look good.
A common experience for beginners is overthinking the design. They scroll through font ideas for an hour, compare twelve shades of white, and debate whether the sign should say “Welcome,” “Hello,” or something adorable involving chickens. Then, once they finally start, they realize the project becomes much easier the moment they commit to a simple layout. The signs that turn out best are usually the ones that do not try to do too much.
Another very real experience is discovering that wood has opinions. Two boards that look almost identical in the store can absorb stain differently at home. One becomes warm and weathered. The other becomes unexpectedly orange and starts testing your emotional resilience. This is why experienced DIYers always test stain or paint first. It sounds boring, but it saves both time and dramatic sighing.
People also learn quickly that crisp lettering is more about restraint than talent. New crafters often load up the brush, push hard on the stencil, and then lift it to reveal a fuzzy word that looks mildly haunted. Once they switch to less paint, dabbing gently, and securing the stencil properly, the results improve fast. That small lesson tends to unlock a lot of confidence for future projects.
There is also a fun shift that happens when someone makes their first sign and realizes it actually looks good on the wall. Suddenly, one sign becomes three. The entryway gets a welcome sign. The laundry room gets a joke. The porch gets a vertical board taller than the family dog. Handmade signs are sneaky like that. They convince you that you are making “just one,” then politely take over the house.
Seasonal farmhouse signs are another area where people have a lot of success. Once you understand the basic process, it becomes easy to swap out phrases or colors for different times of year. A spring sign might feature flowers and soft greens, while a fall sign leans into pumpkins, wheat tones, and darker stain. This makes the project feel useful as well as creative because you can refresh your décor without buying a whole new set of accessories.
Perhaps the best part of the experience is that farmhouse signs make good gifts. People love receiving something personalized and handmade, especially when it matches their home. A wedding gift with a family name, a porch sign for a new homeowner, or a simple kitchen sign for a friend can feel thoughtful without requiring advanced woodworking skills. That is a pretty satisfying return on a board, some paint, and a free afternoon.
In the end, making your own farmhouse sign is one of those DIY projects that rewards effort more than expertise. You do not need to be a professional artist. You just need a clear idea, a little patience, and the willingness to laugh when your first draft looks slightly crooked. Sometimes the so-called imperfections are exactly what make a farmhouse sign feel warm, handmade, and worth keeping.
Final thoughts
If you want a home project that is affordable, creative, useful, and beginner-friendly, a DIY farmhouse sign checks every box. The easiest path is simple: choose a board, prep it well, use a stencil or traced phrase, apply paint carefully, distress lightly, seal it, and hang it securely. That formula works whether you are making a tiny shelf sitter, a bold porch sign, or a personalized gift.
The beauty of farmhouse décor is that it leaves room for personality. Your sign can be elegant, funny, seasonal, sentimental, or all of the above. As long as the finish feels intentional and the message feels like you, it will do exactly what good décor should do: make your space feel more like home.





