Table of Contents >> Show >> Hide
- Before You Start: The “Don’t Make Me Google This Mid-Install” Checklist
- The 12 Steps: Installing Windows 10 in VirtualBox
- Step 1: Download and install VirtualBox
- Step 2: Download the official Windows 10 ISO
- Step 3: Enable hardware virtualization (VT-x/AMD-V) in BIOS/UEFI
- Step 4: Create a new VirtualBox VM
- Step 5: Allocate RAM (memory) like a responsible adult
- Step 6: Assign CPUs (and resist the urge to go full turbo)
- Step 7: Create a virtual hard disk (VDI) with enough space
- Step 8: Mount the Windows 10 ISO (so the VM can boot into Setup)
- Step 9: Tune a few quality-of-life settings (display, clipboard, network)
- Step 10: Boot the VM and start Windows Setup
- Step 11: Choose installation type and finish the install
- Step 12: Install VirtualBox Guest Additions (the secret sauce)
- After Installation: Make Your Windows 10 VM Actually Pleasant
- Troubleshooting: The Greatest Hits of “Why Won’t It Work?”
- Real-World Experiences: What It’s Like Once You’re Doing This for Real (500-ish Words)
- Conclusion
Want Windows 10 without committing to a full-on “we live together now” relationship on your main computer? VirtualBox lets you run Windows 10 in a
virtual machine (VM), meaning Windows lives in a tidy little bubblesafe, contained, and far less likely to ruin your day.
In this guide, you’ll learn a clean, repeatable setup that works on Windows, macOS, and Linux hosts, with practical tips for performance, safety,
and the “why is my mouse stuck in molasses?” moments. We’ll keep it beginner-friendly, but not beginner-boring.
Before You Start: The “Don’t Make Me Google This Mid-Install” Checklist
1) Know what you’re installing (and why Windows 10 still shows up)
Windows 10 is still used for legacy apps, lab environments, testing, and “this software refuses to evolve” scenarios. That said, Windows 10’s standard
support has ended, so if you’re building a VM for anything exposed to the internet, plan for extra hardening (or consider a newer OS).
2) Get the essentials ready
- VirtualBox installed on your host computer (plus the optional Extension Pack if you need USB passthrough features).
- Windows 10 ISO (official disk image) downloaded to your host drive.
- Enough hardware: ideally 8–16 GB RAM on the host, and a modern CPU with virtualization enabled.
- Patience: the VM will reboot a few timesthis is normal, not a cry for help.
3) A quick note on Windows activation
Installing Windows 10 and activating Windows 10 are two different life choices. You can install Windows 10 without entering a product key during setup,
then activate later when you’re ready. If you do have a key or a digital license, keep it handy.
The 12 Steps: Installing Windows 10 in VirtualBox
-
Step 1: Download and install VirtualBox
Install the latest stable VirtualBox for your host OS. Use default options unless you have a specific reason not toVirtualBox knows what it’s doing
more often than we do. On Windows, you may see network interface prompts during install; that’s normal. -
Step 2: Download the official Windows 10 ISO
Download a Windows 10 ISO from Microsoft’s official download flow. This ISO is what your VM will “boot” from to start Windows Setup (like a digital DVD,
minus the dusty plastic case from 2008). -
Step 3: Enable hardware virtualization (VT-x/AMD-V) in BIOS/UEFI
If your VM doesn’t offer 64-bit options (or runs like it’s powered by two hamsters), your CPU virtualization feature may be disabled.
Reboot your computer, enter BIOS/UEFI, and enable Intel VT-x or AMD-V. Save and exit.Pro tip: On some Windows hosts, Hyper-V or similar features can interfere with VirtualBox’s access to hardware virtualization. If you see odd
errors or missing 64-bit guests, check your Windows virtualization stack. -
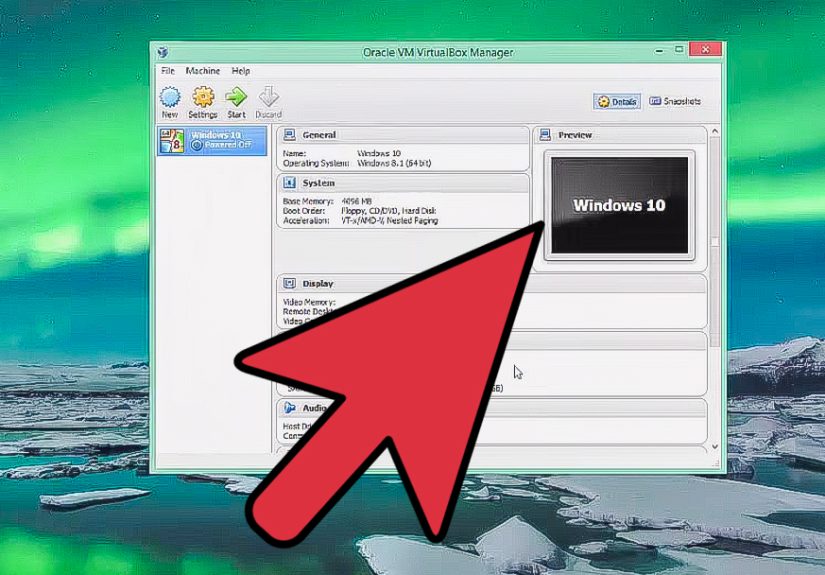
Step 4: Create a new VirtualBox VM
Open VirtualBox and click New. Give your VM a name like Windows 10 (or Win10-Lab if you’re feeling fancy).
Set:- Type: Microsoft Windows
- Version: Windows 10 (64-bit) if available
If you don’t see Windows 10 (64-bit), circle back to Step 3your machine is basically telling you “I can’t do 64-bit until you flip the correct switch.”
-
Step 5: Allocate RAM (memory) like a responsible adult
Minimum requirements are low on paper, but in real life, Windows 10 prefers a bit more breathing room.
- Minimum: 2 GB for 64-bit (works, but cranky)
- Recommended: 4 GB for basic use
- Comfortable: 6–8 GB if your host has plenty
Don’t donate all your host RAM to the VM. Your host OS still needs memory to… you know… exist.
-
Step 6: Assign CPUs (and resist the urge to go full turbo)
In Settings → System → Processor, set the CPU count. A good starting point is 2 cores.
If your host has 8+ cores and you’re doing heavier work, try 4. Keep it reasonableyour host OS also wants to live. -
Step 7: Create a virtual hard disk (VDI) with enough space
Choose Create a virtual hard disk now, then:
- Disk type: VDI (VirtualBox Disk Image)
- Storage: Dynamically allocated (usually fine) or Fixed size (slightly faster, larger upfront)
- Size: 40–60 GB recommended for a smooth Windows 10 life
Yes, Windows 10 can install into less. It can also survive on instant noodles. But should it?
-
Step 8: Mount the Windows 10 ISO (so the VM can boot into Setup)
Go to Settings → Storage. Under the optical drive, choose Choose a disk file… and select your Windows 10 ISO.
This tells the VM: “Boot from this installer.” -
Step 9: Tune a few quality-of-life settings (display, clipboard, network)
Before first boot, open these:
- Display → Video Memory: set higher (e.g., 128 MB) for smoother visuals.
- General → Advanced: set Shared Clipboard to Bidirectional (you’ll thank yourself later).
- Network: keep default NAT unless you specifically need the VM visible on your local network (Bridged).
Clipboard sharing and drag-and-drop work best after Guest Additions (we’ll do that in Step 12).
-
Step 10: Boot the VM and start Windows Setup
Click Start. The VM should boot from the ISO and launch Windows Setup. Choose your language, time, and keyboard, then click
Install now.When asked for a product key, you can enter it or select I don’t have a product key to continue and activate later.
-
Step 11: Choose installation type and finish the install
Select Custom: Install Windows only (advanced). You’ll see your virtual disk as “Unallocated Space.”
Select it and click Next.Windows will copy files, reboot a few times, and eventually land in the out-of-box experience (OOBE) where you pick region, keyboard, network, and account options.
Follow prompts based on your preference (local vs Microsoft account options may vary by build and network state).Important: After installation completes, eject the ISO (VirtualBox menu: Devices → Optical Drives) so you don’t boot back into the installer.
-
Step 12: Install VirtualBox Guest Additions (the secret sauce)
Guest Additions dramatically improve the VM experience: better video drivers, smoother mouse integration, shared clipboard, and more.
- In the running VM window, click Devices → Insert Guest Additions CD image…
- Inside Windows 10, open File Explorer and run the Guest Additions installer (often VBoxWindowsAdditions.exe).
- Allow driver installs if prompted, then reboot the VM.
After reboot, try resizing the VM windowyour display should adjust more gracefully, and clipboard sharing should behave like a polite citizen.
After Installation: Make Your Windows 10 VM Actually Pleasant
Install updates (carefully) and basic tools
If you plan to connect the VM to the internet, patch it as much as possible. Install a browser, a PDF reader, and whatever apps you actually need.
If the VM is for a single legacy app, keep it leanloat is the natural predator of performance.
Use snapshots like a time machine for your sanity
Before installing big software or making risky changes, take a Snapshot. If something breaks, you can roll back in minutes and feel like
a wizard who totally planned this.
Shared folders: better than drag-and-drop when it matters
Drag-and-drop is convenient, but shared folders are usually more reliable for moving lots of files. Configure them in VirtualBox settings, then access them from the guest.
This is especially useful for installers, project files, and anything you don’t want to “clipboard-juggle.”
Troubleshooting: The Greatest Hits of “Why Won’t It Work?”
“I don’t see 64-bit Windows 10 as an option.”
This is almost always hardware virtualization disabled (VT-x/AMD-V) or something on the host hogging virtualization features. Re-check BIOS/UEFI settings,
then review Windows host virtualization features if applicable.
“Windows Setup keeps booting again and again.”
You likely left the ISO mounted. Eject it from the VM’s optical drive after the first successful install and reboot, or adjust boot order so the hard disk boots first.
“The VM is painfully slow.”
- Increase RAM to 4–8 GB (if your host can spare it).
- Assign 2 CPU cores (or 4 if you have plenty).
- Install Guest Additions.
- Use a fixed-size disk if you need maximum disk performance (optional).
- Close heavy host apps while running the VM (Chrome tabs are basically tiny black holes).
“Copy/paste doesn’t work, and drag-and-drop is flaky.”
Shared clipboard and drag-and-drop generally require Guest Additions. Also confirm settings in General → Advanced.
If you need rock-solid file transfer, use shared folders instead.
Real-World Experiences: What It’s Like Once You’re Doing This for Real (500-ish Words)
Installing Windows 10 in VirtualBox is straightforwardright up until you hit the part where real life shows up and says, “Cute plan. Now troubleshoot.”
The most common first-time experience is resource guilt: you give the VM 2 GB of RAM because the minimum requirement says it’s fine, then watch Windows 10 boot
like it’s wading through pancake batter. The fix is simplebump the RAM to 4 GBbut the lesson sticks: minimum specs are a legal definition of “possible,”
not a promise of “pleasant.”
The second universal experience is the Guest Additions revelation. Before Guest Additions, your mouse may feel “trapped” inside the VM window,
screen resizing can be awkward, and copy/paste might act like it’s on strike. Then you install Guest Additions, reboot, and suddenly your VM feels like a real machine.
People often describe it as the moment VirtualBox stops feeling like a science project and starts feeling like a tool.
If you’re on a Windows host, you may also run into the “virtualization is already taken” problem. The symptom can be missing 64-bit guest options, errors about
acceleration, or performance that seems weirdly capped. The emotional journey is predictable: (1) denial, (2) blaming VirtualBox, (3) blaming Windows,
(4) discovering a host setting that was quietly monopolizing virtualization features, (5) triumph, and (6) immediately forgetting what you changed
until the next time. The practical workaround is to keep a tiny notes file: “If 64-bit disappears, check BIOS virtualization + host virtualization features.”
Future-you will be deeply grateful.
Another real-world pattern: you install Windows 10, everything works, and then you try to move a folder full of files into the VM via drag-and-drop.
It fails, half-copies, or acts possessed. This is where shared folders win. Shared folders feel less magical than drag-and-drop, but they’re far more consistent
when you’re transferring installers, datasets, or anything you don’t want to re-copy three times while whispering threats at your screen.
Finally, there’s the “I should have taken a snapshot” experienceusually right before a risky driver install or a mysterious piece of legacy software
with a 2006-looking installer UI. Snapshots aren’t just for the cautious; they’re for anyone who values their time. The best workflow is boring but effective:
install Windows → install Guest Additions → run updates → take a snapshot called “Clean Base.” After that, take snapshots before major changes. You’ll be able to
experiment freely, break things without panic, and recover in minutes. And that’s the real joy of virtualization: you get to be brave with your computer
without paying the full price of bravery.
Conclusion
Installing Windows 10 in VirtualBox is a great way to run legacy apps, test software, or keep a separate Windows environment without touching your main OS.
The keys to a smooth experience are simple: use an official ISO, enable hardware virtualization, allocate sane resources, and install Guest Additions as soon as Windows boots.
After that, snapshots and shared folders turn your VM from “it works” into “it’s actually useful.”