Table of Contents >> Show >> Hide
- Prehung vs. Slab: Which One Are You Hanging?
- Tools and Materials You’ll Actually Use
- Prep Work: 10 Minutes Here Saves 2 Hours Later
- How to Hang a Prehung Interior Door (Step-by-Step)
- Step 1: Remove the old door and jamb (if replacing)
- Step 2: Dry-fit the new prehung unit
- Step 3: Level the threshold area (yes, even for interior doors)
- Step 4: Plumb and secure the hinge-side jamb first
- Step 5: Check the reveal (the gap around the door)
- Step 6: Shim and secure the latch-side jamb
- Step 7: Secure the head jamb (lightly) and re-check everything
- Step 8: Install casing/trim
- Step 9: Install hardware and test for “real life” use
- How to Hang a Slab Door in an Existing Jamb
- Troubleshooting: When the Door Has Attitude
- Pro-Level Tips That Make a DIY Install Look Professional
- FAQ: Quick Answers People Actually Need
- Experience Notes: What You Learn After Hanging a Few Doors (Extra )
- Conclusion
Hanging an interior door is one of those DIY tasks that feels like it should be simple (“It’s a rectangle. In a rectangle.”),
right up until your door starts swinging open by itself like it’s auditioning for a horror movie. The good news: the process
is absolutely learnable, and once you understand what you’re actually adjusting (plumb, level, and reveal), the job becomes
more method than mystery.
This guide walks you through hanging an interior door the two most common ways:
(1) installing a prehung door (door already attached to a new frame) and (2) hanging a slab door
(just the door) into an existing jamb. You’ll get step-by-step instructions, troubleshooting tips, and real-world lessons so
your door closes smoothly, latches properly, and doesn’t look like it’s trying to escape.
Prehung vs. Slab: Which One Are You Hanging?
Before you touch a shim, decide what you’re actually installing.
Choose a prehung door if…
- You’re replacing the whole frame and trim anyway (or the old jamb is damaged/out of square).
- You want the “factory relationship” between door, hinges, and jamb already dialed in.
- You’re okay doing some light framing/shimming to get everything plumb.
Choose a slab door if…
- Your existing jamb is solid, square-ish, and you’re keeping the trim.
- You’re matching a specific style or trying to save money.
- You’re comfortable mortising hinges and drilling for the latch.
If you’re on the fence: prehung is usually easier for first-timers because the door is already hung in its own frame.
Slab installation can be perfectly doable, but it’s less forgivinglike baking without a recipe and hoping cookies happen.
Tools and Materials You’ll Actually Use
You don’t need a garage full of pro tools, but you do need the right basics.
Tools
- Level (4 ft is good; 6 ft is better), tape measure, pencil
- Shims (lots of themdoors eat shims for breakfast)
- Hammer and finish nails or a brad nailer
- Drill/driver + bits (including a countersink bit if you have one)
- Utility knife, pry bar (for removal), wood chisel (especially for slab doors)
- Combination square or speed square
- Door hardware screwdriver set
Materials
- Prehung interior door unit or slab door
- Longer hinge screws (often 2-1/2″ to 3″) for solid anchoring
- Wood filler/putty, paintable caulk (optional but makes trim look “chef’s kiss”)
- Casing/trim if you’re replacing it
Prep Work: 10 Minutes Here Saves 2 Hours Later
1) Confirm the swing and handing
Interior doors can be left-hand or right-hand, and they can swing in or out of the room. If your new door is prehung,
double-check it before you haul it home (or before you remove the old one). A wrong-swing door is like buying shoes
that fit your neighbor perfectlytechnically shoes, emotionally devastating.
2) Check the rough opening (prehung installs)
For a prehung door, your rough opening needs a bit of extra space so you can shim the frame into perfect position. If the opening is too tight,
you’ll fight it. If it’s too big, you’ll be shimming like you’re building a tiny log cabin.
- Check for plumb: Are the studs straight up and down?
- Check for level: Is the floor level where the jamb sits?
- Check for square: Measure diagonals corner-to-corner; they should match (or be very close).
3) Account for flooring
If you’re installing new flooring (carpet, thicker tile, hardwood), plan your undercut. Doors should clear the finished floor and swing freely.
If your flooring is already installed, you’re aiming for a consistent gap under the door that looks intentionalnot “my house is settling”
intentional.
How to Hang a Prehung Interior Door (Step-by-Step)
Prehung door installs are all about establishing one “perfect” side (usually the hinge side), then adjusting everything else to match it.
Think of the door slab as the truth-teller: if the gaps around the door are consistent, the door will behave.
Step 1: Remove the old door and jamb (if replacing)
- Pop hinge pins and lift off the old slab.
- Carefully pry off casing/trim if you’re removing it (score caulk lines first to avoid drywall damage).
- Remove nails/screws holding the old jamb. Pull jamb pieces out.
- Clean the opening. Remove debris, old shims, and anything that prevents the new unit from sitting flat.
Step 2: Dry-fit the new prehung unit
Set the prehung door into the opening with the door still attached. Keep any shipping clips or spacers in place until the frame is secured
(they help maintain alignment during install). Center the jamb in the opening and make sure the face of the jamb will end up flush with the wall surface
(or slightly proud so casing sits tight).
Step 3: Level the threshold area (yes, even for interior doors)
Interior doors don’t have exterior thresholds, but the floor under the side jambs still matters. If the floor is out of level, the jamb legs will
follow that tilt unless you correct it with shims. Start by shimming under the jamb on the low side until the head jamb will sit level.
Step 4: Plumb and secure the hinge-side jamb first
This is the most important part of the whole job. If the hinge side isn’t plumb, the door will swing on its own or rub, no matter what you do later.
Place paired shims behind the hinge locations (top, middle, bottom), adjust until the hinge-side jamb is perfectly plumb, then fasten.
- Fasten near hinge locations so you don’t bow the jamb.
- Use nails or screws through the jamb and shims into the framing.
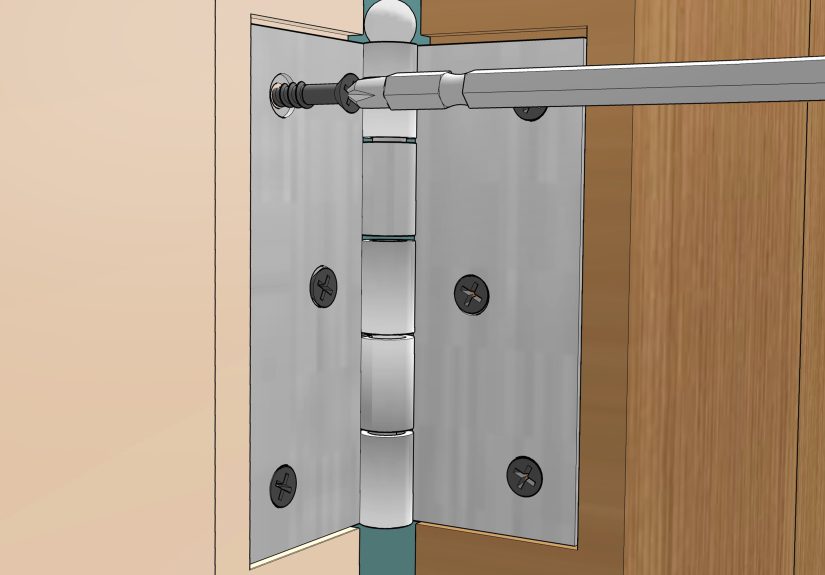
- Consider replacing one screw in the top hinge with a longer screw to bite into framing for extra strength.
Step 5: Check the reveal (the gap around the door)
Close the door and look at the gap between the door edge and the jamb stop area. You want a consistent revealcommonly around
1/8 inchalong the top and hinge side. If it’s tight at the top latch corner, your hinge side may be twisted or the head is out of level.
Step 6: Shim and secure the latch-side jamb
Once the hinge side is solid and the reveal looks good there, you “tune” the latch side to match the door. Shim behind the strike plate area and
near the top and bottom of the latch jamb. Close the door frequently while you shimyour eyes are the measuring tool now.
- If the latch-side reveal is wider at the top than the bottom, the frame is rackedadjust shims accordingly.
- If the door hits the stop too early, the jamb might be bowedback off fasteners and re-shim.
Step 7: Secure the head jamb (lightly) and re-check everything
Many pros avoid heavy shimming in the head jamb because it’s easy to force a bow that ruins your top reveal. The casing/trim will help stabilize the head.
If you do fasten the head, do it gently and only after the sides are perfect.
Step 8: Install casing/trim
With the unit operating smoothly, install casing. Keep your reveal consistent (commonly around 3/16 inch for casing reveal),
then nail the casing to the jamb and studs. Cut off protruding shims with a utility knife or flush-cut saw so the casing lies flat.
Step 9: Install hardware and test for “real life” use
Install the knob/lever, latch, strike plate, and any doorstop adjustments. Then run the door through real use:
open it halfway, let go, close it gently, close it firmly, latch it, unlatch itrepeat. A door that only behaves when handled like a museum artifact
is going to annoy you daily.
How to Hang a Slab Door in an Existing Jamb
Slab doors are great when your existing frame is worth keeping. The trade-off is precision work: hinge locations, hinge mortises, and latch boring
must match the jamb and hardware.
Step 1: Confirm the slab size and trim if needed
Measure the existing door (if you have it) or measure the jamb opening. Many interior slabs are standard sizes, but older homes love surprises.
You may need to trim the slab for height (floor changes) or width (out-of-square jamb). Trim small amounts at a time, and keep the door square.
Step 2: Mark hinge locations
If you’re reusing the old hinges and jamb, match hinge locations exactly. The simplest method is to lay the old door on top of the new slab,
align edges perfectly, and transfer hinge marks. If you don’t have the old door, measure hinge positions from the top of the jamb and transfer
those measurements to the slab.
Step 3: Mortise hinge gains (unless using no-mortise hinges)
For standard hinges, you’ll need shallow recesses (mortises) so the hinge leaf sits flush with the door edge. Use a hinge template/jig if you have one,
or trace the hinge and chisel carefully. Your depth should match the hinge leaf thicknessflush, not buried.
Step 4: Attach hinges to the door
Pre-drill screw holes to prevent splitting and to keep screws straight. (Crooked hinge screws can pull a hinge leaf out of alignment and cause binding.)
Attach hinges snugly, but don’t strip screws.
Step 5: Hang the door in the jamb
Support the door on shims or a wedge so the top gap is consistent, then screw hinges into the jamb. Check swing and reveal.
If the door rubs on the hinge side, the hinges may need adjustment or the mortise depth may be inconsistent.
Step 6: Drill for the latch and install hardware
Use a hole saw and spade bit (or a lockset installation kit) to bore the knob/lever hole and the latch edge hole at the correct backset
(commonly 2-3/8″ or 2-3/4″). Chisel the latch plate mortise so the plate sits flush, then install latch, hardware, and strike plate.
Troubleshooting: When the Door Has Attitude
Doors communicate in subtle ways: rubbing, bouncing off the stop, refusing to latch. Here’s what those behaviors usually meanand how to fix them.
The door swings open or closed by itself
- Likely cause: Hinge-side jamb not plumb.
- Fix: Loosen fasteners, re-shim hinge side until perfectly plumb, then re-secure.
The top latch corner rubs the jamb
- Likely cause: Frame is racked (not square) or hinge jamb twisted.
- Fix: Adjust shimsoften pull the latch side slightly or re-check hinge-side plumb and head level.
The door won’t latch unless you shoulder-check it
- Likely cause: Strike plate alignment is off, jamb bowed, or latch-side reveal uneven.
- Fix: Shim latch side to correct reveal; then adjust strike plate position. Small moves matter.
There’s a big gap on one side
- Likely cause: Jamb bowed from over-shimming or fasteners pulled too tight without shim support.
- Fix: Back off fasteners, add shims at the right locations, and re-fasten through shims.
The door hits the stop before it’s fully closed
- Likely cause: Jamb stop misaligned, or door slab not centered in the frame.
- Fix: If it’s a prehung unit, adjust shims to center the slab and even the reveal.
If the stop is separate, it can sometimes be re-nailed slightly.
Pro-Level Tips That Make a DIY Install Look Professional
- Start with the hinge side. Get it plumb and solid before you chase the latch side.
- Shim at hinges and strike. Those are the structural points that prevent the jamb from bowing.
- Use long screws strategically. A longer screw in the top hinge can pull the jamb tight to framing and reduce sag over time.
- Check the door operation constantly. Don’t wait until the end to discover your reveal is doing interpretive dance.
- Don’t over-fastening the head jamb. Forcing the head can create a bow that ruins your top gap.
- Respect solid-core weight. Solid-core doors feel premium because they are… basically small planets.
FAQ: Quick Answers People Actually Need
How much gap should there be around an interior door?
A common target is about 1/8 inch reveal between the door slab and jamb along the sides and top.
The bottom gap varies depending on flooring and airflow needs.
Can I install a prehung door by myself?
You can, but it’s dramatically easier (and safer) with a helperespecially with solid-core doors. If solo, use shims/wedges and take it slow.
Do I nail or screw the jamb?
Either can work. Screws offer easier adjustment and strong holding power. Nails (finish nails/brads) are common for speed.
The key is fastening through shims at hinge and strike locations to avoid bowing.
Experience Notes: What You Learn After Hanging a Few Doors (Extra )
The first interior door I ever hung taught me a very specific lesson: doors do not care about your confidence. I was feeling great.
I had a new prehung unit, a level, a fistful of shims, and the unstoppable optimism of someone who had watched exactly two “easy DIY” videos.
I set the door in the opening, nailed it off, stepped back… and the door swung shut on its own like it was haunted by a responsible adult.
That’s when I learned “pretty close” is not a measurement, and “plumb” is not a vibe.
The biggest game-changer is treating the hinge side like the foundation of a house. When you get the hinge jamb dead plumb and secure it properly,
everything else becomes adjustment. When you don’t, everything else becomes chaos management. I now shamelessly spend extra time on the hinge side,
shimming behind each hinge location until the level agrees with me. Then I fasten it, check again, and only then move on. This sounds slow,
but it’s much faster than removing trim later while muttering words you don’t want your drywall to hear.
Another lesson: doors will reveal your wall problems. I’ve worked in homes where the rough opening is slightly out of square,
or the wall is subtly out of plumb, or the floor slopes like it’s trying to drain into another state. The trick is remembering your goal:
the door should operate correctly and the reveal should look consistent. That may mean the frame is installed plumb even if the surrounding opening isn’t perfect.
In those situations, you might end up with slightly uneven gaps between jamb and drywalltotally normalbecause casing hides a multitude of sins.
I also learned to stop trusting my eyes alone. Your eyes are useful, but they’re also easily fooled by crooked trim, wavy drywall,
and the fact that you’ve been staring at a 1/8-inch gap for forty minutes. Checking the door’s movement is often the best truth test:
does it swing freely without drifting, does it close without rubbing, does it latch without force? If yes, you’re winning. If not,
don’t keep “finishing” your way out of a structural problem. Back up. Adjust shims. Re-check plumb. Repeat.
Finally, I learned that the small details create the “pro” look. Cutting shims flush so casing sits tight, keeping casing reveals consistent,
and using wood filler and caulk like you’re politely apologizing to the trim for what the saw just didthose are the finishing touches that make people say,
“Wow, who installed your doors?” (That’s your cue to act casual and not mention the part where you installed one hinge upside down at 1 a.m.)
Conclusion
Hanging an interior door is a mix of carpentry and patience: you’re not forcing a door into place, you’re tuning a frame until the door
swings cleanly and the reveal is consistent. If you remember nothing else, remember this: plumb the hinge side first, shim at structural points,
and check operation constantly. Do that, and your door will stop behaving like a dramatic teenager and start acting like a well-trained piece of home hardware.




