Table of Contents >> Show >> Hide
- Why Frame a Corrugated Metal Fence Instead of Just Screwing Up Panels?
- Before You Build: Plan First, Dig Second, Regret Less
- Materials You’ll Likely Need
- Tools for the Job
- Step-by-Step: How to Frame a Corrugated Metal Fence
- Step 1: Mark the fence line and post locations
- Step 2: Dig the post holes
- Step 3: Set the posts
- Step 4: Install the horizontal rails
- Step 5: Measure and cut the corrugated metal panels
- Step 6: Attach the metal panels correctly
- Step 7: Add the frame or trim boards
- Step 8: Finish and protect the fence
- Best Design Tips for a Stronger, Better-Looking Fence
- Common Mistakes to Avoid
- How Long Does a Corrugated Metal Fence Last?
- Experiences and Lessons DIYers Learn the Hard Way
- Conclusion
- SEO Tags
If your backyard fence dreams include clean lines, modern style, and the sweet satisfaction of saying, “Yep, I built that,” a corrugated metal fence deserves a spot on your shortlist. It has the industrial-chic look people love, but when it’s framed correctly, it also feels warm, finished, and intentional instead of looking like a shed wandered into your landscaping.
The trick is not the metal itself. The trick is the frame. A well-built frame gives corrugated panels strength, keeps them aligned, protects the panel edges, and makes the whole fence look polished rather than pieced together on a Saturday after three energy drinks and one regrettable trip to the hardware store.
In this DIY guide, you’ll learn how to frame a corrugated metal fence from the ground up, including layout, posts, rails, panel attachment, trim, and the little details that separate a fence that lasts from one that starts wobbling every time the wind gets ideas. Whether you want a full privacy fence, a stylish side-yard divider, or a modern accent fence, this guide will help you build it with confidence.
Why Frame a Corrugated Metal Fence Instead of Just Screwing Up Panels?
Because raw corrugated metal panels need support. A frame gives the fence structure, keeps the sheets from flexing too much, and helps you control spacing, alignment, and finish details. It also protects cut edges and makes the fence look like a design choice instead of a shortcut.
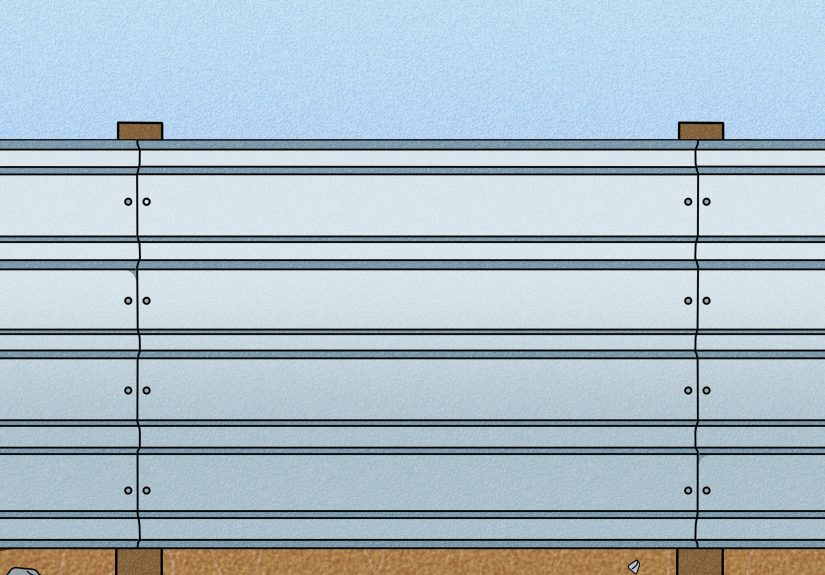
Most DIY corrugated metal fences use one of two framing styles. The first is a post-and-rail frame, where corrugated panels attach to horizontal rails between posts. The second is a picture-frame design, where the metal is bordered on all sides with wood or metal trim. The picture-frame approach usually looks more custom and hides rough panel edges, while the simpler post-and-rail build is faster and often more budget-friendly.
Framing also gives you room to combine materials. Corrugated metal pairs especially well with pressure-treated lumber, cedar, redwood, black steel posts, or powder-coated trim. That mix of warm and cool materials is exactly why these fences show up so often in modern farmhouse, industrial, and minimalist landscape designs.
Before You Build: Plan First, Dig Second, Regret Less
Check property lines, codes, and utilities
Before you buy so much as one screw, confirm your property line and check local zoning or HOA rules. Fence height, setback, and visibility rules can vary a lot. Also, call 811 before digging so utility lines can be marked. That one step is not glamorous, but it is much more fun than discovering a buried line with a post-hole digger.
Choose your fence layout and panel orientation
Corrugated metal can be installed vertically or horizontally. Vertical panels are common for privacy fences because they shed water well and create a taller, cleaner look. Horizontal panels can feel more architectural, but they usually require more careful framing and trim planning.
For most DIYers, the easiest and best-looking build is a fence with vertical corrugated metal panels, wood or metal posts, and two or three horizontal rails. If you want a more finished style, add perimeter trim boards to create a picture-frame effect around each section.
Pick the right span between posts
Many residential fence sections land in the 6-foot to 8-foot range. Shorter spans generally feel stiffer and more forgiving, especially in windy areas. Longer spans can work, but the rails and panel fastening need to be more precise. If you want fewer posts, do not let that decision bully you into a saggy fence later.
Materials You’ll Likely Need
- Ground-contact pressure-treated 4×4 or 6×6 posts, or steel fence posts
- Pressure-treated or cedar 2×4 rails
- Corrugated metal panels sized for fencing or roofing/siding use
- Concrete mix and gravel for post holes
- Exterior-rated fasteners for framing
- Metal-to-wood or metal-to-metal screws with neoprene washers
- Trim boards, C-channel, or metal edging for a picture-frame look
- Exterior wood stain, paint, or sealer if using wood framing
If you’re using treated lumber, pair it with corrosion-resistant hardware. That usually means hot-dip galvanized, approved coated, or stainless fasteners depending on the product and environment. Also make sure your posts are rated for ground contact, not just above-ground use. Fence posts live a rough life. Don’t send them into wet soil wearing the wrong shoes.
Tools for the Job
- Post-hole digger or auger
- Shovel and digging bar
- Level and string line
- Tape measure and speed square
- Circular saw or miter saw for wood
- Metal snips, nibbler, or appropriate metal-cutting tool
- Drill/driver with correct bits
- Clamps
- Work gloves, eye protection, hearing protection
Step-by-Step: How to Frame a Corrugated Metal Fence
Step 1: Mark the fence line and post locations
Set corner points first, then run a string line between them. Mark each post location based on your panel width and framing design. Keep your spacing consistent. A fence can survive many things, but “close enough” measurements are not one of them.
If you’re building a gate, mark those posts separately and size them more carefully. Gate posts usually need extra strength because they carry moving weight and hardware stress.
Step 2: Dig the post holes
For most residential fences, the hole diameter is commonly about three times the post width, and the depth should follow local code and frost-line requirements. A typical 6-foot-tall fence often ends up with post holes around 30 inches deep, but your climate and soil may require more.
Add gravel at the bottom of each hole for drainage. That small layer helps water move away from the post base instead of hanging around like an uninvited guest. If you’re building in sandy or loose soil, you may need wider holes or forms for better stability.
Step 3: Set the posts
Set the corner and end posts first. Brace them, level them on two sides, and pour concrete according to the manufacturer’s instructions. Leave enough time for curing before loading the frame. If you rush this part, the rest of the build becomes an expensive lesson in leaning.
As you install line posts, keep checking height, plumb, and spacing. Use your string line constantly. Fences do not get straighter later. They get straighter now, or crooked forever.
Step 4: Install the horizontal rails
Once the posts are secure, attach your rails. A basic privacy fence usually uses at least two rails, but taller corrugated metal sections often benefit from three: top, middle, and bottom. This gives the panels better support and helps reduce rattling or oil-canning.
Common rail material is 2×4 lumber. Position the bottom rail high enough to keep the metal from sitting directly in mud or standing water. The top rail should support the upper edge, and a middle rail is smart for taller spans. Use exterior-grade fasteners rated for the framing material.
Step 5: Measure and cut the corrugated metal panels
Measure each section individually. Even if your layout was careful, real-world fence openings can vary a little. Cut metal panels with snips, a nibbler, or another tool recommended for the profile and finish. Avoid sloppy cuts that expose jagged edges or burn the finish.
Wear gloves. Corrugated metal edges are basically paper cuts with a villain origin story.
If you drill or cut the metal, clean off shavings right away. Those tiny metal fragments can rust quickly and stain the finished panel surface.
Step 6: Attach the metal panels correctly
Position the first panel carefully because the rest of the run will follow its lead. Keep it plumb, hold it off the soil slightly, and fasten it to the rails using screws with bonded washers. The washer should compress enough to seal, but not so much that it squishes out or deforms. Overdriven screws are a classic leak and maintenance problem on exposed-fastener metal systems, and the same principle matters on fences.
If your design requires overlapping panels, keep the overlap consistent and follow the panel manufacturer’s recommendations for side laps and screw placement. For a fence, the goal is usually rigidity and appearance rather than full weatherproofing like a roof, but you still want a neat, secure connection.
Step 7: Add the frame or trim boards
This is the stage where the project stops looking like “materials” and starts looking like a finished fence. For a wood-framed design, attach trim boards around the panel perimeter to create a picture-frame border. This hides cut edges, visually stiffens the section, and gives the fence a more custom appearance.
You can run vertical trim on the sides and horizontal trim at the top and bottom, or build each fence bay like a framed panel inside the posts. If you prefer a cleaner modern look, use metal trim such as C-channel or purpose-made edging instead of wood.
Take your time here. Even simple trim can make an average corrugated fence look expensive in the best possible way.
Step 8: Finish and protect the fence
If you used wood, seal, stain, or paint it as appropriate for the product and moisture level. Some treated lumber needs time to dry before finishing, so check the label and do not rush it. Protecting the frame matters because the wood usually fails before the metal does.
At the end, tighten hardware, check for sharp edges, and make sure the fence line looks straight from multiple angles. Your phone camera is surprisingly good at spotting mistakes your tired DIY eyes may forgive.
Best Design Tips for a Stronger, Better-Looking Fence
- Use three rails on taller sections: It helps control movement and keeps panels flatter.
- Keep metal off the ground: A little clearance helps reduce constant moisture exposure.
- Choose consistent panel orientation: Switching directions mid-project rarely looks intentional.
- Use trim to hide cut edges: This improves both safety and appearance.
- Do not mix random fasteners: Use compatible, exterior-rated hardware from the start.
- Plan the gate early: A matching framed gate always looks better when it’s designed with the fence, not after it.
Common Mistakes to Avoid
Using above-ground posts in the soil: Fence posts should be rated for ground contact. Anything less is a shortcut to rot.
Ignoring drainage: Gravel at the post base and sensible panel clearance can help the whole system last longer.
Skipping the middle rail: Large metal panels without enough support can flex, rattle, and look wavy.
Overtightening screws: Washer-head fasteners should seal, not look like they survived a hydraulic press.
Not cleaning metal shavings: Those little flakes can rust and stain finished panels fast.
Failing to check alignment as you go: A fence is not a place to “fix it later.” Later is usually worse.
How Long Does a Corrugated Metal Fence Last?
A properly framed corrugated metal fence can last a long time, especially when the posts are solid, the fasteners are compatible, and the framing is protected from moisture. In many builds, the metal panels outlast the wood framing. That’s why quality posts, good drainage, and correct fasteners matter so much.
If longevity is your top priority, consider galvanized or powder-coated metal posts and premium exterior trim details. If budget matters more, pressure-treated posts and rails still work well when installed correctly and maintained over time.
Experiences and Lessons DIYers Learn the Hard Way
Ask anyone who has built a corrugated metal fence, and they’ll tell you the same thing: the project looks simple from a distance. A few posts, a few rails, some metal sheets, done by dinner, right? Then reality shows up carrying a level, a tape measure, and several opinions.
One of the most common experiences is realizing that post alignment is the whole game. DIYers often spend hours choosing the perfect panel color and trim style, only to discover that if the posts are even slightly out of plumb, the metal makes every flaw more obvious. Wood pickets can hide a little. Corrugated metal cannot. It is brutally honest. In that way, corrugated fencing is like a high-definition camera for your measuring mistakes.
Another shared experience is underestimating how much the frame affects the final look. Many people start the project thinking the metal is the star and the frame is just background support. Then they install the first section and realize the opposite is also true: the frame is what makes the fence look finished. A simple border trim, a clean top line, and evenly spaced rails can turn an average build into something that looks custom-made for the property.
DIYers also learn that metal cuts are not the part to rush. The first cut often feels awkward, the second gets better, and by the third panel most people develop a rhythm. But almost everyone has a moment where they think, “I can eyeball this little trim cut,” and the fence immediately replies, “No, you cannot.” Careful measuring, clamping, and test-fitting save time, money, and colorful language.
Wind is another teacher. A framed corrugated metal fence can feel wonderfully sturdy, but only when the posts are solid and the rails are placed well. People who skimp on post depth or support sometimes discover their mistake during the first serious storm. On the flip side, builders who take time to set posts correctly usually talk about how satisfying it feels when the finished fence doesn’t rattle, sway, or complain every time the weather changes its mood.
Then there’s the aesthetic lesson: corrugated metal fences look best when the design is intentional. The most successful DIY builds usually repeat details consistently, such as matching panel orientation, equal trim widths, and a clear visual rhythm from bay to bay. Once builders understand that, they stop treating the fence like scrap-friendly utility work and start treating it like outdoor architecture.
Finally, many DIYers say the biggest surprise is how much this kind of fence changes the yard. It doesn’t just mark a boundary. It creates a backdrop for plants, furniture, lighting, and outdoor living. That modern mix of wood and metal gives a space structure and personality. So yes, you may begin with a practical goal like privacy or containment. But by the end, you often get something better: a fence that makes the entire yard look more designed, more valuable, and more “put together” than it did before. Not bad for a project that started with a string line and a hole in the ground.
Conclusion
Learning how to frame a corrugated metal fence is really about combining strong structure with smart detailing. The metal panels bring durability and modern style, but the posts, rails, fasteners, and trim are what make the fence sturdy and attractive. Build the frame well, use the right hardware, keep moisture in mind, and take your time with alignment. Do that, and you’ll end up with a fence that looks sharp, performs well, and earns every compliment from neighbors who suddenly become very interested in “weekend projects.”