Table of Contents >> Show >> Hide
- What Is Kintsugi?
- Traditional Kintsugi vs. Modern DIY Kintsugi
- Can You Use Kintsugi on Food-Safe Dishes?
- Supplies You Need for DIY Kintsugi
- How to Do Kintsugi Step by Step
- Step 1: Collect and Arrange the Broken Pieces
- Step 2: Clean the Edges
- Step 3: Mix the Adhesive and Gold Powder
- Step 4: Apply the Golden Adhesive
- Step 5: Build the Shape Slowly
- Step 6: Fill Gaps and Missing Chips
- Step 7: Add Extra Gold Detail
- Step 8: Let the Piece Cure Completely
- Step 9: Clean and Finish
- Common Kintsugi Mistakes to Avoid
- Design Ideas for Beautiful Kintsugi Repairs
- Is Kintsugi Worth Trying at Home?
- Experience Notes: What Kintsugi Feels Like in Real Life
- Conclusion
There are two kinds of people in the world: people who throw away a broken bowl, and people who stare at the pieces and think, “Well, this looks like the beginning of a very dramatic art project.” Kintsugi belongs proudly to the second group.
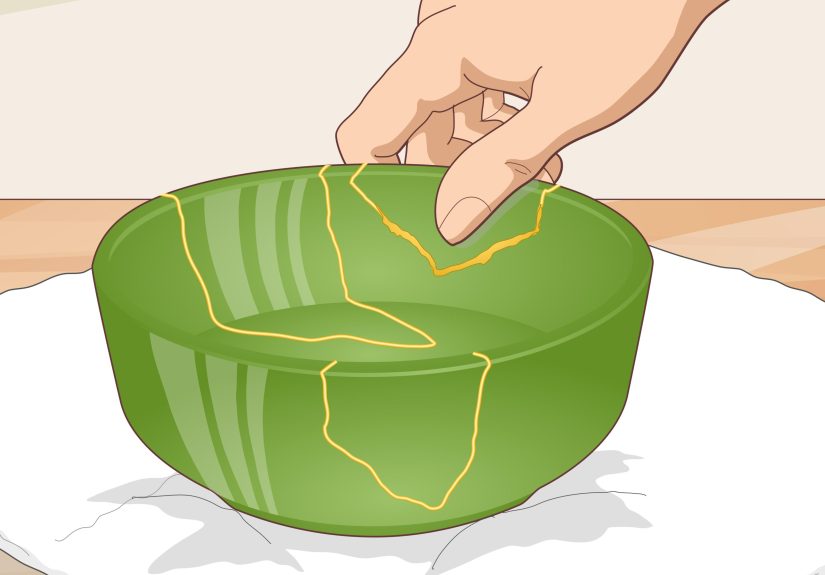
Kintsugi, often translated as “golden joinery” or “golden repair,” is the Japanese art of repairing broken ceramics by making the cracks visible rather than hiding them. Instead of pretending the accident never happened, kintsugi turns the damage into the star of the show. A chipped tea bowl, a cracked vase, or a plate that had an unfortunate meeting with the kitchen floor can become something richer, more personal, and honestly, a lot more interesting than it was before.
Traditionally, kintsugi uses urushi lacquer and powdered gold, silver, or platinum. Modern home versions often use epoxy resin and metallic powder to create a similar golden-vein effect. Both approaches celebrate the same idea: broken does not mean worthless. Sometimes, broken just means the object is about to get a very stylish second chapter.
What Is Kintsugi?
Kintsugi is more than a repair technique. It is part craft, part philosophy, and part quiet rebellion against the idea that perfection is the only kind of beauty worth keeping. In many Western repair traditions, the goal is to hide the crack as completely as possible. Kintsugi does the opposite. It says, “Look at this line. This is where the story continued.”
The method is closely connected to the Japanese aesthetic of wabi-sabi, which values imperfection, age, irregularity, and natural change. A repaired ceramic piece is not restored to its original state. It becomes a new object with a visible history. The break remains, but it no longer feels like failure. It becomes design.
That is why kintsugi has become so popular with artists, collectors, home decorators, and DIY lovers. It gives people a practical way to repair broken pottery while also creating something meaningful. And let’s be honest: a gold-lined crack looks far more glamorous than a sad glue mark pretending it is invisible.
Traditional Kintsugi vs. Modern DIY Kintsugi
Before you start repairing ceramics with gold, it helps to understand the difference between traditional kintsugi and beginner-friendly modern kintsugi.
Traditional Kintsugi
Traditional kintsugi uses urushi, a natural Japanese lacquer made from tree sap. The broken ceramic pieces are bonded with lacquer-based mixtures, gaps may be filled with additional lacquer paste, and the final surface is dusted or decorated with fine metal powder. This method can produce beautiful, durable, and historically accurate results, but it is slow and demanding.
Urushi requires the right humidity and temperature to cure properly. It also needs careful handling because wet urushi can irritate the skin, similar to poison ivy for some people. Traditional kintsugi is a serious craft, not a “do it in ten minutes while your coffee cools” situation.
Modern DIY Kintsugi
Modern DIY kintsugi usually uses two-part epoxy resin or ceramic adhesive mixed with gold mica powder, brass powder, or another metallic pigment. It is faster, easier to learn, and more accessible for beginners. Many kintsugi repair kits include adhesive, metallic powder, mixing sticks, gloves, and instructions.
The trade-off is authenticity. Epoxy kintsugi is not the same as traditional urushi kintsugi, but it is a practical choice for decorative repairs and beginner projects. If your goal is to learn the visual style and repair a sentimental object, modern kintsugi is a friendly place to begin.
Can You Use Kintsugi on Food-Safe Dishes?
This is the question that matters most if you are repairing a mug, bowl, plate, or teacup. Not every adhesive is food-safe. Not every metallic powder is safe for contact with food. And not every repaired dish should go back into daily service, especially if the repair crosses an area that touches hot liquid, acidic food, or repeated washing.
If you want the repaired ceramic to be used with food or drinks, choose a repair material that clearly states it is food-safe once fully cured. Read the manufacturer’s instructions carefully. “Looks shiny” is not the same thing as “safe for soup.” If the product does not specifically say it is suitable for food contact after curing, treat the finished piece as decorative only.
For beginners, the safest approach is to practice on decorative ceramics first: a vase, small dish, planter, ornament, or display bowl. Once you understand the process, you can decide whether to invest in a proper food-safe kit or learn traditional urushi kintsugi from a trained instructor.
Supplies You Need for DIY Kintsugi
For a beginner-friendly kintsugi repair, gather your materials before you mix anything sticky. Epoxy has a way of turning people into panicked octopuses if the tools are not ready.
Basic Materials
- Broken ceramic pieces
- Two-part epoxy resin or ceramic adhesive
- Gold mica powder, brass powder, or metallic pigment
- Disposable mixing tray or small cup
- Wooden stick, toothpick, or small spatula
- Fine brush for applying extra powder
- Masking tape or painter’s tape
- Cotton swabs or paper towels
- Rubbing alcohol for cleaning surfaces
- Gloves
- Fine-grit sandpaper, used carefully after curing
Optional Materials
- Epoxy putty for missing chips or gaps
- Clear sealant, if appropriate for the project
- Clamps, rubber bands, or soft supports
- Wax paper to protect your work surface
Choose a well-ventilated work area, protect the table, and wear gloves. Ceramic edges can be sharp, and adhesive is much less fun when it becomes a permanent feature of your fingers.
How to Do Kintsugi Step by Step
Step 1: Collect and Arrange the Broken Pieces
Lay out all the ceramic pieces on a clean surface. Do a dry fit before using glue. This means assembling the object without adhesive so you know where every piece belongs. Think of it as a puzzle, except the puzzle used to hold noodles.
Start with the largest pieces first. Smaller fragments and chips should be placed last. If there are tiny shards that do not affect the structure, set them aside until you know whether they are worth including.
Step 2: Clean the Edges
Dust, grease, and old residue can weaken the repair. Wipe the broken edges gently with a little rubbing alcohol and let them dry completely. Do not soak porous ceramics unless the piece can safely handle moisture. The goal is clean edges, not a ceramic spa day.
Step 3: Mix the Adhesive and Gold Powder
Follow the instructions for your epoxy or adhesive. Usually, two-part epoxy requires equal amounts of resin and hardener, mixed thoroughly. Add a small amount of gold powder or metallic pigment until the mixture looks rich and visible but still sticky enough to bond properly.
Do not overload the adhesive with powder. Too much pigment can weaken the bond or make the mixture crumbly. Aim for a smooth, golden paste that can spread along the ceramic edge.
Step 4: Apply the Golden Adhesive
Use a toothpick, wooden stick, or small spatula to apply a thin line of the gold adhesive to one broken edge. You do not need a giant blob. Excess adhesive will squeeze out when the pieces are pressed together. A little overflow is good because it creates the signature gold line. A glue volcano is less charming.
Press the matching pieces together firmly but gently. Hold them in place according to the adhesive’s setting time. Use masking tape, rubber bands, or soft supports if needed.
Step 5: Build the Shape Slowly
Repair one joint at a time. Beginners often try to assemble the whole object at once, then discover that gravity has strong opinions. Let each major section set enough to support the next piece. For bowls and cups, it may help to repair two or three larger sections first, then join those sections together.
If adhesive squeezes out unevenly, you can shape it carefully with a toothpick while it is still workable. Leave enough gold visible to highlight the crack.
Step 6: Fill Gaps and Missing Chips
If a piece is missing, use epoxy putty or a compatible filler. Mix it according to the instructions, shape it into the gap, and smooth the surface. Once it cures, you can apply a thin layer of gold-colored adhesive or metallic finish over the filled area.
Missing chips are not disasters. In kintsugi, they can become beautiful gold islands. The trick is to make them intentional. Shape the filled area neatly and let the gold accent look like a design choice rather than a desperate cover-up.
Step 7: Add Extra Gold Detail
While the adhesive is still slightly tacky, you can brush a little extra gold powder over the seam for a brighter finish. Use a small brush and a light hand. After the adhesive cures, gently remove loose powder with a clean, dry brush.
For a more controlled look, wait until the repair cures, then paint a thin gold line over the seam with a compatible metallic lacquer or paint. This method is especially useful if the first line looks too faint.
Step 8: Let the Piece Cure Completely
Do not rush curing time. Follow the adhesive manufacturer’s instructions and give the piece extra time if the repair is thick or structural. A repair may feel dry on the surface before it has reached full strength.
If the item is decorative, curing is mostly about durability. If the item is intended for food use and you used a food-safe product, full curing is essential before any contact with food or drink.
Step 9: Clean and Finish
Once the repair is fully cured, inspect the seams. If there are sharp bumps, you may smooth them very lightly with fine-grit sandpaper. Be careful not to scratch the ceramic glaze. Wipe away dust with a soft cloth.
For decorative objects, you may add a clear protective coating if it is compatible with the adhesive and finish. For food-contact items, only use coatings that are specifically rated for that purpose.
Common Kintsugi Mistakes to Avoid
Using Too Much Adhesive
More glue does not mean more strength. Too much adhesive makes the seam bulky and messy. A controlled line creates a cleaner gold vein and a better fit.
Skipping the Dry Fit
Always test the arrangement first. Once adhesive is mixed, the clock starts ticking. You do not want to discover that piece number four should have gone in before piece number two while your epoxy is turning into golden chewing gum.
Expecting Perfection
Kintsugi is not about making the piece look factory-new. The lines should have life. Slight unevenness can add character. The goal is beauty with honesty, not a ceramic version of airbrushed perfection.
Using Non-Food-Safe Materials on Dinnerware
If the repaired object will touch food, do not guess. Use products clearly labeled food-safe after curing, and follow every curing instruction. When in doubt, display the piece instead of eating cereal from it.
Design Ideas for Beautiful Kintsugi Repairs
A simple gold line is classic, but you can also make creative choices based on the object’s shape, color, and story.
For White Porcelain
Bright gold looks crisp and elegant against white porcelain. Keep the seams thin and clean for a refined look.
For Dark Stoneware
Gold lines on dark clay feel dramatic and earthy. Slightly wider seams can work beautifully because the contrast is strong.
For Blue-and-White Ceramics
Gold can add warmth to blue patterns. Try to follow the natural crack lines rather than forcing symmetry.
For Rustic Pottery
Rustic ceramics welcome irregularity. A thicker repair line or filled gold chip can look organic rather than messy.
Is Kintsugi Worth Trying at Home?
Absolutely, as long as you choose the right project. Do not begin with a priceless heirloom, rare antique, or your grandmother’s most emotionally loaded teapot. Start with something meaningful but not irreplaceable. A broken thrift-store bowl is perfect. A cracked planter is excellent. A mug you liked but did not name after a family member is also acceptable.
Kintsugi teaches patience, but it also rewards imperfection. The first attempt may be slightly lumpy. The gold line may wobble. You may use too much powder or not enough. That is normal. In fact, it fits the spirit of the craft. Every repair teaches your hands how the materials behave.
Experience Notes: What Kintsugi Feels Like in Real Life
The first real lesson of kintsugi is that broken ceramics are much more complicated than they look. When a bowl breaks, it does not politely separate into three convenient pieces like a craft tutorial. It may break into one big dramatic section, two medium pieces, and a tiny shard that appears to have no home but somehow clearly belongs somewhere. This is where the dry fit becomes your best friend.
A good beginner experience usually starts with lowering expectations in the best possible way. You are not trying to create a museum-quality repair on day one. You are learning how adhesive moves, how fast it sets, how much gold powder is enough, and how long you can hold two pieces together before your hand starts questioning your life choices.
One helpful habit is to photograph the broken object before moving the pieces around. Take a picture from above, then another from the side. When confusion arrives, and it will, the photos help you remember the original shape. This is especially useful for patterned ceramics, where a painted flower or stripe can guide the placement.
Another practical experience: gold powder travels. It gets on gloves, tools, paper towels, and sometimes mysteriously on your elbow. Use a protected workspace and keep a damp cloth nearby, but do not wipe uncured adhesive across the ceramic surface. Blot carefully instead. Rubbing can smear the gold line into a glamorous but unwanted fog.
Patience also matters more than strength. Pressing pieces together too hard can squeeze out too much adhesive or shift the alignment. Gentle, steady pressure works better. If a piece keeps sliding, use tape or a small support instead of wrestling it into submission. Ceramics are stubborn, but gravity is undefeated.
The most satisfying moment usually comes after the repair cures. The object that looked ruined now has a visible map of survival. The gold lines catch light in a way ordinary glue never could. Even if the repair is imperfect, the piece feels alive again. It has a before and after. It has evidence.
Kintsugi is also surprisingly emotional. People often choose objects that carry memory: a cup from a trip, a dish from a parent, a vase from a first apartment. Repairing it slowly gives you time to think about why you kept it. The process is not just about saving ceramic. It is about refusing to let one accident erase a story.
For beginners, the best advice is simple: start small, work slowly, and accept the wobble. The wobble is not your enemy. In kintsugi, even the shaky line can become part of the charm. Your first piece may not be perfect, but it will be yoursand it will look much better than a pile of sad pottery in the trash.
Conclusion
Kintsugi is one of the rare crafts that repairs an object while changing the way you look at damage. It teaches that a crack can be a feature, a flaw can become decoration, and a broken ceramic can return with more character than it had before. Whether you choose traditional urushi lacquer or a modern epoxy-based method, the heart of kintsugi remains the same: do not erase the break; honor it.
If you are learning how to do kintsugi at home, begin with a simple decorative piece, use safe materials, follow curing instructions, and give yourself permission to be a beginner. The gold lines do not need to be perfect. They only need to be honest. And if your first repair comes out a little crooked, congratulationsyou have understood the assignment.





