Table of Contents >> Show >> Hide
- What Is Rigid Foam Insulation, Exactly?
- Before You Start: Tools That Make the Job Easier
- How to Cut Rigid Foam Insulation: 15 Steps
- Step 1: Identify the type of rigid foam board
- Step 2: Choose the cutting method before you mark anything
- Step 3: Set up a stable work surface
- Step 4: Put on basic safety gear
- Step 5: Measure the opening carefully
- Step 6: Mark the cut line clearly
- Step 7: Double-check the layout before cutting
- Step 8: Score the foam with a sharp utility knife
- Step 9: Make additional passes until the groove deepens
- Step 10: Snap the board over a firm edge
- Step 11: Cut through the remaining back layer
- Step 12: Use a saw when the board is thick or the cut is complex
- Step 13: Cut notches and cutouts in stages
- Step 14: Dry-fit the piece before installation
- Step 15: Seal edges, clean up, and store scraps smartly
- Best Tips for Cleaner Cuts
- Common Mistakes to Avoid
- When a Knife Is Better Than a Saw
- Real-World Lessons and Experience From Cutting Rigid Foam Insulation
- Conclusion
Rigid foam insulation is one of those building materials that looks easy to work with right up until you make your first crooked cut and create a snowstorm of static-charged foam bits. Then suddenly you are standing in the garage, holding a dull utility knife, wondering how a simple insulation board turned into arts and crafts for contractors. The good news is that cutting rigid foam insulation is not hard. The better news is that once you learn the right method, you can get clean edges, tighter fits, less waste, and a much smoother installation.
Whether you are trimming foam board for a basement wall, rim joist, shed, garage, crawl space, or exterior sheathing project, the trick is matching the tool to the material and the cut. Some boards respond beautifully to the classic score-and-snap method. Others behave better with a saw. Foil-faced boards can be a little dramatic. Thick boards can be stubborn. And every board seems strangely determined to leave crumbs everywhere except the trash can.
This guide walks you through exactly how to cut rigid foam insulation in 15 practical steps, along with safety tips, common mistakes, and real-world advice that helps the finished pieces fit the way they should. If your goal is a cleaner job, a warmer house, and fewer annoying gaps, you are in the right place.
What Is Rigid Foam Insulation, Exactly?
Rigid foam insulation is sold in stiff panels rather than fluffy rolls or batts. In residential projects, the most common types are EPS, XPS, and polyiso. They vary in density, facer materials, moisture resistance, and R-value, but they all share one thing: they can be field-cut to fit your project. That makes them especially useful for basement walls, rim joists, crawl spaces, exterior continuous insulation, attic access covers, and all those awkward spaces where standard batt insulation starts to lose the argument.
Because these boards are designed to be cut on site, homeowners and contractors usually rely on a few proven methods: scoring with a sharp knife and snapping the board, using a straightedge for long clean cuts, or switching to a saw for thicker boards and specialty shapes. The best approach depends on thickness, board type, and whether you need a straight cut, notch, or curve.
Before You Start: Tools That Make the Job Easier
You do not need a workshop that looks like a TV renovation set. You just need the right basics. Most projects go more smoothly with a tape measure, marker or pencil, straightedge or drywall square, sharp utility knife, spare blades, work table or sacrificial surface, and a vacuum for cleanup. For thicker boards or odd shapes, a hand saw, jigsaw, or circular saw may help. Gloves, eye protection, and a dust mask are also smart choices, especially when cutting with power tools.
How to Cut Rigid Foam Insulation: 15 Steps
Step 1: Identify the type of rigid foam board
Start by checking what kind of board you have. EPS is usually lighter and bead-like. XPS tends to be denser and smoother. Polyiso often has a foil facer. This matters because some boards snap easily after scoring, while others cut more cleanly with a saw or multiple passes of a knife. If the board has a facer, plan on cutting through that layer cleanly too.
Step 2: Choose the cutting method before you mark anything
For thin to medium boards and straight cuts, score-and-snap is usually the cleanest and least messy option. For thick panels, long production cuts, or shaped cuts around pipes and framing, a saw or jigsaw may be faster. Picking the method first helps you measure more accurately and avoid the classic DIY move of making a perfect line for the wrong tool.
Step 3: Set up a stable work surface
Support the board fully before cutting. A shaky setup leads to wandering cuts, crushed corners, and language that does not belong in a family-friendly home improvement article. A workbench, pair of sawhorses with a scrap sheet on top, or a clean floor can all work. The board should lie flat and stay still while you cut.
Step 4: Put on basic safety gear
Wear safety glasses and gloves at a minimum. If you are using a saw, add a dust mask or respirator appropriate for the work area and improve ventilation. Foam dust and crumbs are messy, and power-cutting certain boards can send particles farther than you would expect. Also keep the work area away from open flame or strong heat sources.
Step 5: Measure the opening carefully
Measure the cavity, wall section, rim joist bay, or panel area where the foam will go. Check width and height in more than one spot if the framing is older or uneven. Homes love to pretend they are square. Many of them are not. If you are planning to seal the perimeter with foam or caulk, a near-snug fit is ideal. Tiny imperfections can be sealed later, but a big gap turns insulation into a suggestion.
Step 6: Mark the cut line clearly
Use a marker, pencil, or chalk line to lay out the cut. For straight cuts, draw against a metal straightedge, drywall square, or level. For notches, transfer each measurement carefully and label the waste side. That one little detail saves a surprising number of very irritating mistakes.
Step 7: Double-check the layout before cutting
Pause for a ten-second reality check. Is the line on the correct side? Did you account for any framing lip, corner obstruction, or pipe? Are you cutting one board or stacking two measurements in your head by accident? This tiny pause is cheaper than buying another sheet.
Step 8: Score the foam with a sharp utility knife
For straight cuts, place your straightedge firmly on the line and make a light first pass with a sharp utility knife. Do not try to muscle through the full thickness immediately. The first pass is for control, not bravado. Let the blade follow the guide and establish a straight groove.
Step 9: Make additional passes until the groove deepens
Run the knife along the same line several times, using steady pressure. Deepening the score creates a cleaner break and reduces edge tearing. Replace blades often. A dull blade drags, shreds facers, and turns a neat project into foam confetti. If your board is foil-faced, make sure you cut the facing cleanly as well.
Step 10: Snap the board over a firm edge
Move the scored line to the edge of a workbench or table and apply even pressure to snap the board. This works especially well on many straight cuts. If the board does not break cleanly, do not force it like you are auditioning for a lumberjack contest. Instead, deepen the score and try again.
Step 11: Cut through the remaining back layer
After snapping, use the knife to finish any material still holding the pieces together. On thicker boards or faced insulation, turn the piece over and cut the backside as needed. This is where patience wins. A clean finish pass beats a ragged tear every single time.
Step 12: Use a saw when the board is thick or the cut is complex
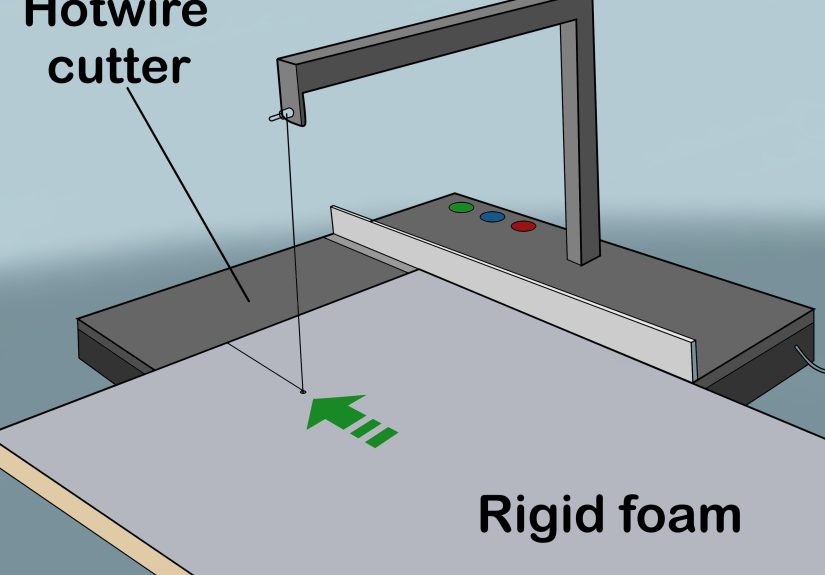
If the board is too thick to score easily, or if you need to make long repetitive cuts, use a saw that matches the job. A hand saw works for many simple cuts. A jigsaw can help with curves, corners, and odd shapes. Some pros also use circular saw setups for faster cutting. Keep in mind that power tools can increase dust and debris, so use them thoughtfully and keep cleanup in the plan, not as a surprise ending.
Step 13: Cut notches and cutouts in stages
For outlets, pipes, windows, or framing interruptions, mark the shape carefully and cut one segment at a time. It is usually easier to make two or three controlled cuts than one heroic diagonal slash that misses the mark. For round penetrations, a jigsaw or repeated knife passes often gives you better control than trying to improvise with a straight blade.
Step 14: Dry-fit the piece before installation
Place the cut piece where it belongs and check the fit. The board should sit flat without bowing, crushing, or leaving oversized gaps. If it is slightly oversized, trim it gradually. If it is undersized, do not pretend sealant will fix everything. It can help with small gaps, but the board still needs to do most of the insulating work.
Step 15: Seal edges, clean up, and store scraps smartly
Once the piece fits, seal the edges if your assembly requires it. Tape seams when appropriate, and use compatible sealant or canned foam around the perimeter as needed. Then vacuum the workspace instead of sweeping foam crumbs into a larger, angrier pile. Save useful offcuts for small patches, rim joists, attic hatches, or other narrow spaces. Leftover rigid foam has a magical way of becoming useful the week after you throw it away.
Best Tips for Cleaner Cuts
The cleanest rigid foam cuts usually come down to three things: sharp blades, good support, and not rushing. A fresh blade glides instead of dragging. A straightedge keeps the cut from wandering. Full support prevents the board from flexing and cracking in the wrong place. If you are using a power tool, slow and steady usually beats aggressive cutting. The goal is not simply to divide the board in half. The goal is to end up with a piece that actually fits and still looks like it belongs in a house.
If you are cutting foil-faced polyiso, take a little extra care with the facer. If you are cutting multiple identical pieces, make a template. If you are insulating around rim joists or irregular framing, expect to do some test fitting and minor trimming. Precision is part of the job, not evidence that the universe is personally against you.
Common Mistakes to Avoid
The biggest mistake is using a dull blade. The second biggest mistake is assuming all rigid foam boards behave the same way. Another common problem is ignoring adhesive compatibility. Some foam products can be damaged by solvent-based materials, so check the product instructions before gluing anything. Homeowners also run into trouble when they cut pieces too loose, forget to seal gaps, or leave foam exposed where it should be protected by the finished wall assembly.
And then there is cleanup. Foam debris is lightweight, static-prone, and weirdly talented at sticking to clothes, tools, and pets. Planning for cleanup makes the job feel less chaotic, especially when using saws.
When a Knife Is Better Than a Saw
For many homeowners, a utility knife and straightedge are the sweet spot. The method is affordable, accessible, quiet, and produces less mess than power cutting. It also gives you excellent control for straight cuts on common rigid foam panels. If your project is a basement wall, crawl space insert, or rim joist cut-and-fit job, score-and-snap is often the most practical way to go.
Saws shine when the foam is thicker, the cuts are repetitive, or the shapes are more complex. They can save time, but they also demand better dust control and a little more setup discipline. In other words, the knife is often better for one careful homeowner on a Saturday, while the saw starts looking great when speed and volume matter.
Real-World Lessons and Experience From Cutting Rigid Foam Insulation
In real projects, cutting rigid foam insulation usually teaches the same lesson over and over: the cutting itself is only half the job. The other half is getting a piece that fits well enough to perform like insulation instead of acting like an expensive placeholder. Homeowners often start out focused on speed, but after the first few boards, most shift toward accuracy. That is a smart move. A perfectly fast cut that leaves a half-inch gap is still a bad cut.
One of the most common experiences people report is underestimating how much easier the job becomes with a new blade. The difference is dramatic. With a fresh utility blade, the knife tracks better, the edge stays cleaner, and the board snaps more predictably. With an old blade, every pass feels like you are trying to butter toast with a house key. The result is fuzzier edges, more effort, and a greater chance of slipping off the line.
Another practical lesson comes from working in older homes. Framing is rarely perfect. Basement walls may bow slightly, rim joists may vary from bay to bay, and corners often seem to have been invented by people who had only heard rumors about right angles. In those situations, the best approach is to measure each opening individually instead of assuming every piece can be cut to the same size. Yes, it takes longer. No, the house does not care about your optimism.
People also learn quickly that rigid foam rewards dry-fitting. Trying the piece in place before sealing anything helps catch small errors while they are still easy to fix. A board that seems accurate on the floor can behave very differently once it meets a slightly twisted stud or a hidden fastener head. Minor trimming is normal. In fact, it is often the difference between a project that looks slapped together and one that looks professional.
Cleanup is another part of the experience that deserves honesty. If you use power tools, especially in a garage or driveway, little foam particles can travel farther than expected. Static cling turns cleanup into a comedy routine. Many DIYers end up preferring the slower score-and-snap method simply because it keeps the mess under control. That is not laziness. That is wisdom earned one stubborn foam crumb at a time.
Finally, the biggest real-world insight is that rigid foam works best when cutting and sealing are treated as a team. A neat board plus sealed edges gives you better thermal performance, fewer air leaks, and a more durable assembly. That is why experienced builders do not stop once the board is cut. They test the fit, correct the edges, seal the gaps, and move on only when the piece actually belongs there. In insulation work, neatness is not cosmetic. It is performance.
Conclusion
Learning how to cut rigid foam insulation is not complicated, but doing it well makes a real difference. The right method gives you cleaner cuts, tighter fits, less waste, and better overall insulation performance. For many straight cuts, a sharp utility knife and straightedge are all you need. For thicker boards or specialty shapes, a saw may be the smarter choice. Either way, careful measuring, patient cutting, and proper sealing are what turn foam board from a basic material into a solid part of a high-performing building envelope.
So yes, you can absolutely cut rigid foam insulation yourself. Just bring a fresh blade, a little patience, and a healthy suspicion of any project that claims to be “quick and easy.” That phrase has led many good people directly into an afternoon of recutting panels.




