Table of Contents >> Show >> Hide
- Why Clay Ghost Candle Holders Are Perfect for Halloween Decor
- Choosing the Right Clay and Candles
- Tools and Materials You’ll Need
- Step-by-Step: How to Craft Charming Clay Ghost Candle Holders
- Decorating Ideas and Cute Variations
- How to Style Your Clay Ghost Candle Holders at Home
- Safety Tips and Common Mistakes to Avoid
- Troubleshooting: If Your Ghost Looks More “Blob” Than “Boo”
- Real-Life Crafting Experiences & Extra Tips
- Conclusion
If your idea of Halloween decor is more “cozy spooky” than “blood-curdling horror,” clay ghost candle holders are about to be your new favorite project. These little spirits are cute, customizable, and surprisingly easy to makeeven if your last art class involved a box of crayons and a lot of chaos.
With a bit of air-dry or oven-bake clay, a few basic tools, and some tea lights, you can create a sweet ghostly crew to glow on your mantel, dining table, or entryway shelf. Think Anthropologie-style Halloween decor, but at a fraction of the price and with way more personality.
In this guide, we’ll walk through step-by-step instructions for crafting clay ghost candle holders, share smart styling ideas, and sprinkle in practical tips from real-life Halloween crafters so your little ghosts look adorableand stay safewhen the candles are lit.
Why Clay Ghost Candle Holders Are Perfect for Halloween Decor
Before we dive into the “how,” let’s talk about the “why.” Clay ghost candle holders check all the boxes for modern Halloween decorating:
- Spooky but not scary: These ghosts are more “friendly boo” than “nightmare fuel,” which makes them perfect for homes with kids, pets, or jumpy adults.
- Highly customizable: You can make tall ghosts, tiny ghosts, floral-patterned ghosts, minimalist ghostswhatever matches your aesthetic.
- Budget-friendly: A block of air-dry clay plus a pack of tea lights usually costs less than one fancy store-bought decor piece.
- Beginner-friendly craft: You don’t need pottery tools or a kiln. Many tutorials use simple tools like cups, foil balls, toothpicks, and cookie cutters.
- Reusable every year: Once properly dried, baked (if needed), and sealed, your ghosts can come back to haunt your house every October.
Choosing the Right Clay and Candles
There are several ways to make clay ghost candle holders, and the best option depends on your time, tools, and whether you’ll use real flames or LED lights.
Air-Dry Clay vs. Oven-Bake Clay vs. Polymer Clay
Air-dry clay is the most popular choice for DIY ghost tealight holders. It’s easy to find at craft stores, doesn’t require baking, and dries to a nice matte finish that’s perfect for ghosts. Many crafters simply roll out the clay, drape it over a foil or ball-shaped armature, and let gravity create natural folds that look like flowing fabric.
Oven-bake clay or ceramic clay is another option if you’re comfortable baking pieces or working with a kiln. These clays can be more durable and feel a bit more “finished” and ceramic-like, but they require more steps and careful baking times.
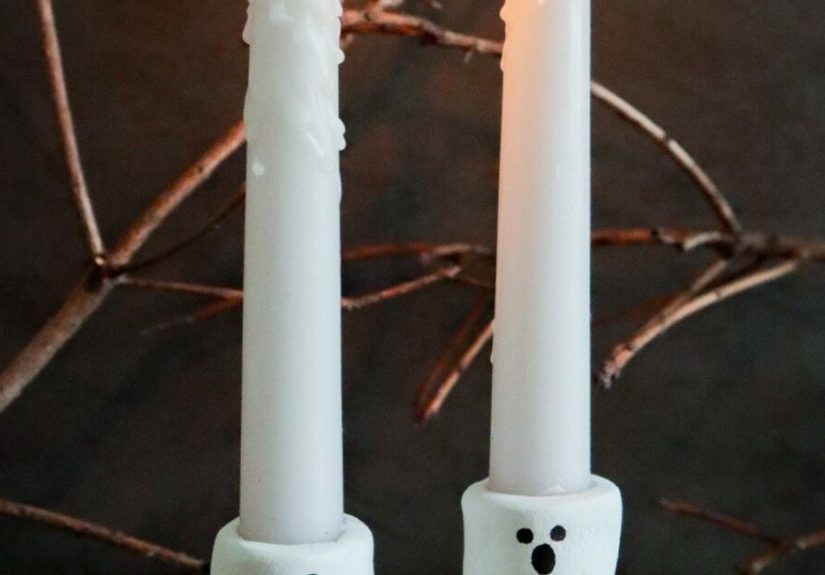
Polymer clay works well for smaller ghosts or taper candle holders. You shape the ghost around a foil form or base, bake it in your home oven, then add paint or sealant. This is ideal for tiny ghosts that sit around a candle rather than covering one.
Real Candles vs. LED Tea Lights
Clay ghost candle holders look magical with a flickering glow inside, but safety always comes first.
- LED tea lights or LED tapers: Safest option for air-dry clay and for households with kids or pets. No heat, no open flame, just cozy vibes.
- Real tea lights: If you use real flames, make sure the candle sits in a well-ventilated opening and doesn’t touch any clay above it. Also, never leave candles unattended.
- Glow-in-the-dark or fairy lights: You can skip flame completely and use glow-in-the-dark paint or tiny string lights to illuminate your ghosts from behind or underneath.
For most home crafters, LED tea lights are the easiest, safest, and most flexible choice. They also let your ghosts glow all evening without worry.
Tools and Materials You’ll Need
Here’s a simple shopping list to make your first clay ghost candle holder:
- White air-dry clay or oven-bake clay
- Small jars, cups, or foil balls (for forming the ghost’s shape)
- Rolling pin or a smooth glass bottle
- Craft knife, toothpick, or wooden skewer (for cutting and drawing details)
- Straw or round tool (to punch out eyes and mouth)
- LED tea lights or small candles
- Fine-grit sandpaper (optional, for smoothing edges after drying)
- Acrylic paint or paint markers (for faces and decorative details)
- Mod Podge or clear acrylic sealer (for protection and a finished look)
- Wax paper, parchment paper, or a silicone mat (to keep clay from sticking)
Once you’ve gathered everything, clear a workspace and maybe light a pumpkin-scented candle. You’re about to make something adorable.
Step-by-Step: How to Craft Charming Clay Ghost Candle Holders
Step 1: Prep Your Clay and Workspace
Lay down parchment paper or a silicone mat to protect your table. Cut off a chunk of clay and knead it thoroughly until it feels soft and workable. If the clay is crumbly, you can lightly dampen your fingers with water (for air-dry clay) and work the moisture in until it smooths out.
Roll the clay into a ball and then flatten it with a rolling pin or bottle until it’s about 1/4 inch thick. Aim for an organic, wavy circle or ovalghosts don’t need perfect geometry; the irregular edges actually make them cuter.
Step 2: Create a Simple Ghost Armature
To get that classic draped-sheet ghost shape, you’ll want a little “body” to drape the clay over. You can use:
- A small inverted cup or jar with a round top
- A ball of aluminum foil sitting on top of a cup or glass
- A ping-pong ball taped onto a small jar
Cover your armature with plastic wrap or a bit of parchment so the clay doesn’t stick. This makes it easier to slide the ghost off once it’s dry enough to hold its shape.
Step 3: Drape and Shape the Ghost Body
Carefully lift your flattened clay and center it over the top of the armature. Let it drape down naturally. Gravity will create soft folds that already look like a floating ghost. Gently pinch and nudge the clay to accentuate those folds, making sure the bottom flares out enough to sit securely on a flat surface.
If you’re making a ghost that covers a tea light, check that there’s enough open space under the ghost to slide a candle in later. You can slightly widen the base or peel the clay back with your fingers to create more room.
Step 4: Cut Out the Ghost Face and Candle Openings
Time to give your ghost some personality. Use a straw or the end of a paintbrush to punch out two eyes. For the mouth, you can cut a small oval or wavy “O” shape with a craft knife or toothpick. Keep the expressions variedsome ghosts can look surprised, others sleepy, and a few slightly mischievous.
If you’re making a candle holder where the flame or LED sits inside the ghost, ensure there’s a clear opening at the back or bottom for the light to shine through and for air to circulate. You can also cut small star or crescent shapes in the body so more light spills out in fun patterns.
Step 5: Drying or Baking Your Ghost
For air-dry clay, leave the ghost on its armature for several hours or overnight until it firms up enough to stand on its own. Then gently remove the armature and let it continue drying completely, usually 24–48 hours depending on thickness and humidity. Rotate it occasionally so it dries evenly and doesn’t warp.
For oven-bake or polymer clay, follow the manufacturer’s temperature and time instructions. Place your ghost on parchment paper on a baking sheet, and avoid overbaking to prevent browning or cracking.
Once the ghost is fully dry or baked and cool, lightly sand any rough edges around the bottom or facial features with fine-grit sandpaper.
Step 6: Paint, Decorate, and Seal
Now comes the fun, personality-packed part.
- Classic white ghost: Leave the clay its natural white color or give it a thin coat of white acrylic paint for an even finish.
- Patterned ghosts: Add tiny pumpkins, stars, moons, or leafy vines around the bottom edge. You can use a fine brush or paint pens for more control.
- Floral or chinoiserie style: Paint delicate blue florals or patterns all over the ghost for a high-end, Anthropologie-inspired look.
- Glow-in-the-dark: Use glow-in-the-dark paint on the eyes, mouth, or entire body for an extra eerie effect when the lights go off.
When the paint is fully dry, seal your ghost with a coat of clear acrylic sealer or Mod Podge to protect the surface and make it easier to dust off year after year.
Decorating Ideas and Cute Variations
Mini Ghost Families
Don’t stop at one. Roll out smaller circles of clay and make baby ghosts to sit next to the larger ones. You can give each ghost a different expressionone sleepy, one giggly, one totally shocked by how late you started decorating for Halloween.
Ghost Place Card Holders
Make tiny ghosts with a small opening on top or a slit in the back where you can tuck a name card. Pair these with LED tea lights and use them as place settings for a Halloween dinner or party. They’ll double as favors guests can take home.
Ghosts With Accessories
Use leftover clay to form tiny witch hats, mini pumpkins, or bats that you can attach to the ghosts before drying. Or glue on little ribbons, bows, or faux flowers after sealing. You can even give a ghost a tiny clay mug or book for a “ghost having a cozy night in” vibe.
How to Style Your Clay Ghost Candle Holders at Home
Once your ghost candle holders are ready, decide where they’ll haunt first. A few ideas:
- On the mantel: Cluster several ghosts with varying heights around framed art, faux cobwebs, and mini pumpkins.
- As a table centerpiece: Arrange ghosts around a wooden tray with faux leaves, mini gourds, and fairy lights.
- On a console or entry table: Place two or three ghosts beside a Halloween sign and a bowl of candy to greet guests.
- On a bookshelf: Tuck a tiny ghost or two between stacks of books for a subtle, playful touch.
- In kids’ rooms (with LED lights only): A glowing ghost on a shelf or dresser can be a fun seasonal “night-light.”
Keep the rest of your decor simple and let your handcrafted ghosts steal the show. Their charm comes from the handmade details, not from being drowned in clutter.
Safety Tips and Common Mistakes to Avoid
Clay ghost candle holders are simple, but there are a few things to watch out for:
- Don’t use real flames with thin air-dry clay: If the clay walls are too thin or too close to the flame, they may scorch. Use LED tea lights if there’s any doubt.
- Allow full drying time: If you paint or seal clay that’s still damp inside, it may crack later. Be patient with drying.
- Support the shape while drying: If you remove the ghost from its armature too early, it can sag. Let it firm up first.
- Keep the base flat: Gently tap the bottom edge on a level surface before drying so your ghost doesn’t wobble.
- Test fit the candle first: Before everything dries, make sure your tea lights or LED candles actually fit under or inside the ghost.
Troubleshooting: If Your Ghost Looks More “Blob” Than “Boo”
Don’t worryevery crafter has made at least one ghost that looks like it melted emotionally before it dried physically. Here’s how to fix or avoid the most common issues:
- Problem: The ghost slumps or collapses.
Fix: Use a taller, sturdier armature and make your clay slightly thicker. Let it dry longer before attempting to remove it. - Problem: Cracks appear while drying.
Fix: Smooth a little slip (clay mixed with water) into the cracks while the clay is still slightly damp, then let it dry again. Try kneading the clay more thoroughly next time. - Problem: The edges are rough or uneven.
Fix: Use fine sandpaper after drying, then go over with a fresh coat of paint to clean things up. - Problem: The candle doesn’t glow through.
Fix: Thin out the clay in a few areas or add extra openings (stars, moons, tiny dots) so more light escapes.
Real-Life Crafting Experiences & Extra Tips
One of the best things about clay ghost candle holders is how forgiving they are. Many crafters admit that their first ghost didn’t look anything like the perfect photos onlinebut once the lights dimmed and the candle glowed, all those tiny imperfections just made the ghost look more charming and handmade.
Imagine this: you start with a simple goalmake one ghost for the mantel. Two hours and a slightly dusty kitchen later, you’ve somehow created an entire ghost family, plus a cousin who looks a bit like a marshmallow that saw something shocking. That’s part of the fun. These pieces don’t need to look identical. In fact, a mix of sizes and expressions makes your display feel curated and cozy, not mass-produced.
Many people find it helpful to treat the first ghost as a “practice piece.” That’s the one where you experiment with clay thickness, learn how much pressure to use when cutting out eyes, and figure out how long your clay takes to dry. Once you’ve made that first test ghost, the second and third usually come together much fasterand with fewer mysterious fingerprints.
If you’re crafting with kids, turn the experience into a mini Halloween workshop. Assign roles: one person rolls the clay, another drapes it over the armature, and someone else is in charge of “ghost expressions.” Kids love deciding whether a ghost looks confused, sleepy, or overly dramatic. Just remind them that LED tea lights are the only option for their ghosts, and keep the actual paints and sealants as an “adults-only” step if they’re very young.
Another fun twist is to make a ghost “timeline.” Each year, set aside one October afternoon to create at least one new ghost candle holder. Label the bottom discreetly with the year and, if you want, initials of who made it. Over time, you’ll build a little collection that tells the story of your family’s Halloweenssome years might be full of tiny, chaotic kid-made ghosts, and others may lean more polished and decorative. Either way, it becomes a sentimental tradition that’s way more meaningful than buying new decor every season.
Don’t underestimate styling power, either. A simple white ghost looks completely different depending on what you pair it with. Set a few ghosts on stacked old books with black-and-white spines, and they suddenly look like they belong in a moody library. Place them on a wooden tray with velvet pumpkins and brass candlesticks, and the vibe turns into chic, vintage Halloween. Add pastel pumpkins and gold accents, and your ghosts become soft and whimsical instead of spooky.
If you live in a small space, clay ghost candle holders are ideal because they don’t require much storage room. Wrap them individually in tissue or bubble wrap, tuck them into a shoebox or a small plastic bin, and store them with your other seasonal decor. When next year rolls around, you’ll forget just how cute they wereuntil you open the box and realize you already own the perfect Halloween centerpiece.
Finally, remember that “handmade” doesn’t mean “flawless,” and that’s a feature, not a bug. A slightly lopsided ghost can feel more expressive than a perfectly symmetrical one. A tiny smudge of paint near the mouth might make it look like the ghost is mid-gasp. If you’re crafting these as gifts, that homemade charm is exactly what people lovethey’re not getting something stamped out by a machine; they’re getting a tiny, glowing character made by you.
So go ahead: roll out the clay, put on a Halloween playlist, and build your own ghostly little neighborhood. By the time October rolls around, your mantel or dining table will look like a cozy, candlelit haunted villageand you’ll know every single ghost by personality.
Conclusion
Clay ghost candle holders are the perfect mix of spooky, sweet, and simple. With a bit of clay, a few basic tools, and some imagination, you can create Halloween decor that feels personal, stylish, and reusable year after year. Whether you make one elegant floral ghost or a full squadron of goofy little spirits, you’ll end up with decorations that make your home feel warm, welcoming, and just haunted enough.
SEO Summary & Metadata
sapo: Clay ghost candle holders are the perfect blend of cute and spooky, turning simple clay and tea lights into glowing little spirits for your mantel, table, or entryway. This in-depth guide walks you through everything from choosing the right clay and shaping your ghosts to painting, sealing, and styling them like high-end Halloween decor. Whether you’re crafting solo, with kids, or for a party, you’ll discover step-by-step instructions, creative variations, and real-life tips to help your handmade ghosts shine all season long.




