Table of Contents >> Show >> Hide
- Before You Start: What “Porcelain” Really Means
- Supplies You’ll Want (No Need to Buy a Whole Aisle)
- 10 Steps to Clean and Shine a Porcelain Sink
- Step 1: Clear the deck and do a quick rinse
- Step 2: Wash with dish soap first (yes, even if you’re mad at the stains)
- Step 3: Dry the sinkon purpose
- Step 4: Sprinkle baking soda like you’re seasoning a very boring casserole
- Step 5: Add hydrogen peroxide for brightening (the “bubble show” step)
- Step 6: Gently scrub in sections
- Step 7: Treat stubborn stains with a “poultice” (targeted soak)
- Step 8: Handle mineral buildup (hard water) the right way
- Step 9: Rinse like you mean it, then dry for shine
- Step 10: Optional finishing touches (shine + protection)
- Special Problems (And What To Do About Them)
- What Not to Do (Unless You Want a Sink With “Character”)
- Maintenance: The “Stay Shiny Without Losing Your Weekend” Plan
- FAQ
- Real-World Experiences: What People Usually Run Into (And How They Fix It)
- Conclusion
A porcelain sink is basically the “white sneakers” of your kitchen or bathroom: classic, bright, and somehow
magnetically attracted to stains the second you turn your back. The good news? Porcelain is tough. The better
news? You don’t need a chemistry degree (or a flamethrower) to make it look glossy again.
The secret is gentle cleaning done consistently, plus the right tricks for the “How did that happen?” marks:
gray scuffs, hard-water rings, rust freckles, and that mysterious shadow that appears only when company comes over.
Follow these 10 steps for a clean-and-shine routine that protects the glaze instead of grinding it into a sad matte finish.
Before You Start: What “Porcelain” Really Means
Many sinks people call “porcelain” are actually one of these:
- Vitreous china (porcelain-like ceramic with a glossy glaze, common in bathrooms)
- Porcelain-coated cast iron (heavy, durable, often in kitchens)
- Fireclay (another glazed ceramic, often farmhouse sinks)
The care approach is the same: protect the glossy glaze. That glaze is what makes the sink look bright and smoothand
what gets dulled by overly aggressive scrubbing.
Supplies You’ll Want (No Need to Buy a Whole Aisle)
- Dish soap (mild)
- Soft sponge or non-scratch scrub pad
- Microfiber cloths (at least two)
- Baking soda
- Hydrogen peroxide (3%) or oxygen-based bleach powder (optional but helpful)
- White vinegar (optional for mineral buildupuse smartly)
- An old toothbrush or soft detail brush
- Rubber gloves (recommended)
- Paper towels or a clean rag (for “poultice” stain treatments)
10 Steps to Clean and Shine a Porcelain Sink
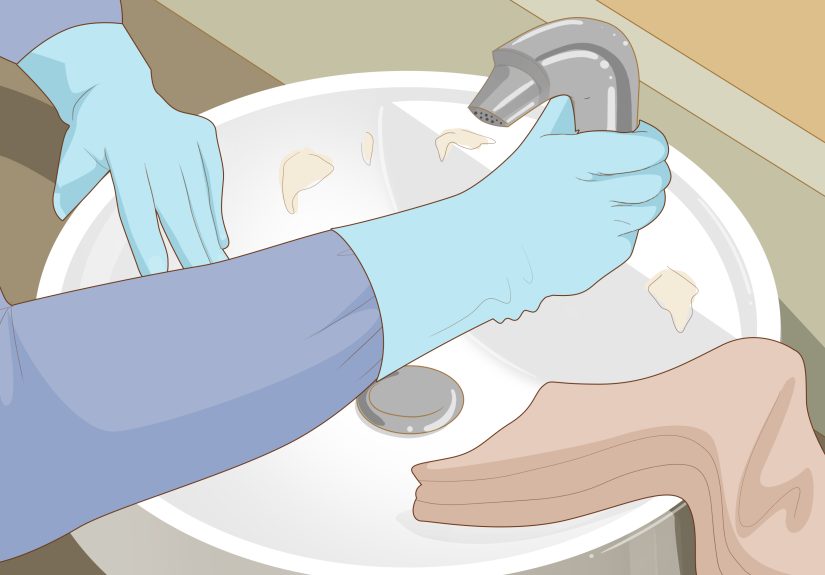
Step 1: Clear the deck and do a quick rinse
Remove dishes, mats, strainersanything that blocks the surface. Rinse with warm water to wash away loose grit.
(Grit is basically sandpaper’s adorable cousin. Don’t give it a starring role.)
Step 2: Wash with dish soap first (yes, even if you’re mad at the stains)
Add a few drops of dish soap to a wet sponge and wash the entire sink. This removes oils, toothpaste film, and everyday
grime that can “shield” stains from treatment. Rinse well.
Step 3: Dry the sinkon purpose
It feels backwards, but drying matters. Many cleaners work better when they’re not instantly diluted. Use a microfiber
cloth to dry the basin and around the drain and overflow.
Step 4: Sprinkle baking soda like you’re seasoning a very boring casserole
Coat the sink with a thin, even layer of baking soda. Baking soda is mildly abrasive, which is exactly what you want:
enough scrubbing power to lift grime without scratching the glaze when used with a soft sponge.
Step 5: Add hydrogen peroxide for brightening (the “bubble show” step)
Drizzle or spray 3% hydrogen peroxide over the baking soda until it forms a damp paste. Let it sit for 5–10 minutes.
This combo helps break down stains and brighten whites without the harshness of heavy scouring.
Shortcut option: If you prefer, you can use an oxygen-based bleach powder mixed with a little water to
make a paste. It’s great for organic stains like coffee or tea.
Step 6: Gently scrub in sections
Using a soft sponge or non-scratch pad, scrub in small circles. Work from the rim down into the basin. Pay extra
attention to corners and around the drain, where buildup loves to settle like it pays rent.
Pro move: For the faucet base and tight seams, use a toothbrush with a dab of the paste. Gentle is the theme.
Step 7: Treat stubborn stains with a “poultice” (targeted soak)
For stains that laugh at your first scrub, go targeted:
- Make a thicker paste of baking soda + hydrogen peroxide.
- Spread it directly on the stain.
- Cover with a damp paper towel or rag to keep it from drying out.
- Wait 15–30 minutes, then gently scrub and rinse.
This works especially well for yellowing, coffee/tea marks, makeup stains, and “I swear it wasn’t me” discoloration.
Step 8: Handle mineral buildup (hard water) the right way
Hard-water deposits often look like chalky white crust or dull rings. An acid helps dissolve minerals, but you don’t need
to marinate the sink.
- Soak a cloth in white vinegar (or a citric-acid-based cleaner).
- Lay it over the mineral spots for 5–10 minutes.
- Remove, then scrub lightly with a soft sponge.
- Rinse thoroughly.
Important: Don’t use vinegar as your “everything cleaner,” and don’t leave acidic products sitting forever.
Short contact time + thorough rinsing keeps the glaze happier.
Step 9: Rinse like you mean it, then dry for shine
Rinse the sink thoroughly with warm water to remove all residue (especially powders). Residue left behind can dull the
finish over time. Dry immediately with a clean microfiber cloth to prevent water spots and boost shine.
If you want that “showroom sparkle,” buff with a second dry microfiber clothlike you’re polishing a trophy you definitely earned.
Step 10: Optional finishing touches (shine + protection)
Pick one of these depending on where the sink lives:
-
Bathroom sink: A tiny drop of mild dish soap in warm water, followed by a dry buff, keeps the surface glossy.
If you use a specialized porcelain-safe polish, follow the label directions and rinse well. -
Kitchen sink: Stick to cleaning + drying. Avoid adding any coating that could transfer to dishes or food-prep items.
The safest “shine product” in a kitchen is… a microfiber cloth and the habit of drying the sink.
Special Problems (And What To Do About Them)
Gray scuff marks from pots, shoes, or mystery objects
Many scuffs are metal transfer, not actual damage. Try baking soda paste first. If needed, use a porcelain-safe cleaner
designed for sinks, then rinse thoroughly. Skip aggressive scrub padsscuffs are annoying, but a dulled glaze is forever.
Rust stains (orange or brown spots)
Rust often comes from metal cans, shaving cream cans, or items left to drip-dry. Use a gentle rust-removing cleaner that’s
labeled safe for porcelain, or try an oxalic-acid-based cleanser used lightly. Work in short sessions, rinse completely, and avoid mixing with other chemicals.
Chips or cracks in the glaze
If your sink has chips, stains may cling to rough edges. Clean gently and consider a porcelain repair kit for chips.
(No cleaner can “scrub” a chip back into existence, sadly.)
Dullness that won’t go away
Persistent dullness usually means residue buildup, micro-scratches from harsh scrubbing, or hard-water film. Your best fix is:
(1) a thorough rinse, (2) a gentle brightening paste, and (3) consistent drying after use. If the glaze is worn, a professional refinishing may be the real solution.
What Not to Do (Unless You Want a Sink With “Character”)
- Don’t use steel wool or heavy-duty scouring pads on glossy porcelain.
- Don’t mix chemicalsespecially bleach with ammonia or acids like vinegar.
- Don’t let strong cleaners sit for long periods. Short contact times are safer.
- Don’t ignore the rinse. Cleaner residue is a common cause of haze.
- Don’t store harsh chemicals under the sink in a way that could leak or create fumesporcelain is tough, cabinets are not.
Maintenance: The “Stay Shiny Without Losing Your Weekend” Plan
- Daily (30 seconds): Rinse and quick-dry with a microfiber cloth.
- Weekly (5 minutes): Dish soap wash + baking soda scrub + rinse and dry.
- Monthly: Brightening paste treatment, detail around seams/drain, check for chips or stains forming.
Bonus protection: use a sink grid or mat in kitchen sinks to reduce metal scratches from heavy cookware. And pleasedo not
leave a cast-iron pan to “rest” in your porcelain sink. Cast iron rests by leaving rust stains. That’s its love language.
FAQ
Can I sanitize a porcelain sink?
Yes, but cleaning and disinfecting are different. Clean first (remove grime), then disinfect using a product labeled for
hard, nonporous surfaces. If using diluted bleach, follow the label directions exactly, ventilate the space, and rinse thoroughly.
Never combine bleach with other cleaners.
Is baking soda safe for porcelain?
Generally, yeswhen used with a soft sponge and light pressure. It’s a mild abrasive, which is why it works. The key is
“mild” and “soft,” not “death-grip scrubbing while reenacting an action movie.”
What if my sink is antique or has decorative details?
Treat it like a vintage car: gentle products, soft cloths, and spot testing in an inconspicuous area. If the glaze is already worn,
aggressive cleaning can make it worse.
Real-World Experiences: What People Usually Run Into (And How They Fix It)
Let’s talk about the part no one puts in the glossy “perfect home” photos: sinks are where life happens. They’re the backstage area
of your day, and they collect evidence. Here are common porcelain-sink situations people run intoplus practical ways they get back to
“sparkly enough to brag about.”
1) The Coffee Ring That Became a Lifestyle
Someone rinses a mug “later,” and later turns into tomorrow. The result is a tan ring that looks like it’s applying for permanent residency.
In most homes, a quick dish-soap wash won’t touch it because the stain is partly organic (coffee oils) and partly mineral (if you have hard water).
The fix is usually a brightening paste: baking soda + hydrogen peroxide, left for 10–20 minutes, then gently scrubbed and rinsed. The “aha” moment is
realizing you don’t need to scrub harderyou need to let time do the work.
2) The Gray Marks That Look Like Scratches (But Aren’t)
A pot gets slid across the sink, a belt buckle taps the edge, or a metal utensil gets dropped, and suddenly there’s a gray streak. Many people assume
the porcelain is ruined, but often it’s just metal transfer. They try to “fix it” with something super abrasive and end up dulling the glaze. A gentler
approach usually wins: baking soda paste, soft sponge, circular motion, rinse, dry. If a stronger cleanser is used, it’s applied lightly and rinsed completely.
The experience here is humbling: the sink wasn’t scratchedour panic was.
3) Hard Water Spots That Keep Coming Back Like a Sequel
If your water is mineral-heavy, you can clean the sink perfectly and still see spots after it dries. People often blame the cleaner, but it’s the water
evaporating and leaving minerals behind. That’s why drying makes such a difference. In real bathrooms, the easiest “upgrade” is keeping a microfiber cloth
nearby and doing a quick wipe after brushing teeth or washing hands. It sounds too simple, which is exactly why it works. For buildup that’s already crusty,
a short vinegar-soaked cloth treatment (just a few minutes) followed by a rinse and dry is typically the turning point.
4) The Rust Surprise From “Just a Can for a Minute”
A shaving cream can, a steel-bottom cleaner bottle, or even a metal drain strainer sits wet and leaves an orange ring. People try bleach first because it feels
like the “serious” option, but rust often responds better to targeted rust removal that’s safe for porcelainor a careful, light application of an oxalic-acid-based
cleanser. The key experience: once rust is gone, changing the habit prevents it. Dry metal items. Don’t store wet cans on the sink edge. Use a plastic tray if you must.
Rust stains aren’t a moral failing; they’re a predictable outcome of water + metal + time.
5) The “I Cleaned It… Why Does It Look Worse?” Moment
This usually happens when residue is left behind. Powder cleaners (even mild ones) can leave a film if not rinsed thoroughly, and that film looks like dullness.
The fix is often a deep rinse with warm water, a wipe-down, then a complete dry and buff. People are genuinely surprised how much shine comes from the last step
not from buying a new product. It’s also where many realize that harsh scrubbing isn’t “extra clean”; it can be “extra damage.”
If you take one lesson from these everyday sink stories, make it this: porcelain likes a gentle routine more than a dramatic rescue mission. A few minutes each week
beats an hour of scrubbing once things have hardened, stained, and developed emotional attachment to your sink.
Conclusion
A shiny porcelain sink isn’t about finding a magical cleanerit’s about using the right level of “gentle persuasion.” Start with soap and water, graduate to
baking soda for lift, use hydrogen peroxide for brightening, treat stains in targeted ways, and always rinse and dry like it’s the final boss level.
Do that, and your sink will stay glossy, bright, and far less likely to embarrass you when someone asks, “Can I wash my hands?”




