Table of Contents >> Show >> Hide
- Quick refresher: What “audio output” means on Windows
- Method 1: Switch audio output from the taskbar (the fast way)
- Method 2: Change audio output in Settings (the “set it and forget it” way)
- Common situations (and what to do in 10 seconds)
- Power tips (optional, but you’ll feel like a wizard)
- Troubleshooting checklist (when switching doesn’t fix it)
- Conclusion
- Real-world experiences and scenarios (about )
Windows is amazing at many things: multitasking, gaming, pretending you meant to open 37 browser tabs. But when it comes to audio output,
it occasionally acts like that one friend who “helpfully” changes the music… to the TV in the next room.
If your sound is coming from the wrong speakers (or nowhere at all), you usually don’t need a reboot, a driver ritual,
or an interpretive dance for the Sound Control Panel.
In this guide, you’ll learn two simple ways to switch your audio output on Windows (Windows 11 and Windows 10),
plus a few power-user tips (like per-app audio routing and quick keyboard shortcuts) to make your future self proud.
Quick refresher: What “audio output” means on Windows
Your audio output device is where Windows sends soundyour laptop speakers, Bluetooth headphones, a USB headset,
an HDMI monitor, a dock, or that fancy audio interface you bought because a YouTuber said “warmth.”
Windows usually picks a default output automatically, but it can change when you connect/disconnect devices.
The goal is simple: choose the device you actually wantright nowand (optionally) set it as the default so Windows stops guessing.
Method 1: Switch audio output from the taskbar (the fast way)
This is the quickest option because it lives where you already are: the system tray/taskbar.
Think of it as the “I’m in a meeting and everyone can hear my laptop speakers” emergency exit.
Windows 11 (Quick Settings)
-
Click the speaker/volume area in the bottom-right corner of the taskbar
(near the Wi-Fi and battery icons). -
In Quick Settings, find the volume slider. Click the small arrow ( > ) next to it
(or the sound output selector). -
Select the device you want (for example: Headphones, Speakers, Monitor (HDMI)).
Windows switches output immediately.
Keyboard shortcut bonus (Windows 11): Press Win + Ctrl + V to open the sound output page in Quick Settings,
which also includes options like spatial sound and the volume mixer. It’s a great “hands stay on keyboard” move.
Windows 10 (volume flyout)
- Click the speaker icon in the bottom-right of the taskbar.
-
Look for the current output device name near the top of the volume popup
(for example: Speakers (Realtek Audio)). - Click the device name (or the small dropdown arrow) to view available outputs.
- Select the device you want.
Why this works so well: it’s designed for quick switchingespecially when you bounce between
Bluetooth earbuds, USB headsets, and HDMI monitors.
Method 2: Change audio output in Settings (the “set it and forget it” way)
If you want a more detailed view (and more control), use Windows Settings.
This is the best option when you want to pick a device, set defaults, adjust properties,
or route audio per app.
Windows 11 (Settings > System > Sound)
- Press Win + I to open Settings.
- Go to System > Sound.
-
Under Output, click the device you want to use for playback.
In many cases, selecting it sets it as the default output device right away. -
Optional: If you see a “Set as default” option (including a communications default),
choose what fits your workflowespecially if you want calls to prefer your headset.
Windows 10 (Settings > System > Sound)
- Press Win + I to open Settings.
- Go to System > Sound.
-
In the Output section, use the dropdown to pick your output device.
This sets your default playback device for most apps.
Per-app audio output (when one app refuses to behave)
Sometimes you want your game on speakers, but your voice chat in a headset. Or you want music in headphones,
while a screen recording tool listens to the monitor audio. Windows can do thatdepending on your version and updates
through the Volume mixer and app audio device preferences.
-
In Windows 11, open Settings > System > Sound >
Volume mixer (or use Win + Ctrl + V to jump into the quick sound output panel). -
Under the app list, pick an app and choose a specific Output device if available.
(Not every app supports every routing scenario, but it’s surprisingly useful when it does.)
Pro tip: If you change an app’s output mid-stream and it doesn’t switch, close and reopen the app.
Some apps “lock in” the audio device when they start.
Common situations (and what to do in 10 seconds)
1) “My monitor is stealing my audio” (HDMI/DisplayPort)
This is one of the most common “Where did my sound go?” moments. Windows sees an HDMI/DP display and thinks,
“Ah yes, clearly this person wants audio through the monitor.” Sometimes that’s correctoften it’s chaos.
- Use Method 1 to switch output back to your speakers/headset immediately.
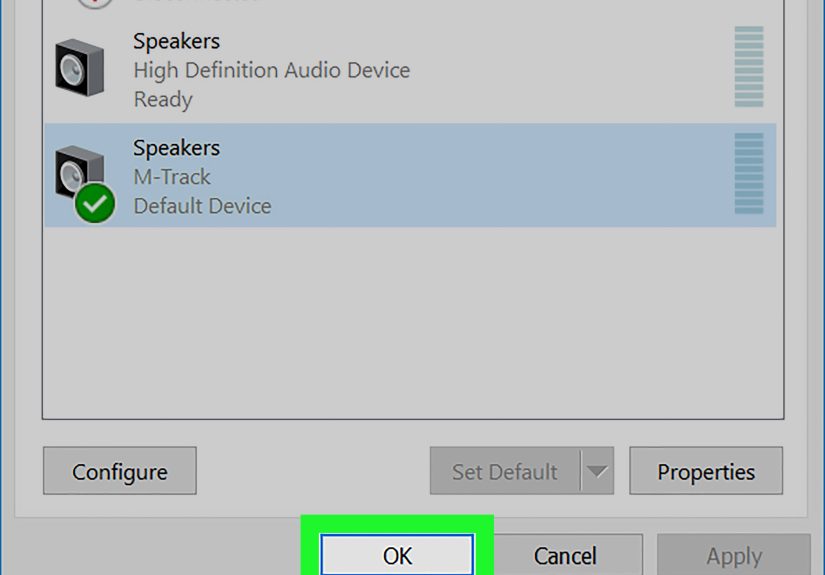
- Then use Method 2 to set your preferred device as default so it stops happening.
2) “My Bluetooth earbuds connect, but Windows won’t play through them”
-
Switch output via the taskbar and select the earbuds/headphones profile.
(Bluetooth can expose multiple profiles; pick the one meant for audio playback.) -
If the device shows up but stays silent, open Settings > Sound,
select the device, and confirm it’s allowed/enabled.
3) “The device I want isn’t listed”
Before assuming the device is cursed, check the basics:
- Make sure it’s actually connected (USB seated, Bluetooth paired, dock awake, monitor on).
-
In Settings > System > Sound, look for device lists and
any “Don’t allow”/disabled device toggles. - If it’s an HDMI audio device, confirm the display audio driver is present and the HDMI output is selected as a playback device when needed.
4) “Calls should use my headset, but everything else should use speakers”
If you live in Teams/Zoom/Meet, this matters. Use Settings > Sound to set defaults, andwhen available
set a communications default device for calls. It reduces the “why is my meeting blasting through speakers?” surprise.
Power tips (optional, but you’ll feel like a wizard)
Use Win + A (Windows 11) like a speed runner
Instead of hunting for tiny icons, press Win + A to open Quick Settings,
then switch your sound output. Fewer clicks, fewer mistakes, fewer “can you hear me now?” moments.
Use Game Bar to switch audio during games (Windows 11/10)
If you’re gaming and don’t want to alt-tab into Settings, Win + G opens Xbox Game Bar,
where the audio widget can show output options. It’s handy when you’re swapping between a headset and speakers mid-session.
Clean up your output list
If your output list looks like a tech museum (virtual cables, old monitors, duplicate endpoints),
disable devices you never use. A shorter list means you’re less likely to pick “NVIDIA High Definition Audio”
by accident and wonder why your desk speakers went silent.
Troubleshooting checklist (when switching doesn’t fix it)
If you selected the correct output device and still have no sound, try these quick checks:
- Volume & mute: Make sure Windows isn’t muted and the app volume isn’t at zero.
- App-specific routing: Check Volume mixeryour app may be routed to a different output.
- Exclusive mode: Some apps can take exclusive control of an audio device, causing conflicts.
- Run the audio troubleshooter: Windows has built-in audio troubleshooting that can catch obvious issues.
- Drivers: If HDMI/USB audio disappears, audio/display drivers may need a refresh.
Conclusion
Changing your audio output on Windows doesn’t need to be a scavenger hunt.
If you want speed, use the taskbar/Quick Settings switcher (Method 1).
If you want control and long-term sanity, set your preferred device in Settings > Sound (Method 2).
Once you get used to these two paths, you’ll spend less time wrestling Windows audioand more time actually hearing things.
Revolutionary, I know.
Real-world experiences and scenarios (about )
In everyday use, switching audio output is less about “learning Windows” and more about surviving modern life:
hybrid work, wireless everything, and the fact that your monitor may or may not be a speaker depending on its mood.
Here are a few real-world scenarios that show why knowing these two simple methods is a genuine productivity upgrade.
The meeting handoff: You join a Teams or Zoom call on a USB headset, then your ears start begging for mercy.
You set the headset down and want the audio on speakersfastwithout announcing to everyone, “Hold on, I’m changing settings.”
In that moment, Method 1 is the hero: pop open the taskbar sound output menu, switch to speakers, and you’re back in business.
The best part is that you can do it quietly, quickly, and without digging through Settings while someone asks,
“Can you see my screen?” for the third time.
The HDMI surprise: You plug in an external monitor for a presentation. Suddenly, your audio vanishes.
It didn’t vanishWindows just rerouted it to the monitor’s HDMI audio device. Sometimes the monitor has speakers.
Often it doesn’t. So you’re basically sending your audio to a silent rectangle. Again, Method 1 fixes it instantly:
switch output back to laptop speakers or your Bluetooth headphones. If you’re presenting regularly, Method 2 helps you go one step further:
set your normal speakers as default so Windows is less likely to “helpfully” flip the output every time you dock.
Gaming + voice chat: A common setup is: game audio on speakers (so the room can hear),
but Discord/party chat in a headset (so your teammates don’t hear your keyboard auditioning for a tap-dance show).
That’s where per-app settings in Volume mixer can shine. You keep your main output on speakers,
then route just the chat app to your headsetno third-party tools required for many setups.
And if something goes sideways mid-match, you can still use Method 1 to reset the main output quickly.
Bluetooth juggling: Wireless earbuds are convenient until they aren’t.
You walk away from your desk, audio follows you (great), then you come back and want sound back on your PC speakers (also great).
The annoying part is when the earbuds reconnect automatically and Windows decides they’re the main character.
Knowing exactly where the output selector lives means you’re not stuck toggling Bluetooth off and on like it’s 2009.
The shared lesson across all these scenarios is simple: audio switching is not an “edge case.”
It’s a daily workflow tool. Once you’re fluent in these two methodstaskbar for speed, Settings for control
Windows audio stops being a mystery and starts being a button you press on purpose.




