Table of Contents >> Show >> Hide
- What a Rain Barrel Actually Does
- Before You Install One, Check These Basics
- Tools and Materials You May Need
- How To Add A Rain Barrel Step by Step
- How To Use the Water
- Common Rain Barrel Mistakes to Avoid
- Maintenance Tips for a Long-Lasting Setup
- Should You Add More Than One Barrel?
- Final Thoughts
- Real-World Experiences With Adding a Rain Barrel
- SEO Tags
If your garden gets thirsty every July and your water bill responds with a tiny villain laugh, a rain barrel may be the backyard sidekick you need. It is one of those rare home projects that is practical, budget-friendly, and oddly satisfying. You cut a downspout, set a barrel in place, and suddenly rain that used to rush away is now stored for flower beds, shrubs, and container plants. That is not magic, but it is very close to homeowner wizardry.
Adding a rain barrel is also easier than many people expect. You do not need to become a stormwater engineer, buy a truckload of mysterious fittings, or spend an entire weekend muttering at your gutters. With the right location, a stable base, a properly connected downspout, and a safe overflow plan, you can install a rain barrel in an afternoon and start collecting water with the next decent rain.
In this guide, you will learn how to add a rain barrel step by step, how to avoid common mistakes, where to place it, what tools you may need, and how to keep the setup working season after season. We will also cover maintenance, mosquito prevention, winter care, and the small but mighty lessons people usually learn only after the first overflow surprise.
What a Rain Barrel Actually Does
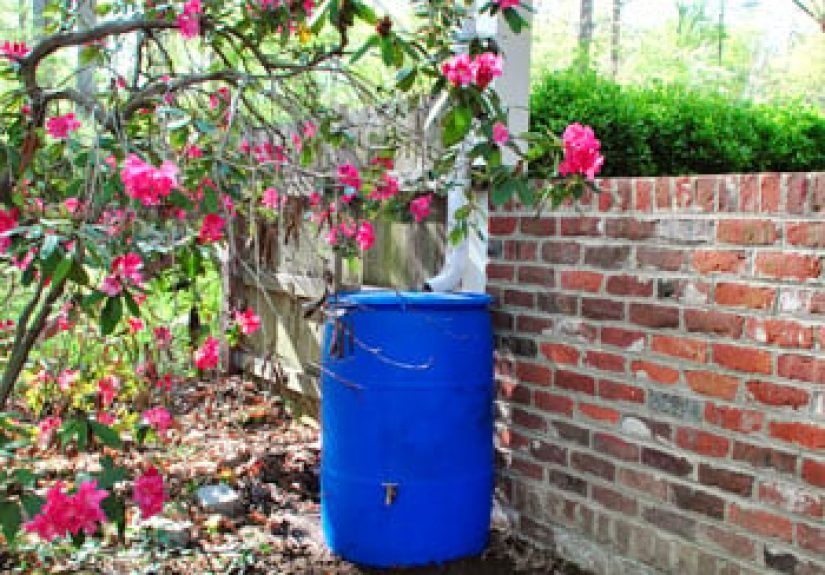
A rain barrel collects runoff from your roof, usually through a gutter downspout, and stores it for later use. Most homeowners use the water on ornamental beds, trees, foundation plantings, and potted plants. Since roof runoff can add up quickly, even a single storm can fill a barrel fast. That means a rain barrel does two useful things at once: it gives you water for the landscape and slows the rush of runoff leaving your property.
That second benefit matters more than many people realize. During heavy rain, water running off a roof can contribute to puddling, splash-back against the house, erosion near the foundation, and extra flow into storm drains. A rain barrel will not solve every drainage issue on earth, but it can reduce the speed and volume of water coming off one downspout. Think of it as a pause button for rainwater.
Before You Install One, Check These Basics
1. Make Sure Your Location Makes Sense
The best place for a rain barrel is under a downspout that already collects a good amount of roof runoff and is close to the area where you will use the water. If you have to drag a hose across three flower beds, around a grill, and through a family argument to use it, the barrel will not feel convenient for long.
Choose a spot with level ground, easy access, and a safe path for overflow. This is important because a typical barrel can fill faster than many people expect. During a strong rain, extra water has to go somewhere, and “toward the basement” is not the answer you want.
2. Check Local Rules and HOA Requirements
Rain barrel rules vary by state, city, utility district, and neighborhood association. In many places, simple residential rain barrels are allowed, but details can differ. Some communities have guidance about overflow, downspout disconnection, visible placement, or rebates. So before you buy a barrel in your favorite shade of eco-hero green, check local requirements and any HOA rules.
3. Pick the Right Barrel Size
For most homes, a 45- to 65-gallon barrel is the standard starting point. A single barrel is easy to manage and works well for small landscape watering tasks. If you have a larger garden or want more storage, you can link multiple barrels together. Just remember that roof runoff adds up quickly. One barrel is usually a starter system, not a “capture every drop from every storm” system.
4. Respect the Weight
Water is heavy. Very heavy. A full rain barrel is not a charming lightweight garden accessory. Once filled, it can weigh several hundred pounds. That means the base underneath it needs to be flat, sturdy, and stable. No wobbly tower of old pavers that looks like it was designed by a raccoon with optimism.
Tools and Materials You May Need
- Rain barrel with lid or screened top
- Spigot or hose bib
- Overflow fitting and hose
- Downspout diverter kit or room to cut the downspout
- Hacksaw or tin snips
- Drill and bits, if assembly is required
- Level
- Pavers, cinder blocks, gravel, or a manufactured stand
- Flexible downspout extension, if needed
- Teflon tape and washers for watertight fittings
- Fine mesh screen to help block debris and mosquitoes
If you buy a ready-made rain barrel, many of these parts may already be included. If you build your own or buy a basic barrel, check all fittings before installation. Discovering you are missing one tiny washer after cutting the downspout is a special kind of DIY annoyance.
How To Add A Rain Barrel Step by Step
Step 1: Choose the Downspout
Start by identifying the downspout that drains the roof section you want to harvest from. A downspout near ornamental planting beds is usually ideal. Avoid locations where overflow could pool near the foundation, sidewalks, crawlspace vents, or your neighbor’s patience.
Look up and check the gutters while you are there. If the gutter is sagging, clogged, or full of leaves that appear to have signed a long-term lease, clean and repair it first. A rain barrel is only as useful as the water flow feeding it.
Step 2: Build a Stable Base
Set the barrel on level ground and raise it enough for a watering can or hose to fit under the spigot. Many homeowners use pavers, concrete blocks, or a prefabricated stand. Gravel underneath can help with leveling and drainage. The key is stability, not artistic improvisation.
Test the base with a level from multiple directions. If the barrel sits crooked when empty, it will not become more cooperative when full. It will become more dramatic.
Step 3: Position the Barrel
Place the barrel on the base and check the height against the downspout. The opening or diverter inlet should align with where the water will enter. Make sure there is room to reach the lid, screen, and spigot. You should also be able to attach an overflow hose without creating a tripping hazard worthy of a slow-motion replay.
Step 4: Mark and Cut the Downspout
If your setup uses a simple top-fed barrel, mark the downspout so it ends a few inches above the barrel opening. If you are using a diverter kit, follow the manufacturer’s height measurements exactly. Then cut the downspout with tin snips or a hacksaw and remove the lower section.
Do a dry fit before you commit. You want water to enter cleanly without splashing all over the side of the barrel like it is trying to avoid chores. If the downspout does not line up well, use a flexible elbow or downspout extension.
Step 5: Install the Spigot and Overflow
If your barrel is not preassembled, install the spigot near the bottom and the overflow fitting near the top. Use washers, thread tape, and the recommended hardware so the fittings stay watertight. The overflow outlet is not optional. It is the grown-up part of the system that prevents the barrel from becoming a backyard geyser with poor aim.
Attach an overflow hose and direct it away from the house foundation. You can send excess water to a lawn area, mulch bed, rain garden, or another barrel in a linked system. The safest setup is one where overflow moves away from buildings and does not create standing water, erosion, or a surprise swamp beside the patio.
Step 6: Secure the Lid or Screen
Your barrel should have a sealed lid or a tight mesh screen over all openings. This keeps out leaves, twigs, curious wildlife, and mosquitoes looking for free real estate. Fine screening matters. A wide-open barrel may collect water, but it also collects trouble.
Step 7: Test the Setup
Before the next storm, run a garden hose into the gutter or directly into the barrel to test the system. Watch the spigot, overflow fitting, screen, and base. Make sure water enters where it should, drains where it should, and does not leak from places that were definitely not invited to the party.
This quick test can save you from the classic first-storm discovery: “Oh, so that is where the overflow goes.” Better to learn that on a calm afternoon than while standing in flip-flops during a thunderstorm.
How To Use the Water
Rain barrel water is best used for nonpotable outdoor purposes, especially ornamental plants and landscape beds. You can fill a watering can, attach a hose for gentle gravity flow, or connect a soaker hose if your setup has enough pressure and elevation. Some larger systems use a pump, but a basic home rain barrel usually relies on gravity.
If you plan to use harvested rainwater on food crops, check your local extension guidance and use caution. In general, rain barrel water is treated as nonpotable. It should never be assumed safe to drink unless it has been properly treated and approved for that use. For many homeowners, the simplest rule is this: use it on the garden, not in the lemonade.
Common Rain Barrel Mistakes to Avoid
No Overflow Plan
This is the most common mistake and the most annoying one. A barrel fills quickly. Without a proper overflow hose or diverter, extra water can dump right next to the house. That is like buying an umbrella with a hole in the center and calling it weather management.
Weak or Uneven Support
If the barrel tilts, settles, or shifts, stress builds on fittings and the entire setup becomes less safe. Always overbuild the base rather than underbuild it.
Ignoring Mosquito Control
Standing water attracts attention from mosquitoes. A tight screen, closed openings, and regular water use make a big difference. In some setups, homeowners also use mosquito control products labeled for rain barrels. Read and follow label instructions carefully.
Putting It Too Far from Where You Need Water
The farther the barrel is from your plants, the less likely you are to use it. Convenience beats good intentions almost every time.
Forgetting Seasonal Maintenance
In freezing climates, leaving a full aboveground barrel connected all winter can lead to cracks, damaged fittings, and a springtime lesson in regret. Drain it, disconnect it, and winterize it before hard freezes arrive.
Maintenance Tips for a Long-Lasting Setup
- Clean leaves and debris from gutters regularly.
- Check the screen for tears or gaps.
- Inspect the spigot and overflow for leaks.
- Use the water often so it does not sit too long.
- Rinse sediment from the bottom of the barrel as needed.
- Drain and disconnect the system before hard freezes if you live in a cold climate.
Routine maintenance is not glamorous, but it keeps the system easy to use. And easy systems get used. Complicated systems become “that thing we meant to deal with last fall.”
Should You Add More Than One Barrel?
If you discover that a single rain barrel fills quickly and empties quickly, you are not doing anything wrong. That is normal. Many homeowners start with one barrel and then add a second or third later. Linked barrels can increase storage and make better use of roof runoff. Just keep the same principles in place: solid base, secure fittings, screened openings, and safe overflow routing.
If your real goal is serious irrigation storage, a larger cistern system may be a better fit than multiple small barrels. But for many homes, one well-placed rain barrel is the perfect entry point into rainwater harvesting.
Final Thoughts
Adding a rain barrel is one of those home projects that pays you back in small, satisfying ways. Your plants get a free drink. Your downspout behaves a little better. Your stormwater runoff gets a little less dramatic. And you get the deeply wholesome pleasure of using rain that fell on your roof instead of watching it rush away for no good reason.
The secret to success is not complexity. It is placement, stability, overflow control, and maintenance. Get those four things right and your rain barrel will feel less like a novelty and more like a smart, useful part of your landscape routine. In other words, it becomes the rare DIY project that is both practical and smugly enjoyable.
Real-World Experiences With Adding a Rain Barrel
The first experience many homeowners have after adding a rain barrel is surprise at how fast it fills. You spend an afternoon measuring, leveling, cutting, tightening, and generally trying to look like someone who has definitely done this before. Then the first real rain arrives, and within a short time the barrel is full. That moment tends to flip the project from “interesting yard experiment” to “oh, this actually works.” It is especially satisfying when you realize how much runoff used to pour off that same downspout with zero benefit to your plants.
Another common experience is discovering that placement matters more than people think. A barrel that looked fine near the garage may turn out to be awkward if you need to haul watering cans across the driveway. A barrel tucked behind shrubs may be hidden, but it can also be annoying to access when you want to turn the spigot or clean the screen. Many people only understand the best location after living with the setup for a few weeks. The lesson is simple: install it where you will actually use it, not just where it disappears from view.
Then there is the overflow lesson, which has educated homeowners across this great nation with remarkable consistency. People often understand overflow in theory, but the first heavy storm teaches it in practice. If the hose is too short, pointed the wrong way, or aimed toward a low spot, you will know very quickly. The good news is that this is usually an easy fix. The better news is that once the overflow is routed properly to a mulch bed, lawn area, or rain garden, the entire system feels much more polished and reliable.
Some homeowners also notice that using a rain barrel changes how they think about water in general. Instead of seeing rain as something that simply happens, they start noticing roof sections, drainage paths, puddling spots, and how quickly soil dries out between storms. The rain barrel becomes a kind of gateway project. One small installation suddenly makes people more aware of landscape design, water conservation, and where runoff goes during a storm. It is a little like getting one tomato plant and ending up six months later discussing mulch depth with alarming confidence.
There is also a quieter satisfaction to watering plants with stored rainwater during a dry spell. The water feels purposeful because you caught it yourself. Garden tasks become a touch more rewarding, especially when the barrel sits near a flower bed that visibly benefits from regular watering. Homeowners often say the project makes the landscape feel more connected to the house. The roof is no longer just overhead protection. It becomes part of a simple working system that supports the yard below.
Finally, most people who add one rain barrel start considering a second. That may be the truest real-world experience of all. Once you see how quickly a barrel fills and how useful the water is, expansion starts sounding reasonable. Not because the first barrel failed, but because it succeeded. And that is probably the best review a rain barrel can get.





