Table of Contents >> Show >> Hide
- First: Know What You’re Cleaning (Because Vinyl Isn’t One-Size-Fits-All)
- The Golden Rules Before You Attack a Stain
- Baseline Cleaning That Makes Stain Removal Easier
- The Stain-Removal Playbook (By Stain Type)
- Food stains (tomato sauce, wine, curry, mustard)
- Grease and oil (cooking splatter, lotion, butter, salad dressing)
- Scuff marks (shoes, rubber soles, furniture feet)
- Ink, marker, dye, makeup (Sharpie, pen ink, lipstick, hair dye)
- Paint (latex or oil) and adhesive residue
- Nail polish
- Rust stains and mineral deposits
- Mold or mildew spots (bathrooms, laundry rooms)
- What NOT to Use (If You Want Your Vinyl to Keep Looking Like Vinyl)
- How to Prevent Tough Stains (So You’re Not Doing This Every Weekend)
- When a “Stain” Isn’t a Stain
- Conclusion: The “Clean, Lift, Rinse, Dry” Formula Wins
- Real-World Experiences (): What Actually Worked in Messy Homes
Vinyl flooring is basically the “low-maintenance friend” of the flooring world: reliable, chill, and usually easy to
clean. But then life happens. Somebody drops spaghetti sauce. A kid “signs” the floor with a marker. Your shoes
bring in a mysterious black scuff that looks like it’s applying for permanent residency.
The good news: most tough stains on vinyl plank flooring (LVP), luxury vinyl tile (LVT), and sheet vinyl can be
removed without harsh dramaif you use the right approach and resist the urge to go full sandpaper.
This guide walks you through smart, vinyl-safe stain removal with specific examples, plus the “please don’t do this”
list that can save your wear layer (and your patience).
First: Know What You’re Cleaning (Because Vinyl Isn’t One-Size-Fits-All)
“Vinyl flooring” can mean sheet vinyl, vinyl tile, or click-lock luxury vinyl planks. Most modern vinyl has a
protective wear layer on topthink of it as the floor’s invisible raincoat. Your goal is to remove the stain
on the raincoat, not scrub the raincoat off.
Quick ID checklist
- LVP/LVT (luxury vinyl): Looks like wood or stone. Often matte. Usually click-lock or glue-down.
- Sheet vinyl: Large rolls with fewer seams. Often used in kitchens, bathrooms, laundry rooms.
- No-wax vs. waxed floors: Most modern vinyl is “no-wax.” Old-school vinyl may have wax or polish builds.
Why this matters: some cleaners that seem “fine” can leave residue, dull the finish, or interfere with coatings.
Also, heat and excessive water can be risky for certain installations (especially if adhesives are involved). When
in doubt, follow your manufacturer’s care pageyour warranty will thank you.
The Golden Rules Before You Attack a Stain
1) Start gentle, then level up
Most stains come off with mild dish soap and warm water. Stronger methods are for when gentle methods failnot
your opening move.
2) Blot, don’t grind
If it’s wet (wine, coffee, pet accident), blot with a clean cloth or paper towel first. Rubbing hard can spread
pigment or push gunk into texture.
3) Use white cloths and soft tools
Dyes can transfer from colored rags. Use a white microfiber cloth, a soft sponge, or a soft-bristle nylon brush
for textured vinyl. Avoid steel wool and gritty scrub pads unless you enjoy “permanent matte finish” as a decor theme.
4) Don’t flood the floor
Vinyl is water-resistant, but seams and edges aren’t invincible. Use a damp (well-wrung) mop or cloth. After stain
treatment, rinse lightly and dry.
5) Spot test anything new
Even “safe” products can react differently with different wear layers. Test in a closet corner or under an appliance
before you treat the main stage.
Baseline Cleaning That Makes Stain Removal Easier
Here’s the unsexy truth: a lot of “stains” are actually grime stuck to residue. A quick reset can make the stain
lift faster.
- Dry clean first: sweep, dust mop, or vacuum (no beater bar) to remove grit that can scratch.
- Damp mop: use warm water plus a small amount of mild dish soap or a vinyl-safe, pH-neutral cleaner.
- Rinse if needed: if the floor feels tacky or looks hazy, go over it with plain warm water.
- Dry: buff with a dry microfiber towel, especially in seams and edges.
If you’ve been using “mop-and-shine” style products, oily cleaners, or too much soap, you may be dealing with
buildup that attracts dirt like a magnet. The fix is usually less product, more rinsing.
The Stain-Removal Playbook (By Stain Type)
Different stains respond to different chemistry. Translation: you don’t need a stronger cleaneryou need the
right one.
Food stains (tomato sauce, wine, curry, mustard)
Pigmented food stains are common on kitchen vinylespecially if they dried while you were “just going to sit for a minute.”
- Clean the area with dish soap + warm water first.
- Make a baking soda paste (baking soda + a little water).
- Apply to the stain, let it sit 2–5 minutes, then gently rub with a soft cloth.
- Wipe with a damp cloth to remove paste, then dry.
Example: Dried marinara on vinyl plank often lifts after a soap wipe plus a short baking soda paste treatment.
If the stain is still faint, repeat once rather than scrubbing harder.
Grease and oil (cooking splatter, lotion, butter, salad dressing)
Grease is slippery, so people tend to overcompensate with harsh cleaners. You can usually win with smart steps:
- Blot excess oil with paper towels (don’t smear it).
- Use a few drops of dish soap in warm water and wipe the area.
- If needed, use a vinyl-safe degreaser or pH-neutral cleanersparingly.
- Rinse with clean water and dry to prevent haze.
Pro tip: If the floor looks dull after degreasing, it may be residue. A rinse pass with plain warm water
often restores the finish.
Scuff marks (shoes, rubber soles, furniture feet)
Scuffs look scary, but they’re usually surface transfernot a “your floor is ruined” situation.
- Start with a damp microfiber cloth and a drop of dish soap.
- If it’s stubborn, try a melamine sponge (aka “magic eraser”) very gently.
- For really stubborn rubber transfer, a tiny bit of lubricant on a cloth can help lift the markthen clean the
area again with soap + water to remove any oily film. - Dry buff the area.
Important: Melamine sponges are mildly abrasive. Use light pressure and stop as soon as the mark lifts,
or you can dull a glossy finish.
Ink, marker, dye, makeup (Sharpie, pen ink, lipstick, hair dye)
When pigment is the problem, isopropyl (rubbing) alcohol is often the hero.
- Dampen a white cloth with rubbing alcohol (don’t pour directly on the floor).
- Blot from the outside of the stain toward the center.
- Switch to a clean part of the cloth as the pigment transfers.
- Wipe with a damp cloth afterward, then dry.
Example: Pen ink in an entryway can usually be lifted with alcohol-blotting in under a minutethen finished
with a quick soap wipe so the area doesn’t look “cleaner than the rest.”
Paint (latex or oil) and adhesive residue
Timing matters. Fresh paint is easier than “I noticed this three days later.”
Latex paint (water-based)
- If wet: wipe up with a damp cloth immediately.
- If dry: carefully lift residue with a plastic scraper (no metal blades).
- Clean remaining shadow with warm soapy water.
Oil-based paint, varnish, sticky residue
- Start with warm soapy water.
- If needed, dab rubbing alcohol on a cloth and gently work the residue.
- For truly stubborn spots, some manufacturers allow stronger solvents (like mineral spirits) used sparinglyspot test first.
- Rinse and dry thoroughly.
Nail polish
Nail polish is basically “tiny bucket of pigment + solvent.” Treat it quickly and carefully:
- Blot excess (don’t spread).
- Try rubbing alcohol first.
- If it won’t budge, a small amount of nail polish remover on a cloth may helpuse minimal product, work slowly, and spot test first.
- Rinse and dry.
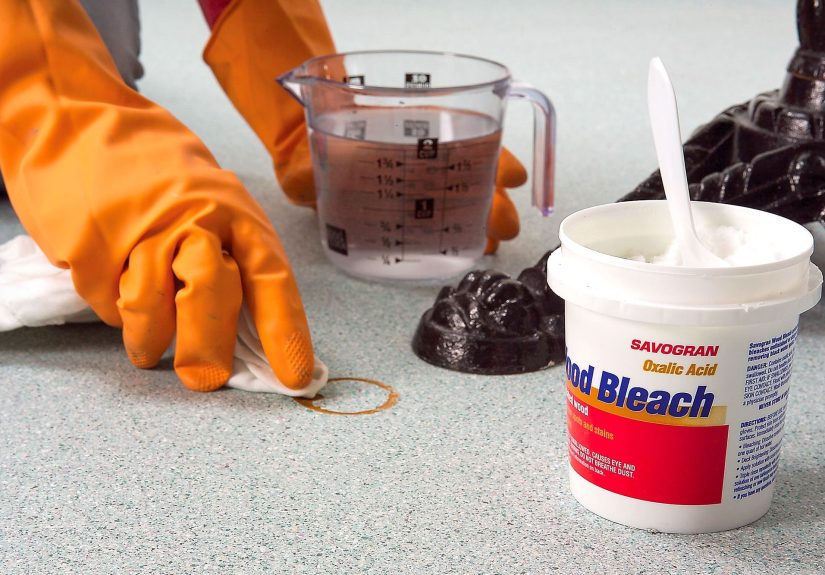
Rust stains and mineral deposits
Rust and mineral deposits often come from metal furniture feet, plant stands, or water that sits too long. Some
care guides recommend a paste of lemon juice + cream of tartar for rust-like marks, applied briefly and then rinsed.
Keep contact time short and rinse wellacids can be tough on some finishes if overused.
- Clean with soap and water first.
- Apply a targeted rust/mineral method (per manufacturer guidance), briefly.
- Gently rub with a soft cloth.
- Rinse and dry.
Mold or mildew spots (bathrooms, laundry rooms)
If you’re seeing mildew on vinyl, the stain is only half the storythe moisture is the villain. Start by cleaning the spot with
mild soap and water. If discoloration remains, use a vinyl-safe disinfecting product that your floor’s manufacturer approves.
Then fix the cause: ventilation, mats that trap moisture, or water that’s pooling near seams.
What NOT to Use (If You Want Your Vinyl to Keep Looking Like Vinyl)
- Abrasive powders and scrub pads: they can scratch the wear layer and dull the finish.
- Ammonia or strong bleach cleaners: can discolor or degrade protective coatings on many vinyl floors.
- Oil soaps, waxes, and “mop & shine” products: often cause buildup that looks cloudy and attracts dirt.
- Steam mops (unless your manufacturer explicitly approves): heat and moisture can be risky for seams and adhesives.
- Soaking wet mops: standing water near edges is a long-term problem waiting to happen.
If you’re torn because you’ve heard “vinegar cleans everything,” here’s the sane middle path: some guides allow
a diluted vinegar solution for occasional cleaning, while others warn repeated acidity can dull finishes over time.
The safest strategy is to stick with a vinyl-safe, pH-neutral cleaner and use any acids sparingly, briefly, and only with a rinse.
How to Prevent Tough Stains (So You’re Not Doing This Every Weekend)
Make your floor harder to stain
- Entry mats: reduce grit and black scuffs from shoes.
- Felt pads: protect against furniture scuffs and metal-rust marks.
- Kitchen “splash zones”: wipe grease near the stove and sink more often than the rest of the room.
- Immediate spill response: pigment is easier to lift before it dries.
- Less product, more rinse: residue is a stain magnet.
Use a quick “spot kit”
- White microfiber cloths
- Mild dish soap
- Isopropyl alcohol
- Baking soda
- Soft nylon brush (for textured vinyl)
- Plastic scraper (for dried paint)
When a “Stain” Isn’t a Stain
Sometimes the discoloration is damage: dye penetration into seams, chemical etching from harsh cleaners, or a permanently
dulled spot from abrasion. If you’ve tried gentle cleaning, then targeted stain removal, and the mark won’t change at all,
it may be a finish issue rather than removable residue.
In that case, stop escalating chemicals. Check your flooring’s care guide, call the manufacturer, or (for click-lock LVP)
replace a plank if you have spares. It’s not defeatit’s choosing a solution that won’t create a bigger problem.
Conclusion: The “Clean, Lift, Rinse, Dry” Formula Wins
Removing tough stains from vinyl flooring isn’t about brute forceit’s about the right method for the right mess.
Start with a basic clean, then match the stain to the safest effective approach: baking soda paste for stubborn food stains,
dish soap for grease, rubbing alcohol for ink and dye, and careful scraping for dried paint.
Keep your tools soft, your mop damp (not dripping), and your expectations realistic: vinyl is durable, but its wear layer
isn’t a punching bag. Treat it kindly and it will keep looking good long after the spaghetti incident is forgotten.
Real-World Experiences (): What Actually Worked in Messy Homes
The most comforting thing about vinyl floors is that they’re built for real lifemeaning the floor has seen things.
I’ve heard homeowners describe vinyl as “the forgiving roommate,” right up until the day someone drops a blob of curry
and it turns into a yellow polka dot by morning. The pattern across most real-world stain battles is simple: the faster you
act, the less “chemistry project” your weekend becomes. When spills get handled immediately, plain dish soap and warm water
usually finishes the job before you even have time to grumble.
One of the most common “tough stain” stories involves tomato sauce. It starts innocentlypizza night, a dropped slice,
a quick wipe with a damp paper toweland then the next day there’s a faint orange shadow. In many cases, that shadow isn’t
pure pigment; it’s pigment plus residue. A quick baseline wipe with mild soap, followed by a short baking soda paste
treatment, often lifts it without dulling the finish. The key is patience: gentle rubbing, wipe clean, dry buff, repeat once
if needed. The people who struggle the most are the ones who panic-scrub like they’re trying to erase the concept of pasta.
Then there’s the legendary “Sharpie autograph.” This usually happens when a kid decides the floor is a canvas or when a
permanent marker leaks in a drawer and leaves a black arc on the plank. The best real-life wins here come from rubbing
alcohol used correctly: applied to a white cloth, dabbed and lifted in sections, not smeared across the whole mark. Folks
who pour alcohol directly on the floor often end up with streaks and a bigger area to clean. The calm approachsmall amount,
lift the pigment, then wipe with water and dryalmost always works better than turning the scene into a slip-and-slide.
Scuff marks are another everyday villain, especially in entryways. People will swear the floor is “stained,” but it’s usually
rubber transfer from shoes. A damp microfiber cloth solves the easy ones. For stubborn scuffs, the stories that end happily
almost always include two steps: lift the scuff with a gentle method (sometimes a very light pass with a melamine sponge),
then remove any leftover film with mild soap and water. The cautionary tales come from overusing abrasive sponges and ending
up with a dull “clean spot” that looks different than the rest of the room.
Finally, the most underrated experience-based lesson: rinsing and drying are not optional “extra credit.” Many homeowners
report that the stain disappeared, but the area still looked cloudyuntil they rinsed with plain warm water and buffed dry.
That haze is often residue, not damage. So if you take nothing else away, take this: for vinyl floors, the real magic isn’t a
miracle product. It’s the boring, reliable routineclean, lift, rinse, and drydone with just enough force to solve the
problem and not a pound more.





