Table of Contents >> Show >> Hide
- First, the “Smart & Safe” Rules (So You Don’t Accidentally Invent a Problem)
- The Basic Method: How to Clean With Hydrogen Peroxide (The No-Drama Version)
- Everything You Can Clean in a Kitchen With Hydrogen Peroxide (Plus Exactly How)
- 1) Countertops (laminate, solid-surface, sealed quartz, and tile)
- 2) Kitchen sink basins (stainless steel, porcelain, and compositecarefully)
- 3) Faucet handles, sprayer heads, and “high-touch” hotspots
- 4) Cutting boards (plastic, wood, bamboowith the right steps)
- 5) Sponges, scrub brushes, and sink strainers (aka the gross little helpers)
- 6) Refrigerator shelves, drawers, and door gaskets
- 7) Microwave interiors (for splatters and smells)
- 8) Trash cans and recycling bins (deodorize + sanitize)
- 9) Tile and grout (brightening and stain-lifting)
- 10) Stovetops and oven doors (spot cleaning, not “deep oven cleaning”)
- 11) Food storage containers (stains and odors)
- 12) Small appliance exteriors (coffee maker, blender base, toaster outside)
- What You Should NOT Clean With Hydrogen Peroxide (Kitchen Edition)
- FAQ: The Questions People Whisper While Holding the Brown Bottle
- A Simple Weekly Routine (So Your Kitchen Stays Clean Without Becoming Your Full-Time Job)
- Experience Notes: What It’s Like to Actually Clean a Kitchen With Hydrogen Peroxide (The Real-World Part)
- Conclusion: The Clean Kitchen Win (Without the Chemical Chaos)
Hydrogen peroxide is the quiet overachiever of the cleaning world. It sits in your medicine cabinet looking innocent,
then shows up in the kitchen and starts bubbling like it just heard the best gossip. Used correctly, the common 3%
hydrogen peroxide you can buy at most stores can help you clean, deodorize, and in many cases
sanitize a surprising number of kitchen surfaceswithout leaving behind strong fragrances or weird residues.
But (and this is a big but) hydrogen peroxide is still a chemical cleaner. It can fade finishes, irritate skin, and cause
damage if you use it on the wrong materials or mix it with the wrong products. This guide breaks down what you can clean,
how to do it step-by-step, and what to avoidso you get the “sparkling kitchen” ending, not the “why is my countertop blotchy”
plot twist.
First, the “Smart & Safe” Rules (So You Don’t Accidentally Invent a Problem)
Use the right strength: stick with household 3%
For everyday home cleaning, 3% hydrogen peroxide (the standard brown-bottle version) is the usual go-to.
Stronger concentrations exist, but they can be hazardous and are not what you want for routine kitchen cleanup.
Clean first, then sanitize (yes, order matters)
Think of it like washing your hands: if you skip the soap-and-water step and just slap on sanitizer, you’re mostly rubbing
germs around with confidence. In the kitchen, start by removing crumbs, grease, and visible grime with dish soap and water.
Then apply hydrogen peroxide to reduce germs and tackle stains.
Never mix hydrogen peroxide with other cleaners
This is not a “cute DIY hack” moment. Don’t mix hydrogen peroxide with bleach, ammonia, or vinegar, and don’t
combine it in the same bottle with anything “because the internet said so.” Some combinations can create irritating or harmful
gases or acids. Use one product at a time, rinse if needed, and keep your cleaning routine boringin the best way.
Ventilation and skin protection aren’t optional extras
Hydrogen peroxide can irritate skin and eyes. Wear gloves if you’ll be using it for more than a quick wipe, avoid splashing,
and keep airflow moving (open a window, run the vent fan). Also: keep it out of reach of kids and pets.
Store it like a grown-up: dark bottle, cool place, lid on
Hydrogen peroxide breaks down over time, especially with light and air exposure. That’s why it comes in opaque or dark bottles.
If yours is very old, it may be less effective. A simple clue: fresh hydrogen peroxide often fizzes when it hits organic gunk.
No fizz ever? It might be past its prime.
The Basic Method: How to Clean With Hydrogen Peroxide (The No-Drama Version)
- Remove food and clutter. Move appliances, clear crumbs, and wipe away loose debris.
- Wash with soap and water first. This cuts grease and removes grime so peroxide can do its job.
- Apply hydrogen peroxide. Use a spray bottle or apply to a clean cloth (often safer around electronics seams).
-
Let it sit briefly. Give it a few minutes on the surface when you’re aiming for sanitizing power.
(If you’re using an EPA-registered disinfectant product, follow its label contact time exactly.) - Wipe and rinse if needed. For food-contact surfaces, rinse with clean water and let air-dry or towel-dry.
Pro tip: Hydrogen peroxide can act like a mild bleach. Always spot-test on an inconspicuous area firstespecially on
painted surfaces, older laminate, colored grout, or anything you’d cry over if it changed color.
Everything You Can Clean in a Kitchen With Hydrogen Peroxide (Plus Exactly How)
1) Countertops (laminate, solid-surface, sealed quartz, and tile)
Hydrogen peroxide is great for everyday counter cleanupespecially after raw-food prep, sticky spills, or mystery smudges that
appear overnight like tiny kitchen gremlins.
- How: Wash counters with warm soapy water and dry.
- Then: Lightly spray 3% hydrogen peroxide (or apply to a cloth) and wipe across the surface.
- Let it dwell: A few minutes for extra germ-reduction, then wipe again.
- Rinse: If it’s a food-prep area, wipe with clean water and dry.
Specific example: After cutting tomatoes and onions, you notice a lingering smell and faint stains on a light
counter. Soap-and-water removes the oils; peroxide helps lift the leftover stain and freshen things up.
Avoid: Natural stone (like marble and many granites) unless you are 100% sure it’s compatible and properly sealed
AND you’ve spot-tested. When in doubt, skip it.
2) Kitchen sink basins (stainless steel, porcelain, and compositecarefully)
Sinks collect everything: food bits, coffee stains, and the emotional weight of your entire week. Hydrogen peroxide can help with
stains and odor, and it pairs nicely with gentle scrubbing.
- How: Rinse the sink, then scrub with dish soap to remove grease.
- Optional boost: Sprinkle baking soda, then spritz hydrogen peroxide to make a mild fizzing paste.
- Wait: 5–10 minutes (don’t let it dry into concrete).
- Scrub: Use a non-scratch sponge, then rinse thoroughly.
- Finish: Dry the sink to reduce water spots and help prevent rust on metal surfaces.
Note on stainless steel: Some pros caution that frequent peroxide use can contribute to spotting or corrosion if left
too long. If you use it on stainless, keep contact time short and wipe dry.
3) Faucet handles, sprayer heads, and “high-touch” hotspots
If germs had a favorite hangout spot, it would be the faucet handle you touch with chicken hands. Hydrogen peroxide is handy for
quick wipe-downs of high-touch areas.
- How: Put peroxide on a cloth (instead of spraying everywhere), then wipe faucet handles and sprayer buttons.
- Detail work: Use a soft toothbrush around seams and bases.
- Finish: Wipe with a damp cloth and dry to avoid water spotting.
Also hit: cabinet pulls, fridge handles, microwave buttons, light switches, trash lid handles, and the drawer where you keep the
snacks (you know the one).
4) Cutting boards (plastic, wood, bamboowith the right steps)
Cutting boards are the front line of kitchen hygiene. Hydrogen peroxide can help reduce odors and lift stains, but it’s not magic:
scrubbing and rinsing still matter.
- How: Wash the board with hot soapy water, scrub both sides, and rinse.
- Then: Spray 3% hydrogen peroxide evenly over the surface.
- Wait: A few minutes.
- Rinse well: Especially for food-contact surfaces.
- Air-dry upright: So moisture doesn’t linger and warp the board.
Specific example: Your plastic board has orange-ish tomato stains. A peroxide mist and short dwell time can help fade
discoloration over a few cleanings.
Extra safety note: If you’re sanitizing after raw meat, follow trusted food-safety guidance and use appropriate
sanitizers (many authorities recommend a properly diluted bleach solution for that situation). Hydrogen peroxide can be useful, but
don’t treat it as the only line of defense.
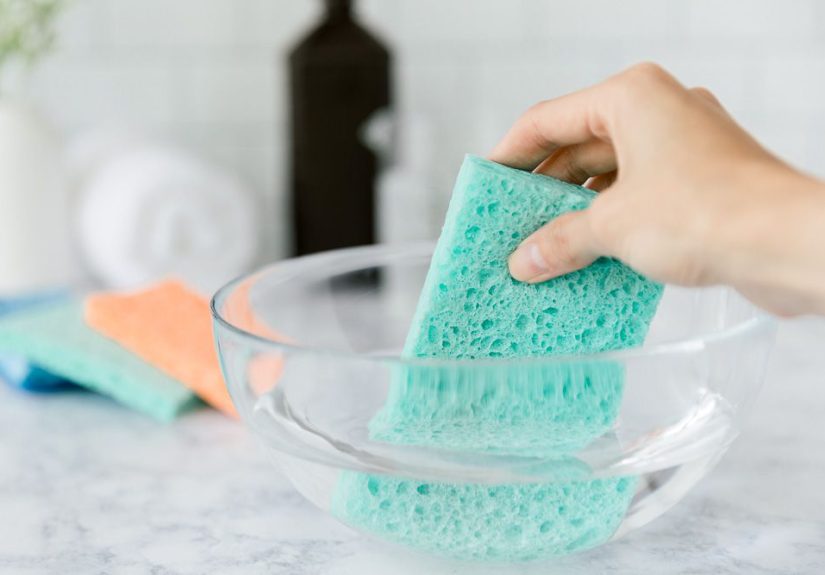
5) Sponges, scrub brushes, and sink strainers (aka the gross little helpers)
Sponges can get funky fast. Hydrogen peroxide can help deodorize and reduce microbial load between replacements.
- How: Rinse the sponge/brush thoroughly to remove food bits.
- Soak: In 3% hydrogen peroxide for several minutes.
- Rinse and dry: Squeeze out water and let it dry completely (wet sponges are basically germ resorts).
Reality check: sponges still need replacing regularly. No cleaner can turn a month-old sponge into a trustworthy friend.
6) Refrigerator shelves, drawers, and door gaskets
The fridge is where spills go to become archaeological layers. Hydrogen peroxide helps with sticky residue, odors, and light staining.
- How: Remove shelves/drawers and wash with warm soapy water.
- Then: Wipe with hydrogen peroxide for extra freshness (especially around old spills).
- Door gasket: Use a cloth lightly dampened with peroxide to wipe folds, then wipe with clean water and dry.
Specific example: A forgotten container leaks and leaves a sour smell. Soap removes the mess; peroxide helps knock back
odor and lingering discoloration on plastic.
7) Microwave interiors (for splatters and smells)
Hydrogen peroxide is useful for the “I exploded spaghetti sauce and pretended it didn’t happen” moments.
- How: First loosen splatters by microwaving a bowl of water (or water + lemon) for a minute or two, then wipe.
- Then: Apply peroxide to a cloth and wipe interior walls, turntable, and door seals.
- Finish: Wipe with a damp cloth and dry.
Don’t spray directly into vents or control panelsmicrowaves do not appreciate surprise moisture.
8) Trash cans and recycling bins (deodorize + sanitize)
If your trash can has a “mysterious aura,” hydrogen peroxide can help.
- How: Rinse out crumbs/liquid, then wash with dish soap.
- Then: Spray peroxide on the inside surfaces, including the lid underside.
- Wait: A few minutes.
- Rinse and dry: Let it air-dry completely before adding a new bag.
9) Tile and grout (brightening and stain-lifting)
Hydrogen peroxide is popular for grout because it can lighten dingy areas without the strong odor of harsher chemicals. It’s especially
useful near sinks and backsplashes where splatter builds up.
- How: Make a paste of baking soda + hydrogen peroxide (thick enough to cling).
- Apply: Spread onto grout lines.
- Wait: 10–15 minutes.
- Scrub: With a grout brush or old toothbrush.
- Rinse: Wipe with clean water and dry.
Spot-test first: Some colored grouts can lighten.
10) Stovetops and oven doors (spot cleaning, not “deep oven cleaning”)
For greasy splatters and cooked-on spots, peroxide works best as part of a gentle scrub systemnot as a solo hero.
- How: Wipe off loose grease with warm soapy water.
- Then: Use a baking soda + peroxide paste on stubborn spots.
- Wait: 10 minutes.
- Scrub gently: Non-scratch pad for glass/ceramic, soft cloth for stainless trim.
- Wipe clean: With a damp cloth, then dry.
11) Food storage containers (stains and odors)
Tomato sauce stains, curry smells, and that one container that will never be the sameperoxide can help.
- How: Wash normally first.
- Then: Soak in a bowl of water with a splash of peroxide, or wipe directly with 3% peroxide for stained areas.
- Rinse thoroughly: And air-dry.
12) Small appliance exteriors (coffee maker, blender base, toaster outside)
For crumb-y fingerprints and sticky splashes, peroxide is handyon the outside.
- How: Unplug the appliance.
- Apply to cloth: Don’t spray into seams, vents, or buttons.
- Wipe: Then wipe again with a water-damp cloth and dry.
What You Should NOT Clean With Hydrogen Peroxide (Kitchen Edition)
Hydrogen peroxide is versatile, but it’s not a universal remote. Skip it (or be extremely cautious) on these:
-
Natural stone countertops (marble, many granites, travertine): can etch, dull, or damage sealants.
Use stone-safe, pH-neutral cleaners instead. -
Unfinished or waxed wood (some cabinets, butcher block without proper sealing): can bleach and dry the surface.
Use wood-appropriate cleaners and follow the finish manufacturer’s recommendations. -
Cast iron and carbon steel: can promote rust. Keep peroxide away from cast iron pans, some knife blades, and
other reactive metals. - Soft metals like copper, brass, and aluminum: can discolor or corrode.
- Electronics and screens: moisture + ports = regret. Use electronics-safe products and microfiber cloths.
- Delicate fabrics or leather on kitchen stools or cushions: peroxide can bleach and dry them out.
FAQ: The Questions People Whisper While Holding the Brown Bottle
Does hydrogen peroxide disinfect kitchen surfaces?
Hydrogen peroxide can be an effective disinfectant on inanimate surfaces, but effectiveness depends on concentration, surface type,
and contact time. If you need disinfecting against specific germs, consider using an EPA-registered disinfectant and
follow its label directions exactly. For routine home use, peroxide is often used as a practical sanitizer and stain-fighter after
you’ve already cleaned away grime.
Do I need to rinse after using hydrogen peroxide?
For food-contact surfaces (cutting boards, counters where you knead dough, container interiors), rinsing with clean water
is a smart habit. For non-food-contact areas (trash cans, grout), wiping is typically fine. When in doubt, rinseespecially if you
used it generously.
How long should it sit?
For everyday sanitizing and stain-lifting, letting peroxide sit for a few minutes helps. If you’re using a disinfectant product that
lists hydrogen peroxide as an active ingredient, follow the product’s label for the required dwell time.
Can I use it every day?
You can, but you don’t always need to. Overuse on certain finishes (especially metals and some sealed surfaces) can lead to dulling or
spotting over time. Rotate with mild soap-and-water cleaning, and reserve peroxide for high-touch areas, stains, odors, and periodic refreshes.
A Simple Weekly Routine (So Your Kitchen Stays Clean Without Becoming Your Full-Time Job)
- Daily: Soap-and-water wipe of counters, quick wipe of faucet handles, spot-clean spills.
- 2–3x/week: Peroxide wipe of high-touch areas (fridge handle, cabinet pulls, trash lid).
- Weekly: Peroxide refresh of the sink basin, trash can interior, fridge gasket wipe, and grout spot-check near the sink.
- As needed: Grout paste for dingy lines, container stain soaks, cutting board deodorizing.
Experience Notes: What It’s Like to Actually Clean a Kitchen With Hydrogen Peroxide (The Real-World Part)
If you’ve never used hydrogen peroxide as a kitchen cleaner, the first experience is usually the same: you spray it, it starts to fizz,
and you immediately feel like you’ve recruited a tiny science lab to help with dinner cleanup. That fizz can be satisfyingbut the most
useful “aha” moments tend to be practical, not dramatic.
One common experience is realizing how much soap-and-water matters first. When people jump straight to peroxide on a greasy
stove backsplash, the results can feel underwhelming: it looks “kind of cleaner,” but the sticky film stays. Once you do a quick degrease
pass (dish soap is the unsung hero here), peroxide suddenly feels more effectiveespecially on the faint stains and lingering odors that
survive the first wipe.
Another real-life takeaway is that hydrogen peroxide is best at the “second layer” of kitchen mess: the ghost stains on plastic containers,
the slightly dingy grout behind the sink, or the cutting board that looks clean but still smells like onions. Those are the moments where a
short dwell time and a gentle scrub often deliver the “oh wow, that actually helped” result. It’s also why many people end up using peroxide
for targeted jobs rather than as their only cleaner.
People also notice quickly that peroxide has opinions about materials. On tile and grout, it can feel like a cheat codeespecially combined
with baking sodabecause it’s easy to apply, it clings, and it brightens in a visible way. On some metals, though, it can be finicky. If you
forget and let it sit too long on stainless steel trim or you don’t wipe dry, you may see spotting that wasn’t there before. The best “experience”
lesson here is simple: short contact time + dry finish on metal.
Another pattern: hydrogen peroxide tends to become the go-to for “high-touch” wipe-downs when someone’s household gets busy. It’s quick to dab
on a cloth and wipe the fridge handle, drawer pulls, and faucetespecially during cold/flu season or after handling raw ingredients. The
experience feels less like deep cleaning and more like preventative maintenance. A two-minute wipe now beats a 40-minute “why does my kitchen
feel sticky everywhere?” situation later.
Finally, most people learn the “don’t get creative with mixing” rule the easy way: by reading a warning… or the hard way: by noticing strong
irritation from a DIY combo. The most consistently positive experiences come from using peroxide in a straightforward, label-respecting way:
keep it separate, use it after cleaning, rinse food-contact surfaces, and store it properly. In other words, peroxide rewards the boring.
And honestly? Your future self will thank you for that.
Conclusion: The Clean Kitchen Win (Without the Chemical Chaos)
Hydrogen peroxide is a powerful, budget-friendly kitchen helper when you use it with a little strategy. Treat it like a finishing step:
clean first, apply peroxide where it makes sense (high-touch areas, stains, odors, grout), and avoid materials that don’t play well with
oxidizers. Keep it separate from other cleaners, spot-test when you’re unsure, and rinse food-contact surfaces. Do that, and you’ll get the
benefitswithout turning your kitchen into a science experiment.