Table of Contents >> Show >> Hide
- Why a Double-Tier Lazy Susan Is the MVP of Small Spaces
- Choose Your Build Path
- Materials & Tools Checklist
- Step 1: Plan Dimensions Like a Person Who Doesn’t Want Wobble
- Step 2: Build the Spinning Base (The “Make It Smooth” Part)
- Step 3A: Assemble Option A (No-Saw Thrift-Store Glam Build)
- Step 3B: Assemble Option B (Woodshop Build With Cleaner Edges)
- Step 4: Make It Glitzy (Without Turning Your Home Into a Glitter Biome)
- Step 5: Troubleshooting (Because Spinning Furniture Has Opinions)
- Where to Use Your Glitzy Double Tiered Lazy Susan
- Cost and Time: What to Expect
- Care & Cleaning
- FAQ
- Experience Notes: What Builders Learn After the First Spin (Extra )
- Conclusion
If your countertop looks like a tiny convenience store (but somehow still can’t produce the one bottle of vanilla you need),
it’s time for a glow-up. A glitzy double tiered lazy Susan is the sweet spot between “I’m organized” and
“I’m kind of fabulous about it.” You get two levels of storage, a smooth spin, and a sparkly finish that says,
“Yes, I label my spice jars… and yes, I also own glitter sealer.”
In this guide, you’ll get two build paths: an easy “thrift-store glam” version (minimal tools, maximum charm) and a sturdier
“woodshop worthy” version (clean lines, stronger joints). Either way, you’ll end up with a rotating organizer that’s useful
in the kitchen, bathroom, craft zone, coffee bar, or anywhere clutter gathers like it pays rent.
Why a Double-Tier Lazy Susan Is the MVP of Small Spaces
A basic turntable already makes life easier because you can rotate items forward instead of excavating the back of a shelf.
Adding a second tier multiplies that benefit: more vertical storage, less “where did that go?” energy, and a centerpiece vibe
that works even when you’re not hosting.
- Better access: Spin to reach items in corners without knocking everything over.
- More capacity: Two levels let you group categories (e.g., oils below, salts and seasonings above).
- Instant style: A glittery finish turns “storage” into “decor that happens to hold stuff.”
Choose Your Build Path
Option A: No-Saw “Thrift-Store Glam” (Fast + Beginner-Friendly)
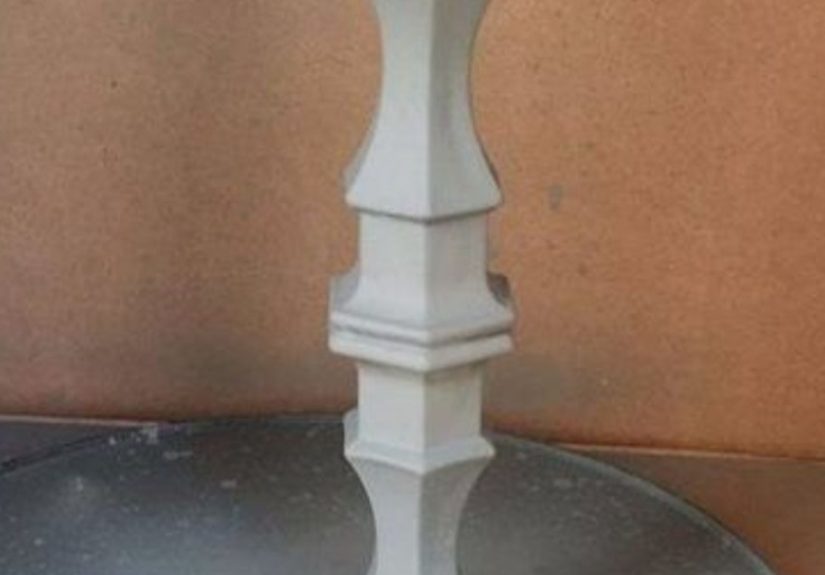
This version is perfect if you want results today. You’ll stack two trays (often cake pans or metal rounds) with a center post
(a candleholder, wood spindle, or sturdy knob-and-dowel combo) and mount the whole thing to a lazy Susan turntable.
It’s quick, customizable, and shockingly cute for something that started life as “random aisle finds.”
Option B: Woodshop “Heirloom-ish” (Cleaner Lines + Extra Stability)
This build uses wood tiers (square or round) and a fixed center support (baluster/spindle) with a turntable mechanism on the bottom.
It takes more time, but the structure is sturdier, the edges can be nicer, and the finished piece looks boutique-levelespecially
with a metallic or glitter topcoat.
Materials & Tools Checklist
Core Materials (Both Options)
- Lazy Susan bearing/turntable hardware (size depends on your base)
- Two tier surfaces (cake pans, wood rounds, square wood trays, metal trays, etc.)
- Center support (candleholder, wood baluster/spindle, or thick dowel + decorative finial)
- Fasteners (short wood screws) and/or strong adhesive (construction adhesive or heavy-duty craft adhesive)
- Non-slip feet (optional but highly recommended)
Glitzy Finish Supplies
- Sandpaper (120 and 220 grit) or a sanding sponge
- Primer (especially helpful for bare wood and some metals)
- Glitter spray paint or metallic spray paint
- Clear sealer/topcoat (important for durability and less “glitter shedding”)
- Painters tape + drop cloth/newspaper
Tools (Pick What Matches Your Path)
- Drill/driver + bits
- Measuring tape + ruler
- Clamps (nice to have)
- Optional: miter saw/table saw (woodshop build), brad nailer, doweling jig
Step 1: Plan Dimensions Like a Person Who Doesn’t Want Wobble
Before you attach anything, do a quick “physics check.” The biggest reason tiered spinners feel unstable is a mismatch between:
(1) base size, (2) bearing size, and (3) top-heavy loading.
- Base tier diameter/width: Typically 10–14 inches works well for counters; larger if it’s a centerpiece.
- Top tier: Usually 2–4 inches smaller than the base so it looks proportional and doesn’t feel top-heavy.
- Tier spacing: Aim for ~6–8 inches between tiers for bottles/jars; less for snacks or décor.
Quick rule: If you plan to store tall bottles (oils, syrups, lotions), choose a wider base and keep the center support stout.
Tall + narrow = the DIY version of wearing heels on gravel.
Step 2: Build the Spinning Base (The “Make It Smooth” Part)
Your turntable hardware is the heart of this project. A quality bearing makes the spin feel effortless instead of crunchy and sad.
Most lazy Susan bearings are designed so you can screw one side to the base and the other side to the top pieceoften using access
holes that line up when you rotate the plate.
How to Center the Hardware
- Flip your base tier upside down.
- Find the center (measure corner-to-corner on a square; measure diameter on a round).
- Place the bearing centered and mark screw holes.
- Pre-drill shallow pilot holes to prevent splitting and to keep screws from drifting off-center.
How to Attach a Bearing Without Losing Your Mind
Many bearing plates include larger access holes that let you drive screws into the “hidden” side after the first side is attached.
The trick is rotating the bearing to align access holes with the screw holes you need to reach. Translation: the bearing isn’t
being difficultit’s being engineered.
- Attach the bearing to the base first (use appropriately short screws so they don’t poke through).
- Rotate the bearing to expose access holes.
- Set the bearing/base assembly onto the underside of your top platform (or the underside of the base tier surface if it’s a single piece).
- Drive screws through the access openings into the second surface.
Safety note: If you’re a teen DIYer, ask an adult for help with drilling and installing hardware.
Spinning projects love to surprise people with pinch points and sudden slips.
Step 3A: Assemble Option A (No-Saw Thrift-Store Glam Build)
1) Prep Your Tiers
- Clean trays thoroughly (dish soap + dry completely). For glossy metal, lightly scuff-sand so paint can grip.
- If using wood rounds, sand smooth and round over sharp edges with sandpaper.
- Decide which side is “up” (especially for cake panssome have nicer rims).
2) Create the Center Support
The center support is what keeps the tiers aligned. A candleholder works well because it’s already decorative and wide enough
to resist twisting. If using a dowel, choose a thick one and add a decorative finial or knob at the top for a finished look.
- Mark the center of the bottom tier (top side this time).
- Attach the center support with a strong adhesive and/or screws from underneath (depending on your materials).
- Let adhesive cure fully before stacking (rushing this step is how you get “leaning tower of snacks”).
3) Attach the Top Tier
- Measure your desired height and mark where the top tier will sit.
- Dry-fit first to confirm spacing and that items will fit beneath.
- Attach the top tier securely; clamp if possible while it sets.
4) Add the Turntable to the Bottom
- Flip the entire assembled piece upside down (carefully).
- Center the bearing and attach it to the base tier.
- Add non-slip feet around the bearing area so the spinner doesn’t skate across your counter.
Step 3B: Assemble Option B (Woodshop Build With Cleaner Edges)
For the woodshop version, you can build square or round. A common approach is a larger bottom tray, a smaller top tray, and a
baluster/spindle in the middle. If you want raised edges (“lips”) on the trays, you can add trim strips or bender board around
the perimeter for that boutique tray look.
Key Structural Tips
- Keep it square: Dry-fit and clamp before final assembly.
- Pre-drill everything: Especially near edges.
- Order matters: It’s often easier to drill dowel holes and do alignment marks before adding edge trim.
- Balance matters: Center the spindle carefully; tiny offsets become obvious once it spins.
Step 4: Make It Glitzy (Without Turning Your Home Into a Glitter Biome)
Glitter is gorgeous… and also famously committed to staying in your life forever. The secret to a “glitzy” finish that still feels
grown-up is: proper prep, light coats, and a compatible clear sealer.
Glitter Spray Paint Tips for a Smoother Finish
- Work in ventilation: Outdoors or an open, well-ventilated area.
- Prep the surface: Clean, dry, and lightly sand glossy areas so paint can bond.
- Shake thoroughly: Shake the can vigorously and keep shaking during use.
- Spray distance: Hold the can about 12–14 inches away and keep it moving.
- Coats: Apply two or more light coats a few minutes apart (heavy coats can clump glitter).
- Dry time: Let it dry to the touch, then to handle, and allow full cure time before loading items.
- Seal it: A clear topcoat helps reduce flaking and keeps the sparkle looking fresh.
Extra Glam Upgrades (Pick One… or Go Full Magpie)
- Metallic basecoat: Use a similar-tone base under glitter for richer coverage.
- Rhinestone or mirrored trim: Add around tier edges for a “boutique display” vibe.
- Gold leaf accents: Great for the center post or tray rims.
- Two-tone design: Glitter on the rims, satin paint on the flat surfaces for easier cleaning.
Step 5: Troubleshooting (Because Spinning Furniture Has Opinions)
“It Wobbles When I Spin It”
- Check centering: If the bearing or spindle is off-center, wobble is basically guaranteed.
- Widen the base: A larger bottom tier improves stability immediately.
- Lower the load: Put heavier items on the bottom tier and keep the top tier lighter.
- Add feet: Non-slip feet reduce skating and help stabilize on slick counters.
“The Spin Feels Rough”
- Check screws: Screws that are too long can rub or interfere with the bearing movement.
- Look for overspray: Paint inside the bearing area can cause dragmask hardware during finishing.
- Upgrade hardware: A sturdier bearing can make a huge difference in feel and load handling.
“Glitter Is Falling Off Like Confetti After a Parade”
- Use a compatible sealer: Clear topcoat helps prevent flaking and fading.
- Let it cure: Don’t load bottles and jars onto fresh paint. Give it real drying time.
- Go lighter: Multiple light coats beat one thick coat every time.
Where to Use Your Glitzy Double Tiered Lazy Susan
The best part of a DIY organizer is making it match the life you actually live. Here are practical, good-looking ways to use it:
Kitchen & Pantry
- Bottom tier: oils, vinegars, cooking sprays
- Top tier: salts, spice blends, small jars
- Or go “coffee bar”: syrups below, stirrers and toppings above
Bathroom Vanity
- Daily skincare on top; backups on the bottom
- Hair products below; brushes and clips above
Craft & Homework Station
- Markers, tape, glue sticks, scissors
- Spinning makes it easy to reach supplies without a desk avalanche
Cost and Time: What to Expect
Your final cost depends mostly on the hardware and what you already have. If you’re repurposing trays and using a simple bearing,
this can be a budget-friendly project. If you’re buying new wood tiers, trim, and premium hardware, it becomes more of a “custom décor build.”
- Time: A simple build can be done in an afternoon, but finishing time (paint + sealer curing) may take longer.
- Budget: Plan for hardware + finish supplies as the most predictable costs.
Care & Cleaning
- Wipe with a damp cloth; avoid soaking edges (especially if wood).
- Don’t use harsh scrubbers on glitter finisheslet the sealer do its job.
- If it’s used for food serving, choose finishes labeled for that purpose and allow full curing.
FAQ
Do I really need a clear sealer over glitter?
If you want the sparkle to stay put and look good longer, yes. A clear topcoat helps reduce flaking and fading while keeping
the glitter finish looking bright.
What size lazy Susan bearing should I use?
Match the hardware to the base size and expected weight. A small plate can work for lightweight décor, but larger and sturdier
bearings generally feel smoother and more stable for loaded organizers. If in doubt, choose the larger option that fits your base.
Can I make this without spray paint?
Absolutely. Use brush-on metallic acrylic craft paint and seal it, or apply peel-and-stick metallic vinyl for shine without aerosols.
If aerosols are age-restricted where you live, ask an adult to help or choose non-spray finishes.
Experience Notes: What Builders Learn After the First Spin (Extra )
People usually think the “hard part” is making it pretty, but the real learning curve is making it spin well and stay steady.
Here are the most common real-world lessons builders report after making a double-tier lazy Susanaka, the stuff you only learn once you’ve
watched your finished piece do that tiny little wobble and thought, “So… we’re doing interpretive dance now?”
1) Centering is everything (and it’s sneakier than it sounds)
The most common issue is an off-center bearing or spindle. Even a small misalignment becomes obvious once the tiers rotateespecially with
a shiny, glitzy surface that catches the light and makes every wobble look dramatic. The fix is boring but effective: measure twice,
mark clearly, and pre-drill pilots so the screws don’t “walk” as they bite. For square tiers, measuring corner-to-corner and marking the
midpoint helps. For round tiers, a quick diameter measurement in two directions gives a reliable center point.
2) The top tier wants to be a divakeep it light
Builders often load the top tier with tall bottles because it “looks balanced,” then wonder why the whole thing feels tippy. A double-tier
organizer is happiest when the bottom tier carries the heavier items and the top tier holds smaller, lighter stuffthink spice jars, tea bags,
sweeteners, cotton rounds, or little décor pieces. If your plan is mostly tall bottles, widening the base tier and using a thicker center support
prevents that top-heavy feel.
3) Paint and hardware don’t mix unless you make them
Overspray is a silent troublemaker. If paint drifts into the bearing area, the spin can feel gritty or slow. A simple habit solves it:
mask off the hardware area (or remove the bearing before painting, then reinstall). Also, builders notice that glitter coats feel “dry” quickly
but still need real curing time before heavy use. Loading items too soon is how fingerprints, dents, and stuck-on labels happen.
4) Adhesive needs timeyour excitement is not a curing agent
For the no-saw version, the bond between tiers and center support matters. People often “test spin” early (because joy), and that twisting force
can weaken a not-yet-cured adhesive joint. Let adhesives fully cure, and consider combining methods: adhesive plus a discreet screw from underneath
for extra security. If you’re building for daily use (coffee bar, skincare station), mechanical fastening is your best friend.
5) The best glitz is controlled glitz
Many first-time builders go heavy with glitter because the first coat looks patchy. But thick glitter coats can clump, shed, and take longer to
cure. The better approach is a compatible basecoat, multiple light glitter coats, then a clear sealer. The result looks richer, feels smoother,
and doesn’t “sparkle-bomb” your entire kitchen the moment someone bumps it with a cereal box.
Bottom line: the most satisfying DIY glitzy double tiered lazy Susan isn’t just prettyit spins smoothly, stays balanced, and fits the way you
actually store things. And if you do end up with a tiny wobble? Congratulations. You’ve built something authentic. Even expensive store-bought
organizers have quirksyours just has more personality (and better sparkle).
Conclusion
A DIY glitzy double tiered lazy Susan is the rare project that’s practical, customizable, and genuinely fun to show off.
Build it fast with a thrift-store style stack, or go sturdier with a woodshop version. Either way, prioritize smooth hardware, careful centering,
and a finish that’s sealed so the sparkle stays on the traynot on your elbows for the next three weeks. When your space spins neatly and looks
like décor at the same time, you’ll wonder how you ever lived without it.





