Table of Contents >> Show >> Hide
- Why Corn Husks Work Surprisingly Well for Summer
- What You’ll Need
- Picking and Prepping Corn Husks (So They Behave)
- Color Ideas That Scream “Summer,” Not “Harvest Festival”
- How to Make a Corn Husk Summer Wreath (Step-by-Step)
- Summer Design Variations You’ll Actually Want to Copy
- Care Tips (So Your Wreath Survives Summer)
- Conclusion
- Experience Notes: What I Learned Making a Corn Husk Summer Wreath
A corn husk wreath might sound like it belongs exclusively to crunchy leaves, pumpkin spice, and that one neighbor who puts out mums like it’s their full-time job.
But corn husks are basically the “neutral linen shirt” of natural crafting: they go with everything, they look expensive even when they’re not, and they forgive a lot of bad decisions
(like eyeballing measurements and calling it “rustic”).
In summer, a corn husk summer wreath is a bright, breezy twist on a harvest classic. Think sun-washed texture, beachy color palettes,
and cheerful front-door energywithout the faux-flamingo drama. Done right, it reads “fresh and handmade,” not “I raided a scarecrow.”
Why Corn Husks Work Surprisingly Well for Summer
Corn husks bring soft movement (they curl, ruffle, and fan), natural texture (matte, fibrous, organic),
and an easy, sunny vibe that pairs perfectly with summer florals and citrusy accents.
Plus, they’re lightweight compared with heavy grapevine or thick greenery wreathsso you won’t feel like you’re hanging a small boulder on your door.
The real magic is versatility. Keep them natural for a sandy, coastal feel. Dye them turquoise, coral, or lemon-yellow for a “summer party” look.
Or do a subtle ombré and pretend you bought it from a boutique that sells candles named things like “Daylight Confidence.”
What You’ll Need
Base + Fasteners
- Wreath base: straw wreath, wire hoop, or lightweight twig form (12–18 inches is beginner-friendly)
- Floral U-pins or greening pins (best for straw bases)
- Floral wire (for tying bundles and securing heavier add-ons)
- Hot glue gun + glue sticks (for quick attachment and finishing)
Corn Husks + Decor
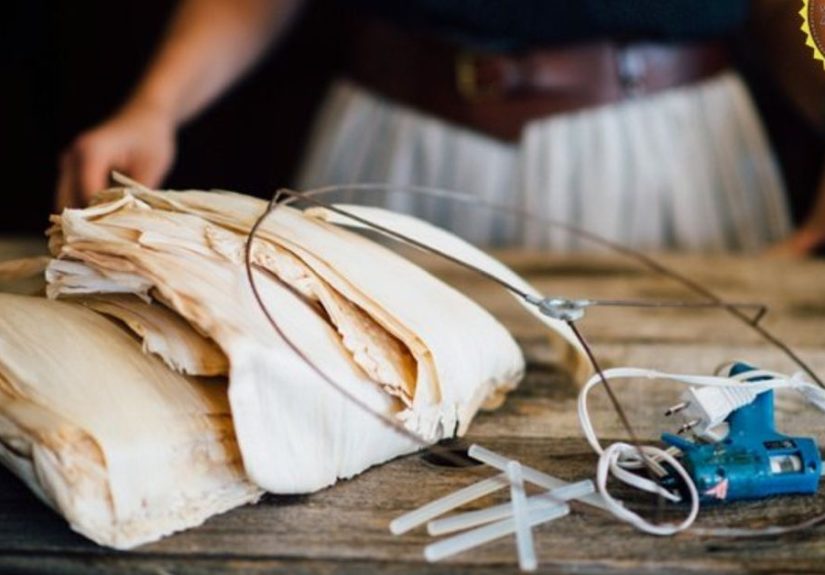
- Dried corn husks (store-bought craft husks, saved from corn, or “tamale-style” husks)
- Optional dye (liquid dye, fabric dye, or craft dye)
- Summer accents: dried flowers, faux citrus slices, small shells, raffia, ribbon, wheat stems, or airy grasses
- Scissors (plus wire cutters if you’re using floral wire)
Pro tip: If your wreath will live outdoors, choose accents that won’t melt, droop, or fade after three sunny afternoons.
(Fresh flowers are beautifulbriefly. Like a popsicle on a sidewalk.)
Picking and Prepping Corn Husks (So They Behave)
Where to Get Corn Husks
You have three good options:
(1) craft-store dried husks (consistent and clean),
(2) “tamale husks” (often sold dried in bags and easy to fold into loops),
or (3) save husks from corn you cookjust rinse and dry them well.
Drying (If You’re Starting from Fresh)
If you’re pulling husks from fresh corn, let them dry fully in a warm, dry spot with airflow. If they’re still damp inside, they can discolor or get musty.
Once they feel papery (not cool-to-the-touch and not leathery), they’re ready to craft with.
Soften Before You Shape
Dried husks can be brittle. A quick soak in lukewarm water makes them pliable. You’re not making soupjust giving them enough moisture to bend without tearing.
After soaking, blot them so they’re damp, not dripping.
Flatten for a Cleaner, Modern Look
If you want crisp, “styled” petals or smooth loops, lightly spritz husks and press them with a warm (low) iron between towels or parchment.
Flattened husks are easier to cut into petal shapes and layer neatly.
Color Ideas That Scream “Summer,” Not “Harvest Festival”
Option A: Keep Them Natural
Natural husks look like sun-bleached straw and pair beautifully with white doors, navy doors, bright teal doors, and anything “coastal.”
Add a simple bow and maybe a small cluster of dried grasses, and you’ve got understated summer charm.
Option B: Dye Them Bright
Dye turns husks into instant summer. Try:
turquoise + sand (beachy),
coral + blush (fresh and modern),
lemon + white (citrus pop),
or navy + wheat (classic Americana).
For bold, saturated color, use very hot water and keep the material moving so you don’t get streaks. Dip just the husk portion for a “color-tipped” effect,
or submerge fully for all-over color. Let the husks dry in the shape you wantflat for petals, curved for ruffles.
Option C: Quick Ombré
Make a dye bath and dip the tips for 10–30 seconds, then dip a little deeper for another 10–30 seconds, and repeat until you get a gradient.
Ombré husks look high-end even if your crafting playlist is just you whispering “please don’t fall apart.”
How to Make a Corn Husk Summer Wreath (Step-by-Step)
Step 1: Choose Your Style
There are two main corn-husk looks:
Ruffled Loop Wreath (soft, full, and fluffy) and
Sunburst/Starburst Wreath (sleek, modern, and sunflower-adjacent).
Summer tends to love bothpick based on your door and your patience level.
Step 2: Prep Your Husks
Soak briefly to soften, blot dry, then sort by size. Long, wide husks make great loops; smaller husks are perfect for filling gaps.
If you’re dyeing, do it now and let everything dry before assembly (unless you like sticky fingers and surprise color transfer).
Step 3: Start Building the Base Layer
For a straw wreath, you can pin husks directly using floral U-pins. For a wire hoop, you’ll likely hot-glue or wire bundles onto the frame.
Begin at the bottom and work around so overlaps look intentional. (Also: gravity is a harsh critic.)
Step 4: Make Loops (Ruffled Look)
Fold a husk into a loop, pinch the base, and secure it to the wreath with a pin or a dab of hot glue. Overlap loops like shingles on a roof.
Keep the “pretty side” facing out, and alternate lengths so it looks airy rather than bulky.
Keep going. Rotate the wreath every few minutes and check your fullness. If you’re using a straw base, you may use a few dozen husks for an 18-inch wreath,
depending on how fluffy you go.
Step 5: Try a Starburst (Modern Summer Look)
For a starburst, lay husks outward like rays. Secure the base ends close together around the inner edge of the wreath form.
Slightly overlap each husk so the wreath looks cohesive, not like a haystack explosion.
This style looks especially good in natural husks with a bright summer ribbon.
Step 6: Add a Summer Accent Cluster
Now the fun part: a focal point. Keep it light and seasonal:
- Citrus pop: faux lemon slices + small white flowers + raffia bow
- Coastal: tiny shells + pale blue ribbon + dried grasses
- Farmers’ market: small dried flowers + wheat stems + gingham bow
- Fourth of July vibe: navy ribbon + a few red/white accents (subtle, not “parade float”)
Wire heavier items first, then tuck and glue lighter fillers. If you can lift the wreath and gently shake it without a “craft confetti” situation, you’re winning.
Step 7: Finish the Back + Hanger
Trim any long glue strings (the unofficial cobwebs of crafting). Add a ribbon hanger or a loop of wire on the back.
If you’re hanging it outdoors, keep the hanger sturdysummer breezes are cute until they relocate your wreath to the neighbor’s yard.
Summer Design Variations You’ll Actually Want to Copy
1) The “Beach House Without the Beach House” Wreath
Natural husks + a soft blue bow + a few shells clustered off-center. Keep it minimal.
The husks provide texture, the ribbon provides color, and the shells quietly say “I own sunscreen.”
2) The Lemonade Stand Wreath
Dye husks pale yellow or dip-dye the tips. Add faux lemon slices and small white blossoms.
Finish with a striped ribbon. It’s cheerful, summery, and impossible to look at without craving something cold.
3) The Backyard BBQ Wreath
Use natural husks, then add a simple gingham bow and a few wheat stems or grasses.
It’s casual, friendly, and looks right at home next to a porch chair and the smell of something grilling.
4) The Modern Ombre Wreath
Ombré-dip husks in turquoise or coral. Keep the wreath mostly husks with one clean bow.
This one looks great on a brightly painted door and gives “design magazine” energy without the design magazine budget.
Care Tips (So Your Wreath Survives Summer)
- Avoid direct rain: A covered porch is ideal. Husks can handle humidity, but soaking rain can warp or loosen glue.
- Watch harsh sun: Bright sun can fade dyes and dry out husks. Shade extends life.
- Dust it gently: Use a soft brush or cool hair dryer setting from a distance.
- Store smart: Keep it in a box or bag with breathing roomno crushing, no damp basements.
Conclusion
A corn husk summer wreath is the kind of DIY that looks far fancier than it is: natural texture, easy volume, and endless ways to customize.
Whether you go coastal, citrusy, modern ombré, or simple and neutral, you’ll end up with a front door that feels welcoming, bright, and unmistakably summer.
And if anyone asks where you bought it, you’re allowed to smile mysteriously and say, “Oh… I made it.”
Experience Notes: What I Learned Making a Corn Husk Summer Wreath
The first thing I learned is that corn husks have personalities. Some are calm, cooperative, and ready to become elegant loops. Others behave like they’re auditioning
for a role as “crunchy leaf #3” in a fall play. If you try to bend those brittle ones without softening them first, they will snaploudlyright when you’re feeling confident.
Soaking is not optional. It’s basically the corn husk version of stretching before a workout.
The second lesson: your wreath base decides your whole vibe. Straw wreaths are forgiving because you can pin things down and reposition as you go.
Wire hoops look sleek and modern, but you need a little more commitmentonce hot glue sets, it’s like your wreath is saying, “We’re not talking about this again.”
If you’re doing a summer look (especially coastal or minimalist), the wire hoop is gorgeous, but I’d recommend practicing a few husk bundles first so you find your rhythm.
Dyeing was the biggest “wow” moment. Natural husks are beautiful, but dyed husks are summer. The trick is to embrace unevenness in a controlled way.
If you dye everything perfectly flat and uniform, it can look a little craft-store. But if you dip the tips in colorcoral, turquoise, lemonand let the rest stay neutral,
it looks intentional and high-end. I also learned to dry husks in the shape you want. If you want loops, let them dry slightly curved. If you want crisp petals, flatten them.
Otherwise, you’ll be wrestling curls while muttering motivational speeches to plant material.
Composition matters more than I expected. When I made my first wreath, I packed husks too tightly because I thought “full” automatically meant “good.”
The result was… enthusiastic. Like a paper pom-pom that got promoted. The next version had more breathing roomoverlapping loops, but not smothering the base.
That little bit of air made it look lighter, summery, and more expensive. Think sundress, not winter coat.
My favorite finishing move was the accent cluster. At first I wanted to add everything: dried flowers, citrus, shells, ribbon, grasses, probably a tiny sign that said “hello.”
But summer wreaths look best when they’re edited. I ended up choosing one main themelemon + white flowersand one supporting textureraffia.
Suddenly the wreath had a point of view. It looked like it belonged on purpose, not like it was assembled during a very emotional trip through the craft aisle.
Finally: outdoor reality is real. On a hot day, some glues soften. In direct sun, dye can fade. And in rain, husks can warp a little.
After a few trials, the “sweet spot” was a covered porch with bright shade, and a wreath that was mostly husks (lightweight), with accents wired where possible.
The good news is that even if it gets a little wild by late summer, it still looks charminglike the wreath is relaxing too.




