Table of Contents >> Show >> Hide
- Why Trash Makes Such Good Fabric Storage
- Before You Start: What Fabric Storage Needs to Do
- The Best “Trash” to Rescue for Fabric Storage
- How to Build a Smarter Fabric Storage System
- DIY Fabric Storage Ideas Made From Castoffs
- Small-Space Fabric Storage That Actually Works
- What Not to Do With Fabric Storage
- Conclusion: Turn the Toss Pile Into a Crafting Advantage
- Experience: What It Feels Like to Turn Trash Into Fabric Storage
Some people see an empty shoebox, a worn-out pillowcase, or a wobbly drawer headed for the curb and think, “Well, that had a good run.” Crafters, sewists, and the occasional chaos-loving organizer look at the same pile and think, “Congratulations, you are now premium fabric storage.” That is the magic of upcycled organization: yesterday’s clutter becomes today’s craft-room hero.
If your fabric stash has started behaving like a small independent nation, you are not alone. Scraps multiply, yardage hides behind less attractive yardage, and the piece you swear you bought for a project somehow vanishes until three days after you buy it again. The good news is that smart fabric storage does not have to mean expensive containers, a custom craft studio, or a reality-show-worthy renovation. With a little strategy and a little scavenging, you can create storage that is practical, good-looking, budget-friendly, and surprisingly satisfying.
This guide walks through how to turn castoffs into useful fabric storage, how to protect your stash so it actually stays usable, and how to build a system that helps you find what you own before your next “I should probably buy more gingham” moment. Because yes, beautiful organization is lovely. But finding the right fabric on the first try? That is true luxury.
Why Trash Makes Such Good Fabric Storage
Fabric is one of those supplies that looks innocent in small amounts and slightly theatrical in large ones. A few folded pieces on a shelf feel charming. Twenty-seven stacks, three bags of scraps, a basket of “future quilt potential,” and one mystery bin labeled holiday maybe? feel like a cry for help.
That is why upcycled storage works so well. Many common household items already have the qualities a fabric organizer needs: structure, stackability, portability, and just enough charm to make your space feel intentional. A sturdy gift box can hold fat quarters. A retired drawer can become an open fabric tray. Glass jars are perfect for buttons, clips, and tiny scraps. Old jeans or tablecloths can be turned into hanging pocket organizers. Worn sheets can become dust covers or soft storage sacks for seasonal sewing supplies.
There is also something delightfully rebellious about refusing to buy a fancy storage bin when a cleaned-up shipping box is standing right there, ready for its second act. It is practical, resourceful, and just a little smug in the best possible way.
Before You Start: What Fabric Storage Needs to Do
Good fabric storage is not just about making things look tidy for five glorious minutes. It needs to solve real problems. First, it should protect fabric from dust, moisture, sunlight, and household chaos. Second, it should make your stash visible enough that you use what you already own. Third, it should fit the way you actually craft, not the fantasy version of you who color-codes ribbon on weekends and labels things with calligraphy.
In practical terms, that means your storage should be:
Clean and Fabric-Friendly
Anything you rescue from the trash pile, donation stack, garage, or curb needs a serious cleanup. Skip anything musty, moldy, insect-damaged, or greasy. Fabric absorbs odors like it is collecting gossip, so only use containers that are fully clean and dry. Sand rough edges on wood, reinforce weak corners on boxes, and line questionable interiors with clean cotton or acid-free paper if needed.
Easy to Open, Stack, and Carry
If a container is annoying to use, it will become decorative clutter. The best organizers are simple: a box with a lid, a basket with handles, a pouch that slides under a bed, a drawer that pulls out smoothly. Storage should help you start a project faster, not trigger an existential spiral.
Visible Enough to Prevent Duplicate Buying
Hidden storage is wonderful until it becomes a time capsule. Try to balance “neat and protected” with “easy to identify.” Labels, categories, and consistent folding matter more than perfectly matching containers. A humble bin marked florals is more useful than a gorgeous mystery box you are afraid to open.
The Best “Trash” to Rescue for Fabric Storage
Sturdy Cardboard Boxes
Shoeboxes, gift boxes, packaging from small appliances, and rigid mailing boxes are excellent for folded fabric, patterns, interfacing, or trim. Cover them with leftover fabric, kraft paper, or even sections of old canvas for a cleaner look. Add labels on the front so you can stack them like a mini archive instead of a cardboard avalanche.
Old Drawers and Small Furniture Parts
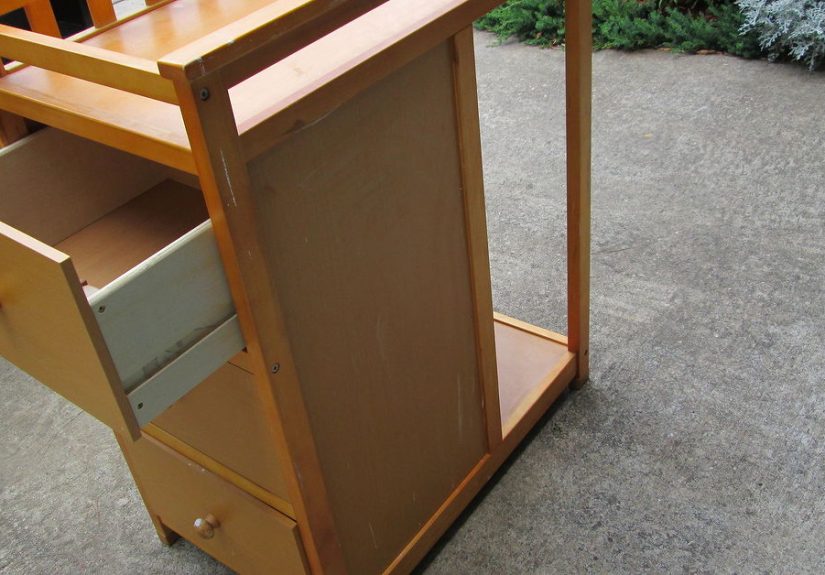
A dresser drawer with decent bones can become a fabric tray on a shelf, a rolling under-table organizer, or an open bin for works in progress. If the drawer is shallow, it is especially useful for quilting cotton, notions, embroidery floss, and flat tools like rulers. Deep drawers can hold larger cuts, batting, and project bags.
Glass Jars and Food Containers
Clean jars are ideal for tiny supplies: buttons, snaps, clips, elastic, labels, beads, and all the little sewing bits that love to disappear. Clear containers help you see what you have, which is excellent for both organization and reducing accidental repurchasing. Just do not use containers that once held strong-smelling foods unless they are truly odor-free.
Worn Textiles
Old pillowcases, sheets, denim, tablecloths, and sturdy shirts can become soft storage bags, drawer liners, dust covers, and hanging organizers. These materials are especially good when you want breathable storage or need custom sizes for awkward spaces. Plus, nothing says “serious crafting energy” like turning an old pair of jeans into a wall organizer for scissors and rotary cutters.
Baskets, Crates, and Tins
Thrifted baskets work beautifully for larger pieces of fabric, yarn, and current projects. Wooden crates can be flipped on their side to create shelf cubbies. Tins can corral machine feet, chalk, pins, and measuring tapes. Just make sure the interiors are smooth and dry before introducing them to your stash like awkward party guests.
How to Build a Smarter Fabric Storage System
1. Declutter Before You Decorate
This step is not glamorous, but it saves everything that follows. Pull out your entire stash and sort it into obvious groups: keep, donate, scraps, special occasion, upholstery-weight, quilting cotton, apparel fabric, and unfinished projects. Be honest. If a fabric has been waiting fifteen years for its “perfect use,” it may be time to release it into the wild.
Decluttering first helps you build storage around what you truly use. Otherwise, you are just building prettier housing for confusion.
2. Fold Fabric to a Consistent Size
Uniform folding is the secret sauce of good fabric storage. When everything is roughly the same width, stacks look cleaner, shelves work harder, and you can flip through fabric like a civilized person instead of excavating a cotton landslide. You can even use a piece of cardboard as a folding template to keep your stacks consistent.
3. Sort by the Way You Actually Sew
There is no universal rule that says everyone must organize fabric by color. Some people sew by project type, some by fiber, some by season, and some by “things I bought because they made me emotional.” The best system is the one that mirrors your habits. If you quilt, color and print type may matter most. If you sew garments, fiber content and drape might be more important. If you love home decor projects, weight and scale may be the better categories.
4. Store Works in Progress Separately
One of the fastest ways to create stash chaos is letting current projects mingle with your main fabric collection. Give every unfinished project its own bin, zipper pouch, or lidded box. Include the pattern, matching notions, and notes about what still needs to be done. This keeps you from accidentally cutting into your project backing for a completely unrelated “quick little weekend make.”
5. Label Like Your Future Self Is Very Tired
Because someday, your future self will be very tired. Labels should be clear, visible, and boring in the best possible way. “Knits,” “holiday,” “linings,” “WIP quilt blocks,” and “tiny scraps worth saving” are all better than “misc.” The word misc is where order goes to die.
DIY Fabric Storage Ideas Made From Castoffs
Fabric-Covered Shoebox Archive
Take a sturdy shoebox, wrap it in leftover fabric or heavy paper, reinforce the corners with glue, and add a front label. Use it for precuts, small yardage, patterns, or interfacing. Stack several on a shelf for a uniform look that costs almost nothing and feels strangely professional.
Old Sheet Under-Bed Fabric Sleeves
Sew old sheets into long zippered or tie-close pouches sized for under-bed storage. These are ideal for seasonal fabrics, costume materials, or backstock you do not need every week. Soft under-bed storage is especially useful when you do not want bulky plastic bins taking over the room.
Jean-Leg Wall Organizer
Cut legs from old jeans, stitch the bottoms closed, and mount them to a backing panel or sturdy hanger. Suddenly you have vertical pockets for rulers, scissors, pens, clips, and rolled trim. It is useful, durable, and gives your sewing area a little “I make things, fear me” attitude.
Repurposed Drawer Project Station
Add small containers inside an old drawer to separate thread, labels, pattern pieces, and a current project. Slide it under a worktable or set it on open shelving. This keeps the active mess contained without pretending your creative process is naturally neat. No one believes that anyway.
Hanging Pocket Organizer From Scrap Fabric
Use a larger scrap or old tablecloth as the backing and stitch smaller scraps into pockets. Hang it inside a closet door or beside your cutting table. This is perfect for rotary cutters, measuring tapes, seam rippers, and all the odds and ends that otherwise wander off like tiny rebellious teenagers.
Small-Space Fabric Storage That Actually Works
Not everyone has a dedicated craft room with built-ins and dramatic lighting. Sometimes your sewing zone is a corner of the bedroom, half a closet, or a dining table that must transform back into normal life by dinnertime. In that case, every inch matters.
Use vertical space first. Shelves, peg rails, hanging pockets, and wall-mounted organizers keep supplies off the table and in sight. Next, look for hidden storage opportunities: under the bed, above a closet shelf, beneath a cutting table, or inside an ottoman or bench. Rolling carts are especially useful because they move where you need them and disappear when you are done. Baskets inside the cart prevent it from becoming a three-tier monument to randomness.
Drawers also shine in small spaces, especially when divided into categories. Fold fabric so it can stand or lie neatly in rows. A drawer should let you browse without unstacking half your stash like a frustrated retail employee at closing time.
What Not to Do With Fabric Storage
Even the prettiest storage system can fail if the location is wrong. Avoid damp basements, hot attics, direct sunlight, and areas with major temperature swings. Do not overstuff containers until fabric is crammed, crushed, or impossible to remove. And do not save every scrap just because it has “potential.” Potential is lovely. So is floor space.
Also, resist the temptation to make everything too precious. Your organization system should support making things, not create a museum where no one is allowed to touch the exhibits. Store fabric well, yes. But keep it usable, reachable, and part of real life.
Conclusion: Turn the Toss Pile Into a Crafting Advantage
The best fabric storage is not always the fanciest. Often, it is the system that makes you feel calmer, helps you find what you own, and quietly saves a few useful items from the trash on their way out the door. A shoebox becomes an archive. A pillowcase becomes an under-bed bag. An old drawer becomes a project station. A mess becomes a plan.
That is the beauty of upcycled craft storage. It solves two problems at once: too much stuff and not enough order. Better yet, it adds character to your space. When your sewing room includes containers you remade yourself, the storage becomes part of the creative story. It is not just where you keep supplies. It is proof that imagination works before the first stitch even happens.
So the next time you are about to throw out a sturdy box, a tired textile, or a piece of furniture with one useful drawer left, pause for a second. That “trash” may be one label and a little hot glue away from becoming the smartest thing in your craft room.
Experience: What It Feels Like to Turn Trash Into Fabric Storage
One of the most interesting things about making fabric storage from castoffs is that the transformation changes more than the room. It changes the way you look at materials. A plain shipping box stops being packaging and starts looking like a future fabric archive. A faded pillowcase turns into a custom bag for batting scraps. A lonely glass jar becomes the perfect home for buttons that used to live in five different places and somehow none of them at the same time.
At first, the process can feel a little scrappy in the most literal sense. You gather boxes, wipe down jars, test lids, fold fabric, and wonder whether any of this will actually look good when it is finished. Then something unexpected happens: the space starts to make sense. The floral cottons sit together. The denim has its own bin. Current projects stop drifting across every available surface. The scraps you almost threw away become the accents that make the storage look personal instead of store-bought.
There is also a particular satisfaction in making organization fit your exact habits. Store-bought systems are often designed for an imaginary person with identical supplies, unlimited shelf depth, and a deep emotional commitment to matching containers. Real crafting life is messier than that. Maybe you keep larger cuts for garment sewing, tiny prints for quilting, and a heroic amount of “useful someday” trim. When you make your own storage, you build around the truth. The shoebox becomes wide enough for precuts. The hanging organizer gets pockets sized for rulers and thread snips. The under-bed bag is measured for that awkward gap no manufacturer has ever respected.
Another real experience people notice is how much easier it becomes to use what they already own. Once fabric is visible, folded, and grouped sensibly, shopping habits change. You stop buying your fourth nearly identical navy print because you can actually see the three you already have. You finish more projects because the supplies for each one live together. You feel less overwhelmed because your stash stops acting like an accusation and starts acting like a resource.
Emotionally, the process can be surprisingly grounding. Crafting already has a way of slowing the brain down, and organizing creative materials can do the same. Washing, mending, folding, labeling, and repurposing all create a rhythm. It is practical work, but it is also reflective. You remember where certain fabrics came from. You decide what kind of maker you are now, not just what you bought years ago. You edit with more confidence. You keep what supports your projects and let go of what only takes up room.
And yes, there is humor in it too. Nothing builds humble confidence quite like standing in front of a beautifully organized shelf and knowing that half of it used to be trash. The fancy basket? Thrifted. The labeled archive boxes? Former shoe packaging. The organizer holding your sewing clips? Once a jelly jar living a completely different life. It is part design, part practicality, part tiny domestic magic trick.
In the end, the experience is less about perfection and more about usefulness with personality. Your fabric storage does not have to look expensive to work beautifully. It just needs to protect your materials, support your process, and make your creative life easier. When that happens, the room feels lighter, projects feel more possible, and the things you rescued from the discard pile get a second life that is far more interesting than their first.




