Table of Contents >> Show >> Hide
- What a Belt Sander Is Actually Good For
- Start With Safety Before You Start With Grit
- Choose the Right Belt, Not Just the Closest Belt
- How to Use a Belt Sander Without Gouging the Work
- The Best Workflow for Woodworking Finishing
- Best Practices for Different Wood Types and Situations
- Common Belt Sander Mistakes That Ruin Finishes
- Small Habits That Make a Big Difference
- When to Put the Belt Sander Down
- Experience From the Shop: What Belt Sanders Teach You the Hard Way
- Conclusion
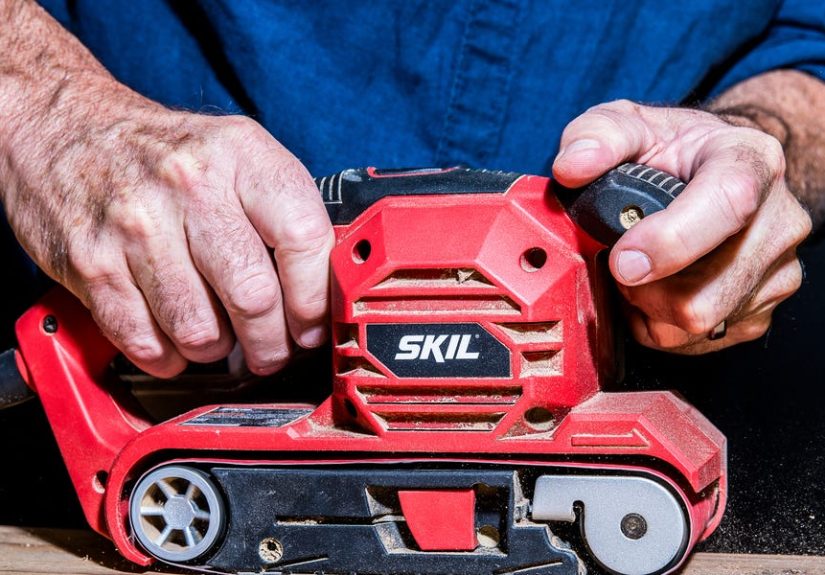
If a random orbital sander is the polite dinner guest of the woodworking world, a belt sander is the cousin who shows up early, eats half the snacks, and somehow still helps you move the couch. It is powerful, fast, noisy, and wildly useful. It is also more than capable of turning a promising tabletop into a gently sculpted landscape if you treat it like a toy.
Used well, a belt sander can flatten glue-ups, knock down proud joints, remove mill marks, strip old finishes, and save you a shocking amount of time. Used badly, it can burn edges, round crisp corners, gouge softwood, and leave scratches so deep they haunt the finish three coats later. The difference is not magic. It is method.
This guide covers the best practices for using a belt sander in woodworking finishing, from choosing grit and controlling the tool to knowing when to put it down and switch to a finer sander. If your goal is a smooth, clean, finish-ready surface instead of a dramatic cautionary tale, keep reading.
What a Belt Sander Is Actually Good For
A belt sander is not usually the last step in fine woodworking finishing. It is the fast stock-removal step that gets you close. Think of it as the tool that handles the heavy lifting before finer tools take over. That mindset alone prevents a lot of rookie mistakes.
Great jobs for a belt sander
A belt sander shines when you need to flatten a glued-up panel, level uneven boards, remove an old finish, tame rough lumber, ease a stubborn proud edge, or clean up large flat surfaces quickly. It is especially helpful on tabletops, doors, workbench parts, shelves, and other broad areas where hand sanding would take roughly the same amount of time as aging.
Jobs where a belt sander is the wrong hero
It is usually a poor choice for delicate veneers, detailed trim, thin edges, tight inside corners, and final finish prep on fine furniture. In those cases, a random orbital sander, sanding block, card scraper, or hand plane is often the smarter move. Belt sanders are wonderful, but they are not subtle. Asking one to be subtle is like asking a pickup truck to perform ballet.
Start With Safety Before You Start With Grit
The best finish in the shop is still not worth a trip to urgent care. Before you even plug in the tool, set up for control and visibility.
Lock down the workpiece
Clamp the board securely, support long pieces, and make sure the surface will not rock while you work. A moving workpiece and a moving belt sander are a terrible comedy duo.
Protect yourself from dust and noise
Wood dust is not just annoying; it is something you want out of your lungs and out of the air. Wear eye protection, hearing protection, and appropriate dust protection. Hook the sander to a vacuum or dust bag whenever possible. Good dust collection improves both safety and visibility, which means your sanding gets better and your breathing stays less adventurous.
Dress like you enjoy keeping your sleeves
Avoid loose clothing, dangling jewelry, and anything else that can get near moving parts. Check the power cord before use and keep it well clear of the belt. Many experienced woodworkers simply drape the cord over a shoulder while sanding to keep it out of the danger zone.
Inspect the tool first
Look at the belt for tears, clogged abrasive, or a damaged seam. Make sure the belt tracks properly and the platen is clean. If the tool feels off before you start, trust that instinct. Sanding is already chaotic enough without adding mystery vibration.
Choose the Right Belt, Not Just the Closest Belt
One of the biggest differences between amateur-looking results and professional-looking results is abrasive choice. Too coarse and you spend the afternoon erasing scratches. Too fine and you waste time while the wood politely refuses to change shape.
Common grit choices
For aggressive leveling or stripping, 60- to 80-grit is common. For general surface refinement after flattening, 100- to 120-grit is often the sweet spot. For preparing a surface before switching to a random orbital sander, many woodworkers finish their belt-sander work around 120 or 150 grit. On some projects, 180 grit is reasonable, but pushing a handheld belt sander too far into “final finish” territory is often inefficient.
Open-coat vs. closed-coat belts
If you are sanding softwoods like pine or removing gummy finishes, open-coat belts are often the better choice because they resist clogging better. Closed-coat belts can work well on hardwoods where you want more abrasive coverage. Matching belt type to the job keeps the cut consistent and reduces heat buildup.
Don’t skip the entire grit ladder
You do not need to march through every grit ever invented, but giant jumps are usually a bad bargain. If you flatten with 80 grit, going straight to 220 is not ambition; it is optimism. A sensible progression might be 80, 120, then 150, followed by a random orbital sander or hand sanding for the final surface. Each step should remove the scratches from the previous one, not simply admire them from a new angle.
How to Use a Belt Sander Without Gouging the Work
The core technique is simple: start flat, stay flat, keep moving, and avoid pressing like you are trying to settle an argument with the wood.
1. Mark the surface first
Before sanding, scribble light pencil lines across the board. These guide marks show where you have sanded and where high spots remain. This little trick makes your work more accurate and keeps you from camping out too long in one area.
2. Start the sander before touching the wood
Most handheld belt sanders behave best when brought up to speed before contacting the work. Lower the tool gently onto the surface while keeping the platen flat. Do not drop the front edge first unless your goal is to invent a new decorative trench.
3. Keep the sander moving at a steady pace
Move in smooth, overlapping passes. Staying in one place for even a moment can dig a low spot. A belt sander rewards rhythm: forward, overlap, forward, overlap, repeat. Think less “jackhammer” and more “confident lawn mowing.”
4. Let the abrasive do the work
Extra downward pressure usually makes results worse, not better. It can cause heat, clogging, deeper scratches, and uneven sanding. A light, controlled touch keeps the cut cleaner and the surface flatter.
5. Keep the tool dead flat
Tipping the tool, lifting the rear, or rocking onto an edge is the fastest route to gouges. The entire platen should stay in contact with the work. If you struggle with this, slow down and reduce pressure. Control beats speed every time.
6. Use a slight diagonal only when flattening
For flattening a glue-up or leveling a broad panel, a slight diagonal pass can remove stock quickly and help blend glue lines. But do not stop there. Follow with passes in the direction of the grain so the final scratch pattern is easier to refine in later sanding steps.
7. Lift off while still moving
At the end of a pass, keep the sander moving as you lift it off the board. Do not stop the machine while it is parked on the workpiece unless you enjoy mystery marks.
The Best Workflow for Woodworking Finishing
If your goal is a finish-ready surface, the belt sander is usually one stage in a larger process, not the whole process.
Step 1: Flatten and level
Use the belt sander to remove glue squeeze-out, flatten panel joints, level edges, or erase rough milling marks. Stay focused on surface geometry here. You are establishing flatness and consistency, not a showroom gloss.
Step 2: Refine the scratch pattern
Once the board is flat, switch to a finer abrasive sequence. On many projects, that means moving from the belt sander to a random orbital sander. This step removes the coarser scratch pattern and brings the surface closer to finish quality.
Step 3: Hand-sand with the grain
For the best-looking finish, a final light hand sanding with the grain can even out the scratch pattern and catch areas power sanding missed. It does not take long, and it can make stain, dye, or clear finish look far more consistent.
Step 4: Remove all dust before finishing
Vacuum thoroughly, then wipe down the surface. Dust left behind can interfere with stain penetration, muddy a finish, and create that special “why does this feel like sandpaper after I already sanded it?” frustration. Clean wood finishes better. No surprises there.
Step 5: Sand lightly between coats when needed
For many film finishes, a light sanding between coats helps improve adhesion and smooth out raised grain or dust nibs. This is not belt-sander territory. Use fine paper, a sanding sponge, or another gentle method, and follow the finish manufacturer’s instructions.
Best Practices for Different Wood Types and Situations
Hardwood panels
Hardwoods can tolerate more aggressive early sanding, but scratch patterns still matter. If you flatten a maple or oak panel with a coarse belt, do not rush the refinement stage. Those scratches have a talent for becoming more visible after finish, not less.
Softwoods like pine
Softwoods dent and gouge more easily, and resin can clog belts faster. Use a lighter touch, keep the belt clean, and check the surface often. On softwood, overconfidence shows up quickly and without mercy.
Plywood and veneered panels
Be extremely cautious. The face veneer may be thin enough that a few overzealous passes can sand right through it. If you are not dealing with severe defects, use a less aggressive sander for finish prep.
Glue-ups and tabletops
These are classic belt-sander jobs. Mark the surface, work diagonally only as needed to level joints, then finish with the grain and move on to a finer sander. Done right, this is where a belt sander earns its shop space.
Common Belt Sander Mistakes That Ruin Finishes
Most ugly sanding results come from a few repeat offenders:
- Starting too coarse: If the board is already fairly flat, 60 grit may be unnecessary punishment.
- Skipping too many grits: Deep scratches do not vanish because you believe in them less.
- Pushing too hard: Pressure creates heat, uneven cuts, and early belt death.
- Tilting at the ends: This rounds edges and dishes the surface.
- Using it as a final finish sander: That is usually a job for a finer tool.
- Ignoring belt condition: A dull, clogged belt burns and smears more than it cuts.
- Failing to inspect under raking light: Scratches hide until finish exposes them like gossip at a reunion.
Small Habits That Make a Big Difference
The best woodworkers are often not dramatically faster. They are just more consistent.
- Use pencil marks on the surface to track progress.
- Check flatness with a straightedge on large panels.
- Test grit progression on offcuts before touching a show surface.
- Clean or replace belts before they stop cutting efficiently.
- Use side lighting to reveal scratches before finishing.
- Break sharp edges intentionally by hand rather than accidentally with the sander.
- Stop often and look. The sander is fast; your brain should remain in charge.
When to Put the Belt Sander Down
Good finishing is not about using one tool forever. It is about knowing when a tool has done its job. Once the surface is flat, glue lines are leveled, and the coarse defects are gone, the belt sander should hand the project off to a finer process. That moment is the difference between efficient woodworking and repair work disguised as finishing.
In other words, the belt sander is fantastic at getting you close. It is not always fantastic at getting you elegant. Knowing where “close” ends is one of the real best practices for using a belt sander in woodworking finishing.
Experience From the Shop: What Belt Sanders Teach You the Hard Way
After enough time in a woodshop, most people collect a few belt-sander stories. They usually begin with confidence and end with sanding a little more than originally planned. One common lesson comes from flattening a tabletop glue-up. At first, the belt sander feels like a miracle. Proud joints disappear. Glue lines level out. The surface starts to look unified. Then confidence takes over, the tool pauses for just a second near one corner, and suddenly one corner is now “character.” That is when many woodworkers learn the first real rule of the belt sander: keep it moving, no matter how sure you are that one more second will help.
Another experience shows up when sanding pine. Pine has a way of making a person humble. On hardwood, a slightly heavy hand may leave scratches. On pine, that same heavy hand can leave a story, a crater, and perhaps a brief speech not suitable for family publications. Woodworkers who regularly work with softwood learn to lighten their touch, clean belts more often, and check the surface sooner than they think necessary. Pine rewards patience and punishes swagger.
Many finish problems also start long before the finish is opened. A project can feel smooth to the palm but still carry coarse sanding marks that only appear after stain or topcoat goes on. That moment, when the finish flashes across the board and suddenly every scratch becomes visible, is unforgettable. It teaches the value of proper grit progression, hand sanding with the grain at the end, and inspecting under angled light before declaring victory. Experience teaches that “looks fine in the shop” and “looks fine under finish” are not always the same sentence.
There is also the lesson of belt choice. Beginners often try to force a worn-out belt to do one more board. Experienced woodworkers know that a dull belt cuts hotter, slower, and uglier. Replacing a belt at the right time feels expensive for about twelve seconds, right up until it saves thirty minutes of extra sanding. That is one of those small shop lessons that seems boring until it becomes deeply practical.
Then there is the two-handed control lesson. Plenty of people assume they can guide a belt sander casually, especially on a quick pass. But once the tool bites a little differently at the edge of a board or catches a transition in grain, you understand why solid grip and body position matter. The belt sander does not weigh a ton, but it has opinions. Good stance, good balance, and both hands on the tool are not signs of inexperience. They are signs that you would like your wrists and your workpiece to remain on speaking terms.
Perhaps the biggest experience-based lesson is that the belt sander is best when it is part of a system. Professionals and careful hobbyists alike tend to use it for what it does best, then move on. Flatten with the belt sander. Refine with a random orbital. Finish with light hand sanding. Clean off the dust. Check the surface in good light. That sequence is not flashy, but it is reliable. And reliability is what turns a project from “pretty good from across the room” into “that looks excellent up close,” which is where woodworking pride tends to live.
So yes, the belt sander can be intimidating. It can also be one of the most useful tools in the shop. Experience does not make it less powerful. It just teaches you to respect the speed, trust the process, and stop before the tool starts making creative decisions on your behalf.
Conclusion
The best practices for using a belt sander in woodworking finishing come down to control, sequence, and restraint. Pick the right grit, secure the work, keep the tool flat, keep it moving, and use the belt sander for rapid leveling rather than delicate final polishing. Then switch to finer sanding methods before finish goes on. Do that consistently, and the belt sander stops being a scary stock-removal beast and starts becoming one of the smartest time-saving tools in your shop.




