Table of Contents >> Show >> Hide
- What Is Camellia Oil (and Why Do People Put It on Tools?)
- Which Tools Benefit Most from Camellia Oil?
- How to Apply Camellia Oil for Rust Protection (Without Overdoing It)
- Camellia Oil vs. Other Rust-Prevention Options
- Common Mistakes That Make Rust Prevention Fail
- Already Have Rust? Fix It First, Then Protect
- Choosing a Good Camellia Oil for Tools
- A Practical “No-Rust” Routine You Can Actually Stick With
- Experiences With Camellia Oil Tool Rust Protection (About )
Rust is the world’s most patient thief. It doesn’t kick down the door it quietly moves in, starts redecorating your favorite
tools in orange, and then acts like you’re the problem for being upset about it.
If you use carbon steel or cast-iron tools (chisels, planes, saws, pruners, shears, trowels, even that mystery screwdriver
you “borrowed” from your future self), you’ve probably heard the same advice: keep them clean, keep them dry, and put a
protective barrier between metal and moisture. One classic optionespecially loved by woodworkers and knife nerdsis
camellia oil.
In this guide, we’ll break down what camellia oil is, why it works, how to apply it without turning your tool chest into an
oil-slick crime scene, and how it stacks up against waxes and other oils. We’ll also cover what to do when rust already
showed up uninvited (rude), plus real-world experiences at the end.
What Is Camellia Oil (and Why Do People Put It on Tools?)
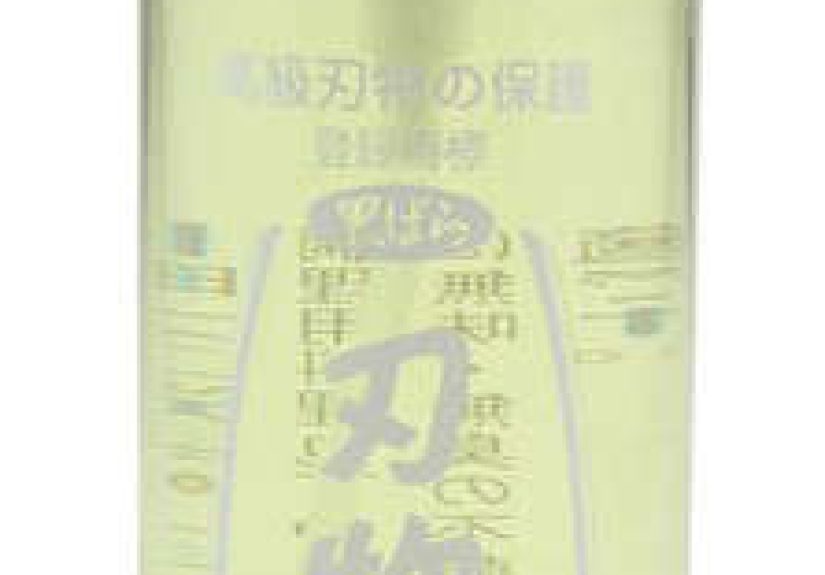
Camellia oil is a plant-based oil pressed from the seeds of camellia plants. You’ll often see it associated with Japanese tool
and knife care, and it sometimes goes by names like tsubaki oil in the knife world. For tool maintenance, the big appeal
is simple: it forms a thin, water-repelling film that helps slow down corrosion on exposed metal.
Many tool-care camellia oils are sold as “lightweight” and “non-drying,” meaning they’re intended to stay slick rather than
curing into a hard finish. That’s great for metalbecause your hand plane doesn’t need a glossy varnish moment.
Why tools rust in the first place
Rust is the result of iron (or iron alloys) reacting with oxygen and moisture. Add salts (sweaty hands, coastal air) or acids
(plant sap, soil residue), and corrosion can accelerate. Tools can look “dry” yet still hold enough humidity in a toolbox, a
garage corner, or a shed to create a tiny rainforest of regret.
Camellia oil’s job: a barrier, not a magic spell
Think of camellia oil as a rain jacket for your tools. It doesn’t change the chemistry of steel, but it can reduce how easily
water clings to the surface. The key is applying a thin, even layer so it protects without attracting dust or
transferring to your work.
Which Tools Benefit Most from Camellia Oil?
Camellia oil shines on tools that meet three conditions: (1) they rust, (2) they’re handled often, and (3) you want a clean-feeling protective coat.
Woodworking tools
- Chisels and plane irons (especially high-carbon steel)
- Hand plane bodies (cast iron) and lever caps
- Handsaws and backsaws (plates and spines)
- Marking knives, spokeshave blades, scrapers
Garden tools
- Pruners, secateurs, loppers (pivot areas and blades)
- Shovels, trowels, hoes (after cleaning and drying)
- Shears (especially if stored in a humid shed)
Kitchen and shop crossover tools
- Carbon steel kitchen knives and cleavers (wipe down after washing)
- Cast iron cookware between uses (as a short-term sealantdifferent from seasoning)
If your tool is stainless steel and lives in a climate-controlled drawer, it probably doesn’t need camellia oil.
But if it’s carbon steel and lives where humidity can bench-press, camellia oil is a strong contender.
How to Apply Camellia Oil for Rust Protection (Without Overdoing It)
Rust prevention is less about “more product” and more about “better habits.” The best coating in the world won’t help if you put
a wet tool away like it’s a sponge that wants to be a metal.
Step 1: Clean first (because oil + grit = sandpaper you didn’t ask for)
- Wipe off sawdust, soil, and plant sap.
- If needed, use mild soap and water, then rinse quickly.
- Dry thoroughlylike “would you bet your favorite chisel on it?” dry.
Step 2: Apply a tiny amount
Put a few drops on a soft cloth (or use a spray lightly onto the cloth). Then wipe metal surfaces until they look barely glossy.
If the tool looks “wet,” you’ve used too much. Your goal is a micro-film, not a salad dressing.
Step 3: Buff and store smart
- Buff lightly with a clean section of cloth to remove excess.
- Store tools in a dry place, ideally off concrete and away from exterior walls.
- For drawers and chests, consider a small desiccant pack or rust inhibitor paper for extra protection in humid climates.
How often should you reapply?
It depends on how you use and store your tools:
- Frequent use: quick wipe-down after each session is ideal.
- Occasional use: every few weeks, or before long storage.
- High humidity / coastal air: more frequent, plus storage improvements (dehumidification, desiccants, or sealed cases).
Camellia Oil vs. Other Rust-Prevention Options
Camellia oil is popular, but it’s not the only route to rust-free happiness. Here’s how it compares to common alternatives.
Camellia oil vs. mineral oil
Mineral oil is a classic for blades and food-contact tools because it’s stable and widely available. Camellia oil is also often
used for knife care and tends to feel lighter and less “slick-oily” on the surface when applied thinly. Either can workyour
deciding factors are feel, cost, and whether you want a traditional plant-based option.
Camellia oil vs. paste wax
Paste wax (often carnauba-based) is fantastic for cast iron machine tops because it improves glide and leaves a dry-ish finish.
For hand tools, wax can work well toobut it usually takes more effort to apply and buff, and it’s not always convenient for
quick wipe-downs. Many shops use oil for hand tools and wax for large cast iron surfaces.
Camellia oil vs. WD-40 and other sprays
Some spray products clean and displace moisture well, which can be helpful in the moment. But for longer-term storage, dedicated
rust inhibitors or a stable oil/wax routine can be more reliable. If you do use a spray, wipe down and avoid leaving heavy
residueespecially on precision surfaces or tools that touch wood.
Camellia oil vs. specialty rust inhibitors
Products designed specifically for corrosion protection (including waxy films and “tool protectant” sprays) can outperform simple
oils in harsh conditions. The tradeoff is often a thicker coating or a stronger smell, plus more cleanup before use. Camellia oil
wins on “pleasant to use” and “fast enough to do consistently.”
Common Mistakes That Make Rust Prevention Fail
1) Putting tools away dirty (soil and sap are basically rust snacks)
Garden tools especially: soil holds moisture and salts. Wipe, rinse if needed, and dry. Your tools shouldn’t be stored wearing
yesterday’s mud like a badge of honor.
2) Over-applying oil
A thick layer can attract dust, transfer to wood, and in some cases feel sticky over time. The fix is simple: use less and buff.
The best oil coat is the one you can barely see.
3) Ignoring storage conditions
If your shop is humid, oil alone may not save you. Condensation happens fast in garages and shedsespecially when temperatures
swing. Consider airflow, dehumidification, desiccants, or sealed storage for sensitive tools.
4) Using “kitchen oils” that can go rancid
Common cooking oils can oxidize and turn sticky or smelly over time. For tool care, you want something stablecamellia oil,
mineral oil, or a purpose-made protectant.
Already Have Rust? Fix It First, Then Protect
Camellia oil is not a rust eraser. If rust is present, remove it firstthen apply oil to prevent a sequel.
A simple rust-removal routine for many tools
- Clean: remove dirt and grease with soap and water; dry thoroughly.
- Loosen rust: a vinegar soak can help on many all-metal parts (avoid soaking wood handles).
- Scrub: use steel wool or a wire brush for light rust; be gentle on precision surfaces.
- Rinse and dry: dry completelyno shortcuts.
- Protect: apply a thin coat of camellia oil and buff.
For fine woodworking tools with flat reference surfaces (like plane soles or machine tables), be cautious with aggressive abrasives.
If you’re unsure, test in an inconspicuous spot or use the least aggressive method first.
Choosing a Good Camellia Oil for Tools
Not all camellia oil products are created equal. Some are made specifically for tool and blade care; others are cosmetic oils
with added fragrance or blends you may not want near metal surfaces.
What to look for
- Tool/knife care labeling: indicates it’s intended for metal protection.
- Minimal additives: fewer mystery ingredients means fewer surprises on your steel.
- Convenient applicator: spray bottles or small droppers help you use less.
What to avoid
- Strong fragrances (can linger in tool storage and be unpleasant)
- Heavy “beauty oil” blends that may feel sticky or leave residues
- Over-application habits (yes, that’s technically not a productbut it’s the #1 culprit)
A Practical “No-Rust” Routine You Can Actually Stick With
The best rust protection plan is the one you’ll do even when you’re tired, hungry, and considering dinner as a new hobby.
Here’s a simple approach:
After each use (2 minutes)
- Wipe tool clean and dry.
- Wipe metal with a lightly oiled cloth (camellia oil).
- Put it away in a dry spot.
Monthly (10–20 minutes)
- Check the “usual suspects” (plane irons, chisels, pruners, saw plates).
- Refresh oil film on anything that looks dry or has been sitting.
- Replace or recharge desiccant packs if you use them.
Seasonal (30–60 minutes)
- Deep clean garden tools; remove sap and soil build-up.
- Sharpen edges as needed.
- Oil metal and condition wood handles if appropriate.
- Improve storage for wet seasons (hooks, racks, dry shelves, airflow).
Experiences With Camellia Oil Tool Rust Protection (About )
Ask ten tool people about rust prevention and you’ll get twelve opinionsbecause two of them will be delivered by someone who
just walked by and couldn’t help themselves. Still, a few consistent “real-world” patterns show up when people adopt camellia oil.
First, the biggest win is how easy it is to stay consistent. Lots of folks start with paste wax, love the results,
and then quietly stop waxing because it’s a whole production: open the can, apply, wait, buff, wonder if you just waxed your
fingerprints into permanence. Camellia oil is more like brushing your teeth: quick, simple, and you regret skipping it later.
Keeping a small oiled rag in a jar (or a dedicated cloth in a zip bag) turns “tool care” into a 15-second habit you can do even
when you’re shutting the shop down at midnight.
Second, people who work in humid or coastal environments tend to describe camellia oil as a “baseline” rather than
the entire plan. In muggy climates, the routine often becomes a one-two punch: oil on the tool + smarter storage. That might mean
a sealed tool chest with desiccant packs, a small dehumidifier in the shop, or even just getting tools off concrete and onto a rack
where air circulates. The oil handles day-to-day contact and micro-moisture; the storage changes reduce the constant humidity assault.
Third, there’s a learning curve around how thin is thin. Many “camellia oil didn’t work for me” stories end up being
“I used half the bottle on one plane.” A thick layer can feel tacky, pick up dust, and transfer to woodespecially if you wipe a plane
sole and then immediately start surfacing lumber. People who get the best results usually apply to a cloth first, wipe the tool, then
buff until the surface looks almost dry. That “almost dry” look is the sweet spot: protected, but not messy.
Fourth, some users report stickiness or gumming over timeespecially if tools sit for weeks. When that happens, it’s
often solved by (a) using less oil, (b) wiping down old residue with a solvent appropriate for the tool surface, and (c) switching to a
camellia oil product marketed specifically for tools and knives rather than a cosmetic blend. The good news is that even in those cases,
the underlying idea still holds: a thin barrier helps, but “too much of a good thing” becomes a magnet for dust and grime.
Finally, the most common “aha” moment comes when someone realizes rust isn’t just about the toolit’s about the system.
Camellia oil becomes part of a bigger rhythm: wipe clean, dry fully, oil lightly, store thoughtfully. That rhythm keeps tools feeling
smooth, looking sharp, and ready to work. And honestly, few things are more motivating than opening a drawer in the rainy season and
seeing clean steel instead of a surprise orange science project.