Table of Contents >> Show >> Hide
- Why Mop & Glo and Laminate Floors Don’t Always Mix
- Before You Start: Safety, Testing, and Tools
- Step-by-Step: How to Get Mop & Glo Off Laminate Floors
- Can You Use Commercial Polish Removers on Laminate?
- What NOT to Do When Removing Mop & Glo From Laminate
- How to Keep Mop & Glo Buildup From Coming Back
- Frequently Asked Questions
- Real-Life Experiences: Lessons Learned From Removing Mop & Glo
- Conclusion: Clear the Film, Not Your Patience
If your laminate floor went from “fresh showroom shine” to “mysterious cloudy film” after a fling with Mop & Glo, you’re not alone. Mop & Glo is a polish designed to leave a glossy acrylic layer behind. That’s great on some floors… but on laminate, it can turn into a streaky, sticky situation that shows every footprint and smudge.
The good news: you don’t have to rip out your flooring or live with that haze forever. With a little patience, the right supplies, and a gentle approach, you can safely remove Mop & Glo buildup and help your laminate look like itself again.
This step-by-step guide (in classic how-to, eHow style) walks you through how to get Mop & Glo off laminate floors, how to avoid damaging the surface, and how to keep that dull film from coming back.
Why Mop & Glo and Laminate Floors Don’t Always Mix
Most Mop & Glo products are acrylic floor polishes. They’re meant to leave behind a thin, plastic-like layer that dries to a shine. On the right surfaceslike some vinyl, sealed tile, or linoleumthat can work beautifully.
Laminate flooring is different. It has a tough but relatively thin wear layer fused over a printed design. That top layer doesn’t need wax or polish; in fact, manufacturers typically warn against it. When you apply Mop & Glo to laminate, a few things can happen:
- Residue builds up. Each coat leaves more acrylic on the surface. Over time, you get dull, uneven layers instead of mirror shine.
- Cloudiness appears. The polish can trap tiny bits of dirt, pet hair, or cleaner residue, creating a hazy, streaky film that never looks truly clean.
- Texture changes. The floor can feel sticky or squeaky, and may even show heel prints and mop marks.
The goal is to remove that acrylic buildup without soaking or scratching the laminate beneath it.
Before You Start: Safety, Testing, and Tools
Check your flooring manufacturer’s guidelines
Every laminate brand has slightly different recommendations. If you still have your installation paperwork or can find the brand online, check what they say about polish removers or vinegar-based cleaners. When in doubt, stick with the gentlest method and test carefully in a hidden area.
Gather your supplies
You don’t need a full chemistry labjust a few household staples:
- Bucket of warm (not hot) water
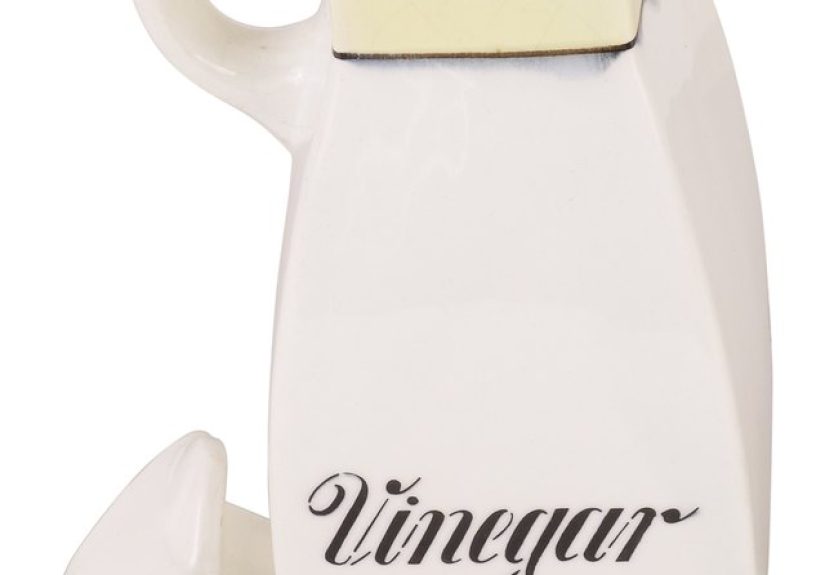
- Distilled white vinegar
- Mild dish soap (a few drops only)
- Microfiber mop or microfiber cloths
- Soft, non-scratch scrub pad (labeled safe for non-stick cookware)
- Old towels or dry microfiber cloths for drying and buffing
- Rubber gloves (optional, but your hands will thank you)
Important: Avoid metal scrapers, abrasive scouring pads, steam mops, and anything that floods the floor with water. Laminate and excess moisture are not friends.
Step-by-Step: How to Get Mop & Glo Off Laminate Floors
Step 1: Start with a basic clean
Before you attack the polish, remove loose dirt that could scratch the surface.
- Vacuum or sweep thoroughly. Use a hard-floor setting or a soft broom to pick up dust, crumbs, and pet hair.
- Do a light wash. Mix warm water with a few drops of mild dish soap. Lightly dampen a microfiber mop, wring out very well, and go over the floor to remove surface grime.
- Dry the floor. Use dry microfiber cloths or towels to quickly dry the laminate. You don’t want standing water sitting on the seams.
This step won’t remove Mop & Glo, but it prepares the surface so your stripping solution can reach the acrylic layer instead of just scrubbing dirt around.
Step 2: Mix a gentle vinegar solution
Vinegar is slightly acidic, which helps break down the acrylic film without being so harsh that it destroys the laminate’s protective layer when used correctly.
In a bucket, mix:
- 1 cup distilled white vinegar
- 1 gallon warm water
You can add 2–3 small drops of dish soap if the floor is especially grimy, but don’t go overboardtoo much soap will leave more residue.
Step 3: Patch test in a hidden area
Choose a low-visibility spotinside a closet, behind a door, or under a piece of movable furniture.
- Dip a microfiber cloth into your vinegar solution and wring it out very well.
- Apply it to a small section of the floor with Mop & Glo buildup.
- Let it sit for 3–5 minutes, keeping the area damp (not soaked).
- Gently scrub with a soft, non-scratch pad.
- Wipe clean with plain water and dry immediately.
If the test area looks less cloudy and the laminate surface still looks intact (no dull patches that look like raw paper or deep scratches), you’re good to proceed.
Step 4: Work in small sections
Mop & Glo builds up in layers, which means it usually takes multiple passes to remove. Patience here is the secret ingredient.
- Divide the room mentally into sections, about 2×3 feet each. You’ll treat one section at a time.
- Apply the vinegar solution with a microfiber cloth or a very well-wrung mop. The surface should be damp, not dripping.
- Let it sit for 3–5 minutes. This “dwell time” helps soften the acrylic film. Don’t let it dry completely.
- Gently scrub. Using your non-scratch pad, move in small circles. You may see a slightly milky residue lift offthat’s a good sign.
- Wipe the slurry away. Use a clean, damp microfiber cloth with plain water to remove the loosened polish.
- Dry immediately. Buff with a dry cloth or towel.
Repeat this process across the room. On heavily coated areas, you might need to go back over the worst spots two or three times over a few days, rather than trying to force everything off in one aggressive session.
Step 5: Spot-treat stubborn buildup
Some areasespecially by the kitchen sink, entryway, or high-traffic pathsmay have extra-thick Mop & Glo layers. For these trouble zones:
- Lay a vinegar-soaked (but wrung out) microfiber cloth directly over the spot.
- Let it sit for 5–7 minutes to soften the buildup.
- Lift the cloth and gently scrub with a soft pad.
- Rinse with a damp cloth and dry.
Resist the urge to use razor blades, metal scrapers, or harsh chemicals just to “get it over with.” Those shortcuts can permanently scar the laminate.
Can You Use Commercial Polish Removers on Laminate?
There are commercial floor-polish removers designed to strip acrylic finishes from vinyl and other hard floors. Some homeowners have had success with these on Mop & Glo buildupbut there are big caveats.
If you decide to go this route:
- Choose a product labeled safe for laminate or multiple hard surfaces. If the label only mentions vinyl or stone, be cautious.
- Follow the directions exactly. Dilution and dwell times matter.
- Patch test twice. Try it in a hidden spot and wait until the area is fully dry before deciding it’s safe.
- Ventilate the room. Some removers have stronger fumes than vinegar.
For many people, a few rounds of vinegar solution plus elbow grease is safer and more predictable than a strong chemical stripper on laminate.
What NOT to Do When Removing Mop & Glo From Laminate
Sometimes knowing what to avoid is just as helpful as the how-to. Here are common mistakes that can turn a simple polish-removal project into a flooring disaster:
- Don’t soak the floor. Excess water can seep into seams and cause swelling, warping, or raised edges.
- Skip steam mops. High heat and moisture can weaken laminate joints and damage the wear layer.
- Avoid harsh abrasives. Steel wool, stiff brushes, or gritty powders can scratch the surface and make it grab dirt even more.
- Be careful with strong ammonia or solvent-based cleaners. They can etch or dull the wear layer if too concentrated.
- Don’t mix chemicals. Never combine ammonia and bleach, or random cleaners togetherthis can release dangerous fumes.
If you’re ever unsure about a product, assume your laminate is delicate and stay on the gentler side.
How to Keep Mop & Glo Buildup From Coming Back
Once you’ve put in the work to remove Mop & Glo, you probably never want to repeat the process. The prevention strategy is simple: treat laminate like the low-maintenance diva it is.
Choose the right everyday cleaner
Stick to one of the following:
- A laminate-specific cleaner spray. These are designed not to leave residue and are usually approved by flooring manufacturers.
- A DIY light cleaner. In a spray bottle, mix about 1 part white vinegar to 10 parts water, or a small splash of vinegar in a full bottle of water. Lightly mist the floor and mop with a microfiber pad, then dry.
Use any cleaner sparingly. With laminate, you’re not scrubbing mud off concrete; you’re basically dusting a very fancy photograph covered in plastic.
Adopt good floor habits
- Vacuum or sweep regularly to prevent grit from scratching.
- Wipe spills quickly so liquids don’t soak into seams.
- Use mats and rugs at entry doors and under sinks.
- Skip the polishes and waxes. If a bottle promises “high-gloss acrylic shine,” your laminate does not need that kind of relationship.
Frequently Asked Questions
Will vinegar damage my laminate floor?
Used straight and frequently, vinegar can gradually dull some finishes. Used diluted (like 1 cup per gallon of water), applied sparingly, and followed by drying, it’s generally considered safe for occasional use to remove films and residue. Always test in a hidden area first.
Can I use rubbing alcohol to remove Mop & Glo?
Rubbing alcohol can cut through some residues, but it’s also a stronger solvent that can soften the laminate’s wear layer if overused or left sitting too long. If you use it at all, keep it for tiny spot treatments, apply it with a cloth (not a soaked mop), and wipe and dry immediately. Many homeowners find vinegar-based methods safer for larger areas.
Why does my floor still look a little dull even after the buildup is gone?
Two possibilities: you might still have a thin film in spots, or your floor never had a super-high gloss to begin with. Many laminate floors are designed with a low-sheen, matte look. Instead of chasing a mirror shine, focus on getting the floor clean, streak-free, and evenly colored.
Is it okay to use Mop & Glo again after I strip it off?
On laminate, it’s usually better to break up with polishes for good. Save Mop & Glo for surfaces it’s specifically recommended for, and use manufacturer-approved cleaners on your laminate instead.
Real-Life Experiences: Lessons Learned From Removing Mop & Glo
Sometimes instructions sound great on paper, but it helps to hear what actually happens in real homes. Here are a few real-world style scenarios that mirror what a lot of homeowners go through when trying to get Mop & Glo off laminate floors.
Case Study 1: The Hazy Kitchen Makeover
Picture a busy family kitchen: kids, pets, constant cooking, and plenty of foot traffic. The laminate floors started looking tired, so the homeowner tried Mop & Glo after seeing the word “shine” on the label. At first, the result seemed okay. But after a few weeksand a couple more coats for “extra gloss”the floor looked muddy and streaked no matter how often it was cleaned.
When they finally decided to strip it, they were worried the laminate was permanently ruined. They tried a simple approach: vinegar and warm water, microfiber pads, and small sections at a time. The first pass barely changed anything, which was discouraging. The second pass helped. Around the third or fourth trip across the kitchen over a few days, they noticed the floor looked more like it did when it was new: less cloudy, more even, and way easier to keep clean. The big takeaway? Mop & Glo doesn’t usually come off in one dramatic “before and after” session. Slow and steady wins here.
Case Study 2: The Spot-Treating Hero
Another homeowner only used Mop & Glo in one areathe path from the back door through the hallway. That strip of laminate looked especially bad: chalky in some spots, sticky in others. Rather than attacking the whole floor, they focused on that high-traffic lane.
They soaked microfiber cloths in a vinegar solution, wrung them out, and laid them directly on the worst sections for a few minutes. After lifting the cloths, they used a soft pad to gently scrub, then wiped with clean water and dried. By repeating this once or twice a week for a few weeks, they were able to gradually erase the worst of the buildup without ever soaking the floor or using harsh chemicals. Eventually, guests couldn’t even tell which part had been “ruined” before.
Case Study 3: The “I Went Too Far” Story
Not every story is perfect. In one case, a well-intentioned DIYer decided vinegar wasn’t strong enough, so they moved straight to a concentrated all-purpose cleaner and a stiff scrub brush. The Mop & Glo came off fasterbut so did some of the laminate’s sheen. In certain areas, the floor looked scratched and permanently dull.
The lesson? Yes, strong chemicals and aggressive scrubbing can remove polish quickly, but they can also damage the wear layer that protects your laminate. That damage can’t be “cleaned away” later; it would require board replacement. It’s better to take a little longer and protect the floor you already paid for.
What These Experiences Have in Common
Across different homes and different brands of laminate, a few themes keep showing up:
- Multiple light passes work better than one brutal scrub. Acrylic buildup is layered, so it makes sense that removal is layered, too.
- Moisture control is everything. The people who kept their mops just damp and dried the floor quickly avoided swelling and edge damage.
- Gentle products are usually enoughjust not instantly. Vinegar and water, used patiently, consistently softens and lifts Mop & Glo for most situations.
- The right cleaner prevents repeat problems. Once homeowners switched to laminate-safe sprays and skipped polishes, they stopped fighting that cloudy film altogether.
So if your laminate floor looks like it’s been living under a layer of plastic wrap, don’t panic. Work in sections, be gentle, and give the process time. Your floor didn’t get heavily coated in one day, and it probably won’t bounce back in one daybut it can bounce back.
Conclusion: Clear the Film, Not Your Patience
Removing Mop & Glo from laminate floors is less about finding a magic chemical and more about combining a mild solution, the right tools, and a patient approach. A vinegar-and-water mixture, microfiber cloths, and small, methodical sections can do a lot of heavy lifting without putting your laminate at risk.
Once the acrylic buildup is gone, keep things simple: vacuum regularly, mop lightly with a laminate-safe cleaner, and retire your floor polishes to the “never again” shelf for laminate. Your reward is a floor that looks cleaner, feels smoother, and doesn’t glare back at you with cloudy streaks every time the light hits it.
SEO JSON




